Paper Doll
Digital Receipt Management Tools (Part 2): Itemize, MyThings, MyReceipts, Risiti & PlanetReceipt
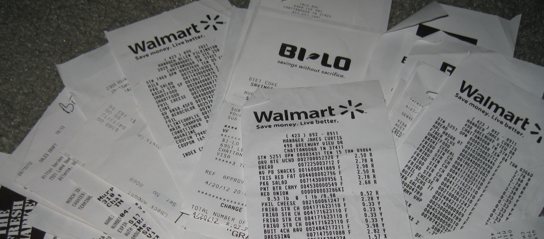
Do you sometimes feel like you’ve received the world’s longest receipt? Thanks to advertising, savings summaries and survey links, our already-plentiful receipts have gone from short and functional to enormous. Two weeks ago, I provided seven steps for controlling receipt flutter clutter, and last week, we started talking about digital solutions for keeping essential data while reducing our interaction with paper receipts. We continue today by looking at a few more digital solutions.

Itemize is a free online service that gathers and organizes your receipts in one digital wallet. It’s designed for consumers as well as small business users to help track purchased items, prices, images (if available), and sales-related data.
During a quick sign-up, you create your personalized @itemize.com address. Then, the system guides you through the Receipt Wizard to sync your personal email with Itemize so it can process automatic updates. While the system works with many webmail domains (Yahoo, Windows Live Hotmail, Gmail, AOL, Mobile Me, Verizon, Comcast, Time Warner/Roadrunner, and Optimum Online), Itemize doesn’t support auto-importing any private level email domains, so, for example, emailed receipts sent to JulieBestry.com can’t be imported.
Auto-importing is only one method of getting your information into the system. You can forward your e-receipts to your @itemize.com address; you can also provide your @Itemize.com address as the default address for any online vendors, guaranteeing that Itemize can snag your essential receipt data.
Additionally, Itemize’s welcome letter notes that, “For old-fashioned stores that still issue old-fashioned receipts, Itemize will soon have an app that you can use to snap a photo of the receipt.” But for now, Itemize is most effective when you’re focusing on organizing digital receipts.
Whatever method you choose, Itemize will filter out the spam and organize all of your receipts, shipping notifications, and other vendor messages, keeping clutter out of your personal email box. (This is a plus for those who don’t want to be bothered with pesky notifications; for more control-oriented shoppers like Paper Doll, this would be a little disconcerting.) Itemize currently supports over 500 receipt formats, which Itemize says is more than any other service provides.
Itemize automatically categorizes your receipts under major category types, like Auto Parts, Clothing, Electronics, Office Supplies, Pet Supplies, etc. You can also tag entire receipts or individual items with relevant keywords. To get a big-picture view, run reports based on specific customized tags, as well as product categories, brands, and time periods.
Itemize’s Reporting tool creates detailed views of your purchases, exports to Excel, and lets you track and manage your expenses, create reimbursements requests for work, and plan and evaluate your budget.
Itemize has a Personal Receipts Gallery that displays photos of whatever you buy, so you have a more Pinterest-y look your purchases. There’s even a item reorder button so you can easily restock your supplies or buy another pair of those cute shoes without going spelunking for product details.
Itemize develops recommendations and offers based on specific past purchases. It suggest accessories (like Kindle cases or iPad doodads) and may suggest similar, related products and services, kind of like the iTunes Genius, which you’ll either find fabulously helpful or creepily Big Brotherish, depending on your tastes.
Itemize updates quickly — less than a minute had gone by between the time I forwarded a receipt and it appeared on my dashboard. However, it wasn’t able to easily parse all of my attached PDF receipts.

Risiti is probably the least-known of the services I reviewed, but it cuts to the chase with simple options for getting information into the system. Once you sign up:
1) Take a photo of any receipt with any smart phone.
2) Email it as an attachment to upload@risiti.com. For online merchants’ digital receipts, just forward to that same address. If you’ve got a web-page receipt, turn it into a PDF and forward it as an attachment.
That’s it. Risiti recognizes your sender address(es), manages your data through the “receipting” processing engine and displays it in your account.
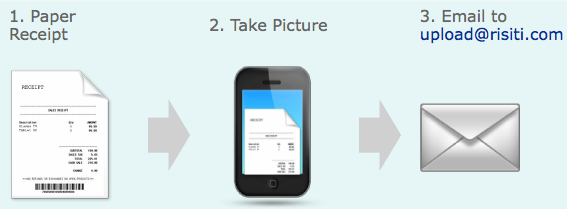
Simple, with no need for a special app, it’s also fairly speedy. I forwarded a Kohl’s receipt for an adorable polka dot dress, and it appeared on my dashboard within three minutes.
However, Risiti isn’t ideal for everyone. First, you have to sign up via an account verified by Google, Windows Live ID, Yahoo! or Facebook, so if you don’t use one of those services, you can’t play.
Second, there’s no fancy reporting system. The My Receipts page merely gives you a listing of receipts with basic information: date, merchant, tag, description, total and tax, which you can view by time period. There is, however, an export button for downloading your data to create more sophisticated reporting.
Finally, there’s really no help screen or FAQ; the support screen merely lets you send an email to request assistance. What little “how it works” information there is focuses solely on how to get receipts into the system, rather than how to work once you’ve got the financial data uploaded. After I traded emails with Risiti regarding a difficulty, I eventually found that one of my browsers was incompatible with the system. I’m sure, had I more actively pursued help, an additional email would have earned me Risiti’s assistance with troubleshooting, but a nice FAQ page with technical specs could have saved time and effort at both ends.

MyReceipts syncs with your online loyalty accounts, enabling you to store digital receipts from a wide variety of popular merchants. Start by signing up for an account online (via validation from your Google, Yahoo!, Facebook or AOL accounts or by manually entering your contact information). Alternatively, you can get a card at participating merchants, which range from major companies like Lowes and Home Depot, Whole Foods and (my beloved) Wegmans, Office Depot and Staples, to small and regional markets and stores.
Additionally, when you shop at participating merchants and agree, at the register, to accept a digital receipt, you’ll either receive a MyReceipts.com card (which you can use at any participating store) or just provide your phone number or email address to indicate you’re part of the MyReceipts program.
Receipts get into the system in one of four ways:
- Directly from any participating merchant, whether online or brick-and-mortar
- Directly from an online merchant when you’ve submitted your @MyReceipts.com email address as your default address
- Shared with you from another MyReceipts.com member — for example, if you need reimbursement for your half of a business-related taxi ride, or if someone wants to give you a gift receipt.
- Manually by typing in information from a printed receipt
Once your receipts are in the MyReceipts system, you can view or generate reports to see purchases by date or transaction type, and compare spending periods year-to-year or month-to-month. In addition to managing receipts, MyReceipts helps you maintain records regarding the products you’ve purchased and distributes coupons based on your purchasing history.
If you often shop at even a few of the participating brick-and-mortar stores, MyReceipts is a worthwhile option for eliminating the BPA-laden curlicue receipt papers that otherwise clutter your space. However, until the list of participating merchants is greatly expanded, MyReceipts will be more useful for grocery, office and home-related purchases than other retail and service categories.

Planet Receipt is an idealistic venture that partners DonateWiseNow‘s GreenSuite program with Greenwise Bankcard and various merchants and non-profits. The goals: to reduce receipt clutter and paper waste while streamlining charitable giving — all at the point-of-purchase.
On the consumer side, you link up to five of your credit cards to your eco-account. From then on, every purchase you make via those credit cards yield, instead of a paper receipt, a digital Green Receipt, which is logged into your account. There, you can view, sort, export, email, text or print (if you must!) your paperless receipts. Additionally, the program enables you to have merchants add small amounts, perhaps $1 or $3, to your purchase to go towards specific charitable donations.
Participating merchants no longer have to maintain signed credit card receipts, because there’s an electronic signature capture solution, and they’ll also have online access to their point-of-sale receipts to sort, retrieve, download, or e-mail. If they must print, they can do so on recycled paper.
Non-profits in the program benefit from consumer’s ease of access for making small, quick donations, and everyone benefits from the lessened environmental impact and reduced exposure to BPA.
Planet Receipt has a referral program whereby for every customer you refer who signs up with the program, Planet Receipt will plant a tree in your name. Referrals to merchants yield cash rewards based on the amount of associated revenue. Even referrals of non-profits can yield donations made in your name.
Planet Receipt has been operational for almost two years, but is still relatively unknown. For those looking to go the eco-friendly route, it’s worth exploring, but, like MyReceipts, is not yet expansive enough to be your only digital receipt solution.
![]()
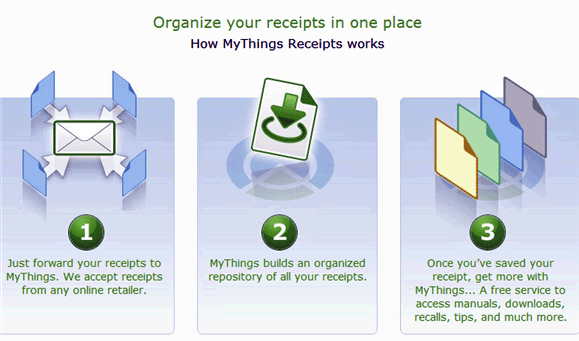
My Things was designed to help you track your purchases and organize receipts so that you can easily create a list of products you own — it’s more a collections manager than a receipt manager. Once you get all of your information entered and organized, you can access associated information, like free product user manuals, customer reviews, deals, warranty information and product support data.
Sign-up is simple — just provide your email address and create a password. To get receipts into the system, either forward them to receipts@mythings.com from your registered email address, or enter them manually. From there, MyThings builds a database, not only of your receipts, but of your possessions.
It could be user error, but I found the system to be slow and buggy, and it appears that MyThings has not upgraded its operations for a while. Although MyThings pops up frequently in online mentions of receipt managers, Paper Doll suggests you consider other alternatives digital solutions, including Shoeboxed, OneReceipt, Slice, and Lemon, covered in the previous post.
Whatever receipt options you use, whether you organize your paper receipts or snap photos at the point of purchase and upload them, whether you forward online receipts or have them sent directly from a merchant to your receipt management service, be sure to schedule time on your calendar for reviewing your purchases and your receipt management systems. Make sure they’re working well and delivering the kind of productivity you need.
Automation is wonderful, but your finances can’t be 100% set-it-and-forget-it.
Digital Receipt Management Tools (Part 1): OneReceipt, Shoeboxed and a Slice of Lemon
Last week, we reviewed the basics for dealing with receipt clutter flutter, including paring paper receipts down to just the essentials, then organizing and storing them. We also touched on how to manage simple digital receipts. Today, we’re going to expand on that digital focus to look at how we might maintain good financial records but have less reliance on the paper.
People want to avoid paper receipts for all sorts of reasons. Sorting receipts is tedious. They crumple and get messy. They come in odd sizes. Thermal paper receipts are laden with toxic BPA.
The following are some new tools for changing the way we interact with receipts.

Shoeboxed has been around since 2007. It’s best known as a service to which you can securely mail receipts to be scanned and collated into separate categories. Just gather your paper crumbles and insert them in Shoeboxed’s pre-paid envelopes. This not only gets receipts out of your home, but Shoeboxed magically turned the crumbles into sortable, analyzable data, which you can review without worry that your kids or kitties will destroy your deductibles documentation (or lick the BPA off of the paper).
Shoeboxed also has mobile apps to let you snap a photo and upload receipts when you’re on-the-go. Of course, you can also scan your own receipts and use the Receipt Uploader, or email receipts to your @Shoeboxed.com email address, although that seems somewhat less magical. Use that same email address as your default when registering with online merchants, and they can send receipts directly to your Shoeboxed mailbox. If your emailed vendor receipts come with discount codes or coupons for future purchases, Shoeboxed can manage those for you, too.
Shoeboxed uses high accuracy scanning, OCR, and human data verification to sort data and organize receipts into virtual shoeboxes, or categories, in your account. Result: no more hunting for receipts in shoeboxes of the cardboard variety. Shoeboxed also creates expense reports and can export receipt data to Quicken and TurboTax.
Shoeboxed has four pricing models, including a free DIY plan for those who have few receipts and are willing to scan for themselves.

OneReceipt, a digital service currently in beta, launched on Cyber Monday 2011. It combines your paper and electronic receipts, displaying them on a secure, personalized web page.
After a speedy sign-up, you get a personalized @OneReceipt.com address. Provide this address to vendors instead of your regular email address in order to protect your privacy and group your vendor notifications in one central area. (Personally, Paper Doll loves it when Amazon emails to tell me a package is on its way, but not everyone likes an inbox full of shipping data.) OneReceipt starts up by syncing with your Gmail, Google Apps or Yahoo! email to capture any electronic receipts that vendors have previously sent you.
Meanwhile, you can snap photos of your paper receipts and email them to your OneReceipt.com address for storage in the same account — use the iPhone app or just forward them from your inbox.
OneReceipt indexes all of your receipt information (for donations as well as purchases), and translates the data into a simple chart, with the date of purchase, order basics (company and order number), product, and financial information, including gross pricing, tax, discounts and net pricing. OneReceipt is allied with Expensify, so you can have detailed expense account information delivered directly to your inbox.
The service also offers tagging and categorizing to help you filter, sort, organize and retrieve whatever receipts you get. (When you’re emailing yourself, just type the tag in the email’s subject line.) However, there are only 15 categories, and it doesn’t appear you can add your own, and the tags are currently limited to Business and Personal.
OneReceipt generates a running total of your purchases, providing an effortless way to track your spending. Easily search through your purchases, narrowing by time frame or price.
OneReceipt also alerts you to deadlines for returning purchases so you don’t have to worry about posting a receipt (which you’ll surely ignore) on your fridge. The company takes a pretty lighthearted approach to itself in this regard.
If you use Google’s Chrome browser, you can also take advantage of an extension that lets OneReceipt play nicely with your Mint, American Express, CitiCards and Bank of America accounts, so that when you’re accessing those sites, you’ll be able to see more robust purchase data.
OneReceipt is free. Paper Doll expects it will eventually offer various levels of premium solutions.
[Edited to note: Effective August 24, 2016, OneReceipt is shutting down. An email from the company dated August 10, 2016 recommends migrating to its sister app, Slice.]

Slice, which turned one year-old in June, is less concerned with receipt clutter flutter than digital receipt disorganization, and focuses solely on organizing the receipts from your online purchases.
Sign up with one click using your Google, Yahoo! or Facebook accounts, or create an account with your name, email and password. From there, Slice asks you to select among Gmail, Yahoo!, Hotmail, AOL (seriously, Slice?) and iCloud — all web-based email accounts — to auto-import receipts; if you want to use other email providers, you have to create a Gmail account, link it to Slice and have it “fetch” from your regular email account. (Paper Doll is no programmer, but these extra steps seem a little clunky.)
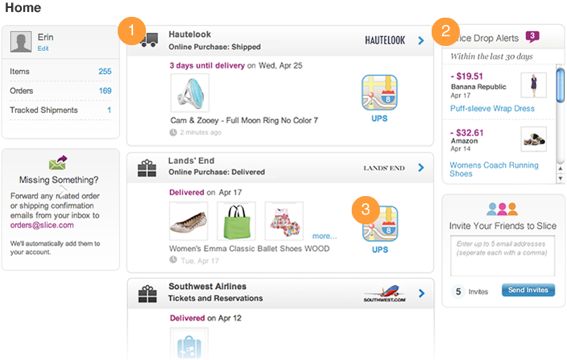
For new purchases, track your shipments on a map, so you can see how far those cute shoes must travel to make it to you. Manually track personal packages, share tracking information with friends to whom you’ve sent gifts, receive real-time updates and view the contents of packages along with shipping data. You also have access to your shipment history, in case you need to have a (not-so) friendly discussion with a vendor.
Slice also tracks your purchase history, letting you sort by order date, merchant, status (purchased, rented, canceled or returned) or item type, including:
Online purchases
General payments
Digital downloads
In-store purchases at brick-and-mortar stores, like Nordstrom, that offer opt-ins for emailed receipts
Subscriptions or rentals
Tickets or reservations
Shipments, such as for repaired or exchanged items
The Slice & Dice function helps you analyze your purchase information, by merchant or price, over any set period of time.
Niftily, Slice detects and notifies you of price drops from merchants that honor price adjustments. Once Slice notifies you, you’re on your own to contact the store, but it’s a nice reminder. (Still, a service that could detect a price drop, automatically contact the company, get you a refund and have it deposited in your account? That would rock!)
Slice is a free service and is still in beta, though out of the invitation-only stage. As it grows, it will have more supported merchants, and, one hopes, more ways to get information into the system. Currently, mobile apps are available for iPhone and Android, in addition to the regular online Slice program. And, although I had to dig through the FAQ to find out, you can send digital receipts for unsupported vendors to your Slice account by emailing orders@slice.com from an email address already linked to Slice.

Lemon launched in October 2011, starting out as an iPhone-only app for helping store, sort and simplify paper and digital receipts. It now accommodates Android and WindowsPhone users, too. Lemon now sees itself as a “digital wallet that organizes and stores your credit cards, receipts, tickets, coupons and more.”
If you’re terrified of the BPA in receipts, or just know you’ll lose the paper ten seconds after it’s handed to you, snap photos at the cashier’s counter right when you check out. Otherwise, gather up a day’s (or week’s) worth of receipts and snap away! If applicable, you can also tag the receipt for the appropriate category, like business or personal.
For paper receipts, upload them using Lemon’s smartphone app. You merely point your smart phone at any receipt, being careful to line up the edges with the on-screen guide, and take a photo. For receipts that are too long to get in a single shot (and what’s the deal with foot-long receipts when you’re just buying milk and Reese’s Peanut Butter cups, anyway?), Lemon’s app program guides you through a series of shots. In that way, it’s kind of like taking a panoramic photo of the Grand Canyon with an old Brownie Instamatic. Lemon will assemble all the different shots to make it all make sense; no Xacto knives or rubber cement required.
Forward email receipts to your personal @lemon.com account; if they arrived to you as web pages rather than email, just use the instructions in last week’s post to turn them into files you can attach to any email.
If you don’t actually have a receipt (perhaps you paid a crisp dollar for an icy beverage at the neighbor’s lemonade stand?) you can still manually input information regarding your purchases so you can track every penny you spend.
Lemon will also let you log in to the Spending section and edit any receipt where data has been misinterpreted. Of course, as with any system, Lemon can only keep track of what’s put in, so it’s important to develop a reliable plan for uploading everything that isn’t already automated. Schedule a weekly upload time for regular statements and receipts and attend to ad hoc items you acquire. Buy a concert ticket? Scan it. Get your new insurance card in the mail? Up it goes!
Whatever method you use to send receipts and documents to Lemon, the service extracts any useful data so you can find whatever information you need to contact vendors about tracking, returns or warranties, and it can generate expense and any other financial reports, as necessary. All the receipts are filed and organized in one central, searchable account, and Lemon offers a graphic display of how and where you’re spending your hard-earned money.
Lemon comes in two flavors, ad-supported but free, and ad-free Lemon Pro at $9.99/month (or $99/year). Both versions allow the scanning of unlimited numbers of receipts, as well as credit, debit and loyalty cards. Both employ bank-secure PIN and SSL encryption, allow offline access to your financial information even when you can’t connect to the internet, and pass along special offers from your preferred merchants.
However, Lemon Pro is extra tangy, sporting “superfast processing” of scanned data. Features include scanning and storing receipts with line-by-line item detailing, tracking shared expenses for up to five people, and exporting of data to Excel, Evernote, Expensify and Concur.
Lemon’s major benefit is the high security; even if your smart phone is stolen, the information is kept behind a pretty impenetrable password. This means the thief can’t see your data, but once you replace your phone, you’ll be able to access your entire account.
Paper Doll found such an embarrassment of riches in terms of high tech ways to organize your receipts, we’re going to continue this topic next time with explorations of more digital receipt management tools.
![]()

Seven Steps to Conquering “Receipt Clutter Flutter”
Most homes and offices have them: fluffy piles of loose, crumpled papers on desktops and filing cabinets, in drawers, and spindled and somewhat mutilated on those desktop spires. Any brisk movement past the desk yields receipt clutter flutter.
Most of this kind of backlog, as well as new incoming papers, can be handled with relative ease using a pretty Old School treatment of receipts at three points in time.
At the register:
–Check receipts for accuracy.
–Neatly place receipts (folded, if necessary) behind the cash in your wallet.
At your home (or office, if these are business receipts) each evening:
–Remove the receipts.
–Discard/shred the receipts that needn’t be kept (see below).
–Tuck away the receipts that you need to keep in an envelope or file folder with the current month labeled on the outside. Keep the envelope or folder in a top desk drawer or the front of a file riser — the goal is to make it immediately accessible but keep the receipts safely tucked away.
At your home or office on a monthly basis (scheduled on your calendar, if necessary):
–Check the receipts against your actual bank or credit card statements.
–Discard the receipts that are no longer necessary to keep after 30 days. (See below.)
–Archive the rest. Easy-peasy, eh? Sure, there’s a little more to it, like knowing what receipts need to be kept. I advise that you:
1) Keep cash receipts for things you might return, and for the duration of the return period only. A Double-Mocha Venti With Foam that you paid for with cash? Unless it’s somehow a business expense, toss the receipt. If you purchase toys or clothing for cash and the store’s return policy is a firm 30 days, discard your receipt after that period.
2) Keep all receipts for big ticket items (set your own benchmark — it could be $50 or $500, depending on your lifestyle), no matter how you paid, and credit card receipts for things you might return, until the return period has expired (and #5, below, has kicked in). Even if you set a relatively high benchmark for how BIG a big-ticket item might be, I suggest you save receipts for all automobile-related part purchases in a Car Maintenance file. This information will prove useful if a part is ever recalled, and a full repair history (usually printed on big auto repair receipts) creates value-added appeal if you choose to privately sell your car instead of trading it in.
If you’ve purchased really big big-ticket items, note that the IRS allows taxpayers to choose between deducting state income tax and sales tax; use the IRS sales tax calculator to see what works best for you. The default amount is usually your best bet, but if you bought a house, car, or other major purchase, you’ll want proof of that big ticket deduction.
3) Keep all receipts for tax-deductible expenses such as charitable donations and medical expenses in your Tax Prep folder until you’ve completed your tax return. You won’t know until the end of the year whether you’ve accumulated a high enough percentage of your adjusted gross income to deduct medical expenses, so err on the side of caution. However, most pharmacies will print a summary of all prescription purchases, so you can shred most prescription receipts. Just hang on to the ones you get from when you’re on vacation or using a drugstore other than your usual one. Be sure to check with a tax professional regarding any state- and municipal-tax reasons to maintain other receipts. For example, states like Louisiana and Minnesota allow residents to deduct K-12 educational expenses.
4) Keep receipts for all items for which you are due reimbursement until you get paid. Most often, this will include purchases submitted on your expense reports at work or on invoices to your clients, if you’re self-employed. Less regularly, you’ll submit receipts to your insurance company for repairs done to your home or auto, or for medical procedures where the doctor’s office won’t file on your behalf. Occasionally, you’ll even have to submit the receipts to someone else’s insurance company if the other party was at fault. If you have to turn in the original, keep a scanned copy for your records.
5) Keep credit card receipts, deposit slips and ATM withdrawal tickets until your credit card or bank statements have arrived. Reconcile the receipts against the statements, and if the receipts don’t fit any of the above-mentioned categories, it’s generally safe to shred them. These five basic Old School tips work great when you’ve received your receipts on paper, such as when you’re in a grocery store, clothing shop or restaurant. In the short term, you’re dealing with deadlines that last about a month — waiting for return policies to expire and bank or credit card statements to appear.
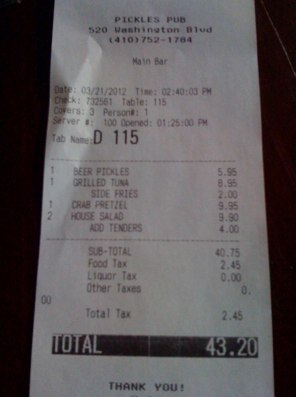
For other paper receipts, you’re dealing with tax or reimbursement issues, and your paper file system should accommodate you. But what if you’re dealing with Receipts 2.0? What if you get an electronic receipt from a taxi driver, as I did when I attended this year’s NAPO Conference?
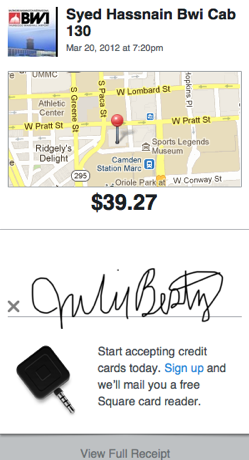
What if you make an online purchase and the only receipt you get comes via email or as a page in your browser? Or what if you split a meal with colleagues where one puts the bill on her card and you all pay her in cash, as I did with my pal Krista Colvin, at that same NAPO conference? (Krista was kind enough to snap a photo of the receipt with her phone and email it to me.)
Increasingly often, purchases are made in ways that were atypical, or even impossible, just a few years ago. At a recent visit to a shoe store, I found that credit card sales were “rung up” on an iPad; service people and mobile vendors have embraced using Square, PayPal Here, and similar devices, allowing more and more small and micro-businesses to accept electronic payments and provide electronic receipts. What then?
6) For receipts you get via email, create a special sub-folder in your email system. For example, in Outlook or Entourage, select “New” and then “Folder” from under the File menu. In Apple’s Mail program, go to “Mailbox” in the menu bar at the top of the screen and select the “New Mailbox” option. In Gmail, select “Create New Labels”. Label the folder “Receipts” — if you want to get fancy, you can then create sub-folders for each year (to make it easy when separating receipts that arrive late in December vs. early January) and even sub-sub folders for categories like books, clothing, transportation, services, and so on. If you like fine detail or need it to help you prepare your business taxes, you can get granular; otherwise, just a big Receipts folder can suffice. Whenever you get a receipt by email, just drag or move it to your Receipts folder.
7) For online receipts that yield no email but just a browser screen, you have a few options. You can:
- Email the web page to yourself
Some browsers have an option to email a whole page. In Safari, select “Mail Contents of This Page” from the File menu and a copy of the page will be sent to you like any other email. In Internet Explorer, select “Send Page By Email” from the File menu. If you use Firefox, add an extension like Email The Web.
- Save the web page to your hard drive
Every browser has an option to save the contents of a page. Mac users can generally create a PDF just by selecting the Print option from the File menu and then printing “to” PDF instead of to a printer, yielding a PDF that can be saved in a Receipts folder anywhere on the hard drive. The easier it is to navigate to the folder, the more you’ll be inspired to use this option. For reference, recent versions Mac OS X even have a pre-created Web Receipts sub-folder in the Documents folder, but of course, you can move it anywhere, including your desktop. If you’re on a PC and are not able to create a PDF, you can still save the contents of a web page receipt. Each browser behaves a little differently, but look under your File menu for something that looks like “Save Page As” or “Save As” — your browser will then ask if you want the resulting page to be saved as HTML (i.e., as a web page) or as text.
- Take a screen capture of the receipt.
No matter what browser you use, you can always take a picture of whatever’s on your screen. On a Mac, select Command ()-Shift-4 — it will yield a little bullseye. Place it at the upper left corner of what you want to capture, click, and drag to the lower left until you’ve highlighted what you want. When you let go, a snapshot of that section, in .png format, will be sitting on your desktop. If you want a screen capture of the whole screen, use Command ()-Shift-3. It’s not quite as easy on a Windows-based PC because there’s an additional step to get the screen capture off of the clipboard. To grab a shot of the whole screen, use the Print Screen key; for just a selection, use Alt-Control-Print Screen, highlight the item and then copy and paste it into Microsoft Paint or a similar program. Remember to save it. (Windows 7/Vista users can employ the built-in Snipping Tool.)
Whichever options you choose, be sure to select a useful title that identifies whatever elements will be essential when accessing the receipt later on. You’ll already be able to sort and search by the date the receipt was created, so think in terms of a name that quickly identifies the store and product or purpose (e.g., Kohls-PinkSweater or Amazon-iPad3). Finally, you may be wondering, what if you’re trying to go paperless (or paper-light) and wish all your crinkled paper receipts could magically be made digital? Or, what if you want to avoid the whole process of dealing with tangible receipts in the first place?
Next time, we’re going to look at an abundance of digital resources, including those shown below, for combating receipt clutter and streamlining your financial information. Be sure to subscribe to the RSS feed (above right, under my photo) or follow me on Twitter or Facebook, so you don’t miss one nifty tip.
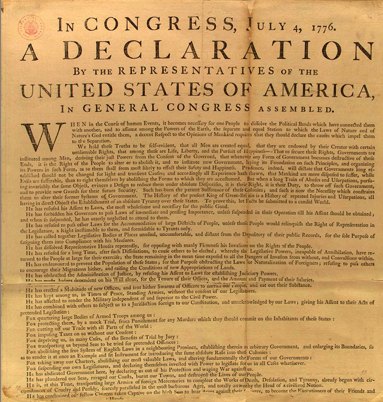
The Paper That Organized The Argument That Organized A Nation

IN CONGRESS, JULY 4, 1776
The unanimous Declaration of the thirteen united States of America
When in the Course of human events it becomes necessary for one people to dissolve the political bands which have connected them with another and to assume among the powers of the earth, the separate and equal station to which the Laws of Nature and of Nature’s God entitle them, a decent respect to the opinions of mankind requires that they should declare the causes which impel them to the separation.
We hold these truths to be self-evident, that all men are created equal, that they are endowed by their Creator with certain unalienable Rights, that among these are Life, Liberty and the pursuit of Happiness. — That to secure these rights, Governments are instituted among Men, deriving their just powers from the consent of the governed, — That whenever any Form of Government becomes destructive of these ends, it is the Right of the People to alter or to abolish it, and to institute new Government, laying its foundation on such principles and organizing its powers in such form, as to them shall seem most likely to effect their Safety and Happiness. Prudence, indeed, will dictate that Governments long established should not be changed for light and transient causes; and accordingly all experience hath shewn that mankind are more disposed to suffer, while evils are sufferable than to right themselves by abolishing the forms to which they are accustomed. But when a long train of abuses and usurpations, pursuing invariably the same Object evinces a design to reduce them under absolute Despotism, it is their right, it is their duty, to throw off such Government, and to provide new Guards for their future security. — Such has been the patient sufferance of these Colonies; and such is now the necessity which constrains them to alter their former Systems of Government. The history of the present King of Great Britain is a history of repeated injuries and usurpations, all having in direct object the establishment of an absolute Tyranny over these States. To prove this, let Facts be submitted to a candid world.
He has refused his Assent to Laws, the most wholesome and necessary for the public good.
He has forbidden his Governors to pass Laws of immediate and pressing importance, unless suspended in their operation till his Assent should be obtained; and when so suspended, he has utterly neglected to attend to them.
He has refused to pass other Laws for the accommodation of large districts of people, unless those people would relinquish the right of Representation in the Legislature, a right inestimable to them and formidable to tyrants only.
He has called together legislative bodies at places unusual, uncomfortable, and distant from the depository of their Public Records, for the sole purpose of fatiguing them into compliance with his measures.
He has dissolved Representative Houses repeatedly, for opposing with manly firmness his invasions on the rights of the people.
He has refused for a long time, after such dissolutions, to cause others to be elected, whereby the Legislative Powers, incapable of Annihilation, have returned to the People at large for their exercise; the State remaining in the mean time exposed to all the dangers of invasion from without, and convulsions within.
He has endeavoured to prevent the population of these States; for that purpose obstructing the Laws for Naturalization of Foreigners; refusing to pass others to encourage their migrations hither, and raising the conditions of new Appropriations of Lands.
He has obstructed the Administration of Justice by refusing his Assent to Laws for establishing Judiciary Powers.
He has made Judges dependent on his Will alone for the tenure of their offices, and the amount and payment of their salaries.
He has erected a multitude of New Offices, and sent hither swarms of Officers to harass our people and eat out their substance.
He has kept among us, in times of peace, Standing Armies without the Consent of our legislatures.
He has affected to render the Military independent of and superior to the Civil Power.
He has combined with others to subject us to a jurisdiction foreign to our constitution, and unacknowledged by our laws; giving his Assent to their Acts of pretended Legislation:
For quartering large bodies of armed troops among us:
For protecting them, by a mock Trial from punishment for any Murders which they should commit on the Inhabitants of these States:
For cutting off our Trade with all parts of the world:
For imposing Taxes on us without our Consent:
For depriving us in many cases, of the benefit of Trial by Jury:
For transporting us beyond Seas to be tried for pretended offences:
For abolishing the free System of English Laws in a neighbouring Province, establishing therein an Arbitrary government, and enlarging its Boundaries so as to render it at once an example and fit instrument for introducing the same absolute rule into these Colonies
For taking away our Charters, abolishing our most valuable Laws and altering fundamentally the Forms of our Governments:
For suspending our own Legislatures, and declaring themselves invested with power to legislate for us in all cases whatsoever.
He has abdicated Government here, by declaring us out of his Protection and waging War against us.
He has plundered our seas, ravaged our coasts, burnt our towns, and destroyed the lives of our people.
He is at this time transporting large Armies of foreign Mercenaries to compleat the works of death, desolation, and tyranny, already begun with circumstances of Cruelty & Perfidy scarcely paralleled in the most barbarous ages, and totally unworthy the Head of a civilized nation.
He has constrained our fellow Citizens taken Captive on the high Seas to bear Arms against their Country, to become the executioners of their friends and Brethren, or to fall themselves by their Hands.
He has excited domestic insurrections amongst us, and has endeavoured to bring on the inhabitants of our frontiers, the merciless Indian Savages whose known rule of warfare, is an undistinguished destruction of all ages, sexes and conditions.
In every stage of these Oppressions We have Petitioned for Redress in the most humble terms: Our repeated Petitions have been answered only by repeated injury. A Prince, whose character is thus marked by every act which may define a Tyrant, is unfit to be the ruler of a free people.
Nor have We been wanting in attentions to our British brethren. We have warned them from time to time of attempts by their legislature to extend an unwarrantable jurisdiction over us. We have reminded them of the circumstances of our emigration and settlement here. We have appealed to their native justice and magnanimity, and we have conjured them by the ties of our common kindred to disavow these usurpations, which would inevitably interrupt our connections and correspondence. They too have been deaf to the voice of justice and of consanguinity. We must, therefore, acquiesce in the necessity, which denounces our Separation, and hold them, as we hold the rest of mankind, Enemies in War, in Peace Friends.
We, therefore, the Representatives of the united States of America, in General Congress, Assembled, appealing to the Supreme Judge of the world for the rectitude of our intentions, do, in the Name, and by Authority of the good People of these Colonies, solemnly publish and declare, That these united Colonies are, and of Right ought to be Free and Independent States, that they are Absolved from all Allegiance to the British Crown, and that all political connection between them and the State of Great Britain, is and ought to be totally dissolved; and that as Free and Independent States, they have full Power to levy War, conclude Peace, contract Alliances, establish Commerce, and to do all other Acts and Things which Independent States may of right do. — And for the support of this Declaration, with a firm reliance on the protection of Divine Providence, we mutually pledge to each other our Lives, our Fortunes, and our sacred Honor.
— John Hancock
New Hampshire:
Josiah Bartlett, William Whipple, Matthew Thornton
Massachusetts:
John Hancock, Samuel Adams, John Adams, Robert Treat Paine, Elbridge Gerry
Rhode Island:
Stephen Hopkins, William Ellery
Connecticut:
Roger Sherman, Samuel Huntington, William Williams, Oliver Wolcott
New York:
William Floyd, Philip Livingston, Francis Lewis, Lewis Morris
New Jersey:
Richard Stockton, John Witherspoon, Francis Hopkinson, John Hart, Abraham Clark
Pennsylvania:
Robert Morris, Benjamin Rush, Benjamin Franklin, John Morton, George Clymer, James Smith, George Taylor, James Wilson, George Ross
Delaware:
Caesar Rodney, George Read, Thomas McKean
Maryland:
Samuel Chase, William Paca, Thomas Stone, Charles Carroll of Carrollton
Virginia:
George Wythe, Richard Henry Lee, Thomas Jefferson, Benjamin Harrison, Thomas Nelson, Jr., Francis Lightfoot Lee, Carter Braxton
North Carolina:
William Hooper, Joseph Hewes, John Penn
South Carolina:
Edward Rutledge, Thomas Heyward, Jr., Thomas Lynch, Jr., Arthur Middleton
Georgia:
Button Gwinnett, Lyman Hall, George Walton
A Healthy Piece of Mail: Health Insurance Rebates
It’s very rare that a Paper Doll blog post is so intricately tied to the news. After all, the subject of organizing is generally more timeless than timely. At a period where so many people are struggling to organize their finances, especially in light of rising health costs, I’m hopeful that this today’s post, accurate at the time of writing, will prove informative and useful.
Whatever the Supreme Court announces this week regarding the decision on the “mandate” element of the Affordable Care Act, you may still be in the running to receive an important piece of mail sometime in the next five weeks: a rebate check from your insurance company.

The multi-part, controversial Act includes a variety of provisions, from guaranteeing access to insurance for persons with pre-existing conditions to covering more preventative care, from helping states crack down on unreasonable insurance premium hikes to allowing young people to stay on their parents’ health insurance for longer periods of time.
In addition, the Act holds health insurance companies accountable to consumers. As part of that, it guarantees that Americans will be reimbursed if and when health insurance companies don’t meet “a fair standard of value.”
A FAIR STANDARD OF VALUE
All health insurance companies are now required to spend, on average, at least 80% of subscriber premiums on actual medical care (i.e., payment to physicians, hospitals and other care providers or reimbursement to enrollees for such care, as applicable), instead of on overhead (like marketing, advertising, CEO bonuses, fancy office parties, etc.) and corporate profits.
As a result, health insurers have to submit data regarding the proportion of premium revenues they’ve spent on “clinical services and quality improvement.” This is called the Medical Loss Ratio (MLR). The insurance industry calls it that because it’s the percentage of the premium considered “lost” to insurance companies. From the industry’s philosophical perspective, there’s no benefit from the actual provision of health care. (It’s much like if a private university referred to the money spent actually educating undergraduates as an educational loss ratio.)
The National Association of Insurance Commissioners (NAIC) was responsible for standardizing definitions and methodologies for figuring out which services constitute clinical services and quality improvement, but the Department of Health and Human Services got final say on some questionable definitions. For example, the NAIC wanted to count insurance agent commissions as health benefits rather than overhead.
ARE YOU ELIGIBLE?
The amounts of these rebates will vary by state, insurer and how a subscriber’s insurance has been acquired. For individual plans purchased directly from an insurance company, such as what Paper Doll acquires as a self-employed individual, and for “small group” plans (companies with fewer than 50 employees), insurance companies can only spend up to 20% of insurance premiums on administrative expenses.
For “large group” policies, employees of larger companies (anywhere from those with 50 employees to those of Walmart, America’s largest employer) can spend no more than 15% of premiums on non-health care expenses.
Also, six states have special circumstances. In Georgia, Iowa, Kentucky, Nevada, New Hampshire, and North Carolina, insurance companies were allowed to meet a slightly smaller medical loss ratio to keep the insurance markets there from “destabilizing.” States had to demonstrate that requiring insurers in an individual market meet the 80% MLR would result in fewer choices for consumers.
Hawaiians won’t be getting a rebate, as all health insurers in that state met the medical loss ratio requirements in 2011.
Those who are insured via public programs, like seniors covered by Medicare and individuals covered by Medicaid, will not receive rebates, as those programs already apportion well more than 80% of funds to actual medical care. (Indeed, unlike big insurance companies, for Medicare Parts A and B, only a thrifty 3% of premiums are spent on administrative costs.)
Also, Medicare supplemental policies (like Medigap) have different standards applied (65% for individual policies, 75% for group policies). These programs are also not expected to owe rebates to their customers.
And, assuming the Affordable Care Act is not reversed in its entirety, all of us who pay taxes should be pleased to note that, as of 2014, insurance companies participating in Medicare Advantage plans will have to spend 85% of funds on actual healthcare costs or will have to refund the federal government any “wasted” tax dollars. Plans that miss the 85% limit three years in a row won’t be allowed to accept new enrollees; if they miss it for five years, they won’t be allowed to operate at all.
REALITY CHECK
The Kaiser Family Foundation, a non-profit health policy analysis and health journalism group, analyzed the 2011 data collected by the National Association of Insurance Commissioners. The Kaiser study projects that approximately one-third of consumers who purchase their own insurance will get rebates, as will about 28% of insured small businesses employees and about one-in-five employees covered by large group policies.
If you purchase your own insurance and don’t get a rebate, it’s not exactly bad news. Just like an IRS refund means you’ve been giving a tax-free loan to the government all year, a rebate means you’re getting money back because your insurance company spent too much of your premium (as defined by federal regulations) on things that won’t improve your health.
HOW PAYMENTS WILL BE MADE
If you paid for your own insurance, you will be reimbursed:
–by a refund check delivered by August 1, 2012; or
–by a lump-sum reimbursement to whatever credit card or debit card account was used to pay the premium; or
–via a reduction in whatever next monthly premium payment is due after August 1.
Whether or not you are actually owed a rebate, your insurer is required to alert you to the fact, in writing, by August 1, 2012, so watch your mailbox.
You may be wondering what happens if your employer deducts funds from each paycheck to pay for your portion of your premiums. Generally, health insurance companies will rebate the money to employers. However, since employers usually cover 70-80% or more of employees’ (or employees’ families’) full premiums, employers will be expected to refund amounts based only on the percentage of the whole premium that each employee paid.
So, if your insurance is a perk for which you pay nothing, you’ll get nothing back. If you kick in some portion of the premium for yourself, or you’re covered for free but pay extra for your dependents to be covered, your employer should return a portion of the rebate based on what was deducted from your checks in 2011.
HOW MUCH WILL YOU GET?
Last week, the Department of Health and Human Services announced the final amounts that health insurers will have to refund. $1.1 billion in rebates will be apportioned to 12.8 million Americans. Although the average American family will receive about $151, the word average may be deceptive. For example, according to Healthcare.gov, it’s estimated that per-family subscribers in Mississippi ($651), Alabama ($582), Maryland ($496), and Delaware ($461) will see the highest rebates. Obviously, to meet an average of $151, that means some rebates will be very tiny.
If you can’t wait until August 1 to know your share, you can try to estimate your little windfall by using the following sites.
Consumers Union (the people behind Consumer Reports Magazine) created a map which lists the insurance companies expected to owe rebates (based on companies’ prior self-reports). Consumers Union also put together a Health Insurance Refund List to show state by state lists of major insurance companies’ total rebate amounts for individual, small and large group markets. Still, unless you know how many insured persons or families make up each group, it’s difficult to estimate how much you’ll receive.
For a better guess, refer to the federal government’s Estimate of Total Rebates in All Markets for Consumers and Families, by State list — scroll down to the charts for Appendix I, II and III.
NO TIME MACHINE
Unfortunately, even if your insurance company’s executives have been having beach parties in Fiji on your nickel since the days of Duran Duran, the rebate is not that retroactive. The rebates issued during July 2012 are solely for overages on insurance premiums that you paid in 2011.
In theory, the Supreme Court’s decision on the mandate portion of the Affordable Care Act, alone, should not impact whether insurers will still be limited to spending an average of 80% of premiums on health care, but it remains to be seen what other changes to the Act, in whole or in part, may be in store. As of this writing, it’s expected that that the Supreme Court’s decision will be announced this Thursday, June 28, 2012. Until then, at least, Paper Doll will be keeping an eye on the mailbox.


Follow Me