Paper Doll
The Password for Your Passwords: Understanding ID.me and Login.gov
Are you over it? Do you feel like you’re all prepared, password-wise?
Two weeks ago, in Not Your Mama’s Passwords: Passphrases, Passkeys, and the Future of Logging In, we did a deep dive, examining:
- how the characteristics of a good password have changed over the years
- what it means to have strong passwords nowadays
- all the elements to consider when picking your login credentials (Did I at least convince you that having capital I and lowercase L (I vs. l), and zeros and O’s (0 vs. O vs. o) might be confuse your eyeballs as you age?)
- the advantages of a passphrase over a traditional password
- how to fix weak, compromised, and re-used passwords
- the advent of passkeys and the many reasons why they’re advantageous (and getting more popular)
- what the difference is between 2-Factor Authentication (2FA) and Multi-Factor Authentication (MFA) and how you can use those methods to the advantage of your digital security.
Then last week, in Paper Doll’s Guide to Managing Passwords for the 21st Century, we had a bit of a reality check as to how we can no longer hope to remember our passwords and why keeping them on sticky notes isn’t (and was never) a good idea. We looked at:
- the advantages and disadvantages of analog password management and whom they are likely to serve best
- the advantages and disadvantages of digital password managers (the solution that’s best for most of us)
- the most built-in digital password managers you may already have
- the most popular third-party digital password managers (plus their features and costs)
- essential features of digital password managers, and some bonus features you might want to check out
- resources for learning more about digital password management.
So, I’d get it if you think you know everything there is to know about organizing your passwords for a more orderly digital life.
Except…maybe not quite yet?
Having access to your login credentials and using your fingerprint or FaceID to prove to a website that you have the right to access your digital stuff should be enough. <sigh> But as we go along, for some sites, that’s still not enough.
The question for this point in the 21st-century is: How do you prove that you are really you?
WHAT IS DIGITAL IDENTITY VERIFICATION?
If you’ve tried to log in to Social Security, EFTPS, the Veterans Administration or any of a number of government websites in the last few years, you may already know that having a password isn’t enough. Because of this, in recent years, new kinds of digital identity verification platforms have been developed.
In the simplest of terms, digital identity verification is the process by which you can prove that your identity is real — that you are really you — without necessarily having to interact in person. Instead of a company making you come in for in-person identification — like how you have to go to an airport to interview for TSA Pre-Check — government agencies, organizations, and businesses can now outsource the collection of that biographical and biometric data digitally, remotely, and match it against trusted, verifiable sources.
These outsourced sites require you to jump through some reasonable hoops to sign up and prove your identity so that when you go to log in to your actual destination (like the Social Security Administration), it’s like there’s a drawbridge with a guard asking you to prove that you are who you say you are before you can go any further.
You just have to have the right answers.
The two best-known sites for digital identity verification, particularly for use federal and state agencies, are ID.me and Login.gov.
ID.me
ID.me was started in 2010 by two U.S. Army Ranger veterans. It’s a secure digital identity verification service that has been described as acting “like a driver’s license for the internet.”
Once you prove who you are to ID.me, it won’t help you buy alcohol or get you on an airplane, but it will unlock access to your accounts with government agencies and programs, healthcare portals, and online store discounts that are dependent on you having a particular kind of status.
How to Get Validated By ID.me
To get validated by ID.me, there’s a one-time set-up where you create a single, unique set of login credentials and confirm the sign-up via email, then choose a multi-factor authentication method. (You also get to create a VERY complex recovery code you can use in case you ever lose your device and/or phone number.)
And, of course, you have to verify your identity.
On the plus side, you won’t have to answer those pesky security questions like you used to have to do to get your credit score. (This is a boon to anyone who no longer recalls their address when they were twelve or the lending company for their first car loan.) But you will need the following basic identifying information:
- your email address — Select one that you check frequently and that you can access during the sign-up process. (So, don’t use your work email if you can’t access it from home, or vice versa.)
- your Social Security number — Alternatively, if you do not have an SSN but do have an Individual Taxpayer Identification Number (ITIN), use that.
- your valid state or federal ID, like a driver’s license, passport book or passport card
- a reliable multi-factor authentication (MFA) method — This may be the ability to receive a security code via text message, an authentication app (like Google Authenticator), a security key, or backup code.
- your phone, tablet, or computer with a camera — You will be asked to take photos of your ID and of your face to verify your identity. You may not want to do this at 2 a.m. after you’ve rubbed off half your eye makeup or mussed your hair to the point that you’re no longer recognizable, so consider this before starting the process.
Once you have everything in hand and provide your identifying information, you will be prompted to either take a brand-new selfie or join a brief video call in order to prove that the photo on your driver’s license matches the photo of your face. I hope, for your sake, your driver’s license photo doesn’t look like Nick Nolte’s famous mug shot.
Be ready to create your ID.me password. Yes, you need a password for the site that let’s you log in to other sites with passwords you already have. And yes, I recognize how ridiculous that sounds.
And, of course, you’ll have to abide by wisdom we’ve previously discussed regarding letters, numbers, special characters, randomization, length, etc.
The process is only slightly laborious, fairly painless, and free, and you will only ever have to do it once.
Where Can You Use ID.me?
More than 21 federal agencies and at least 45 state government agencies in the United States use ID.me as a trusted credential service provider to allow you to safely access information, manage your benefits, and help stop fraud. Government agencies using ID.me include:
- Internal Revenue Service (IRS)
- Social Security Administration (SSA)
- U.S. Department of Veterans Affairs (VA)
- Centers for Medicare & Medicaid Services (CMS)
- U.S. Department of the Treasury
- U.S. Department of Commerce
- U.S. Department of Health and Human Services (HHS)
- Patent and Trademark Office
Various individual states use ID.me for their Departments of Labor or Unemployment, Departments of Revenue/Taxation, and Health & Human Services programs, like state Medicaid and SNAP. You can access a list of all federal and state agencies using ID.me at https://www.id.me/government.
But it’s not just the government that wants to verify your identity. Various businesses offer discounts based on status, and that status is built into your provable identity with ID.me. For example, if you go to ID.me and select Shop instead of Government at the top of the screen, you can use your ID.me Wallet to prove your status as a:
- current member of the military
- veteran
- nurse (or other medical professional)
- first responder
- teacher
- student
- government employee
and access a variety of discounts on product categories including clothing and accessories, health and beauty, sports and outdoor equipment, travel and entertainment, lifestyle items ranging from publications to meal delivery to toys, technology and office equipment, home and auto supplies, pet supplies, and delivery services.
Two Ways to Log On Using ID.me
In order to log in using ID.me, there are two main methods. The first represents my own experience, because I like to jump through hoops.
I pay quarterly estimated taxes for my business through the Electronic Federal Tax Payment System (EFTPS). When I first signed up, more than a decade ago, I had to submit an application and then wait for the government to send me a PIN and an enrollment number in the mail. Only once I received it could I create a password, after which, every time I logged into EFTPS to pay my taxes, I would have to provide my email address and password, as well as that PIN.
Then, several years ago, I was prompted to sign up for either Login.gov, ID.me, or a third verification platform that no longer exists. At the time, ID.me seemed the easiest, so that’s what I picked. Now, when I go to EFTPS and start to log in, I’m immediately sent to ID.me, where I log in, and it then takes me back to EFTPS, to use my agency-specific login credentials.
It’s a lot, but it protects me from someone else logging in and paying my taxes for me. (Wait. Tell me again why that would be bad?)
There’s a second method. Because ID.me is considered single sign-on (SSO), an identification method allowing users to log into multiple independent apps and websites using a single set of credentials, you can get to all of the various government agencies (and the aforementioned shops) directly from the ID.me website.
Once logged in there, your ID.me wallet can take you to any federal or state government agency or shop that’s part of the program.
How ID.me Ensures Safety and Privacy
ID.me follows strict federal security rules for consumer authentication set by U.S. Department of Commerce and is approved by the National Institute of Standards and Technology (NIST) as a NIST 800-63-3 IAL2 / AAL2 credential service provider per the Kantara Initiative. (If you think that sounds like something out of Star Trek, well, we’re on the same page.)
ID.me is a private company, not operated by the government. So how does it make money?
ID.me states it does not sell your personal data to advertisers. Rather, ID.me stays afloat by:
- Charging software subscription and verification fees to government agencies and businesses — Government agencies pay ID.me for Identity as a Service (IDaaS) while enterprise-level companies pay ongoing subscription fees or per-verification fees to securely verify their users and prevent fraud.
- Charging individual retailers transaction fees to verify customer groups (like military members, or teachers) so they can securely offer discounts to identity/status-linked audiences.
- Receiving affiliate commissions on anything users purchase through the ID.me Shop.
However, because people have now experienced signing up with ID.me, leading to trust in the name, you can be sure bad guys are pretending to be ID.me.
As always, watch out for fake emails and text messages purporting to be ID.me in order to purloin your data. Every time you use ID.me, check the URL and security padlock icon (the one that Paper Mommy thinks it looks like a purse), and make sure you’re on the real website before typing any personal information.
LOGIN.GOV
Login.gov is a secure, single sign-on service managed by the U.S. General Services Administration, an independent federal agency.
Login.gov allows you to use one username, password, and multi-factor authentication (MFA) method to access participating federal and state government websites. Unlike ID.me, Login.gov is only for accessing government sites, not retail shops or other types of sites.
How to Create Your Login.gov Account
In addition to all the same bulleted items (above) that you would need to set up an ID.me account, Login.gov also requires that you have a US-based telephone number on a plan that’s in your name.
So, if you’re on a family account that doesn’t list your name or your cell phone is owned by your employer, that can be a sticking point, which is why some people prefer ID.me.
Signing up for Login.gov works much the same way as ID.me, although in addition to using the same standard personal information and matching your ID to a photo or doing video check, Login.gov also matches your identity to your credit history and checks government databases.
There’s one more twist. If any part of the verification process for matching your selfie to your face via Login.gov is problematic, you can go to a United States Post Office location in person, smile that 1000-watt smile of yours, and prove your identity to a human being in order to complete the process.
Your Login.gov credentials will allow you to access many of the same government websites as ID.me, including the IRS, the U.S. Department of the Treasury, and the VA, as well as various sites in the Trusted Traveler Programs (like TSA PreCheck application management, Global Entry, NEXUS, SENTRI, and FAST).
SO, WHAT’S ARE THE DIFFERENCES BETWEEN ID.me AND LOGIN.GOV
Login.gov and ID.me are both official secure single sign-on services used by the United States government to access official websites. So, you may be wondering, what are the differences between Login.gov and ID.me?
The main differences are that Login.gov was built and is managed by the federal government to access only government sites, while ID.me is run by a private company that also contracts with private businesses.
Both meet strict federal security rules, but they handle setup and verification differently.
As mentioned, ID.me requires uploading photos of your ID, like a driver’s license or passport, and uses biometric checks like a selfie scan via your device’s webcam or a live video chat with a support agent.
Login.gov is similar in that it uses the same personal information, and biometric scans, but also digs into what the government already knows about you (whatever is in those sneaky government databases and credit bureaus) to check you out. And again, you’ve got an out if your selfie skills are abysmal — just head to the post office.
So, which should you choose?
The answer may be you-specific, or situation-specific.
ID.me is the more flexible choice if you are currently living outside of the United States, don’t have a Social Security number, don’t have a phone plan in your own name, or need specialized verification via video call.
Additionally, ID.me is often required for specific tasks, like if you want to use the IRS tool to get an Identity Protection PIN.
And if you fit one of those special identity/status categories as a current member of the military or veteran nurse (or other medical professional), first responder, teacher, student, government employee, you may want to use ID.me’s Shop to get discounts. (That said, always shop around to make sure that the price of what you’re buying can’t be found for less elsewhere.)
However, there are times when Login.gov might be better. If you’d prefer to avoid facial recognition software or biometric uploads and would rather visit your local post office, Login.gov might be your cup of tea.
But guess what? You might not have to choose. Assuming you live in the U.S., have a Social Security number and U.S.-based phone in your own name, there’s no reason (aside from annoyance at having to use either one at all), that you can’t sign up for both.
But in all likelihood, you will eventually have to sign up for at least one, as an increasing number of government agencies are requiring one of these two forms of identity validation.
SEE ID.ME AND LOGIN.GOV AT WORK
So, let’s say you want to create your brand-spanking-new online Social Security account.
Before 2026, you’d go to SSA.gov and answer a long list of questions about your childhood addresses, cars you used to own, and financial information in your name, just to prove your identity.
Now, when you click to log in, the site will prompt you to either sign in or create an account with either ID.me or Login.gov. You select which you plan to use and then follow the prompts for whichever you choose. For example, ID.me:
or Login.gov:
Once your account is set up, on future visits, you’ll be able to log in by choosing either “Sign in with ID.me” or “Sign in with Login.gov” from the Social Security website and authenticating your identity with your selected MFA method.
It works the same way with any other site (governmental or otherwise) that prompts you to use one of these verification systems.
HOW ABOUT CANADALOGIN, EH?
Are you reading Paper Doll from above the 49th parallel? Welcome, Canadian readers! Did you know that you will soon have your own, nifty single sign-on and identify verification program similar to ID.me and Login.gov?
CanadaLogin provides a simple, reliable, and secure way for Canadians (and those residing in Canada or needing to avail themselves of Canadian governmental agency services) to sign in to the websites for various programs and services of the Canadian government.
It’s designed to “prioritize security, convenience, and usability.” As such, it’s not just a matter of being able to verify identity, but make it easier for people to access the 270+ online services offered by the government of Canada. (And remember, Canada is bilingual! Everything has to be available in English and French!) Apparently, there are more than 60 different access points for these services. So, Canada is moving toward streamlining everything!
Eventually, all Government of Canada online services will connect to a single entry point through CanadaLogin. This will eliminate the need to remember (or even have) a bazillion sets of login credentials. (Paper Doll apologizes for not knowing if there is a metric conversion for bazillion.)
So far, users can only start setting up CanadaLogin credentials with two-step verification through one of three MFA methods:
- a one time code sent as a text message or by voice call,
- a passkey, or
- a security key
Soon, though, CanadaLogin will start adding more kinds of 2FA/MFA methods and other ways to log in and recover login credentials, including through Interac sign-in partners. For readers unfamiliar with Interac, here’s a cheatsheet:
And eventually, Canadians will be getting the same kinds of secure, online identity confirmation options as Login.gov and ID.me, but likely with a charming, polite, Canadian approach.
Currently, Canadians do have access to a mix of identity verification options, including eID-Me, an encrypted digital ID on one’s cell phone. It offers a secure digital wallet, almost-instantaneous identity verification, password-free logins, and high security and privacy. To register for eID-Me, you need a valid Canadian or U.S. passport as well as a Canadian driver’s license or photo ID card.
Canadian residents can also get verified to access identity/status-based (first responders, teachers, etc.) Canadian Shop ID.me discounts.
THE FUTURE OF IDENTITY VERIFICATION
The first post in this series looked at the question, “How do I prove something (an account) is mine?” and found solutions in developing passwords, passphrases, passkeys, etc.
The second post examined, “How do I manage it all security to keep organized and productive?”
And today, we’re answering, “How do I prove that I am who I say I am?” so that, again, we can productively access our online stuff.
It’s not going to stop here.
Just last week, I was asked by the brokerage company for my IRA to set up a digital voice print identifier so that when I call in, there will be an additional level of security.
On the one hand, the process was easy and interesting. I was asked to stand in the middle of a room and turn 360° as I described various things I could see in a long and rambling discourse. (Paper Doll is very good at delivering a long and rambling discourse.)
On the other hand, given what I’ve learned about AI and the ability to spoof our voices and our faces for scams, I can’t say I’m comforted. Of course, when fingerprint identification for phones came out, I have to admit I was a little queasy, imagining thieves stealing iPhones and cutting off people’s fingers, and as far as I know, that never came to pass.
The only thing we know for sure about the future of login credentials, identity verification, management of all of it is that it will continue to evolve, which means we will have to keep monitoring the changes to protect our identities and access credentials with more and more care. Our ability to stay productive online will depend on embracing these methods, even while familiarizing ourselves with the methods will initially slow us down. ‘Twas ever thus.
Do you already have accounts with ID.met or Login.gov? Do you have a preference?
Paper Doll’s Guide to Managing Passwords for the 21st Century
Last week, in Not Your Mama’s Passwords: Passphrases, Passkeys, and the Future of Logging In, we saw how much has changed since we all made our first online passwords. Now, creating a strong password requires more characters, more variety, and more possibilities for making them secure, memorable, and useful. We also looked at passkeys, those secure digital handshakes that are even more powerful than passwords, and we got a greater understanding of what goes into multi-factor authentication.
So now we’ve got these big, strong, hunky passwords, passphrases, and passkeys, what do we do with them once they’re created? Organize them, of course!
HOW SHOULD YOU ORGANIZE YOUR PASSWORDS?
Having something and not being able to find it is just as bad as never having had it in the first place.
Have you ever lost or forgotten a password you really needed?
So, let’s start with a different question: how shouldn’t you organize your passwords?
- Don’t count on your memory! — When a password is first created, everyone thinks they’ll remember it, but time and disuse (as well as stress) can make the memory of a password foggy. One too many half-remembered attempts can lock you out altogether.
- Don’t re-use the same password for everything in order to lessen the likelihood that you’ll forget. — As we saw last week, a re-used password is an invitation to ne’er-do-wells.
- Don’t leave passwords on sticky notes around your desk for others to see (or for tiny humans or furry friends to accidentally carry off) — The security of where you keep your passwords can be just as important as the security around their creation.
The main ways to organize your passwords are either analog or digital.
ANALOG PASSWORD MANAGEMENT
You can use a password notebook or even an address book to log your passwords as you create them, alphabetically by the website’s name or URL.
A simple, nondescript option can hide in plain sight. For example, this faux leather, hardcover Clever Fox Password Spiral Book with alphabetical tabs, measures 4.7″ x 5.7″ and comes in more than a dozen colors. There’s a pocket for loose notes and an elastic band to keep it from accidentally opening to view.
Each entry block has spaces for the website/URL, user name, password, and a hints or clues.
Importantly, the cover (once the label is removed) does not betray the contents and the average onlooker would likely mistake it for a journal. This one costs about $15 at Amazon.
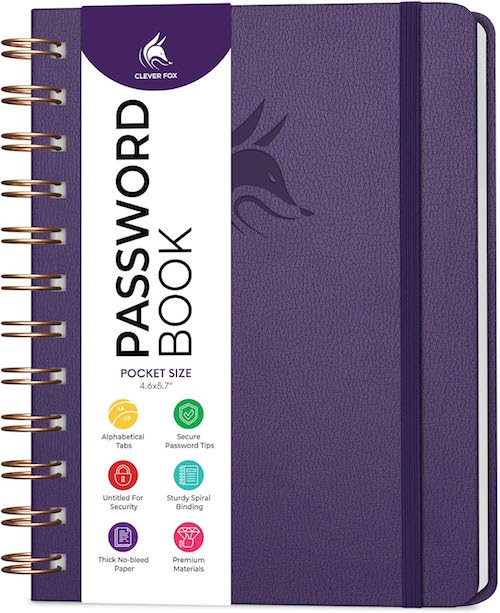
There are a variety of similar options. What you really don’t want is a novelty version with a cute phrase or design that lets on that it contains passwords.
Even if you normally only used a password notebook at home, the minute you need or want your passwords to be as portable as your phone (such as when you’re traveling), if your notebook can’t go incognito, the information within will be at risk.
Advantages of an Analog Password Notebook
The main advantage of a notebook for storing and organizing your login credentials is that you already know how to use one.
Every time you create a new password, you just reach for your password notebook and write it down. You don’t need any technical skills, just diligence.
Disadvantages of an Analog Password Notebook
And there’s the first drawback. It requires diligence. How often have you been prompted to make a new password while in a hurry? You think you’ll remember it and do nothing, or you write it on the nearest piece of paper. Either way, you’ve got trouble.
There are other drawbacks of a tangible, analog password notebook:
- It has no backup — If you lose your password notebook, spill coffee on it, drop it down a subway grate, leave it on the hood of your car as you drive away, or otherwise destroy it, you’re stuck clicking “forgot my password” for the next several months (or years) until you recreate every password for every site you visit. Worse, if you’re traveling, not being able to log into your accounts to access reservations or financial sites could put a serious crimp in your plans.
- It’s not secure — If you do lose your password book (or if it’s stolen), someone has access to your entire financial and personal life. It’s not that big deal if someone logs into your Netflix account, watches to their heart’s content, and messes up your algorithm. But if someone can log into your bank, investment, and shopping accounts (especially the ones in which you have a credit card on file), you’ll be in a world of hurt.
- It’s not really searchable — Yes, you can use the alphabetical tabs, in general, so Apple and Amazon will stay in the A’s, but you don’t live your life in alphabetical order. You don’t encounter websites in alphabetical order, either, so whatever you add later will be out of order, making it harder to find what you seek.
- It runs out of space — Password notebooks have limited pages, so when you run out, you’ll need a second (and then a third) notebook. The additional cost of one notebook every several years isn’t a huge barrier, but not knowing whether the right password is in the first book or the second (and so on) is inconvenient, and again, having to take two notebooks any time you travel from home or office doubles your chances of loss.
- It’s hard to keep organized when you need to update passwords — You should update passwords every so often; some sites require it. The problem? If you use a pen, you need to cross out the prior password and squish the new password into the space. If you’ve run out of space in that entry, you could cross everything out and write the login credentials in a different entry box, but now you’re not only going to be out of alphabetical order, but if you don’t do a good enough job crossing out the old information, you may someday stop at the first entry and think it’s valid. (If you use pencil instead of pen, you may struggle with legibility, and eventually, with erasing a hole through the paper!)
You could create a spreadsheet with all of this information to make it digital, adding lines and then using the sorting function to keep the websites/apps in alphabetical order. However, printing the document (which may get unwieldy the more passwords you add) yields the same problems regarding security.
I won’t tell you that an analog password notebook is never a good choice. Some seniors and many people averse to technology will find it easier to commit to using an analog tool.
While it’s better than no system at all, an analog password notebook lacks the nuance and robust resources of a digital version.
DIGITAL PASSWORD MANAGEMENT
A digital password manager is simply a piece of software; on your mobile device, it works as an app. On your computer, it’s a free-standing program that generally integrates with your web browser. Its job is to sit and wait until you need to create or access login credentials.
Advantages of Digital Password Managers
There are more advantages to digital password managers than most people realize. A modern, sophisticated password manager can:
- Remember thousands of passwords so that you don’t need to do it.
- Generate strong, unique passwords automatically — Most can generate options based on the requirements of the site for which you’re creating a password and your preferences.
So, if BlahBlah.com requires 16 characters, capital and lowercase letters, a number, a special symbol, and a dash of fairy dust, but you also prefer passwords that don’t include capital “I” or lowercase “l” because they look the same to you (just in case you ever need to actually read the password), you can make an adjustment.
If you tell it to generate a password with all of the site requirements, but you want it to look more like a passphrase, not only can a digital password manager do so, but if one of the words reminds you of a horrible ex-boyfriend, you can “regenerate” the password with a click of an on-screen button. Next!
But digital password managers can do so much more, like:
- Store more than just passwords, including passkeys, Wi-Fi credentials, credit cards, secure notes, software license keys, recovery codes, and passport/ID information.
- Warn you of weak, re-used, or compromised passwords (as we discussed last week).
- Prevent the reuse of passwords across multiple websites and apps during the creation/generation stage.
- Auto-fill usernames, passwords, passkeys, and payment information so you can minimize the time you spend typing and optimize your productivity.
- Sync securely across all of your digital devices, including computers, phones, and tablets.
- Provide safe sharing capabilities with spouses, family members, co-workers, or trusted advisors.
- Save time by reducing password re-sets due to lost or misread passwords.
In summary, digital password manager can organize your digital life by helping you create, maintain, and access your login credentials (and more) in one secure, searchable system across all of your devices.
Disadvantages of Digital Password Managers
I’m not going to tell you that digital password management is perfect. As with any system, there are some demerits and hiccups, and each person has to weigh the costs and benefits. The imperfections of digital password managers can include:
- Learning curves — If you’re constantly online, this is barely a blip; you’ll either intuit or learn whatever you need to in order to start using it immediately. However, for folks who find computers and mobile devices a source of frustration, the concept of digital management, if not any one password manager’s functions, may cause more annoyance than it helps.
- Temporary inconvenience — While creating/entering new passwords is easy, importing all of your passwords from a different digital password manager or from analog lists may not be instantaneous.
- Single point of failure — Digital password managers depend on a master password, known only to you. There’s no clickable “forgot my password” for the key to your keys, and though there are recovery methods, you actually have to put them in place for them to be available. Without your master password or recovery methods arranged, it’ll be difficult or impossible to access your vault.
- Browser auto-fill isn’t always 100% successful — Every once in a while, particularly on mobile, you may encounter a situation where you have to manually copy-and-paste (or view-and-type) your username and password from the digital password manager into the website login section.
- Cost — While most digital password managers have free tiers, you will likely have to pay for all the bells and whistles.
- Subscription fatigue — Most software-as-a-service entities have moved from one-time payments to subscription models. If you’re the type of person who wants to pay once and never again, this may be a mindset hurdle.
- Trust — You’re giving the keys to the kingdom to a piece of software. When you’re trusting a third party with all of your highly sensitive information, it’s vital that you choose a reputable company whose security is undeniable.
While any/all of these can be drawbacks, they are almost certainly outweighed by the advantages of digital password management.
THE MOST POPULAR DIGITAL PASSWORD MANAGERS
You have a variety of choices when it comes to digital password management.
Built-In Password Managers
Let’s start with the digital password managers you already have.
Apple Passwords (Part of iCloud Keychain)
![]()
Apple’s Passwords is built in to all Apple devices, interacting with iOS apps, Mac apps, and the Safari browser. I’m a fan, especially because it’s free and works like a charm, but I’m the first to admit it’s not feature-full in the way many third party apps are.
Contrary to popular belief, Passwords can work in Chrome and on Windows computers, but it’s not turnkey. You have to download the official Apple extension to sync your passwords and autofill logins.
- On a Windows PC, download the iCloud for Windows app from the Microsoft Store, turn on “Passwords,” and install the iCloud Passwords Chrome Extension.
- On a Mac, install the same iCloud Passwords Chrome Extension from the Chrome Web Store.
- On an iPhone/iPad, go Settings > Passwords > Password Options and turn on AutoFill Passwords to select Chrome as a trusted autofill provider.
You’ll still need an Apple ID to authenticate yourself with a verification code when you set it up.
Google Password Manager
![]()
Google Password Manager is built in to the Chrome browser on all desktop and mobile platforms and every Android app.
One problem I’ve noticed is that it’s not uncommon to have more than one Google identity, and that can cause frustration. If you created a Google account in 1999 and built a life for yourself as ILikePuppies1959@gmail.com, but created ProfessionalLeader@gmail.com in 2010, you may have different accounts linked to each Google identity.
You may use Chrome and want to log in to Website A, only to find that Google Password Manager’s login for Website A is associated with your other Google account. On the plus side, Google won’t make you log out; just click on your little avatar and log in as the appropriate profile.
Third-Party Digital Password Managers
One benefit of a third-party digital password over a built-in one is easier cross-platform compatibility without dealing with QR codes or fiddly Apple vs. Android/PC fussing.
But the truth is, every digital password manager, including the ones from Apple and Google, have trade-offs: personal aesthetic preference, user user convenience, cost, styles and methods of security protections, backup/synchronization and preferred features.
Bitwarden

Bitwarden has a very generous free plan, making it a budget-friendly option. The Personal Premium plan is $19.80/year and includes premium features like an integrated authenticator, secure password and file attachment sharing, emergency access for trusted contacts, security reports, and the ability to share vault items with one other user. Families get up to six premium accounts, unlimited sharing, unlimited collections, and a shared vault for $47.88/year.
Bitwarden is open source, so anything you do decide to pay goes toward further development and not lining the pockets of evil billionaires.
Some users feel the interface isn’t as polished as some of its competitors, and that the family and sharing tools aren’t always intuitive. Additionally, there are complaints that if you update a password, it may create a new entry instead of modifying a pre-existing one, leaving both the correct and outdated passwords in place.)
1Password

1Password has a 14-day free trial, after which it’s $36/year for individuals and about $60/year for families, with additional team, business, and enterprise-level plans.
1Password is beloved for it’s easy-to-use interface, family and shared-vault features, and a security dashboard that alerts you to weak and reused, and monitors the dark web for compromised passwords. It autofills logins across mobile apps and browsers with biometric unlock via fingerprint, face, or iris.
One standout feature is Quick Access, which can be used to search for anything you’ve saved in 1Password, including medical records and software license keys. Quick Access automatically identifies the app or website you have open and suggests relevant items from your vaults, providing a fast and convenient way to sign in to your accounts.
Unfortunately, there’s no free version and it’s slightly more expensive than its (un-discounted) competitors. (Also, while the software is user-friendly, the website a bit intimidating.)
Proton Pass

Proton Pass has a strong privacy focus and is part of the Proton ecosystem. Like Bitwarden, it’s open source.
On top of the basic password generator, the feature-rich free plan works in the browser, on mobile, and in desktop apps, and includes unlimited logins, notes and credit cards, unlimited devices, 10 hide-my-email aliases, passkey support, alerts for weak and reused passwords, and an easy password import function.
Pass Plus, at $2.99/month or $35.88/year, also includes unlimited hide-my-email aliases, a built-in 2FA authenticator, secure vault and link sharing, dark web monitoring, file attachments, emergency access for trusted contacts, a custom domain and additional inboxes for aliases, and command-line interface. Pass Family is $59.88/year includes everything in Pass Plus for up to 6 accounts, plus an admin panel for your family. There’s also Proton Unlimited, which gives you Proton Pass, Proton Mail, Proton Calendar, Proton VPN, and Proton Drive, all for $119.88/year.
Keeper

Keeper is one of the more expensive options at $42.99/year for a personal plan with unlimited storage, sync, and devices, unlimited identity and payment storage, fingerprint and FaceID login, web app and browser storage, and 24/7 support.
A family plan is $91.99/year for up to five users, providing the same features as a personal plan, plus shared passwords for WiFi and streaming services, unlimited shared folders, records and permissions, 10GB of secure file storage, and emergency access for estate planning. (Note: family members cannot access each other’s vaults.) In addition, there are also student plans at 50% off, and personal and family military plans with separate pricing options.
Keeper has a strong security reputation and rich business features, but a regular plan does not include dark web monitoring or secure storage, which require add-ons at extra cost.
For casual users, Keeper can be a little feature-heavy.
Dashlane

Dashlane has a very polished interface and is beginner-friendly, but it no longer offers a free plan (though there is a 14-day free trial). The usual Premium price is about $65/year, though a current 40% discount brings it to $39.12/year.
In addition to unlimited devices, dark web monitoring, and the usual password generation and monitoring tools, the Premium plan includes passwordless instant login (without typing), securely shared access, a built-in virtual private network (VPN) for when you’re on public Wi-Fi, and live AI-powered scam protection.
The Friends & Family plan covers 10 users and has a family dashboard.
NordPass

NordPass, from the makers of NordVPN, starts with a free lifetime plan with essential features like password generation, autosave, autofill, biometric/MFA access, password import capability, secure storage, and 24/7 support, but if you want access on multiple devices, a password health dashboard, a data breach scanner, file attachments, and the NordPass authenticator, you’ll have to upgrade to Premium (usually $35.88/year, but currently $19.08/year for the first 12 months, a 46% savings).
The “Family” Plan (good for friends and family) has all of the same features as premium for up to six users for $35.88/year (usually $71.88). Both the Premium and Family plans have a 30-day money back guarantee and both 1- and 2-year plans.
Other well-known options like Roboform and Aura may be worthy of your consideration, too. This post was a survey of options, not recommendations.
Fancy Words: Zero Knowledge Architecture and Encryption
Digital password manager marketers talk about these two features.
Zero knowledge architecture means that your data is encrypted and decrypted exclusively on your local device, ensuring only you can access it. But guess what? All six of these third-party password managers has it, as should every leading password manager. But because these companies can’t access your information, it’s vital that you always know and remember (and never re-use) your master password!
Oh, and encryption? They all tout having AES-256 encryption, except for NordPass, which uses XChaCha20 (yes, I’m serious) encryption, which is a newer, highly regarded encryption algorithm.
Essential Digital Password Manager Features
- Intuitive user interface — Because if you don’t get it, you won’t use it.
- Strong encryption — Duh!
- Multi-factor (including biometric) authentication for your vault/master login
- Strong password generation according to your specifications
- Passkey support
- Cross platform support — If it doesn’t sync across all of your devices, something is going to fall through the cracks.
- Browser extension for auto-fill, so the minute a login screen pops up, your browser should detect the need for credentials and fill them in, awaiting only your approval by click.
- Easy search and organization tools
- Mobile app
- Secure backup and recovery options
- Import/Export Tools — Because the last thing you need is for your passwords to be spread across multiple digital password managers
Bonus Features
- Security alerts and/or a password health dashboard for compromised or reused passwords
- Secure sharing capabilities to let family members (or team members at work)
- Emergency access login for trusted contacts
- Secure notes
- Document storage with high (or no) limits
- Dark web monitoring
- VPN included in subscription
- 24/7 Customer Support
And of course, consider the costs — look for a free trial (or better yet, a free tier) to make sure you find it intuitive. Whatever you pick, don’t just think in terms of a monthly cost, but also the annual cost and total cost over a “lifetime” of use.
A digital password manager means that you no longer have hundreds of login credentials and related information on sticky notes and in notebooks, un-synced browsers, and spreadsheets. And definitely not in your memory.
Instead, everything can live in one organized, searchable, encrypted repository.
Keep Your Digital Password Managers Organized and Maintained
As discussed last week, dealing with the backlog of weak, compromised, and reused passwords will take a while. Once all your strong passwords are migrated into your new system, block time to periodically check (and update) compromised passwords and delete outdated, unnecessary ones.
MORE RESOURCES
For more on helping you select a digital password manager, try these resources.
Cyb3R_Sm@rT!: Use a Password Manager to Create and “Remember” Strong Passwords (CISA.gov)
Trusting the Tech: Using Password Managers and Passkeys to Help You Stay Secure Online (National Cyber Security Centre, UK)
The Best Password Managers of 2026 (Security.org)
The Best Password Managers for 2026 (PC Magazine)
Best Password Managers for Android 2026 (ZDNet)
The Best Password Managers (Wirecutter)
Just don’t let analysis paralysis keep you from getting started. Any reputable password manager that you use consistently will improve your security more than whatever you were doing before.
In the first post in this series, we focused on creating better passwords and passphrases, because what made a good login credential in 1997 (or even 2017) just doesn’t work today.
Today, we looked at password management systems for these new and improved security credentials.
Next time, we’ll examine how we prove who we are online with the new digital identity platforms increasingly used by federal governments.
Not Your Mama’s Passwords: Passphrases, Passkeys, and the Future of Logging In
Those of us of a certain age remember the first time we had to create a password, and for many years, lots of people used the same password for everything. As we edged from the 20th century into the 21st, we got “smart” about using smart passwords so they’d be harder to crack.
This short video from comedian Michael McIntyre may reflect your early password experiences.
Have you found that it’s become even more frustrating in recent years?
You don’t just need a password. There are passwords, passkeys, two-factor authentication, multi-factor authentication, facial and thumbprint recognition, and so much more. You may think you know everything there is to know about passwords; but even if you do, are you actually doing what you know you ought? And are there people in your life (like teens, grandparents, or technophobes) who could use a little support?
Today, we’re going to look at all the things you need to know and the various actions to consider taking to make sure your vital data is organized, safe, and protected.
Let’s start with the classic, the good old password.
HOW TO MAKE A GOOD PASSWORD
Do you know what makes up a solid password?
A Good Password is Strong
A good password is a strong password, one with serious muscle, one that’s hard to break or crack. The experts say that a strong password should have the following characteristics
- Sufficient Length — A strong password should be 16 characters. (I remember fondly when they asked for eight; then 12 characters were recommended. Sigh.) The shorter your password, the chance of a hacker figuring it out increases exponentially.
- Complex Makeup — Generally, it’s recommended that a strong password should be a mix of both uppercase and lowercase letters, numbers, and symbols that you can type from the keyboard. (Don’t use emoji.)
- Randomization — It’s a lot harder to guess 1dK5d8P91e65nNwf82et than PaperDoll123456.
- Uniqueness — Never reuse passwords across different accounts. Yeah, I know. We are all guilty of it, but the easier it is for a bad guy to hack one of your passwords, the easier it is to get into your others. If you must re-use passwords, aim to only do so on with sites that have no real impact on your life.
The problem with this recipe for strong passwords is that we are human. We’re lazy. We don’t want to keep creating new passwords. And complex, random passwords are hard to remember. But do you know what’s harder? Dealing with a hacked bank, investment, or Amazon account.
Instead of creating a random block of letters, numbers, and characters, you can keep the randomization but make the password a little easier to remember.
Create a Passphrase Instead of a Password
Instead of one block of letters or numbers, develop a sequence of unrelated words.
For example, WinterWonderland, while possessing 16 characters, would not be a great passphrase because the words are thematically related. GrotesqueBroccoli, while reflecting my feelings about a particular vegetable, aren’t commonly used together. Even better would be something even longer, more bizarre, and unrelated, like YuckySweaterRodentNoise.
One advantage of a passphrase is that if you’re hand-copying it (from a password notebook, or typing on a computer but retrieving it from an app on your phone), it’s much easier to see and parse a string of words than il7-0oO-nmn-MWN, especially if you’ve got eyes that were in their prime in the 1980s.
Think about the characters you choose.
The above example prompts a tip that the experts never mention. Because various letters and numbers, like a capital “I” (as in “I am”) and a lowercase “l” (as in “login”) are indistinguishable from one another in some fonts, as can be the number 1 and an exclamation point.
Capital “O” (as in “order”) and “0” (zero) can be confused for one another, and some lowercase letters, like “r,” “n,” and “m,” and uppercase letters like “M,” “N,” and “W” can also be hard to differentiate.
Avoid predictable password information.
First, don’t use common dictionary words like “password” or keyboard sequences like qwertyiop. Duh!
Similarly, don’t use your personal information. Your password shouldn’t have your birthdate, phone numbers associated with you, names of your pets or the street on which you live.
If you need to be able to remember a password and won’t be safeguarding it in a digital password manager, an alternative method might be to pick information that’s personal to someone unassociated with you. Everyone knows I’m a fan of Jane Austen, so someone trying to hack me would find it easy to pick obvious things like Pemberley or Rosings, but if you have a favorite book or movie character that wouldn’t be easy for someone on the internet (or an evil ex) to suss out, consider stealing their fictional personal information.
Consider combining the above tips with a foreign language.
While I am only fluent in English, I have studied Italian, French, and Spanish, and know a smattering of Yiddish. Picking words from another language to come up with a lengthy but easy-to-read/remember passphrase might help you more easily read and remember it to safeguard access to your data.
Let a digital password manager do the heavy lifting for you.
Often, you can designate the features you want, so that if it needs (or you want) the number of characters to be even more than 16, or you prefer a readable passphrase over one with garbled numbers and letters, it will accomplish that for you.
Hacker Reality Check
The longer and more complex your passwords, the harder it will be to crack them. Hive Systems annually creates a table of the characteristics that increase your chances at organizing and preserving your dat privacy. Here’s their most recent table.

Courtesy of Hive Systems
This table confirms what we know: “Fluffy” and “123cookie” just aren’t going to cut it.
HOW TO FIX THE PROBLEMATIC PASSWORDS YOU ALREADY HAVE
If you have a digital password manager, it may prompt you with warnings regarding some of your passwords because they are:
- Weak — Such passwords are likely not long, complex, or random enough to be effective.
- Compromised — This status indicates that passwords have shown up on the dark web in a hack, likely one of a large corporation, like a retailer or insurance system (like the Change Healthcare cyberattack in 2024).
- Reused — An internal scan of passwords shows your app that you’ve used the same password repeatedly.
While working with a client recently, we saw that her iPhone’s Passwords app listed 610 passwords with a scary exclamation point on a red background indicating that 236 passwords had a security concern. Of those, about 122 were shouting “COMPROMISED PASSWORD” in red letters, with another 100 or so listed as “reused password.”
(Again, it’s not a huge problem to reuse passwords solely for sites you’re merely using to gain access to articles; but if such a site allows comments on articles, would you want to risk a hacker making you look like a fool or scammer by commenting with your identity?)
Closing your eyes to this problem isn’t a solution. In this case, the only way out is through.
Schedule a date with yourself — perhaps weekly, to deal with the backlog, and then perhaps quarterly for maintenance — to address your password hygiene. Treat it the same way you do (or should do) to periodically update your operating system and apps, clean your desktop, pare down your inbox, etc.
Again, consider letting a digital password manager create replacements for you. It will be faster and easier than trying to come up up with something unique for any/many of your passwords.
WHAT IS A PASSKEY AND WHY IS EVERY SITE ASKING ME FOR ONE?
Have you noticed in the last year or so that every time you log into a web site, it asks you if you want to set up a passkey? Are you ever prone to thinking, “I just logged in with my password. Isn’t that already a passkey? What’s the difference?”
A password is your super-secret word or phrase that you create and then memorize (or write down, somewhere). It’s like the secret password that might have gotten you into a speakeasy in the 1920s.
(Trust me, this is worth watching for a laugh, especially if this whole topic stresses you out.)
But there’s the problem. You, a flawed (but adorable, I’m sure) human, must come up with the secret password and then protect it. This makes it vulnerable — to memory loss, password loss, phishing, hacking, and data breaches.
A passkey is different. It’s an un-phishable digital credential that’s tied directly to your device. Instead of typing a word, phrase, or string of gobbledygook, you unlock your account through a handshake between your device and the website, usually through some kind of biometric scan on your device (like FaceID on your phone, or thumbprint/TouchID on your device or keyboard), or a device/screen PIN. If you’re already logged into your computer or phone, you may be all set!
Passkeys differ from passwords in several ways.
Passkeys Are More Secure than Passwords
With a password, you’re sharing a secret with the server for whatever site you’r trying to log into. The thing is, secrets like these get revealed or betrayed all the time, either on our side, by our faulty memories or poor record-keeping, or on the server’s side, by getting hacked. Either way, access to your account is either lost or exposed.
Passkeys, however, use what’s called public-key cryptography. That’s a fancy way of saying that rather than having one key (your password) that fits in a lock on the other side, it’s more like in an old movie, where they’d go into a bank vault and the customer and the banker would each have a key for the safe deposit box.
Your private key is always securely locked inside the security chip of your device, while only the public key, which is totally useless-to-hackers, is maintained by the website.
Passkeys are More Resistant to Phishing Attempts
Have you ever been tricked (or almost tricked) into typing your password into a fake website, one made to look like the one you really want? Passkeys link your login effort to only a legitimate app or website, so if you try to log in to a faked website, your device will say, “No way, José!” and refuse to authenticate.
No handshake. Do not pass GO, and the phishers will not get $200 dollars.
Passkeys Are More Convenient than Passwords
Aren’t you tired of having to REMEMBER passwords?
Aren’t you tired of typing passwords?
Well, with a passkey, you don’t have to. If you’re already logged in to your device, access feels like magic. If not, logging in is limited to a simple scan of your beautiful face or a tap of your finger or thumb. It’s quick, and your face or thumbprint can’t make a typo, so your success rate will be higher.
Passkeys Are Unique
We’ve already established that people reuse their passwords, which means that if you reuse the same password on ten shopping sites and a hacker gets your password once, they can probably guess it on a lot of other major sites.
Conversely, each passkey gets generated uniquely for whatever individual account at which it’s being set up.
Passkeys Are Loss-Proof
If you lose your phone, get a new computer, or your toddler puts your iPad in the dishwasher, you’re not out of luck.
Passkeys are synced across cloud services, like your Google Password Manager or your iCloud Passwords app, so access can be restored by setting up a passkey to the new device.
Passkeys (Usually) Eliminate the Need for Multi-Factor Authentication
I don’t know about you, but I’m so tired of having to check my email and/or my phone for a email or text code that I then have to type in. With a passkey, two-factor authentication is built-in, so you’re all set.
Passkeys Bypass Password Fatigue
Have you ever just given up and done something else because you can’t bear to type in another password? (If you have a digital password manager and your passwords are organized and frequently pruned, probably not, but if you’re go the analog route 100% of the time or you’ve let your password management go rogue, this may sound familiar.)
So, the next time a website asks, “Would you like to set up a passkey?” you can feel confident in saying, “Why yes, thank you. I would very much like to set up a passkey! How nice of you to ask.”
A NOTE ABOUT AUTHENTICATION AND DIGITAL IDENTITY PLATFORMS
In addition to passwords and passkeys, you may have found websites asking you to use additional forms of identity authentication.
Authentication
Do you cringe when you hear people talking about two-factor authentication? You know it has something to do with security, but maybe you’re having trouble wrapping your head around it? Just like you don’t need to know how to rebuild a carburetor to be a good driver, you only need to know a little to make this aspect of security feel accessible.
For example, you’re almost certainly used to providing a security code, usually a series of numbers, that gets sent as a text or email.
This process is an example of two-factor authentication or multi-factor authentication. We’re not going to get too deeply into the weeds on this, but very basically:
- Two-Factor Authentication (2FA) requires exactly two authentication steps, like using login credentials (a user name and password combo) plus that security code texted to you.
- Multi-Factor Authentication (MFA) requires two or more authentication steps.
So, 2FA is a type of MFA, but not all MFA is 2FA.
In order to classify a method as Two-Factor Authentication or Multi-Factor Authentication, the “factors” have to come from different categories. For example:
- Knowledge — In order to log in, you have to provide something that you know, like a password, passphrase, code, or PIN, which means you have to keep your password information organized.
- Possession — This step involves something that you have, like your mobile device, your computer, or a hardware security key. (Again, not to get too geeky, but that’s a physical device used for MFA or password-less logins. If you actually want to know more about hardware security keys, you can read PC Magazine’s The Best Hardware Security Keys for 2026.) The key proves your identity using advanced cryptography when you:
- insert it into a USB port in your computer
- tap it wirelessly via near-field communication (NFC) against your phone or tablet
- connect via Bluetooth (for devices that don’t have USB ports or aren’t NFC-capable)
- Inherence — This fancy word means something that you are, or that is inherent to you and nobody else. This is where FaceID or a fingerprint scan on your phone or your keyboard come in handy, because only you have your face or your fingerprints. Well, mostly. Per Apple, identical twins can sometimes unlock one another’s FaceID!
Digital Identity Platforms
As technology gets more advanced, the bad guys avail themselves of more technology. This means that modern authentication needs to get more advanced, too. Just as the Michael McIntyre video of the top of the post made the point about our old-timey passwords requiring us to add capital letters, then numbers, then symbols, so too are we facing more complex requirements beyond simple passwords and multi-factor authentication.
Because of this, there’s a whole honking sub-category of authentication through digital identity platforms.
In two weeks, we will look at two very special kinds of login credentials we need to set up in the United States to help ease our access to federal government websites in order to pay our taxes, check our benefits, and travel. We’ll also look at a companion platform in Canada. But first…
COMING ATTRACTIONS
While long passwords are good, long blog posts on complex (and sometimes scary) technology topics are not. So, this week’s post is shorter than usual. (Really! It it’s 20% shorter!)
Next week, we’ll explore how to organize your passwords to make them accessible (to you) so you need never worry about forgetting them or making your kids crazy trying to figure them out.
We’ll cover:
- Analog methods for tracking your passwords
- The built-in digital password managers you already own
- The most popular third-party digital password managers and what makes each stand out
- The advantages and disadvantages of digital password managers
- The key features every digital password manager should have — and some bonus features you might not know about
We’ll also explore how to safely share your passwords with family members and trusted advisors.
And the week after that, we’ll end July with the aforementioned look at those digital identity platforms, which I’ve come to think of as “the password for your passwords.”
Until next time, please feel free to share any unique tricks or strategies you have for creating passwords, and any thoughts you have about this strange world of passwords, passphrases, and passkeys.
How do you feel about your password security?
How To Stay Organized and Productive Under a Heat Dome

According to the news, there’s going to be a massive and prolonged heat dome blanketing the central and eastern parts of the country this week, bringing high humidity and temperatures in the 90s and 100s. The heat index (the “feels like” item in your weather app) could reach upwards of 100° to 110° between now and 4th of July in many places. According to The Weather Channel, this will affect about about 230 million people.
It’s set to be 96° in my neighborhood today, so I’m updating a post from last year to add even more helpful advice on staying organized and productive when it’s hot. Grab a cold beverage and scroll.
WHY IT’S HARD TO STAY PRODUCTIVE WHEN IT’S HOT
When we’re uncomfortably warm, we get cranky. We perspire and our clothes stick to us. Our skin chafes and our hair sticks to our necks. We stick to our car seats and desk chairs. Our mouths get dry, and everyone in our space (strangers in public, colleagues at work, or family members wherever) annoy us more.
But it’s not just mere crankiness and discomfort.
Hot weather is linked to everything icky from mild irritability to aggression, headaches and reduced motivation to decreased memory, focus, and cognition. Productivity doesn’t stand a chance.
The Science Behind “It’s Too Darn Hot”
According to a 2018 study conducted at Harvard’s T.H. Chan School of Public Health, students in dorms without air conditioning during a heat wave performed significantly worse on cognitive tests than their peers who were able to (literally) chill out, and their reaction times were slower. Elementary school students (and their teachers) in hot classrooms suffer similarly.
Other studies, such as by Soloman Hsiang and Jesse Anttila-Hughes (who study economics and public policy), Joshua Graff Zivin and Matthew Neidell (in global policy and economic research), and Shin-ichi Tanabe, a professor of architecture at Waseda University in Tokyo (studying “thermal comfort”) found that for ever 1° degree rise in temperature beyond 77° degrees Fahrenheit (~25° Celsius), productivity a dropped approximately 2%!
On a typical workday, this works out to thirty minutes less work completed for every single degree rise in temperature, or 2 1/2 hours of lost productivity each week. (If you’re a peri-menopausal or menopausal woman, that productivity drop starts much lower than 77°; if you’re one of those people always complaining that it’s too cold with the A/C on in your office, I respectfully suggest that you back away from the comments section.)
A study published in PLOS Medicine in 2018 found a correlation between high indoor temperatures and impaired working memory and decision-making, particularly for tasks that required focus or logic.
Long story short, being hot isn’t cool if you hope use your brain to get anything done.
In fact, researchers at the Helsinki University of Technology and Lawrence Berkeley National Laboratory found that the performance of people who work in offices (or what is now generally called “knowledge work”) peaks at around 71.6°F (22°C). So, being able to maintain a fairly cool (or at least tepid) and comfortable office temperature is key to our productivity.
But Mother Nature doesn’t seem to care whether we get our work done, and I’m humming Cole Porter’s “It’s Too Darn Hot” from Kiss Me, Kate.
Why Else Productivity Declines During a Cruel Summer
Humans are like Goldilocks, built for the middle ground, and we prefer our porridge neither too hot nor too cold. Our bodies go into survival mode when we get hot. Our integumentary system diverts resources from elsewhere and toward cooling ourselves such that:
- perspiration increases — Glands in our skin get stimulated by the sympathetic nervous system to produce sweat. (Yes, I know. “Horses sweat, men perspire, ladies glow.” But when it’s 94° outside, I’m glowing like a nuclear reactor.) Perspiration evaporates, carrying heat away, effectively cooling us and lowering body temperature.
- vasodilation occurs — This is a fancy way of saying that blood vessels in the middle layer of skin widen. It increases blood flow to the skin’s surface, so excess heat gets released (through radiation and convection, which makes it sound like we’re built out of spare microwave oven parts).
Meanwhile, our hypothalamus serves as a thermostat, controlling thermo-regulation. Thermoreceptors send signals to trigger our systems to either dissipate heat (to keep us cool) or generate it to keep our internal temperatures stable.
The problem? When it’s hot, all those resources used to cool us down leave our organs — including our brains — with less energy to keep things running. Uh, oh.
So it’s not surprising that when we’re hot, our executive function capabilities drop. That means less mental acuity and power for attention, working memory, planning and organization, task initiation, problem solving, metacognition (thinking about our thinking), or time management.
To keep our bodies from feeling like burnt toast, our cognition departs. Next window, please!
Additionally, when we’re dehydrated, our ability to focus is severely limited. Even a mild case of dehydration (defined as 1-2% loss in body weight from water) can cause headaches, impair our concentration, reduce our short-term memory, and crash our math skills.
And Why It’s Hard to Stay Organized When It’s Hot
All of the above reasons explain why, physically and mentally, it’s hard to be productive when hot, but what about organizing? Both productivity and organizing skills are dependent upon concentration, short-term memory, and (argh, sometimes even) math skills so that we can focus on what to do, prioritize tasks, recognize patterns, make qualitative decisions, and figure out what goes where (and when).
When it’s too darn hot, our bodies do what they have to, and sometimes that means shutting down our means of production (that is, cognition and productivity). That’s why, on top of the decision fatigue that 21st-century already piles on us, being so uncomfortable makes it harder to decide what chore to do next or what to cook. (My friend, a trained pastry chef, calls being “angry at dinner.”)
None of this means that we can’t achieve our goals, but we’re going to have to take some extra precautions to keep us from losing control during a cruel summer.
REDUCE DECISION FATIGUE WHEN THE TEMPERATURES RISE
When you’re already uncomfortable, every little decision feels heavier. Simplify and lighten up!
- Wear a capsule wardrobe as if you were on vacation: fewer options to consider and fewer (and lighter) loads of laundry. Don’t make yourself decide what to wear when everything feels sticky anyway!
- Reduce errands. Anything that can wait until the temperatures cool down means fewer times entering a hot car.
- Keep everything where it belongs. You’re already not feeling up to putting much away; the last thing you need is to keep pulling things out or trying to figure out how to create new systems. Yes, I’m a professional organizer, but I’m telling you this isn’t the time to clean out your closets or move things around in the garage. Let everything that can stay in its home do so. If you’re feeling the itch to nest, re-organize your home on paper and do the heavy lifting when the heat dome pops.
- Opt for “girl dinner” whenever possible. — Instead of pressing yourself to be inventive with cooking, use this week as an opportunity to graze leftovers or eat ingredients as-is.
- Pretend you’re camping.
- Anything can be a charcuterie board if you lay it out on a tray. Load up with cheese, fruit, hummus, crackers, veggies, olives, and salad and you can pretend you’re on a Mediterranean vacation!
- Meal prep in the evening or before the hottest part of the day. Think cold foods: pasta or tuna salads, cold cheeses, wraps, salads into which you can toss anything from rotisserie chicken to cut veggies, and cold soups like gazpacho.
Less effort, less cleanup, less electricity!
MODIFY YOUR SCHEDULE ON HOT DAYS
Be patient with yourself (and your colleagues and anyone you supervise) with regard to pace of productivity. If you’re not on an unrelenting deadline, move non-essential tasks to when Heat Miser isn’t trying to make you miserable.
(I dare you to not listen. Just don’t get up and dance. It’s too hot.)
Reorganize your workload so you tackle your highest priorities and deliverables early in the day. Then give yourself permission to let low-priority tasks wait a few days until the A/C (and your brain) can operate at full blast.
Think of this as task-blocking based on temperature instead of time.
- Schedule shopping, appointments, and outdoor activities for the early morning.
- Block the afternoons for desk work, phone calls, and Zooms.
- Do gardening tasks in the evening, taking advantage of the late sunset.
- Save “hot” chores like laundry for nighttime, and run your dishwasher overnight. Generating less heat during the day is good for your electric bill, too.
- Exercise in the evenings after the heat dissipates or if you must run or exercise outside. Better yet, swim!
Speaking of swimming, if you don’t have access to a neighborhood pool or gym, and you’re used to working off your stress outside, did you know that:
-
- Municipal recreation centers often have drop-in rates to use the pool that can range from $3-$10?
- Colleges and universities often offer discounts for pool access during summers and other holiday breaks?
- RV campgrounds sometimes offer daily pool access to the public for reasonable daily rates?
- Resort Pass lets you access hotel pools at a discounted rate?
- Swimply offers hourly private pool rentals? Like an AirB&B for just a pool, you can rent pool access for $30-$60/hour. (You can also buy a summer or monthly pass for a surprisingly low rate.) If your kids are driving you crazy or you and your family just need a break from the sweltering heat, it’s an alternative to taking a cold shower or running through the sprinkler.

©2026 Swimply
I have a pool in my complex, but if I didn’t, Swimply found me an option 8 miles from my house. For $32, it not only offers a lovely pool, restroom access, free Wi-Fi, inflatable floats, pool toys, and speakers!
Time-shift your productivity. Embrace the Mediterranean and South American models and take a siesta. Again, wherever possible, get your deep work done early in the morning and schedule light, less brain-intensive tasks during those hot midday hours. To get a handle on this international approach to dealing with steamy workdays, embrace the advice in Take a Break for Productivity — The International Perspective.
If you, like Paper Doll, are a night owl, see if you can schedule follow-up tasks (particularly those where you don’t have to interact with others) in the cooler evening hours.
The productivity strategies we’ve discussed at length at Paper Doll HQ over the years, like the Pomodoro Technique, or the approach discussed in Frogs, Tomatoes, and Bees: Time Techniques to Get Things Done, accent the importance of employing breaks to clear your head. For more on these kinds of breaks, see Take a Break — How Breaks Improve Health and Productivity.
REDESIGN YOUR WORKSPACE TO BEAT THE HEAT
If you work from home, consider working in the coolest room in your house. Get away from windows and trade that hot, bright midday sunlight for more subdued lighting.
Do the limbo, by which I mean, go lower!
Heat rises, so you may just find it cooler to get down on the floor to work. And when the atmosphere in your home is steamy, basements are often darker and cooler. If you don’t have a finished basement, it may lack the creature comforts you depend upon, but when the alternative is suffering while your A/C limps along, you may not mind roughing it. Think of hanging out in the basement as similar to camping out, only with running water, a nearby fridge, and bathroom facilities.
Use blackout curtains (or at least pull down your shades and close your curtains). Position fans to create a cross-breeze — but either don’t point them directly at your workspace; otherwise, grab some coasters or cans from the kitchen to use as paperweights. If you have to chase your papers all over the room, you’re going to feel hot and bothered, not cool and collected.
RELOCATE YOUR WORKSPACE TO WHERE IT’S COOLER
If your air conditioning has conked out or is on the way to its final reward, or if you never had an A/C to begin with, consider relocating your workspace elsewhere for the days the heat is oppressive. Some options include:
- the public library — Although you generally need a library card to check materials out, any member of the public can occupy table space and enjoy the air conditioning and rest room facilities of the public library.
- a college library — University libraries are more likely to limit access to current students, faculty, and staff. However, if you’re an alum, or if there’s a university (or perhaps a community college) nearby with more lenient policies, you may find a cool, quiet place (perhaps a carrel in the graduate student stacks) to focus for a few hours.
- a coffee house — Long before COVID drove people to work from home, coffee houses were the in spot for creating your own remote office. Just be sure to buy food or beverages in exchange for that free Wi-Fi, and tip your servers.
- a cafeteria space — Massive stores like IKEA and Costco often have food courts or cafeterias. If you’ve got noise-canceling headphones, get yourself some gravlax or a hot dog, tuck yourself into a corner, cool down, and focus with an un-fried brain.
- a hotel lobby or business center — Most cities have hotel conference centers with lots of empty/unused space. Think of all the times you’ve been at a conference and tucked yourself away in a quiet corner to read or a make a call without schlepping all the way to your room.
- your local community center — Many community centers are remodeled schools with a variety of rooms, and most community centers have quiet spaces set aside for working or studying.
- a friend’s house — I’m not saying to descend on a friend’s house and take over her dining room or guest room. But if you’ve got friends who love you and they have the chilly air that you’re lacking, especially if they’ll be off to their offices, why not ask? You’d do the same for them, right?
- a co-working space — While co-working spaces aren’t generally free, you may be able to buy an affordable day pass. Google “co-working” and your geographic location, or check out an online directory, like CoWorker, Liquid Space, Peerspace, Commercial Cafe, or Co-Working Cafe.
REDUCE TECH USE TO KEEP YOUR COOL
Ever notice how your lap gets extraordinarily toasty when you’ve had your laptop balanced on your legs for a while? Or touched the back of your desktop computer on a hot day? Yikes!
On days when the heat is excessive, use less electricity and feel less burnt out by making changes to how you use computers and mobile devices:
- Dim your monitor’s brightness — The brighter your computer or phone, the more battery and energy your screen is using, and the more heat it may give off.
- Close unused browser tabs — Too many open tabs in your brain keeps you from working at top speed; the same goes for your browser. If that article has been sitting in an open tab for weeks, you’re probably never going to read it. If you’re not inclined to read it today, save it to Evernote, add a bookmark, or ask ChatGPT to summarize it for you.
- Unplug chargers and unnecessary lights and devices — They radiate heat and add to your discomfort during a heat wave.
- Unplug yourself — If you’re not on a deadline, go analog! Power down your computer and grab a notebook. Obviously, you aren’t going to replace email with passing notes (across the country), but if you just need to write a draft or brainstorm, power down your tech. Conserve the energy — your device’s and your own.
KEEP YOUR COOL AND PROTECT YOUR HEAT-SENSITIVE ITEMS
Extreme heat causes damage. Organize your space when you exit your car. Make sure you’ve removed anything heat can damage:
- Medications
- Crayons
- Batteries
- Groceries
- Aerosol cans
- Lipsticks
- Canned and bottled beverages
- Chocolate and other melty candies
- Phones and laptops
- People!
Don’t leave plastic water bottles in the car; sun reflecting off bottles can burn holes in your auto’s upholstery!
REDUCE FRICTION WHEN YOUR BRAIN IS MELTING — CREATE A GRAB-AND-GO KIT
We’ve substantiated that the heat keeps our brains from working optimally. Whether you’re working at the office, taking care of the family, vacationing, or just trying to cope, the last thing you need is to find yourself without what you need because you forgot to grab it. If you have to get out of the car and go back inside, you’ll avoid doing so — and then regret it later.
This pattern is called Island Breeze. Doesn’t it make you feel cooler already?
Assemble a dedicated hot-day kit to store in an insulated grocery carrier:
- sunscreen
- foldable hat
- sunglasses
- portable fan
- small cooling towels
- water bottle
- electrolyte packets
- extra phone charging cables
- medication that shouldn’t stay in a hot car
- bug repellant
It’s like your travel toiletry kit, only this stays near the launch pad at your exit door so you can take it with you whenever you have to face the heat.
PRACTICE SELF-CARE WHEN THE TEMPERATURES RISE
You know that your car doesn’t work as well in extreme heat. You need to check the radiator, keep the fluids topped off, shade your windshield, maintain a fairly full gas tank. Take similar precautions to keep yourself running smoothly.
- Hydrate — Keep one of those reusable bottles (whether it’s named Stanley or YETI or nicknamed George Clooney) on hand. Fill it with icy water (and not caffeinated beverages) to sip throughout the day. Use a visual water tracker (like a bottle with time markers) or try a hydration app to prompt you to drink more. Popular apps with free tiers (and annual costs of $10-$30) include:
-
- WaterLlama (iOS)
- WaterMinder (iOS, Apple Watch, Android)
- HydroCoach (iOS, Android)
- Plant Nanny (iOS, Android)
- Waterful (which has a cute Octopus mascot — you hydrate to keep him (and yourself) healthy).
![]()
(Don’t like drinking prompts but still want to be aware of your hydration? There’s actually an app called P where you track your, um, outflow instead of your intake.)
Create a hydration station in your fridge during the cool of the evening so you’re set for the next day. Fill one accessible shelf with water bottles, electrolyte drinks, and containers of washed grapes and cubed fruit so everyone and hydrate without having to pester you.
- Eat smaller meals more often, and focus on snacks with high water makeup, like salads and fruits (hello, watermelon!), and select lean proteins. Reduce excess sodium intake. A heavy meal full of fats, carbs, and sodium make us sloth-like and lethargic at any time of year. Add high temps, and the 3 o’clock slump becomes the all-afternoon crash-out.
- Nap —The more we are exposed to heat, the less time we spend sleeping, and the pejorative effects are stronger under a heat dome.
- Relax your dress code — Don’t show up to Teams meetings in your PJs. But switch out form-fitting clothes for looser cuts (and looser weaves) to let the air circulate around you.
- Brush your teeth — I mean, I hope you’re probably already brushing your teeth. But there’s something about a minty fresh mouth that helps cool your system down.
- Run your wrists under cold water or rest them on soft, squishy ice packs (like chilly wrist rests) while typing or reading.
- Consider a personal cooling tool device. — A few years ago, Paper Mommy bought me a bladeless neck fan and it directs a lovely (and not-too-noisy) breeze up under my hair, cooling my neck and head.

- Check in with others — on your team, in your neighborhood, in your family. Heat reduces our mental energy and sometimes capacity to take care of ourselves, so we need to do what we can to take care of one another. Heat can make us anxious, but connecting with others (and maybe stopping to take a Popsicle break together) can help us feel less out of sorts.
We organize homes and workspaces so life requires fewer decisions when we’re tired, busy, or overwhelmed. During a heat wave, arrange your space and your schedule to do the heavy lifting so you can devote what little energy you have to doing what actually matters.
Productivity is important, but endangering your mental and physical health in the short term is a recipe for declining productivity in the mid- and long-term.
Pace yourself, relocate, use less tech, and take care of your body and your brain. The work will still be there when the temperature comes down.
Work Smarter, Hurt Less: Ergonomic Tips for Healthier Hands, Smarter Breaks, and Better Productivity
Repetitive stress injuries. Carpal tunnel. Cubital tunnel. Tech neck. Tendinitis. Mouse elbow. (It’s a real thing!) Over the last few weeks, we’ve covered a variety of issues related to workspace injuries and organizing preventative ergonomic solutions — all in hopes of better, and healthier, productivity.
- The Productivity-Boosting Power of Ergonomics — Organizing Your Workspace and Systems for Success
- Paper Doll Introduces Ergonomic Helpers that Organize Your Posture
- The 20-20-20 Rule — Protect Your Eyes and Boost Your Productivity
Talking about ergonomic wellness is not super-fun, though better than having workplace injuries, but hopefully these blog posts have been better than listening to a health and safety lecture on The Office.
We’ve looked at workspace arrangement, posture helpers, and breaks for our eyes. In today’s post, we’re going to wrap up with some final solutions and thoughts on how to stay healthy while working.
LEND A YOURSELF A HAND FOR ERGONOMIC WELLNESS
While our necks, backs, and heads take brunt of the abuse we heap on our bodies, our arms and hands can be ill-treated. How often do you find yourself gripping your mouse (or your phone) too tightly, only to feel your hands aching later in the day?
KEYBOARD YOGA
Last week, we looked at a variety desktop apps to help us remember to take doctor-recommended breaks to soothe our eyes, ensure that we blink, and reduce dry eyes, eye strain, and fatigue. Unfortunately, orthopedic hand specialists aren’t as enthusiastic as eye doctors in getting the word out about taking care of our hands, wrists, and arms to prevent repetitive stress injuries.
Keyboard Yoga to the rescue!
Keyboard Yoga is a project created by ZSA Technology Labs, Inc., a Taiwanese manufacturer of built-to-order ergonomic “split” keyboards. However, Keyboard Yoga is not commercial in nature, and unless you clicked through a few pages, you’d never know the connection to the manufacturer.
The screen for Keyboard Yoga is reminiscent of the earliest video games; it appears fairly low-tech. There’s a purple-ish outer space theme, with several planets of indeterminate type bobbing up and down in the atmosphere. Two parallel but unequal blobs in the center of the screen grow and shrink and you move through the Keyboard Yoga experience.
When you click the button to begin, you are prompted to put on headphones and select a British-accented male or female voice for narration.
Ethereal music and ocean sounds play in the background as you are guided through a series of gentle hand and wrist exercises. In addition to providing soothing breaks from gripping the mouse or power-typing, the calming, meditative narration leads you to relax various parts of your body and take a mental break from the stresses of the workday.
(As I’ve been researching this series on ergonomic health, I’ve found using Keyboard Yoga to be a great way to revive my aching wrists and a flagging spirit.)
The narrator explains that if you stop typing at any point during the experience, the narration will cease but the music will continue. (I wouldn’t have minded an actual pause button, but otherwise, it’s nice to know that the relaxing background music will continue if you get called away mid-yoga “pose.”)
The “yoga” itself involves both physical actions and reflection on your body’s relationship to the keyboard, mouse, and screen. Much like an actual yoga class, you are called to notice tension in your palms and wrists, the angles at which you hold and move your fingers and hands, the placement of your elbows, the curve of your spine, the placement of your shoulders, your breathing, and so on.
As the “yoga” continues, the narration guides the user through progressive relaxing and tensing of muscles through fist-making with one hand while randomly typing with the other. It continues through neck and head circles, and then a variety of breathing exercises. The entire process takes less than ten minutes, though I cannot be certain of the exact length, because it’s so relaxing that one occasionally forgets to keep typing, causing the narration to pause.
PERKINS KEYBOARD YOGA
I was so charmed by ZSA’s Keyboard Yoga, I went in search more information about “keyboard yoga.” This was initially difficult to Google because Lenovo manufactures an ergonomic-friendly computer model called Yoga.
However, I was intrigued when I found that the Perkins School for the Blind had an entire (and very instructive) page on keyboard yoga, which it defined as becoming aware of your body in relationship to the items on the desk in front of you. While the material is designed for people with low vision, the page includes information on ergonomic finger curvature and placement, posture, body position, foot positioning, and wrist and elbow placement.
The Perkins Keyboard page also includes a fun set of typing exercises for practicing typing that will, for some of you, harken back to typing class in high school.
ACTUAL YOGA
Yoga instructors can provide you with helpful yoga moves and poses to incorporate into your regular yoga practice. The popular Yoga with Adrienne host, Adriene Mishler, has a video entitled Yoga For Hands, Fingers, Wrists | 11-Minute Yoga Quickie.
This gentle video is designed to reduce inflammation, increase range of motion in wrists, and improve flexibility in the small muscles of the hands, fingers, and forearms.
The SaraBeth Yoga channel also has an easy 5-minute Desk Yoga for Wrist Health video for soothing forearms, wrists, and fingers.
AUTO MOUSE
Do you struggle with repetitive stress injuries? Could you use some pain-free mousing?
Auto Mouse from Sphere 10 Software is a Windows-based background utility for your computer, designed to alleviate the strain associated with overuse of a computer mouse. It changes the way you operate your mouse by shifting the hand/arm workload in an ergonomically positive way, from your mousing hand to your keyboard hand(s).
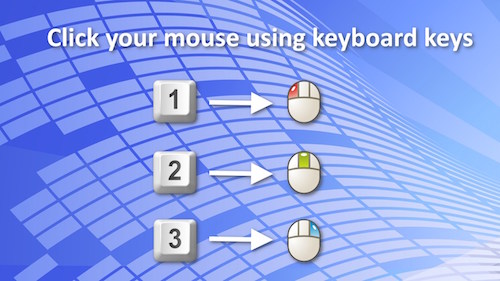
Auto Mouse can be configured to your specifications, so depending on your setting selections, you can select to map mouse functions to your keyboard, like:
- “click the mouse” (that is, approximate the clicking of the mouse) by using keyboard combinations
- automatically click the mouse by ceasing to move the mouse
- choose to sometimes activate the on-screen mouse using an activation key
- flip the right and left mouse button actions to make mousing easier for left-handed users
- show an expanding on-screen ring when a click is issued to gauge progress
- allow keyboard arrows to move the on-screen mouse
- make a mouse-click noise to simulate an actual mouse click
- control the duration between the when the mouse stops moving and auto-click is issued
Auto Mouse also removes the need to tap a laptop touchpad. Instead, you can press a key in order to to click your mouse button but without hijacking that key when you need to actually type.
You can download Auto Mouse directly from the Microsoft App Store. Auto Mouse is free.
Other “Handy” Ways to Maintain Hand/Wrist/Arm Wellness Ergonomically
Learn keyboard commands
Almost every computer program has keyboard commands, combinations of keystrokes that avoid you having to lift your hands from the keyboard and move your mouse. You certainly already know some, like Command-X for Cut or Control V to paste in Windows. But you’d be amazed at how many keystrokes you didn’t know there were!
CheatSheet for Mac from SourceForge is a free utility that displays the keyboard shortcuts available in the active app whenever you hold down a “modifier key,” generally the ⌘ key. Rather than memorizing oodles of key combinations, just view a nifty overlay of commands — for that app — by category.
The best Windows alternative to CheatSheet seems to be CheatKeys; you hold down the CTRL key (or a global hotkey of your choice) and it provides a list of all active short-cuts for whatever app you’re in. Unfortunately, CheatKeys is not free; there’s a 14-day free trial, and during the current promotional period, a one-time license (for use on up to two devices) is currently $12.99 (down from the standard price of $19.99).
The point is that the less mousing you do, the fewer repetitive stress injuries you’re likely to get.
Choose an alternate keyboard or mouse
Ergonomic keyboards come in three main types:
- Split Keyboards — The keyboard is separated into two somewhat equal halves, so you can align your hands directly with your shoulders. This is as much to prevent you from hunching over your keyboard as to soothe your hands.
- Contoured/Concave Keyboards —The keys sit in a bowl-shaped well to match the natural resting lengths of your fingers. (If this description calls to mind Madge and the old Palmolive “Your soaking in it!” commercial, I’m sorry.)
- Wave/Curved Keyboards — With this type, there’s one single, continuous keyboard but the keyboard’s shape tends to be sloped or wavelike/undulating to keep the wrists from bending.
For more information, see Wired’s The Best Ergonomic Keyboards for Your Tired Hands.
Ergonomic mice also come in multiple styles, including a vertical mouse or a trackball mouse, and while both are easier on the hands, you do still use your wrist. With a trackpad mouse (whether on your laptop or as a free-standing combination trackpad mouse), like the Apple Magic Trackpad, you’re not moving your wrist; instead, you control the cursor with your thumb. Experiment to see what works best for you.
PC Magazine recently covered The Best Ergonomic Mice for 2026.
Ask for a referral
If you experience discomfort or pain in your hands, wrists, or arms, ask your healthcare provider for a referral to hand therapy (also called occupational therapy) treatment.
Zzzappy
100 Plans’ Zzzappy is a bit of combo plate, as it monitors both your eyeball/screen time and your “arm input load” in order to scientifically schedule breaks to protect your vision and prevent repetitive strain injuries (RSIs).
Arm Fatigue Detection
Zzzappy’s Arm Fatigue Detection provides real-time monitoring on five types of ergonomic inputs to prevent RSIs, tendinitis, and computer elbow/mouse elbow:
- keystrokes
- mouse clicks
- trackpad travel
- scroll distance
- continuous use duration
Using these metrics, Zzzappy calculates a composite fatigue score, and if any of the metrics hit a no-no threshold, Zzzappy triggers a break (so you can stretch, do some keyboard yoga, and generally stop giving yourself booboos)!
Eye Guard
Zzzappy’s Eye Guard also promotes the 20-20-20 Rule we discussed last week. It has a variety of features, including:
- built-in light, deep, and customizable pre-sets for taking eye-soothing breaks
- flexible time-of-day schedules
- gentle pre-break alerts so that you won’t be startled out of flow when it’s time to take a break
- snooze settings, in case you need a little more time
Zzzappy also has multiple display styles for blink and posture nudges while you’re working.
Smart Pause
We all know that no matter how important eye, hand, and body health is, sometimes we just shouldn’t be disturbed. Zzzappy’s Smart Pause will automatically pause when it detects that you’re on video calls or in meetings, watching video playback, participating in an event on your calendar, and during “fullscreen” gaming. You can also define your own “deep focus” app list so that if you’re using an app that always requires your full attention, Zzzappy knows to play it cool.
If you’re away from your Mac for five or more minutes, Zzzappy recognizes that that’s already a break, and considers it among your metrics.
Immersive Breaks
Because Zzzappy provides eyeball breaks as well as hand/arm in breaks, it keeps you from continuing to stare. Instead, it overlays your choice of blur, grain, frosted glass or ambient glow effects. You can add customized motivational messages (carrot or stick style, depending on what motivates you) or an animation to show you the progress through any given break.
And if you’re using a multiple-screen setup, Zzzappy can sync the overlay across all screens.
With one tap, you can force a lock screen so you’ll really want to step away from the screen.
Health Dashboard
For users who are motivated by data, the health dashboard provides a bevy of goodies:
- Visual charts illustrating screen time, input load, and break patterns.
- Tracking statistics to show:
- completion rates
- streaks
- personal records over time
- Smart insights to use AI analysis of performance data and give users personalized advice.
All of Zzzappy’s data is kept locally on the Mac, with nothing uploaded to the cloud.
Zzzappy Pricing
You can try Zzzappy for free for three days. After that, it’s a one-time purchase of $9.90.
IMPROVE YOUR ERGONOMICS WITH MOVEMENT REMINDERS
Ten minutes before each hour, my Fitbit buzzes to remind me to get up and walk at least 250 steps. Do I do it? Not always.
As I noted in the second post in this series, posture reminders don’t work as well as the posture correcting apps that show you what you’re doing wrong and how you should sit instead. Similarly, reminders to get up and move (or do anything good for your body) are only as good as your willingness to take action when prompted.
It’s not that reminders aren’t useful; they are. But just like buying an organizing book or an exercise video won’t declutter your home or strengthen your abs, just downloading a reminder app won’t get you across the finish line. Pair apps and reminders with cues for why you want to take these self-care measures, whether it’s to be strong and mighty when you reach retirement and are no longer shackled to your computer, or to stay fit to keep up with your children or grandchildren. Know your why.
RMinder
RMinder is a free Chrome extension (so it works on all platforms). Periodically, Rminder pops up on your screen to remind you to do the essential ergonomic and other tasks to maintain your health. RMinder nudges you to:
- Correct your posture — This is only a reminder, not a real-time evaluation or instruction as to what to do
- Blink — Here’s a good time to practice the 20-20-20 Rule!
- Hydrate (with water, not the sugary, caffeinated so-called beverages that keep us from screaming into the void)
- Stretch
These are the things we often forget to do while working, browsing, or gaming. As failing to do them can adversely affect our health, the prompts from this free extension are like an angel on our shoulder (or a mom peering over your shoulder), reminding you to do some self-care.
Rminder lets you customize the interval between notifications and the actual text of the notification, in case you want to be mean, funny, or extra-caring to yourself.
You can also chose to turn off notifications (when you need some intense focus time). Note: some users complain about the audio alert that’s simultaneous with the pop up.
STRETCHLY
Stretchly is a free, open-source app that reminds you to take a break when you’re on your computer. Stretchly is available to download for Mac, Windows, and Linux operating systems (though Mac users will want to read the instructions for installation using Homebrew).
By default, Stretchly prompts users to take a 20-second “mini break” every 10 minutes and a 5-minute “long break” after 30 minutes to reduce fatigue, improve productivity, and prevent RSIs. However, you can customize the intervals for either type of break.
In addition to reminding you to take a break, Stretchly will fill your screen with suggested wellness activities.
Stretchly notifies you 10 seconds prior to a mini break and 30 seconds before a long break to give you a gentle nudge to pause your work. When Stretchly starts a break, you have the option to postpone a mini break for 2 minutes or a long break for 5 minutes; just click on the link at the bottom of window or use the Ctrl/Cmd + X keyboard shortcut. (There’s an optional “Strict Mode” that prevents you from postponing or skipping breaks.)
Stretchly monitors your computer’s idle time; if you haven’t typed or clicked for at least five minutes, the app will pause breaks until your activity starts again, because (duh!) if you’re not at your computer, you don’t need a break from your computer! It will also pause breaks if your computer is set to Do Not Disturb.
MOTION MINUTE
EU-based desktop app Motion Minute reminds you to take regular, healthy breaks while working at your desk, boosting wellness, and productivity.
Motion Minute works on both Windows and Mac operating systems. It uses animated models to guide you through exercises to reduce tension and stiffness, enhance blood circulation, and improve posture and focus.
There’s a free 7-day trial, after which there one-time payment, lifetime licenses, each offering two times more exercises than in the trial. The Starter is €7.95 for one license while the Friends level is €9.90 for two licenses. Each version gets one year of free updates.
BE KIND TO YOUR BODY
If the movie Jerry McGuire is to be believed, the human head weighs eight pounds. (If Google is to be believed, it’s closer to 10 or 11.)
When you’re working at your desk, staring at a screen all day and then curved like a question mark with a death grip on your phone once the workday is over, you’re balancing that beachball head on a much smaller pedestal — your neck.
As we’ve reviewed over four weeks, your neck and shoulders and back — really, all of you except your hair — is dealt a low blow by the way you treat it all day!
Let’s close out this series with resources to help you be kind to your body so that no matter whether you are working or playing, trying to be productive or recovering from that effort, you will be healthy and safe:
- DeskFit: 20 Essential Desk Exercises You Can Do Without Leaving Your Office or Home Workspace (NASA) — This robust PDF from NASA has clear exercise graphics and instructions, helpful whether you want to be an astronaut or just look like one.
- Desk Exercises to Stay Fit At Work (UPMC Healthbeat)
- Desk Stretches Video Collection (Mayo Clinic)
- Office Ergonomics – Stretching – At the Workstation (Canadian Center for Occupational Health and Safety)
- Six Ergonomic Desk Exercises for Office Workers to Relieve Musculoskeletal Issues (Fellowes)
- Stretches to Do at Work Every Day (Healthline)
Thank you for sticking with this series, and I hope you’ve found some new strategies for organizing your workspaces, your systems, and your body for better health.
Follow Me