Archive for ‘Vital Documents’ Category
Paper Doll’s Ultimate Guide to Organizing Yourself to Get a REAL ID
On Friday, I renewed my driver’s license. Typically, that wouldn’t be blog-worthy.
I’ve lived in Tennessee for more than three decades, and generally I’ve been able to renew my license at a little kiosk that looks like an ATM. I’d verify some information on a screen, get a new (horrible) photo taken, and pay with my debit card, all in the vestibule of the DMV while avoiding the packed waiting area.
Not this time, though. I wasn’t merely renewing my license; I made an appointment to apply for my REAL ID, and had to engage with the DMV representative behind the glass barricades.
WHAT IS A REAL ID?
In 2005 (and yes, that really was twenty years ago), Congress passed the REAL ID Act in the long shadow of 9/11-related security concerns. The Act did the following:
- Set clearer standards for government-issued photo IDs — So, if you have a driver’s license, your great-grandmother has a non-driver ID card, or someone you know has different government-issued ID card, they will all fall under an established and uniform set of security standards so everyone will be on the same page.
- Prohibited various government agencies (including the TSA) from accepting forms of identification that don’t meet the new standards. For quite some time, TSA agents had some wiggle room in letting people on airplanes even when/if they didn’t have proper identification (such as when they lost their wallet or had their ID stolen, and showed up at the airport desperate to make a flight). No more.
- Added an extra layer of security to the process of flying — Having uniform requirements for flying makes it much harder for someone to use false documents to board an airplane or gain access to secure facilities.
Basically, the REAL ID Act established minimum security standards for state-issued driver’s licenses, permits, and ID cards to reduce identity fraud.
REAL ID: A LONG TIME COMING
Dear Paper Doll Readers, you know I always try to share information with you in good faith, but ever since I originally blogged about the REAL ID, the US Department of Homeland Security has turned me into the boy who cried wolf.
Originally, the federal government wanted the new regulations to go into effect in 2008, but many states and territories opposed to the immense effort it would take to comply.
First, not all states had required photos for driver’s licenses; conversely, REAL IDs require facial image capture and states need “an effective procedure to confirm or verify a renewing applicant’s information.” To anyone who has watched too many episodes of Law & Order and other police procedurals, it’s a bit surprising that not every state was verifying that faces and names matched!
Second, states would have to confirm Social Security account numbers with the Social Security Administration and cross-check to make sure old or expired licenses were “terminated” in other state’s systems before taking effect in the state where someone was applying.
Third, states were going to be required organize and maintain the documentary evidence submitted. For example, each state would be need to either retain paper copies of documents for a minimum of 7 years or scanned/capture images of those source documents for a minimum of 10 years.
Fourth, states must limit the validity of all driver’s licenses and (non-temporary) ID cards to 8 years; some states had previously kept IDs valid for ten years.
Lacking professional organizers to keep their processes straight, state governments were not particularly keen on having make these changes! Kerfuffles ensued. From 2012 through 2018, states and territories acted in fits and starts.
Eventually, the federal government announced that it would require REAL IDs effective October 1, 2020. However, as we all know, 2020 didn’t exactly turn out as anyone planned, and the CARES Act (remember that $2.2 trillion COVID stimulus package?) delayed the start to September 30, 2021. Later, after several more changes to documentation and funding regulations, the date was pushed to May 3, 2023.
And now, finally, the official date appears to be on the horizon: May 7, 2025, which is (as of this writing), 57 days away!

If you already have a REAL ID-compliant license or other identification, you’re good, but if your license wasn’t due to renew over the past five years or so, you might have figured there was no need to rush to upgrade. But now, it’s time to pay attention.
WHY MIGHT YOU NEED A REAL ID?
Now that you understand why the government has been working toward this change for the last twenty years, you may wonder how it affects you. Why might you need a REAL ID?
1) You Need a REAL ID to Fly
As of May 7, 2025, in order to board an commercial aircraft, your identification must be REAL ID-compliant. Some people seem to believe that flying for particular purposes makes the new law inapplicable to them, but just to be clear, the REAL ID Act will apply no matter what kind of commercial flying you will be doing, including:
- business travel
- vacation/pleasure travel
- heading to college (or taking your children to/from college)
- accompanying minor children during a custody transferral
- traveling to care for ill relatives
- getting health care from specialists in distant cities
- looking for houses in a city to which you’re moving

United Airlines Red Carpet, courtesy of 1950sUnlimited, CC BY-NC 2.0
Do you need a REAL ID to fly on a private plane?
Yes!
Even if your non-commercial flight has private screening or you travel through a private FBO (fixed-base operator), the REAL ID act still sets — and the TSA must enforce — a minimum security standard for all air travel.
Do you need a REAL ID to fly on Air Force One?
No, but that’s because it’s categorized as a military (not commercial) aircraft used for official government travel. Journalists and politicians authorized to fly on Air Force One go through such thorough vetting by the Secret Service that gathering documents to secure a REAL ID will seem like a walk in the park.
Do you need a REAL ID to fly a crop duster?
Nope.
A crop duster is an agricultural aircraft, so flying in one is not considered commercial airline travel and therefore doesn’t fall under the REAL ID requirements. However, to work as an agricultural pilot, you must earn a private pilot license, a commercial rating, and a tail-wheel (conventional gear) airplane endorsement, and get specific agricultural aviation training. That seems like a lot of extra effort to just to avoid going to the DMV to get your REAL ID.
Do you need a REAL ID to fly firefighting aircraft (like air support to drop water or fire suppression chemicals on a fire)?
Sometimes, actually, yes. These aircraft, like those operated by Cal Fire during the recent fires, are sometimes considered commercial aircraft. I was surprised, too.
If you’re not familiar with these aircraft that drop water or pink suppression chemicals, may I point you to the CBS TV show Fire Country, or if you’re feeling up for something sappy but wonderful, the star-studded aerial firefighting movie Always, a remake of a WWII-era film A Guy Named Joe.
Do you need a REAL ID to fly on a rocket like SpaceX, Virgin Galactic, or Blue Origin?
Yes! These non-NASA rockets are considered commercial flights. Pack your REAL ID.
But no, you don’t need a REAL ID to go hot air ballooning like Dorothy in The Wizard of Oz, as there are no TSA checkpoints in the sky!
Can’t you just use a passport to fly? What about a Trusted Traveler card?
What a smartypants you are! In order to fly, you must have a REAL ID-compliant document, which includes a US passport or passport card (the acquisition of which already requires the kind of documentation required for a REAL ID).
However, most Americans do not have valid passports. Currently, only ~45% of Americans hold one. If you have a passport, you’re set; if not, and you aren’t likely to do international travel, a state-issues REAL ID is a more economical choice.
Trusted Traveler program cards, like Global Entry, TSA Pre-Check, NEXUS, SENTRI, and FAST are REAL ID-compliant, but are pricier than a driver’s license and may not be applicable to your lifestyle.
What about a state-issued Enhanced Driver’s License?
Michigan, Minnesota, New York, Vermont, and Washington issue these for land or sea border crossings with Canada, Mexico, and the Caribbean. They require the same documentation and count as REAL ID-compliant; if you have one, you already know it. But if you don’t, and unless you live in these states and don’t have a passport, go ahead and upgrade your driver’s license.
2) You Need a Real ID to Enter Secure Federal Buildings
If you have reason to enter any secure federal buildings, you’ll need REAL ID-compliant documentation.

Panorama of United States Supreme Court Building at Dusk courtesy of Joe Ravi, CC BY-SA 3.0
You may be thinking, “When the heck will I ever have to go into a secure federal building? I’m not a judge or legislator!” However, you might go to a federal building to:
- apply for or renew certain federal benefits — For example, some Social Security Administration offices are in federal buildings.
- access services at a VA facility — While most VA medical centers won’t require REAL ID, some administrative offices do.
- attend an immigration or visa appointment
- work in or visit a federal agency — If you’re a contractor or consultant, or if you’re applying for a federal job, or if you need to visit the IRS, EPA, or Department of Labor, know that such offices are in federal buildings
- attend a public hearing or town hall — Agencies hold open meetings for the public on policy matters.
- attend a government conference or training — Federal agencies host public events, seminars, and professional development sessions.
- retrieve records or conduct research — Agencies like the National Archives or Library of Congress require in-person access to certain records.
- serve on a federal jury or grand jury
- give testimony in legal proceedings — And no, if you’re accused of a crime at the federal level, you can’t get out of being tried for that crime just because you don’t have a REAL ID.
- report to a federal probation or parole office
- visit an inmate in a federal detention center
The REAL ID Act doesn’t require you to present identification anywhere it’s not currently required for accessing a federal facility.

So, while all federal buildings have security, they don’t all count as “secure federal facilities.”
You don’t need a REAL ID to visit the National Archives museum or its reading rooms, but you do need a valid form of identification to enter the research rooms. Similarly, you don’t need a REAL ID to visit the public areas of the Smithsonian Institute.
3) You Need a REAL ID to Enter Nuclear Power Plants
Do you work in a nuclear power plant?
Are you a government employee whose job it is to inspect nuclear power plants? Engineers, safety inspectors and maintenance crews often have to visit plants for inspections and upgrades.
Are you a government regulator from the Nuclear Regulatory Commission or the Environmental Protection Agency?
Are you a vendor or contractor for a nuclear power plant? Whether you restock the candy machines or service the bathroom plumbing or do public speaking events for the staff, you’ll need a REAL ID-compliant document to gain access.
Are you a first responder? Emergency personnel, firefighters, and HAZMAT teams often train in nuclear facilities.
Are you an energy industry professional or a policymaker taking a tour? Are you a journalist? A researcher? You’ll need that REAL ID!
Are you a teacher or professor planning on taking your students to visit a nuclear power plant? If you’re taking third graders on a tour of a nuclear power plant — wow, that’s weird — they wouldn’t need to be REAL ID-compliant, but if you’re a college professor, your age 18+ students would.
Are you Homer Simpson?
One assumes this also applies to Mr. C. Montgomery Burns (Homer’s boss) and sycophantic Smithers. However, Mr. Burns is a billionaire, and they seem be getting a lot of special treatment lately. Your mileage may vary.
WHEN DON’T YOU NEED A REAL ID?
- If you’re a kid — Children under 18 are not required to have REAL ID-compliant identification.
However, I strongly encourage you to make sure your college-bound students get their IDs as soon as they are able, particularly if they attend school more than a few hours’ drive away. From Spring Break to getting home for a family emergency or a funeral, help them be prepared.
- If you’re showing ID to vote — You can’t be required to show a REAL ID to vote.
The REAL ID Act is for maintaining security, so as long as your assigned polling place is not on an airplane, in a secure federal building, or in a nuclear power plant, you should not be required to have or show a REAL ID-compliant identification. (For more on IDs for voting, see my post, The Ultimate Guide to Organizing Yourself to Vote.)
What if you aren’t a US citizen?
If you’re a tourist, you’ll have a passport, which serves the same purpose. If you are neither a citizen nor tourist but are lawfully present in the United States, you can obtain a REAL ID, provided you can demonstrate your legal presence and meet other requirements.
Remember, this doesn’t just include citizens of the 50 states and Washington, DC. If you live in Guam, Puerto Rico, American Samoa, the US Virgin Islands or the Northern Mariana Islands, the REAL ID Act applies to you, too.
REAL ID MINIMUM DOCUMENT REQUIREMENTS
To be a valid REAL ID-compliant state-issued ID (whether a driver’s license or other identification card), it must include the following:
- Full legal name
- Date of birth
- Gender*
- Driver’s license or identification card number
- A digital photograph
- Address of principle residence
- Signature
- Physical security features designed to prevent tampering, counterfeiting, or duplication of the document for fraudulent purposes.
- A common machine-readable technology, with defined minimum data elements.
*Until recently, the gender marker on a passport could be M, F, or X. However, the current administration has announced that the X marker will no longer be allowed on renewed/new passports issued and the marker must match the individual’s assigned sex at birth. However, at least right now, states can make their own rulings regarding gender markers on REAL IDs.
Remember, REAL ID is a set of standards, not a national identification card. Each state issues its own unique licenses and ID cards.
SO, HOW DO YOU GET A REAL ID?
First, gather your documents. You will need to present the following types of original or certified documents to your state to apply for a REAL ID.
- Proof to establish citizenship or legal presence — Again, if you have a passport or passport card, you’re covered. Otherwise, you’ll need official documentation, like:
- a birth certificate
- US Certificate or Consular Report of Birth Abroad
- a valid, unexpired Permanent Resident card issued by DHS or INS
- a certificate of citizenship or naturalization
- an unexpired employment authorization document issued by DHS
- an unexpired foreign passport with a valid US visa and approved I-94 form
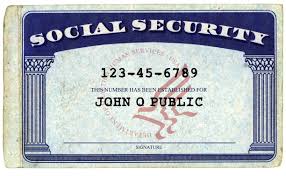
- Proof of your full Social Security number — Find your official Social Security card. If you’ve lost yours, replace your Social Security card as I explained in How to Replace and Organize 7 Essential Government Documents before applying for a REAL ID. However, my state gave me the option of alternatively showing a W-2, 1099, or payroll check stub bearing my SSN.
- Two proofs of residency of the state in which you currently reside — My state offered more than a dozen options, including a recent home utility bill, a vehicle registration, a voter registration card, an IRS tax return, a bank statement, and a variety of other financial and insurance documents.
- Documentation of any name changes — due to marriage, divorce, adoption, change of name (associated with a gender reassignment or otherwise, etc.), explaining a discrepancy between the names on all your forms of proof.
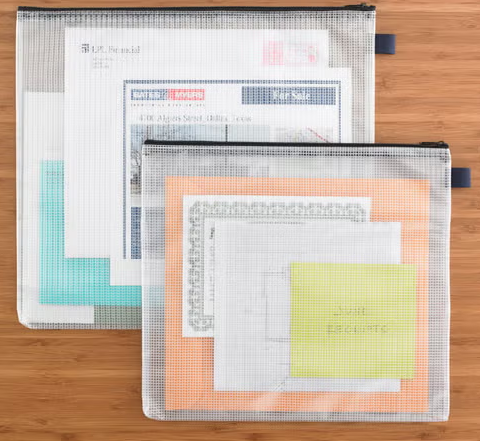
Safeguard your documents; don’t just put them in a manilla folder where they can fall out or damaged by inclement weather. I used a teal Container Store vinyl zippered document pouch because it looked like it might rain.
Next, make an appointment to apply at a local branch of your state’s Department of Motor Vehicles or equivalent. You must apply in-person, and it’s possible that only some (or even one) DMV location in your community will process these applications. Don’t just show up when you have a free afternoon, unless your idea of fun is rubbing elbows with random strangers in uncomfortable plastic seats.
Make yourself look presentable. You’ll be showing this ID all the time. (Also note: you’ll be required to take off your glasses for the photo, so try not to squint.)
Give yourself ample time to arrive. (I was told to arrive 15-minutes before my appointment. I got stuck behind a train and was only 10 minutes early.)
Be prepared to check in on your phone using a QR code. Many people were befuddled by this process and it delayed their appointments.
Be kind; the DMV staff goes through a lot. The wonderful representative processing my application spilled some serious tea about the way some people behave. (People apparently show up for their appointments while on drugs. People get high and then suddenly feel the need to renew their licenses? Seriously?)
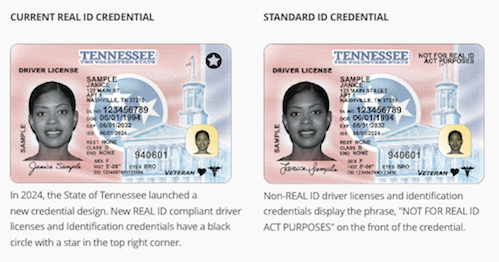
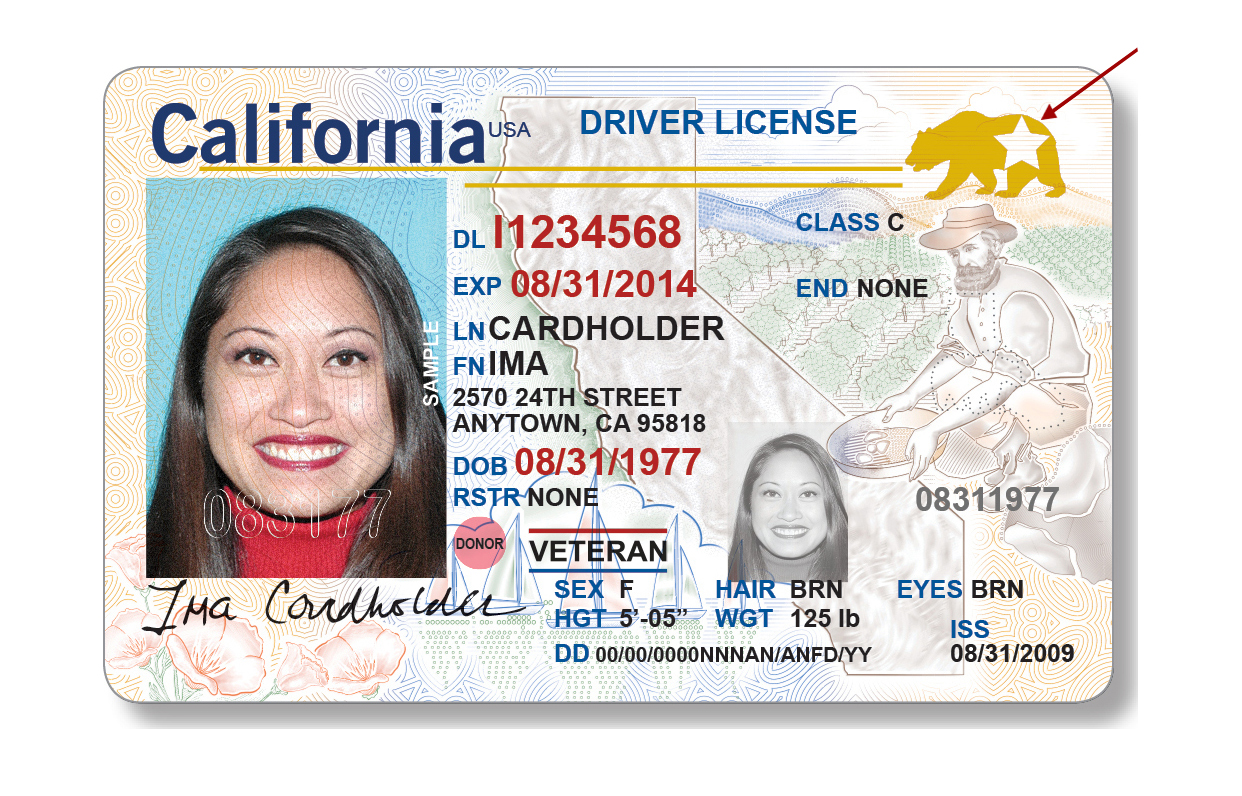
HOW DO I KNOW IF MY ID IS A REAL ID?
Look in the upper right-hand corner of your ID. Do you see a star that looks like any displayed below?

No star? It’s not REAL ID-complaint. (In addition to the star, Enhanced Driver’s Licenses will have an image of the United States flag and the word “Enhanced” at the top of the card.)
For further information, check the Department of Homeland Security‘s REAL ID Frequently Asked Questions page.
Because my papers are organized, it took me about five minutes to gather my documents, and another five to make the appointment online. Even delayed by the train, I arrived ahead of my 2 p.m. appointment.
When my number was called a few minutes later, I was walked through the process of providing all of my documents, signing required statements, and getting my photo taken. At one point, all of the women behind the counter and several applicants stopped to call attention to a very handsome man with a dazzling smile (who looked quite a bit like the actor Donald Glover) getting his ID photo taken.
Dani Pudi, Betty White, and Donald Glover Doing the Anthropology Rap
I was back in my car at 2:21 p.m. It had taken longer to fix my hair for a good DMV photo than to apply for my REAL ID.
Getting organized makes obtaining a REAL ID REAL(ly) painless.
The Ultimate Guide to Organizing Yourself to Vote
 WHAT DOES VOTING HAVE TO DO WITH ORGANIZING?
The word organize has three common meanings:
- to arrange, assemble, or put in order your tangible stuff (or activities or thoughts) so you can access what you need when you want it, to be more productive
- to coordinate, assemble, and unify a group, as when organizing a search party for a missing child or organizing in a union to collectively bargain
- to mobilize in support of a cause or effort you value, like Save the Seals (remember that, GenX?) or “Fix the Pot Hole on Main Street!”, or to get a candidate elected or a ballot proposition approved or rejected
In the United States, National Voter Registration Day is September 17, 2024, and no matter what you believe regarding any given issue or candidate, it’s hard to make a difference if your resources and information are disorganized.
To that end, today’s non-partisan post includes everything you need to know to exercise your right to vote, no matter your opinion on candidates, propositions, or pot holes.
(Dear non-US readers; please feel free to post non-partisan links about organizing to vote in your countries in the comment section.)
KNOW YOUR “WHY”
We do not have government by the majority. We have government by the majority who participate.
~ Thomas Jefferson
No matter which candidates get your vote or what positions you take on any given issue, don’t let disorganization to be an obstacle to voting.
If you’re an American citizen over the age of 18, you have the right to cast votes regarding a wide variety of national issues and policies, including:
- The Economy
- The Environment and Energy policy
- Foreign policy
- Healthcare
- Immigration
- Reproductive and Family Issues
- Veterans’ Affairs
It’s not just federal policies and candidates. You never know when you’ll care about a school board vote that impacts your kids, a zoning issue, or a noise ordinance related to a neighbor’s teenage beau boosting Peter Gabriel’s In Your Eyes at maximum decibels in the wee hours.
Voting preserves your right to have a say in how your community (school district, town, city, state, and nation) will be governed. It also allows you to model community organization and civic responsibility for your children or grandchildren.
REGISTER TO VOTE
Let’s start with the basics of voter registration.
Know your state’s voting eligibility requirements.
You would think voting eligibility requirements would be uniform across all fifty states, but nope. (Note: residents of the United States’ territories can vote in presidential primaries, but not the presidential election, nor in Congressional or Senate races.)
Between 1812 and 1860, property ownership qualifications to vote were progressively abolished. In 1870, non-white men gained the right to vote. Until the 19th Amendment, ratified in 1920, only twenty states granted women the right to vote.
Even then, in effect, only white women were guaranteed suffrage, as poll taxes and civic literacy tests disenfranchised the poor and people of color. (Poll taxes were stuck down by the 24th Amendment; the Voting Rights Act of 1965 outlawed discriminatory state voting practices.)
Native Americans weren’t granted the right to vote until 1924, and that right wasn’t guaranteed until 1948. And of course, the 26th Amendment lowered the minimum voting age requirement from 21 to 18 in 1971, when Paper Doll was only four years old, but already really wanted to vote.
Federal voting regulations aside, individual states have varying rules regarding voter eligibility. In order to vote in federal and state elections, you must be a citizen, of “sound mind,” and over the age of 18, but most states have residency requirements.
In 1972, the U.S. Supreme Court struck down one-year residency requirements, ruling that anything in excess of 30 to 50 days violated equal protection of the Fourteenth Amendment.
And given that residency implies an address, the passage of the National Voter Registration Act of 1993 and 2002’s Help America Vote Act — in addition to modernizing voting technology — removed registration impediments and ruled unhoused people may not be denied the right to vote based on their lack of a permanent address.
Thirteen states (Alaska, Connecticut, Delaware, Florida, Georgia, Idaho, Montana, New Jersey, Utah, Vermont, West Virginia, Wisconsin, and Wyoming) and Puerto Rico do not require a mailing address, and in Arizona and Nebraska, homeless citizens may use county clerks’ offices and court houses as their mailing addresses.
Most states have regulations restricting the voting eligibility of convicted felons while in prison or on parole, while convicted felons in Kentucky and Virginia lose the right to vote in perpetuity. (Florida recently reversed its law in this regard, but … it’s complicated.)
Know your state’s voter registration deadline
As befits a nation that initially considered itself to be a collection of smaller nations, each state has its own voter registration deadlines.
Twenty-two states require registration between 16 and 30 days prior to Election Day (Tuesday, November 5th this year). Six states require registration from 1 to 15 days prior to election day, and twenty-two states and Washington, DC allow registration at your polling place on Election Day.
Fill out the “paperwork” to register to vote.
Your paperwork may not be on paper; forty-three states (plus DC and Guam) allow online voter registration, up from only fourteen in 2008 when I first wrote about organizing to vote. However, you must register to vote by mail or in person in Arkansas, Mississippi, Montana, New Hampshire, South Dakota, Texas, and Wyoming.
Notably, North Dakota does not require voters to register, having abolished advanced registration in 1951! As long as you’ve lived in the state for 30 days and have valid ID, you can vote.
To register:
- Check online, call, or drop by your Board of Elections to request a registration application.
- The National Voter Registration Act of 1993, also called the Motor Voter Act, made it possible to register when you apply for or renew a driver’s license or at government agencies when applying for public assistance and disability.
- Find your state election offices at USA.gov, or Google “board of elections” or “election commission” and your county name plus the state (because there are 31 Washington Counties, 26 Jefferson Counties, and 25 Franklin Counties).
- Use the master voter registration document at Vote.org, or scroll down on that page to find your state’s voter registration site.
Review your voter registration card and keep it safe
Voter registration cards show your voting precinct (which determines where you vote) and districts (e.g., Congressional, State Senate and House, school district, county/city district, etc.) for individual campaigns, referenda, and ballot initiatives.
File your card with your VIP papers, and make a notation on your calendar to bring your card to the polls on Election Day (or on early voting days, if applicable). You may only need your photo ID, but I recommend always taking your voter registration card with you to vote, especially if you registered recently.
SPECIAL CIRCUMSTANCES FOR REGISTERING AND VOTING
If you or someone you know needs assistance with registering to vote and securing a ballot, check the following resources.
College Students
Students should determine whether they will register to vote in their home states or at school. They are likely to be first-time voters and unfamiliar with residency requirements, party registration, absentee ballots, and the election process. These resources will help.
- Away at College: Where Do You Vote? (FindLaw)
- How to Vote in College: Know Your Rights (BestColleges)
- Out of State College Student Voting Guide (All-In Challenge)
- Voting as a College Student (Vote.org)
Disabled Voters
- The Americans with Disabilities Act and Other Federal Laws Protecting the Rights of Voters with Disabilities (ADA.gov)
- Resources for Voters with Disabilities (US Election Assistance Commission)
- Voters with Disabilities Activated (National Disabilities Rights Network)
- Voting with a Disability (Vote.gov)
- Voting Accessibility (US Election Assistance Commission)
Members of the US Military
- Military and Overseas Voters UOCAVA (US Election Assistance Commission)
- Military Voters (Federal Voting Assistance Program)
- Voting During Military Service (FindLaw)
- Voting While You’re Away From Home: The Absentee Voting Process (Military One Source)
Overseas and Expat Voters
Are you an American citizen reading Paper Doll from somewhere outside of the U.S.? Howdy! These non-partisan sites can help you register and vote from abroad:
- Election Assistance Commission
- Federal Voting Assistance Program
- Overseas Vote Foundation
- Vote from Abroad
Unhoused voters
- Every One Votes (National Alliances to End Homelessness) — including A Toolkit to Ensure People Experiencing Homelessness Can Exercise Their Right To Vote
- The Homeless Vote: Can You Legally Cast a Ballot? (FindLaw)
- Step-by-Step Voting Guide for People Experiencing Homelessness (United States Interagency Council on Homelessness)
- Voting for People with Nontraditional Residences (The National Conference of State Legislatures)
- You Don’t Need a Home to Vote (The National Coalition on the Homeless ) includes a voter information primer and a 2024 voting rights manual
CHECK YOUR VOTER REGISTRATION
Perhaps you registered to vote years or decades ago. Even if you wore an “I Like Ike” button, registering to vote once is not enough. Even after you register, there are multiple ways you can fall off the rolls, as Archie Bunker learned years ago!
If you haven’t voted in several election cycles — whether presidential or mid-term elections — your state may remove you from the rolls.
If you move, even within a state, you have to register in your new location. Update your registration even if you move neighborhoods in the same town, as dividing lines for school and legislative districts are narrowly drawn.
You may be purged from the rolls by accident, such as if you share a name with someone who died, or intentionally as part of partisan disenfranchisement efforts.
Check your voter registration soon, before the deadline for registering in your locale, to ensure that you are able to vote on election day. Contact your local board of elections, or go to https://www.vote.org/am-i-registered-to-vote/ to use the state-by-state lookup.
LOCATE YOUR POLLING PLACE
Your voter registration card should specify your polling place. Alternatively, many boards of elections or election commissions let you safely log in to your registration with information like your name, birthdate, and part of your Social Security number (which they already have on record).
Or, use Vote.org’s Polling Place Locator.
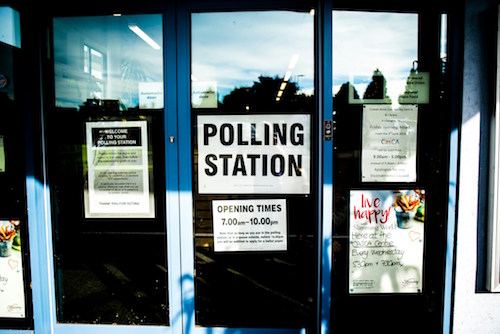
Photo by Elliott Stallion on Unsplash
If you have early voting in your jurisdiction, it may be at a different polling place than the one listed on your registration card. My Election Day polling place is within walking distance of my home; however, to avoid inclement weather or having to rush on a client day, I vote at one of the four early voting locations in my city.
OR, ARRANGE TO VOTE BY MAIL
Voting by mail has become more popular, particularly since COVID, but as with other voting regulations, the rules vary by state. This method, usually referred to as an absentee ballot, reduces crowding at the polls, increases voter participation, and makes it easier for college students, people with disabilities, members of the armed services, travelers, and others to cast their votes.
In eight states (California, Colorado, Hawaii, Nevada, Oregon, Utah, Vermont, and Washington) and the District of Columbia every eligible voter can vote by mail. (And in Colorado and Oregon, all eligible voters are mailed a ballot without even having to request one.)
Voters in those eight states and DC can generally return ballots through the USPS, in-person at election offices, or in secure drop-boxes. In states that have in-person voting, voters may still opt to vote at the polling place.
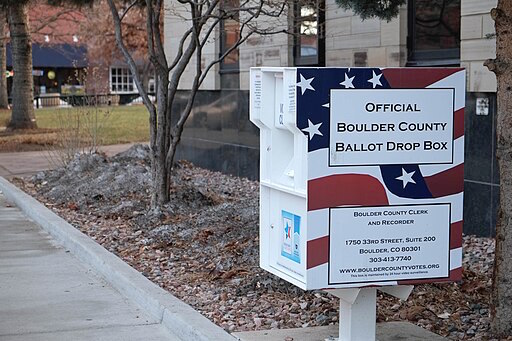
Paul Sableman, CC BY 2.0, via Wikimedia Commons
But what if you live in the 42 states and 14 territories that don’t run all elections by mail? There, eligible voters must request a ballot.
Some have a “no-excuse” ballot system; request a ballot for any reason. Other states require you submit a “valid excuse,” which might be that you will be out of state for business or out of the country due to work or military service, that you will be hospitalized or otherwise too infirm to vote; some states let everyone over 65 vote by mail.
The duration of absentee ballot status can vary. In some states, like New York or Georgia, once you request an absentee ballot, you’ll receive one for all elections, whether federal, state, or local, general elections or primaries. In others, voters must request absentee ballots for every single election in which they intend to vote.
Scroll down on this FindLaw page for a comprehensive list of each state’s requirement for requesting an absentee ballot and voting by mail. Where applicable, it provides a link to each state’s absentee ballot application.
Make sure you’re registered to vote by the applicable deadline, then contact your county’s Board of Elections or your state’s Secretary of State for an absentee ballot.
SECURE THE RIGHT IDENTIFICATION
Your voter registration card proves you registered (at some point) but it can’t be used as ID to vote.
If you live somewhere like Dixville Notch, a tiny New Hampshire polling district of four registered voters, the poll worker is likely your daughter-in-law or third grade teacher who knows you. However, most jurisdictions require you to show some kind of government photo ID, like a driver’s license, state-issued ID card, military or tribal ID, or a passport, and even locations without strict voter ID laws require first-time voters who’ve registered online or by mail to show ID.
Other states accept non-photo identification with proof of name and address. For example, in Arizona you can bring your Indian Census card; in Kansas, government-issued concealed carry handgun or weapon licenses and government-issued public assistance ID cards are acceptable ID; Virginia allows valid student IDs.
Even states that are strict regarding photo ID have exemptions, such as for those with a religious objection to being photographed, or have impediments to getting an ID (due to indigence or after a natural disaster). Wisconsin has confidential voting for victims of domestic abuse, sexual assault, or stalking.
Check your state’s voter ID laws at your board of elections website or this list from the National Conference of State Legislatures.
Alternatively, use the map at VoterRiders.org and the cursor over your state to see what proof of identification your state requires. States are divided by strict and non-strict photo ID laws, strict and non-strict non-photo ID laws, and states with no specific ID required.
If you have none of the appropriate categories of identification required by your state, you’ll want to get a state-issued photo ID card. In most cases, this will require presenting a copy of your birth certificate, as explained in How to Replace and Organize 7 Essential Government Documents.
All this aside, if you don’t have your ID, you can generally cast a provisional ballot by signing an affidavit, signing a poll book, and providing biographical information. (You may also cast a provisional ballot if your identity or right to vote is challenged by a poll worker or election official, or if your name is not on the poll or registration list on Election Day.)
MAKE A PLAN FOR WHEN AND HOW YOU WILL VOTE
Very little gets done unless you organize your schedule to do it.
Think of voting the way you might think of leaving on a trip. Normally, you might get in your car, drive to the airport, park, and fly. Or perhaps you arrange to have a friend drive you. But if you wait until the last minute and you have a dead battery or flat tire, or your friend’s child has the flu but no baby sitter, you’d have to scramble to figure out whether you’d call another friend, get a rideshare, or find some other solution.
Voting is not time-specific, but it’s day-specific, and the lines in some precincts can be as long as those for TSA. And if you were planning to vote after work, but you got delayed by weather or traffic, you might be cutting it close.
When and how will you vote?
Look at your schedule and figure out:
- Will you vote by mail? How will you remember to get your ballot in the mail or to a drop-box by deadline?
- Will you vote early? What day? How will you accommodate your schedule and remind yourself to go? At which early voting polling place can you vote?
- If you’re voting on Election Day, what time will you go and how will you get there?
Borrow some accountability and vote with a friend. Arrange to vote together (early or on Election Day) or even drop your mail-in votes at a drop-box together, then celebrate your right to vote with an ice cream, adult beverage, or meal.
How will you get to the polls?
If you’re going to the polls in person, either on Election Day or when voting early, plan how you’ll get there, and create a backup plan in case something goes awry.
If you are able, offer rides to those who may lack transportation or the physical ability to get to the polls on their own.
If you need help getting to the polls:
- Ask friends or neighbors how they are voting and see if you can ride with them.
- Ask if your house of worship is transporting congregants to the polls for early voting.
- Get free rides to vote early via Lime, as well as access to free scooters and e-bikes through Vote Early Day.
- Check to see if your locality offers free public transportation via bus or rail on Election Day.
- Call your public library or your state’s League of Women Voters to find out what assistance is available locally to help voters get to the polls.
- Ride Lyft, partnering with Levi Strauss & Co. and Showtime/MTV, to providing discounted rides to the polls.
RESEARCH THE BALLOT
Democracy cannot succeed unless those who express their choice are prepared to choose wisely. The real safeguard of democracy, therefore, is education.
~Franklin D. Roosevelt
You may be able to log into your board of elections or election commission site to see a sample ballot prior to any local, primary, or general election. Alternatively, use:
- League of Women Voters‘ Vote 411 — Provide your state to get your voting information. Closer to the election, click on the Candidate and Ballot Measure Information tab.
- LWW’s 411 also offers a personalized ballot — Enter your address and view (or print) ballot guidance.
- Ballotpedia is a digital encyclopedia of elections. Pick federal, state, and local elections, as well as ballot measures, from the sidebar to aid your research, or look up your sample ballot.
- Vote.org has a See What’s On Your Ballot feature.
Then, evaluate candidate and party web sites, read news articles, and ask the opinion of people you respect.
PROTECT YOUR RIGHTS
We don’t want seven-year-olds or random Peruvians or visitors from Alpha Centauri to pick our city councilperson or mayor, but we do (or at least should) want everyone citizen to be able to exercise the right to vote without fear of threats or violence, or even ignorance on the part of un untrained person.
I mean, how often have we heard about the airport employee who insists that people with driver’s licenses from New Mexico or the District of Columbia need to show passports because they don’t know these places are in the United States?
If you are in line when the polling hours close, stay in line. By law, as long as you are in line, you are guaranteed the right to vote.
If you are threatened with violence or otherwise experience or observe intimidation:
- Report intimidation to the Election Protection Hotline at 1-866-OUR-VOTE. (Put the number in your phone.)
- Report threats to your state and local election officials.
If you are denied the right to vote:
- Give a sworn statement to a poll worker that you satisfy the qualifications to vote in your state, and then proceed to cast a ballot (or provisional ballot).
APPRECIATE HOW YOU GOT THE RIGHT TO VOTE
Over the centuries, many have fought to secure and protect your right to vote. The following three videos from U.S. Capitol Historical Society explain the evolution of the Constitutional amendments that secured that right.
Not only is Tuesday, September 17, 2024 National Voter Registration Day, but it’s also Constitution Day. What better way to celebrate than to make sure you’re organized and registered to vote.
Organize Your College-Bound Student for Grown-Up Life: Part 1

In a matter of weeks, fresh-faced first-year college students will be headed off to begin their adult lives.
Everyone needs a little organizational guidance on this path. Last week, I re-shared a popular post from the Paper Doll vault, Paper Doll & Real Simple Organize Dorm Rooms: SUPER-EXTENDED Edition, looking at how to organize a dorm room for maximum comfort and productivity.
There’s a lot of support out there for getting the right stuff to make college life easier. IKEA has created a stellar master list of what to take to college that likely exceeds whatever your student’s department of residence life has forwarded. If you care mainly about having the right electronic solutions, you can scroll through pieces like Back to School — 10 Cool Tech Gadgets for 2024.
Taking advantage of the “college lists,” reminiscent of the photocopied (and previously, mimeographed) lists of teacher’s required school supplies, can put most parents and students on a fairly level playing field. Well, at least in terms of the tangibles, like basic creature comforts necessary to sleep, study, and snack while paying at least a modicum of attention to personal hygiene and health while at college.
The stuff is one thing. However, not all 18-year-olds arrive at college with the same levels of maturity, knowledge, and awareness of the world. TikTok, Instagram, and YouTube sensation Chip Leighton of The Leighton Show hit it big the last past few years with his series of videos of funny texts from teenagers.
But Leighton really caught my eyes with the texts from college students. These texts, and the rush of comments from parents illustrating their own young people’s texts, help us realize that parents and guardians may need to do more than they realize to prepare offspring for independent life on the planet.
Some things are universal — students arrive at college not having a handle on how to do laundry or manage their finances. But the deeper I’ve gone into talking with clients with kids at college (and, yes, reading the hysterical — and embarrassing — stories from parents in Leighton’s comments sections), I’ve realized that there are ways in which kids are ill-prepared for college (and life beyond) in a ways that adults may not realize.
Today’s post and the rest of this series is a starter kit for the issues to discuss with your college-bound Gen-Zers before they risk endangering their lives, messing up their financial histories, or embarrassing themselves in front of age cohorts who have been better prepared for life “in the real world.”
ESSENTIAL INFORMATION AND PAPERWORK
Before we get into what your college students need to know, we should look at what documents they need to possess and understand.
Social Security Number
If you’re an American, your kid already has Social Security numbers. But do they actually know it?
This is the number you most need to memorize for the next six or more decades. Once at college, students will find they need to provide a student ID number and Social Security number on forms all the time. If they haven’t memorized it as a result of the college application process, now is the time to help them remember it.
You’ll have to discuss whether it makes sense for your student to take the actual card to school, or if it’s best kept safely in the family home until or unless they need it for official reasons. If they do take it to school, remind them that it shouldn’t live in their wallet or anywhere it could be lost or easily stolen.
Contact information for the important people in their lives
Yes, college-bound students mainly text people, but at some point, you might point out that if they send a real letter (or even a postcard) to Grandma, she might be inclined to send back money or a tin of cookies or some sort of care package.
College students need to have phone numbers, email addresses, and mailing/shipping addresses at the ready. And while yes, they can text Mom and Dad for the answers, warn them that they may end up as an example on Leighton’s TikTok or Instagram page!

Encourage or even help them to memorize a few essential phone numbers in case their phones are ever lost, stolen, or damaged. Of course, the era of Snoopy address books is probably long gone, so this is a plug for making sure you urge them to back up their phones to their (or your family’s) iCloud or Google Drive.
Health records
At some point in the weeks before college, aspiring first-years need to provide proof of immunizations plus information regarding their medical history of epilepsy, diabetes, or any other physical or mental health conditions that might impact a student’s life at college or need for medical accommodations, per the Americans with Disabilities Act (ADA) and Section 504 of the Rehabilitation Act of 1973.
But sending the requested documentation to the school isn’t enough; your newly-minuted adult needs to know and have access to this information. Make sure they either have a paper folder for medical records or a shared digital folder, perhaps in Dropbox, where you mutually maintain potentially necessary information.
It’s not enough that Mom & Dad and the school can access these things; your child may need to provide medical professionals with information about their blood type, health conditions (past and present), medications, surgeries, etc. (Seriously, your kids need to know their blood type!)
Legal documents related to healthcare
There are two federal laws related to maintaining the privacy of a student’s medical records. Both refer to when students are aged 18 or above, and in the first case, when students are at college.
The first is the Federal Educational Rights and Privacy Act (FERPA). It protects the privacy of a students’ educational records, including a student’s treatment or care at a campus health center (as well as grades and academic standing, and any disciplinary actions against them). This applies not only to students who have reached 18, but all college students.
The second, you are likely to have more familiarity with. The Health Information Portability and Accountability Act, commonly known as HIPAA, protects all medical information.
If a student has turned 18, or in the case of FERPA, is at college, Mom and Dad don’t have any legal right to access this information. But of course, that doesn’t mean your student might not want you to have access. This means you need to talk to them about three essential documents that will allow you to know what’s going on with them if they need medical care and allow you to make decisions for them if they are unable.
- HIPAA Release — This grants you permission to be involved in knowing what’s going on with your student’s health situation. You’ve probably had to sign a lot of your own HIPAA releases, so you know that your student will need to specify each health care provider (so, a physician, a healthcare center, a hospital) whom they authorize to release medical/treatment information. Your student’s school health care center may have links to release forms on their web site. For security, encourage your student to fill out a HIPAA release before drop-off day.
- FERPA Waiver — This allows a student to select what kinds of information they want to share with their parents. Rather than giving blanket access, the student can choose to grant access to medical records but not grades, or vice versa. The college registrar’s office can provide a FERPA waivers, which may be a paper or online form.
- Power of Attorney for Healthcare (also called a healthcare proxy) — We’ve talked about this document many times, including in How to Create, Organize, and Safeguard 5 Essential Legal and Estate Documents.
Whereas a HIPAA release and FERPA waiver allow you to be part of the conversation about your young person’s medical status, a Power of Attorney for Healthcare allows you to make medical decisions for your 18+ student in the unfortunate event they are unable to do so.
Google “Power of Attorney for Healthcare” or “Medical Power of Attorney” and your state name to find sample forms online. (If your student is attending school out of state, you may need a form for both states.)
Obviously, keep copies of these documents in a secure place where you will be able to access them if your student has medical needs requiring your support.
Help Them Register to Vote
I am cautiously hopeful that I shouldn’t have to explain to you (nor you to your college-bound student) why it’s essential to be politically aware and educated, to register to vote, and to exercise that vote (not just for the highest offices, but for all down-ticket offices and ballot measures).
“I Voted” Photo by Element5 Digital on Unsplash
Laws governing registering to vote vary by state. Some states have voting by mail; others strictly require voting in person and limit absentee ballots. Deadlines also vary by state. Determine with your child whether it makes sense to register in your home county or (if possible and/or necessary) at their college residents. Be aware that voter registration deadlines are looming in many states.
Once they’re registered to vote, teach them how to evaluate candidates and issues, how to secure an absentee ballot (if applicable), and make sure they know their protections. (For example, once they are in line to vote, no matter how long the line is, or how far past official poll closing hours, they should stay in line and are guaranteed the right to cast a ballot.)
Share resources, such as:
- Voting Registration Guide by State
- Away at College? How and Where Do You Vote?
- How to Vote in College: Know Your Rights
- Rock the Vote
- Make a Plan to Vote (StudentVote.org)
- United States Election Commission Assistance Program
The point is not to tell your student for whom they should vote, but to empower them with all the resources so that they can make educated decisions that reflect their beliefs, and to understand the value of their participation in the process.
ADULTING SKILLS & KNOWLEDGE BASE 101
It would take a book (see the end of today’s post) and not merely a blog post to review all the things you should make sure first-year students should know before they head off to college. But you really don’t want to get a text like the ones in this video. (Be sure to click the audio icon at the bottom to un-mute. If you want to play it again, click the “replay” circular arrow icon in the lower left corner, not the play button in the middle of the screen.)
@the_leighton_show Posting this again for all the parents who just dropped kids off at college #teenager #text #college #freshman #funny ♬ original sound – The Leighton Show
A Punch List for Adulting
The rest of this post is not designed to tell you how to teach what your kids need to know; that will depend on your family’s location, lifestyle, standards, and values. Rather, treat it as a punch list.
Traditionally, a punch list is a document that lists the final work items remaining before a construction project is considered complete. More specifically, contractors use a punch list to add all the work that isn’t included in the official specifications in the construction contract; it’s the stuff that comes up later. The punch list is often made up of various tasks that were skipped because they weren’t considered originally or overlooked in favor of tasks that were more important at the time.
Well, your kid is your construction project. You’ve been building this project for 18 or so years, and you’re ready for the closing date, but you don’t want to suddenly realize there’s no time left to complete or fix what left undone. What follows today and in this series, will provide opportunities for you to tighten the bannister on the ladder of your child’s college years and adult life.
How Money Works
Many people get out into the post-college world without any idea how manage their finances.
Sometimes this is because their parents aren’t equipped to teach them the skills; other times, parents assume that certain knowledge and skills are common sense.
However, I can assure you that writing a check is no more “common sensical” to the average college-bound Gen-Z student than mobile deposits or CashApp is to your average elder Boomer or Silent Generation grandparent.
Talk to your student to figure out what they need to know about the following:
- How to create a budget (and keep to it)
- How to track when bills are due and ensure they pay them on time (and understand the basics of how interest rates, fines, and fees rack up)
- How to write a check (because yes, sometimes that’s the only way to pay for something)
- How to endorse a check (see above, re: Grandma)
- How to fill out a deposit slip and withdrawal ticket, and how to comport themselves in a bank, in case ATMs are down and they actually have to (gasp!) speak to someone.

- How to use a banking app (including for mobile deposit of a check)
- How to use a check register — Sigh, I know this is a lost cause these days, but learning how to keep a check register (even if you never write a check) is the key to reconciling and balancing your account and thus keeping from being overdrawn or going over budget.
- How to call, go online, or use the bank app to check the bank balance.
- How to safely use mobile financial and payment apps — For those of us who rarely, if ever, use such apps, it can be a surprise that the default is for users of platforms like Venmo to share and display transactions (and who they paid)!
Encourage kids to keep transaction information on financial sharing apps private. Nerdwallet’s What College Students Need to Know About Payment Apps has some sound advice for protecting against fraud and safely using these apps.
- How to understand the difference between checking and savings accounts, and between debit and credit cards. If your student does not already have a bank account, make sure to help them open one that has a branch (and ATMs) in their college community in order to avoid non-member ATM fees. Make sure they understand which ATM networks they are in and how to identify non-member ATMs.
More generally, ensure your student understands how banks work — and how your family finances will work as it pertains to them while they’re at college.
If you’ll be funding some or all of their at-school lives, explain how much money you will provide them (at the start of the semester, or each month), what they will be responsible for covering, and what to do in a financial emergency.
They may be new adults, but they are still your children, so encourage them to come to you with problems so you can problem-solve together. (This is good advice for non-financial situations, as well.)
Make sure your student understands how credit works, and discourage opening lines of credit early on. Most of the predatory methods for signing college kids up for credit cards that were common when I was an undergraduate are now illegal. Still, help them to be wary. They can sign up and start building a credit history later in their undergraduate years.
- How to tip, when to tip, and how to determine how much to tip
- How to sign up for student discounts on everything from computers to clothes, electronics to entertainment, retail shopping to restaurant food.
This may require showing a student ID at a local store, downloading an app, granting permission to be texted or emailed, or other more privacy-invading options. Your student will have to weigh the discount against the value of granting a company access to them. For starters, check out these resources for getting student discounts:
- How taxes work, and more specifically, which tax-related documents to save and share with you so that you can help them prepare their taxes. They may receive W-2s from student jobs, Form 1098-T tuition statements, Form 8863 for American Opportunity and Lifetime Learning Credits, etc. Taxes are likely the last thing on your student’s mind right now, but understanding the American Opportunity credits may be a huge boon for your family.
If this is your first go-round with sending a kid off to college, I recognize that this might be overwhelming. Your student’s college will likely provide some financial literacy workshops during orientation and ongoing, but don’t depend on them having the time or inclination to check them out.
Start by working through Study Corgi‘s A College Student’s Guide to Financial Literacy: Benefits, Tips, + Resources. It has some stellar infographics, links, and resources for guiding a young person through getting a handle on all-things-financial.
Another good option is The Financial Diet‘s The College Student’s Guide To Money video series on YouTube. It covers budgeting, saving, investing, mindset, and making big money decisions. Start here and then continue on with the playlist:
How Insurance Works
Your student may need some or all of the following insurance coverage while at school:
- Health insurance — The college may offer a healthcare plan. When I was in college, I was covered by both my parents’ plan and the school’s plan, but things have changed since I was a student and dinosaurs roamed the earth.
The Affordable Care Act (ACA) guarantees that your child can stay on your health insurance until reaching the age of 26. If your student is staying in-state, that should be relatively straightforward; if they’re attending college out of state, and depending on whether they will need a Marketplace plan, your student may need to apply separately. Begin familiarizing yourself with the options described on the ACA page for college students.

Doctor with stethoscope photo by Online Marketing on Unsplash
Students need to understand how co-pays, co-insurance, deductibles, and out-of-pocket limits work. Start by walking them through Paper Doll Explains Your Health Insurance Explanation of Benefits. (Who knows; you might learn something, too. Meanwhile, your student will be head-and-shoulders above where most college kids are in understanding health insurance.)
- Car insurance — Students taking cars to college need to have insurance. Maybe your student will be on your insurance; maybe they’ll get their own policy. However your family arranges finances, it’s essential your student understands how car insurance works (and what to do in a car-related emergency).
Students, and young people in general, might be inclined to pick the least expensive coverage without knowing what it actually covers and what it doesn’t.
As with health insurance, a lot of the language surrounding car insurance can be mystifying. Try reading Organize for an Accident: Don’t Crash Your Car Insurance Paperwork [UPDATED] together to gauge what questions they might still have so you can help them make good decisions now and in the future.

Toy Car Photo by Atish Sewmangel on Unsplash
Along with standard car insurance, you may want to sign your student up for AAA or an automobile club associated with a family credit card, insurance company, or car manufacturer. Most services are fairly inexpensive and will give you (and your student) confidence in case the car needs urgent towing or emergency roadside assistance.
- Renter’s insurance — Homeowners know they have to have insurance, but young people (and renters, in general), are sometime surprised to realize that they should have coverage for their rented apartments. In fact, some apartment complexes require it. Luckily, renter’s insurance is (relatively) inexpensive at between $100 and $200 a year.
Most colleges don’t require separate renter’s insurance for students living in a dorm. Parents should consult their own agents to see if their homeowner’s insurance will cover their student’s “stuff” while off at college.
Remember, renter’s insurance doesn’t just cover the cost of replacing expensive items (like computers) if they are stolen or damaged; it can also protected your whole family from liability claims if your student accidentally injures someone or damages their property.
This is just the beginning of the advice and considerations you’ll want to discuss with your college-bound student. As this series continues next week, we’ll explore more topics, including how to:
- Stay safe (guard your personal safety on campus)
- Avoid an all-pink wardrobe (AKA: how to do laundry)
- Keep the crud away (how to protect health and hygiene)
- Stay fit and fed (what college kids should know about exercise and nutrition at school)
- Master time management at college
- Care for a car at school
- Develop essential adulting skills
The next post, Organize Your College-Bound Student for Grownup Life: Part 2, covers adult essentials like effective communication, campus (and off-campus) safety, staying healthy, and the bane of all college students, laundry!
Organize Your College-Bound Student for Grownup Life: Part 3 covers time management, academic success strategies, etiquette, car care, avoiding scams, and a grab-bag of life skills. You’ll also find a plethora of follow-up resources, both for parents and students, to be as prepared as possible for college life, and beyond.
Until next time, when we get deeper into these resources, give yourself grace if you are stressed about sending your “construction project” off to college. Whether Leighton’s videos makes you laugh or just comfort you that you’re not alone in your frustrations with GenZ, you might want to look at his book, What Time Is Noon?: Hilarious Hilarious Texts, Ridiculous Feedback, and Not-So-Subtle Advice from Teenagers.

Ultimate Guide to Organizing the Passport Process: In Person, By Mail, & Now: Online!
If you’re organized in approaching the experience, travel can broaden the horizons and delight the senses, as I have talked about in posts like:
- Paper Doll’s 5 Essential Lists For Planning an International Vacation
- Paper Doll on the Smead Podcast: Essential Lists For Organized Travel
- Paper Doll Organizes Your Space, Money, and Well-Being While Traveling
Of course, one large part of international travel is having an up-to-date passport, which I covered dating all the way back to 2010, when I wrote “May We See Your Papers?”: Passport Cards and Trusted Travelers. As you can imagine, a lot has changed since then.
And, in fact, a lot has changed in the world of passports as recently as last month! But first, let’s start with the basics.
THE GROWTH IN PASSPORT POPULARITY
In 1990, only 4% of citizens of the United States held passports. This was consistently a shock to Europeans, where international travel between nations was common. Certainly some of this was due to the immensity of the United States, per the old joke:
Texan: “I’m from the great state of Texas. My state is so big that you can get on a train, ride for a day and a night, and still be in Texas!”
Rhode Islander: “We used to have trains like that in Rhode Island.”
However, our expanse of land is not the only reason many Americans didn’t feel the need for a passport. Prior to 9/11, we Americans traveled in a much less restricted way. However, when the Intelligence Reform and Terrorism Prevention Act came into effect in January 2007, the law required U.S. citizens to have valid passports when traveling by air between the United States and Canada, Mexico, Central and South America, the Caribbean, and Bermuda.
Previously, traveling (by land, sea, or air) to these areas was fairly easy and required no passports. (Indeed, having grown up in Buffalo, I recall the many times my family or friends would dive to Canada for the day or even just for dinner, needing only to tell the customs officer our location of birth and whether we had anything to declare.)
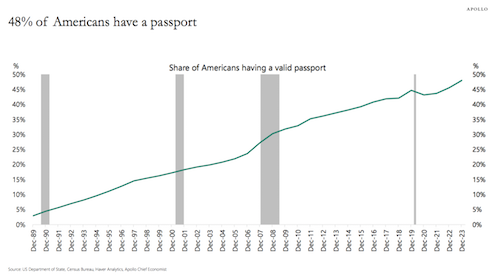
US Department of State, Census Bureau, Haver Analytics, Apollo Chief Economist
Over the course of decades, the number of American citizens holding passports has continued to rise. Back in 1997, only 6.3 million U.S. passports were issued; in 2017 the State Department issued a record 21.4 million passports. Now, 48% of U.S. citizens, just slightly less than half, hold valid passports.
Unfortunately, I have no statistics on how many people leave for the airport having forgotten their passports.
>
BENEFITS OF HOLDING A PASSPORT
Holding a valid U.S. passport comes with a number of benefits beyond having a photo that rivals your driver’s license pic as being one of the least appealing shots ever taken of you.
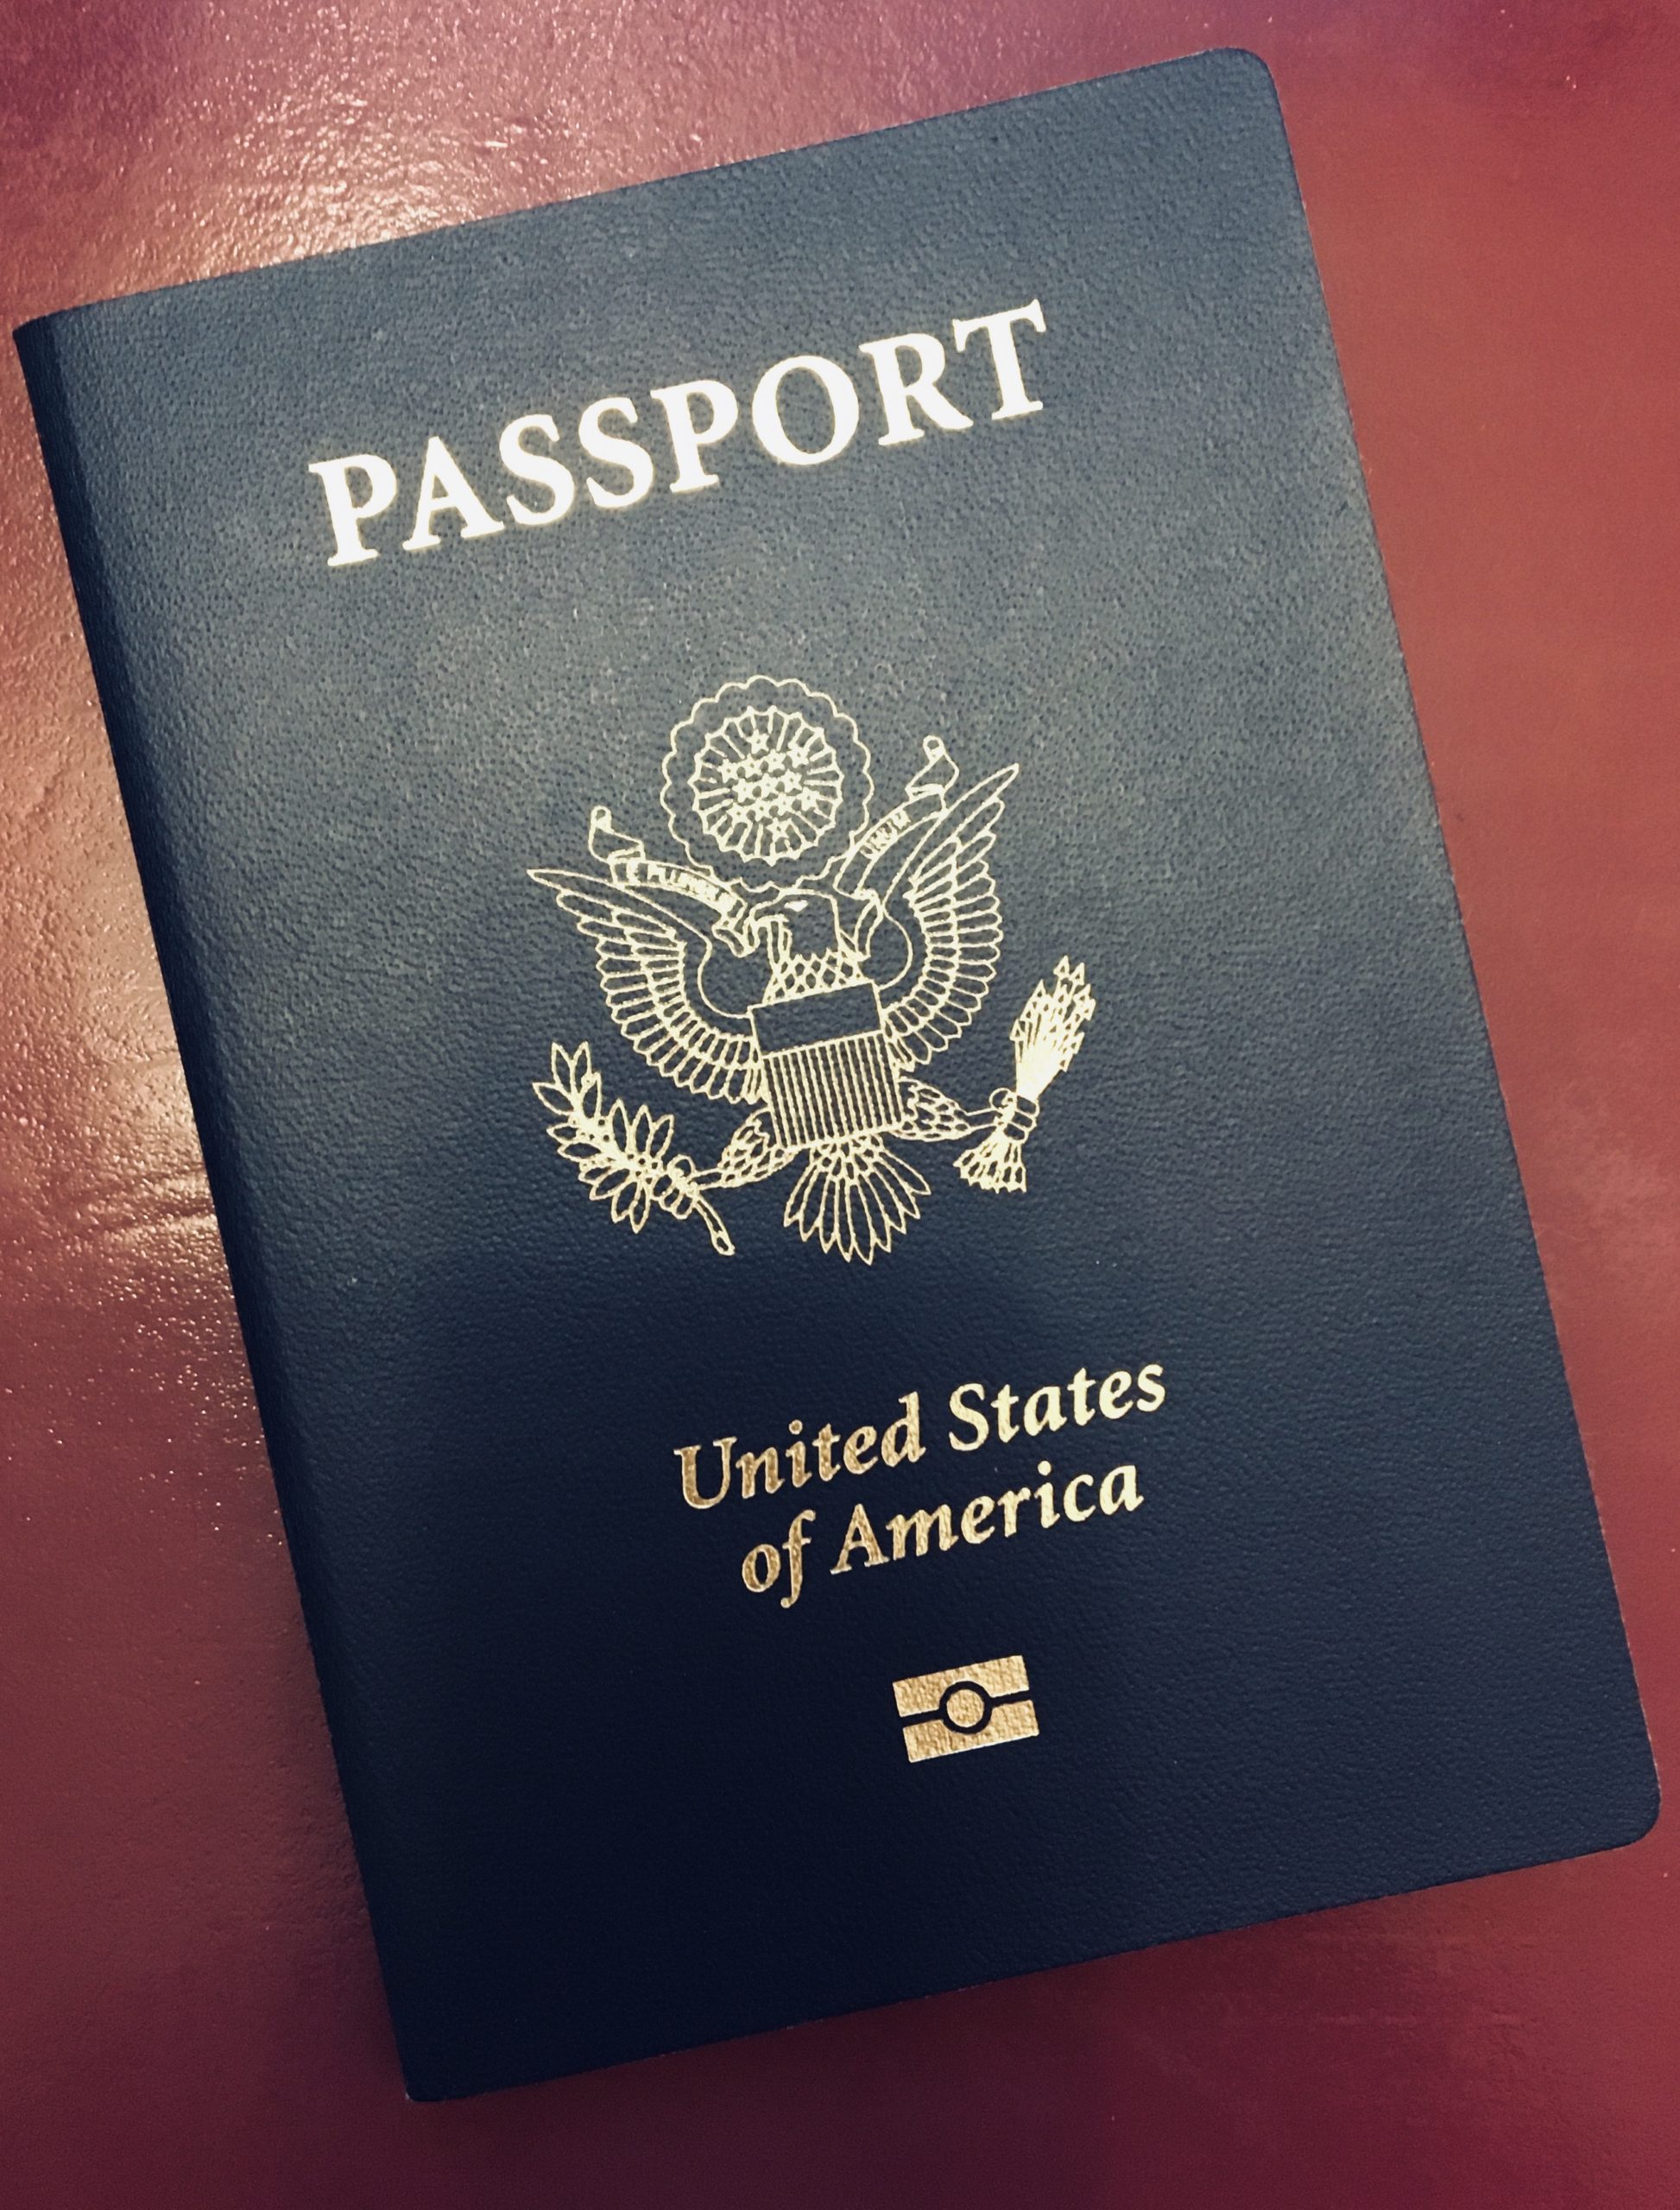
A passport isn’t just a nifty little book for getting pretty stamps. It’s an essential document that facilitates domestic and international travel, and serves as a crucial form of identification and proof of citizenship. In particular, a U.S. passport comes with additional benefits, including:
Visa-Free Travel — Your U.S. passport allows you visa-free or visa-on-arrival access to much of the world, making international travel easier and more convenient. In fact, current holders of a United States passport may travel to 188 (of 193) countries and territories without a travel visa, or with a visa-on-arrival.
Consular Protection and Services — In case of emergencies (like loss of one’s actual passport, natural disasters, legal issues, etc.), U.S. citizens can receive assistance from U.S. embassies and consulates around the world.
Global Entry Program —U.S. passport holders can apply for Global Entry, which expedites customs processing when you return home, saving time navigating airport lines.
Ease of Travel to U.S. Territories — Your U.S. passport lets you travel seamlessly to U.S. territories such as Puerto Rico, Guam, and the U.S. Virgin Islands. No, you don’t have to have a passport to travel to these locations — because they are part of the United States — but having a U.S. passport makes it much easier to travel to territories without any additional documentation.
HOW TO APPLY FOR A PASSPORT
Let’s assume you’re an adult applying for your own passport for the first time. (If you’re seeking a first-time passport for a child under the age of 16, the rules are different.)
Gather Required Documents
This is where being organized comes in handy. Gather the following documentation:
- Proof of Citizenship — Usually, a certified birth certificate will suffice, but if you weren’t born in the United States, you’ll need a Consular Report of Birth Abroad (CRBA), a Certificate of Naturalization, or a Certificate of Citizenship.
- Proof of Identity — No, a note from your mother will just not do. Be prepared to show a valid driver’s license, government ID, or a military ID, and bring a photocopy, too.
- Passport Photo — Your latest Instagram selfie may be gorgeous, but you’ll need a passport photo that meets specific requirements: 2″ x 2″, in color, taken within the last six months, with a white or off-white background. You also aren’t allowed to smile! There are apps to help you, but if you’re a member of AAA, I encourage you to get your photo taken there. I’m a “blinker” and the nice ladies at AAA put up with SO MUCH blinking until we secured a decent photo.
Missing any of these essential documents? Check out my post How to Replace and Organize 7 Essential Government Documents.
Fill Out Form DS-11
- Fill out Form DS-11 online using the Department of State’s form filler or download a PDF and print it. Alternatively, pick up a paper copy from a passport acceptance facility or any U.S. post office. The DS-11 lets you apply for a passport book, a passport card*, or both. If you think there’s a chance that you’ll be traveling a lot (did you win an around-the-world trip?), request a larger passport book with more visa pages. Just check the large book box at the top of the DS-11 form; there’s no extra charge.
- DON’T SIGN THE FORM until instructed to do so at the passport acceptance facility. Seriously, do not sign the form or you’ll have to start all over.
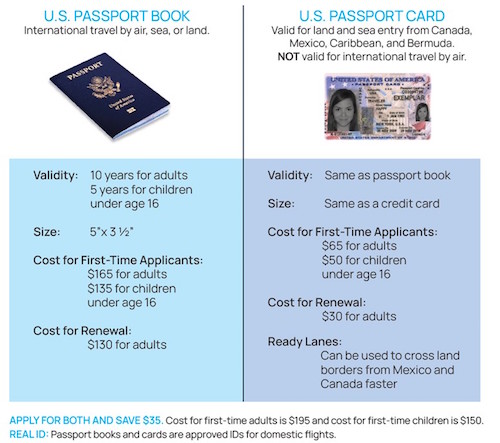
*A passport card is a wallet-sized, plastic passport (so it has no visa pages) that serves as proof of your United States citizenship and identity, with the same length of validity as the passport book. However, it’s not valid for international travel by air; you can only use it to travel by land or sea between the United States and Canada, Mexico, Bermuda, and Caribbean countries.
Submit Your Application in Person
- Visit a passport acceptance facility in person. Depending on your location, this may be a post office, library, or other designated location, with official staff for handling passport acceptance. The Department of State has a search page; put in your zip code to find the closest options for your needs. If your travel is urgent and in the next three weeks, make an appointment at a passport agency location.
- Bring everything (the completed Form DS-11, proof of citizenship, proof of identity, passport photo, and the required fees (check or money order, only)) with you to the passport acceptance facility.
(There are also special passport acceptance fairs for processing new passports, but mostly only in New Jersey and Georgia.)
Pay the Fees
- As of the latest update, the total cost for a first-time adult passport book is $165 ($130 application fee to the U.S. Department of State and a $35 execution fee to whatever facility takes your application); for a passport card, it’s $65 ($30 application fee, $35 execution fee); for both, it’s $195 ($160 application fee, $35 execution fee).
- For expedited service (see below for details), add $60 to your application fee; add the weirdly specific $21.36 to your application fee if you want your completed passport shipped 1-2 days after issuance.
- Check the current fee schedule, as fees can change over time.
Wait for Processing
- Enroll in email updates to track your passport’s status.
Have your eyes glazed over while reading this? Perhaps a video is more your style.
RENEW YOUR PASSPORT THE TRADITIONAL WAY: BY MAIL
This is all well and good, but what if you’ve had a passport forever, or applied for one the first time you ever read a Paper Doll post about passports, but now need to renew?
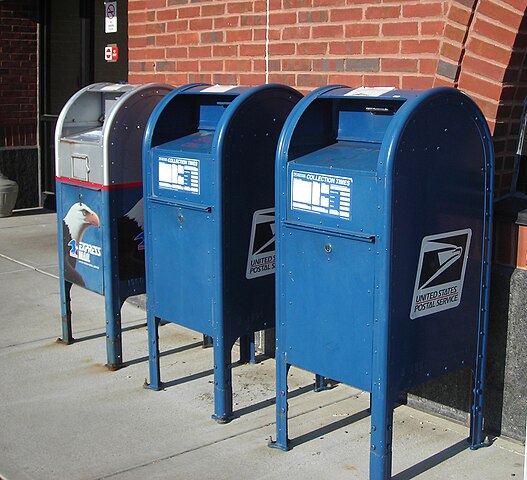
Mailboxes by EraserGirl licensed under the Creative Commons Attribution 2.0 Generic license
Well, the simple act of renewing your passport was never particularly simple (or swift). The traditional method of renewing your passport by mail still requires the following steps:
Make sure you meet the renewal requirements
- You must have your old, undamaged passport in your possession so you can mail it in — The problem? If you travel frequently for work or your personal life, you might have had to cancel trips because you would not have (or would not know if you’d have) your passport back in time.
- The passport had to have been issued within the last 15 years to you when you were at least 16 years of age. — The problem? If a college student has to renew a passport received as a child. It’s not always easy for college-age people to accomplish all the steps to renew their passports, as they’ll likely have to get their original documents from their parents, get themselves somewhere to take an acceptable passport photo, and get to a location that helps with passport renewals by mail.
- The passport must have been issued in your current name unless you can provide, by mail, a document like a marriage certificate, divorce decree, or court order showing a change of name to affirm gender. (For more on this topic, check out Paper Doll’s Ultimate Guide to Legally Changing Your Name.)
- Your passport had to have never been reported lost or stolen (even if you later reported it found or returned).
Fill out the passport renewal form, DS-82
Note, this is not the same DS-11 you use to apply for an original passport, so don’t think you can just send in a photocopy of your old form!
Access the DS-82 online with the passport form filler tool or downloading and printing a PDF and filling it out by hand. Print out the DS-82 and fill it out completely (and, honestly).
Put it all together
Package up and mail the form with your original passport book and/or passport card (which the State Department will return to you by mail), plus:
- a passport photo that follows all the rules stapled to the application form
- any applicable name certified change documents (the State Department will return your copies)
- a personal check or money order made out to the U.S. Department of State for the cost of renewing plus all applicable fees. No credit cards. No cash. No Venmo. Again, if you’ve got a college kid hoping to take a semester abroad, these things may come as a surprise to them. Whether you’re writing a personal check for yourself or your college kid (who may not even have a checking account), be sure to write the full name and date of birth of the applicant at the top of the check!
Send this application package via a trackable method
The State Department can give you status updates once your passport is in the system, but it doesn’t know whether your envelope is in your corner mail box, at the post office, or sitting on a tarmac at an airport in a random city.
A Sidebar on Passport Renewal Fees
There’s a lot going on with passport fees. To start, it costs $130 to renew a passport book, $30 to renew a passport card, and $160 if you want to simultaneously renew both (and sadly, there are no discounts for renewing both at the same time).
However, if you want to speed up your renewal by mail, there are a few different approaches.
- Expedited service — Think of this as if you were buying a double-caf macchiato for the folks at the State Department to get them to speed up their time spent processing your passport. This adds an extra $60 to your application.
- Faster delivery of your completed passport — This is separate from speeding along the work of the State Department. For an extra (again, weirdly specific) fee of $19.53, the State Department will mail your completed passport (whether you have paid for expedited service or not) within 1-2 days of issuance, and you will receive it within 1-2 days of them having mailed it.
You can also speed everything along by sending your renewal packet (with your application, photo, check, old passport, and any supporting documents) via the US Postal Service’s Priority Mail.
Per the State Department, the current routine processing time for passport renewals is 6-8 weeks; for expedited service, it’s running 2-3 weeks. And these estimates only account for processing, not for mailing (in both directions).
What if you need a super-speedy renewal? In an urgent situation, you can make an appointment to visit a passport agency. You can only secure such an appointment if you have urgent emergency travel to a foreign country in the next 14 calendar days, such as if an immediate family member outside of the United States has died, is dying and/or in hospice, or has a life threatening injury (or if you need a foreign visa in the next 28 calendar days).
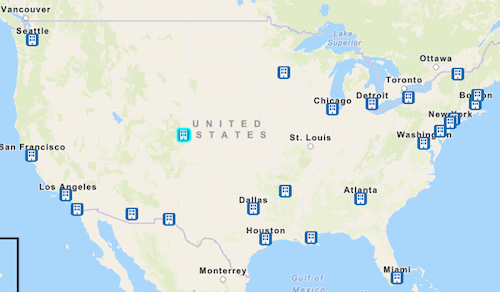
Note, if you live in the northeast, you’ll have your pick of options for passport agencies; in the southeast, Atlanta and Miami are your only choices. However, a huge portion of the interior of the United States is a multi-day drive from a passport agency office, so be organized and plan ahead!
Depending on whether you’ve already applied for your renewal and time is getting short or the trip (or the passport renewal) has caught you by surprise, there are different approaches to securing an appointment, so click the above link to see your options.
To wrap it all up, here’s how you renew your passport using the traditional renewal-by-mail method.
NEW: RENEW YOUR PASSPORT ONLINE!!!
Now that you know the standard way to renew your passport (book or card) by mail, here’s a curveball. The United States Department of State has an intriguing new “beta” program where you can renew your passport online!
As of June 2024, eligible American citizens can skip the lines at the post office to renew their passports!
Just don’t think this is going to speed up the process, or expect that it’s going to be significantly more convenient, at least in the near term. However, if you’re eligible, you can at least renew your passport while sitting in your jammies at home.

Woman in PJs at Computer designed with Bing Image Creator
Note, that this is a “beta” release of the online passport renewal system means they are still working the kinks out. Some aspects of the online passport renewal system are similar to what you’d do if you processed everything by mail, but there are several differences, depending on your personal status and your previous passport situation.
Online renewal requirements related to you
- You are at least 25 years old.
- You are not changing the name, gender, date of birth, or place of birth associated with your current passport. So, online renewal isn’t appropriate for anyone who has changed their name since their last passport was issued, whether due to marriage, divorce, matching their gender, or otherwise.
- You won’t be traveling internationally for at least 8 weeks from the date you submit your application. There’s no expedited service during the beta phase of this renewal by mail, so this program isn’t faster; it’s just (when everything else works), easier and prevents you have having to schlep out in the 90°+ temperatures.
- You live in the United States (in either a state or a territory). If you’re living in a foreign country or have an Army Post Office (APO) or Fleet Post Office (FPO) address, you don’t qualify for passport renewal by mail. (Again, this is likely because of beta program. Requirements are likely in flux.)
Online renewal requirements related to the passport
- You’re applying to renew a regular (tourist) passport. This online program doesn’t cover renewals of specially-issued passport statuses, like diplomatic, official, or service passports. So, if you’re a new American diplomat, like the Stephanie Syptak-Ramnath, our brand-new U.S. Ambassador to Peru, you’ll have to renew by mail (or, y’know, get your fancy assistant to help).
- The passport you are renewing was issued between 2009 and 2015, or over 9 years but less than 15 years from the date you plan to submit your application, and it is (or was) valid for 10 years.
- You have your passport with you, and it is not damaged or mutilated, and you have not previously reported it as lost or stolen. Unlike when you renew by mail, you’ll be keeping that passport with you; don’t mail it in!
A few other differences exist. For example, you don’t have to (and indeed, can’t) pay your renewal fees by check. Instead, pay your passport renewal fee by credit or debit card. Yes, this means you can get points or airline miles. Yay!
You can upload a digital passport photo. However, it still has to follow all the same requirements, so again, no goofy selfies!
Finally, understand that the passport you’re renewing will be canceled after you submit your application so you can’t use it for international travel in the interim.
Once you know you are eligible:
- Create an account at MyTravel.gov.
- Sign in to your new account and select the option to renew your passport to start your application. Don’t worry if you get interrupted; you can save your application and finish it later. However, you only have 30 days to complete the application once it’s started; after that, you’ll need to start from scratch.
- Enter information about your current passport and travel plans.
- Upload your digital photo, following all of the rules.
- Digitally sign the application and pay for your application fee(s). You’ll get a series of confirmation emails letting you know that the payment is pending, then that it’s been processed. (This may take up to three days.) If something goes wrong and they can’t process the payment, they’ll let you know that, too, so be sure to check your spam folder if you don’t see update emails.
- Wait a week; then enroll to get updates in the Online Passport Status System. (Yes, it’s silly that this isn’t an automatic part of the account set-up process.) They’ll notify you as your status changes, such as when your application is in process, when it gets approved, and then when your passport is mailed.
Sticking points of the ‘beta’ passport renewal program
You can’t necessarily start your application at the time or on the day of your choice.
The system opens for a limited mid-day Eastern Time window each day, and closes once they reach their limit for the day. So, if you try to start your application at 4 p.m. on Thursday and you’re not allowed in, you can either try again the next day (or any other day) or renew by mail.
The State Department just began this program in June, so they’re limiting the number of applications accepted each day so they can monitor the program’s real-time performance. They want to make sure the software (and the employees using the software) aren’t inundated and that nothing breaks. (This is a good thing, so don’t be that person, like in the TikTok skits, complaining that a restaurant won’t stay open past official hours because you’re hungry and arrived late.)
Eventually, this online passport renewal program will get a full launch, and we can expect some (but not all) of the requirements may be relaxed.
WHAT SHOULD YOU DO NOW?
- Look at your passport to see when it expires.
- Consider your travel plans (or make some travel plans) and figure out how far in advance you need to renew to be able to travel. Many countries won’t allow you entry if your passport expires within six months.
- If your passport expires in the coming year, renew it now so that you don’t have to worry about additional fees for expedited processing or shipment.
- If you don’t have a passport at all, consider the possibilities. It’s not just so you can travel internationally at the drop of a hat if you win a free trip or get offered a job requiring international travel. A passport also offers advantages for flying domestically.
- If your college-aged (or college-bound) kids don’t have a passport, encourage them to apply this summer. If they suddenly have the opportunity to study abroad, visit college friends, or participate in exciting school programs (like performing or playing sports abroad), they’ll usually have a very brief time in which to make arrangements.
Still need encouragement? If you renew your passport and go to France, you can send your envious friends postcards and letters emblazoned with La Poste‘s new scratch & sniff “La Baguette” postage stamps!

Paper Doll Shares 12 Kinds of Paper To Declutter Now

After last week’s 24 Smart Ways to Get More Organized and Productive in 2024, we continue with GO Month, an entire month devoted to getting organized and being productive. I thought it might be time to hit a classic Paper Doll topic topic: decluttering papers!

Quite often, Paper Doll focuses on the papers and documents you need to acquire and keep. Always start with the essentials:
How to Replace and Organize 7 Essential Government Documents
How to Create, Organize, and Safeguard 5 Essential Legal and Estate Documents
The Professor and Mary Ann: 8 Other Essential Documents You Need To Create
Ask Paper Doll: Do I Really Need A Safe Deposit Box?
However, we must also look at what we no longer need, and what papers we’d be better off without.
OLD RECEIPTS
Some people throw out all of their receipts. Their desks, bags, dresser-tops and bedside tables are clear of crumpled papers, but they have trouble reconstructing their financial history at tax time, they can’t figure out where their cash went, and can’t prove ownership or value of high-ticket items.
More often, people go to the opposite extremes and keep all of their receipts. When working with clients, I’ll often find zip-locked bags and drawers filled with random receipts. In addition to receipts strewn about, the collected and squirreled-away receipts tend to be older, anywhere from a year to five+ years in the past.
These clients have a vague sense that someone once told them to save receipts in case they needed to return something or create a budget based on tracked expenses. The problem? Neither of these well-intentioned reasons are based on a realistic view of their paper-cluttered lives.
Yes, you should hold onto receipts for purchases you might return, but most return policies that limit how long after the purchase something may be returned. In general, you’ll need the receipt to return something for a full refund for up to 30 days after purchase; after that, the best you can hope for at most retailers is store credit. (Stores vary, and Nerd Wallet has a great piece, Return Policy Guide: What to Know and Which Stores Stand Out, on the most generous return policies at stores like Costco, Kohl’s, and IKEA.)
Similarly, if you were going to track your expenses to create a budget, receipts from years ago won’t help now. Paper Doll gives you permission to start fresh with January (and last week’s receipts) and let go of the bulk of your random receipt clutter.

Woman with Receipts Photo by Karolina Grabowska at Pexels
Reasons to Keep Receipts
There are five main reasons to keep receipts, and none are “forever” reasons:
1) The item is returnable — only keep the receipt until the return period ends.
2) It’s a big-ticket item — keep a Big-Ticket Purchases folder for these kinds of receipts in your financial filing section.
Figure out your comfort level to determine whether “big-ticket” is $50 or $500 or $5 zillion; if the receipt is above a certain threshold, you may want to add a rider to your homeowners or renters insurance policy.
The IRS allows taxpayers to choose between deducting state taxes and sales tax; if you opt for sales tax, the default amount is often the wisest option; however, you’ve purchased a house, auto, boat, private plane, or personal rocket ship, you’ll definitely want proof of that big ticket deduction.
3) The receipt helps you prove ownership. This tends to go along with Big-Ticket items, as you’ll rarely be asked to prove that the soon-to-be-moldy asparagus in your fridge actually belongs to you.
4) The receipt is for something tax-deductible. Non-business purchases are more likely to be deductible if they’re related to healthcare, government fees or taxes, child/dependent care, or tax credits for things the government is trying to promote, like environmentally beneficial or energy efficient home improvements.
5) The purchase will be reimbursed by someone (employer, insurance company, etc.) at a later date.
Additionally, if you’re divorcing and seeking alimony and/or child support, you may need to collate receipts to prove the costs of life maintenance.
Here are some basic guidelines for the receipts you can discard, with a few caveats.

Crumpled Receipt Photo by Michael Walter on Unsplash
Cash Receipts
- Let go of cash receipts for consumable products (like food and beverages) whenever you want. If you’re not tracking expenses, you can toss them immediately. You can even refuse to accept receipts.
If you buy a Slushie at 7-Eleven or a burrito at the taco truck and pay with cash, you’re generally safe tossing receipt — unless you watch too many Law & Order reruns and are convinced you need to be able to prove your time-stamped whereabouts at all times.
- Keep cash receipts for things you might return, but only for the duration return period. After the return policy, buh-bye!
For example, if you buy clothes, a toy, or anything for your home, car, or family with cash, keep a plain #10 envelope to stash purchase receipts. Keep the envelope near where you handle your daily finances so that you know where to find receipts if you need to make a return.
Set a reminder, perhaps on the 5th of every month, to flip through the receipts. Once past the store’s return policy, shred the receipt.
The above assumes you’re not buying fancy-pants, expensive things with cash (and that you are not a member of a Sopranos-style crime family. If you are, please confer with your accountant.)
Debit and Credit Card Receipts
- Keep debit and credit card receipts until the return period has expired and you’ve eyeballed your statement or online account to verify that the final price is accurate.
As with cash receipts, pop credit card and debit card receipts in that #10 envelope. If you get paper statements for your bank and credit card accounts, reconcile the values monthly when your statements arrive. If you no longer get statements, reconcile receipts against your running online account weekly.
Deposit Slips and ATM Withdrawal Slips
If you think about it, a deposit slip is really a receipt, only instead of paying a store or service provider for what they’ve given you, you’re paying the future version of yourself who will spend that money later.
As for the five reasons to keep receipts, none particularly apply here. If you wanted to return the cash you withdrew, you could do that without the ATM slip, and taking or giving back your own money doesn’t involve tax deductions. Reimburse-ability doesn’t apply. The “big ticket” status isn’t applicable with withdrawals (as banks limit how much you can take out in one day); deposits are a little stickier, as there’s a paperwork rigamarole to go through if you ever deposit more than $9,999.99.
Of course, if you’re sort who worries about that pesky Law & Order issue regarding your whereabouts, you might also fear having to prove ownership of the money you’ve withdrawn.
In general, treat these as if they were debit or credit card receipts, and save them until your bank has accurately recorded the information. (But if you are making manual deposits of $10,000 or more, note the purpose, save the receipts, and tuck them in your tax prep folders just in case the amounts are questioned in an audit.)
A Few Other Notes About Receipts
Your pharmacy will print a summary of all prescription purchases. Once you’ve checked your receipts against your bank or credit card statements, you can shred pharmaceutical receipts; just ask your pharmacy to provide printout in early January for the preceding calendar year. (It’s to your benefit to only use one pharmacy so you don’t have to keep track of these things. If you must use a different pharmacy — if you’re on vacation or your regular pharmacy is out of your prescription medication — save those receipts.)
Collect all receipts for tax-deductible expenses (like charitable donations, or medical and pharmaceutical expenses in your Tax Prep hanging folder until you’ve completed your taxes for the prior year. (You won’t know until the end of any given year whether you accumulated a high enough percentage of your adjusted gross income to deduct itemized expenses.)
Keep receipts for anything for which you are due reimbursement until you get paid. This may include:
- Work and travel-related expenses where your company reimburses you. Label a folder “Reimbursable Expenses” and toss receipts in there. Set a reminder on your calendar for the week prior to when expense reports are due, to ensure you don’t put it off and delay recouping your costs.
- Healthcare expenses for which your health insurance company reimburses you. Usually, you pay a co-pay or co-insurance to a healthcare provider, but sometimes providers won’t file insurance claims. You may have to submit documents from the provider, plus your receipt, and forms directly to your insurance company to get reimbursed for medical expenses.
- Sometimes, you’ll need to submit receipts to your car or homeowners/renters policy insurance company for repairs done to your auto or home. You might need to submit receipts to someone else’s insurance company if the other party was at fault. Always keep the original and provide them with photocopies).
If you’re reimbursed for a high-dollar amount for anything unusual, keep the receipt and the proof of reimbursement in your tax prep folder. If audited, it will be easy to say, “Hey, I anticipated that you’d wonder about this! So, here’s the receipt where I chartered a helicopter to get my boss to the top of the mountain for a super-important meeting, and here’s the income you’re questioning, where I was reimbursed for what I paid out.”
Always have a system for collecting your receipts until you get home. Do not stuff receipts in your coat pocket, no matter how many people are behind you in line. Do not put receipts in the shopping bag, because it’s too easy for them to fall out in the car, or for the bag to be discarded with a receipt still inside. Make 2024 the year you resolve not to have any crumpled receipts in your pockets or your car!
[We’ll take a fresh look at digital receipts in a future post, but the rules regarding what you can let go of are the same for digital as paper.]
OLD HOUSEHOLD UTILITY BILLS
It’s common for me to find that clients have saved multiple years of old electric, gas, water, and sewer bills. They shrug. Someone, somewhere, told them they were supposed to save all records.
People’s parents (particularly fathers) rightly told them that it’s important to keep all records regarding auto maintenance. A full and detailed record helps boost the resale value of a car. (Secondarily, if there’s a recall, the car owner can get reimbursed for work previously done.)
The thing is, even if you keep meticulous records, a prospective home buyer isn’t going to offer you more for your house based on ancient utility bills. Knowing what it cost to heat your home in January or cool it in July back in 1992 is not useful information!

Little House Photo by Kostiantyn Li on Unsplash
Keep paper utility statements for the prior calendar year and the current one, just so that you can easily compare year-to-year (for example, to trace the likelihood of a leak vs. “Oh, yeah, July water bills are always high because we use the Slip & Slide). Shred the older ones.
(Note: if you take a tax deduction for a home office for your home-based business, keep utility bills as supporting documents for business tax returns.)
OLD INSURANCE POLICIES
People have a habit of keeping really old insurance policy paperwork.
I advise that if you don’t have any pending claims against your insurer and nobody has a lawsuit against you, it’s OK to shred old declaration pages and toss the generic boilerplate from old home and car policies. You may want to keep the front page of the policy listing the old policy number and contact information for the insurer.
With health insurance policies, if you’ve changed policies recently, I find it’s helpful to keep the paperwork related to coverage you had in the prior calendar year. While medical providers are supposed to process claims within 90 days, I’ve seen where physicians’ offices were so disorganized they were trying to recoup fees (either through insurance or directly from patients) more than a year later. Keeping the essential info about the policy can help if you get caught with “zombie” claims. But policies older than the prior calendar year, unless you’re still fighting about claims, can be shredded.
One insurance policy caveat: If you cash in a life insurance policy, either for the cash value or after someone has passed, make sure you log that you have done so. I’ve worked with clients where there’s been great excitement upon finding old life insurance policy paperwork, only to learn the original policy holder cashed in the policy up to 50 years earlier, but never destroyed or discarded the old paperwork. Bummer.
For clarity, if you cash in a policy, make a note somewhere accessible (like your inventory of assets and debts) so that your future fuzzy brain or your inheritors can make sense of what happened.
EXPIRED WARRANTIES
If the warranty or guarantee period has already expired, toss out the warranty/guarantee card. (If it was a bigger ticket item and you’d stapled the receipt to the warranty card, make sure the receipt gets saved.)
If you no longer even own the product associated with the warranty or guarantee, dunk it like a basketball! Swoosh! (But shred the receipt.)
MANUALS FOR THINGS YOU DON’T OWN (AND SOME YOU DO)
If you don’t own the thing anymore, you don’t need the manual!
If you own the thing, but know how to use it, you don’t need the manual! (I often joke that if you don’t know how to use your toaster or hair dryer, you have a bigger problem than clutter.)
For guidance, there are ways to pare down and organize your manuals, find digital alternatives, or even digitize your collection to help keep things streamlined:
Paper Doll’s Manual Override – Part 1: Declutter and Organize Owner’s Manuals
Paper Doll’s Manual Override – Part 2: Twelve Resources To Find An Owner’s Manual
Paper Doll’s Manual Override – Part 3: Create & Organize A Digital Owner’s Manual Library
OLD DRIVING DIRECTIONS MADE REDUNDANT BY GPS

As you go through your files and piles of old papers, you may find driving directions to anywhere from hotel venues to summer camps to doctor’s offices.
If you’re never going there again, toss the paper. If Siri or Google Maps can get you there, toss the paper. If there’s anything special about the directions (maybe for the last tenth of a mile) and you could get the information again easily, toss the paper. If that last bit of the trip requires special instructions, create a contact (for the venue, the camp, or the office) in your phone and put those final, special directions in the “Notes” field.
DUPLICATE DOCUMENTS
Have you ever accidentally printed a copy of something multiple times and kept the copies? If the item is a form or a template you have to share (physically) with others and can’t just forward a digital file, make a folder. But if you just have random duplicate or triplicate or seventeenplicate of something you printed for no discernible reason, recycle or shred, as applicable.
OLD BOARDING PASSES
Yes, most of us now use digital boarding passes, but if anything changes about your flight, the nice typey-typey airport people will give you a new set of paper boarding passes. When you get home, don’t toss them in a pile with other crumpled receipts. Old boarding passes are of no future use to you. Shred them!
FYI, those QR codes along the edges have all sorts of personally identifiable information about you. They may not be useful to you, but leaving them out on your desk for anyone to find makes it easier for someone to purloin that information.
OLD CONFERENCE PAPERS AND BINDERS
Not all conference material is created equal. Go through your old conference binders and folders, especially those from early in your career. Be ruthless about letting go of handouts and notes related topics that no longer interest you or fields of study in which you never worked, or never intend to work again.
Trust that any information you want can be found again, and found more easily than spelunking in piles of old binders in the back of a closet.
Similarly, get rid of flyers, programs, and any other conference materials that don’t contain essential information.
JUNK MAIL

Did you ask for it? Do you want or need it? No? It’s junk! Instead of letting it pile up, shred it and sent it on its way. To stop junk mail in its tracks:
- Opt out of credit card and insurance offers for 5 years by going to optoutprescreen.com or call 1-888-5-OPT-OUT (1-888-567-8688), operated by the major credit bureaus. You’ll have to supply personal information like your name and address. They’ll also ask for your Social Security number and date of birth; it’s optional, and they’ve always claimed it’s confidential, but this is the 21st-century, so who knows?
- If you prefer to opt out permanently, start the process at optoutprescreen.com or call 1-888-5-OPT-OUT, but to complete the request, they’ll make you sign and return a Permanent Opt-Out Election form.
For other kinds of marketing junk mail, register at the Direct Marketing Association’s (DMA) consumer site, DMAchoice.org and pay a $4 processing fee for ten years of protection from most (but not all) junk mail.
OUTDATED, LOW-QUALITY, OR IRRELEVANT INFORMATION
I once worked with a (very) organized author. I initially joked that I wasn’t sure how I could help, as her office seemed orderly and tidy. However, when we looked in her files, I saw the problem.
The client wrote novels with storylines that included medical information, so she’d saved a few decades of internet printouts regarding diagnoses and treatments of various conditions. In almost every folder, any clip from the web from more than two or three years earlier was completely outdated. While some fields may include timeless information, research related to the sciences is likely to be superseded by newer data and analysis each year.
Unless your actual job description requires analyzing what used to be advised or believed vs. what is now known to be true, toss the outdated information.
Similarly, let go of any clipped articles or printouts that reflect information you already know (or that has become common knowledge), that has been disproven, lacks credibility, or isn’t related to your work or interests.
Tips from 1999 on traveling to Europe won’t fly (pun intended) in a post-9/11 world, but even advice from pre-COVID may not be valid. Introductory-level parenting articles from when your kids were tiny might have been useful, but if you’re cruising toward grandparenthood, you’ll find guidance has changed. Just let the internet be your filing cabinet!
DAMAGED PAPERS
This should go without saying, but discard any papers that are damaged due to water, fire, or animal predation. Papers with tiny blobs of mold can damage your neurological and pulmonological health. If a piece of paper is readable but yucky, digitize it (but then disinfect your scanner).
FINAL RESOURCES
You’ll be delighted to lessen your paper clutter knowing that much of what you’ve saved (due to misinformation, fear, or just plain inertia) can go. However, anytime there’s anything personally identifiable in your papers, make sure you shred them.
Paper Doll’s Secrets: Shred Successfully & Save Money is a good resource for making it easy to destroy what you don’t need and prevent identify thieves and other sneaky folks from benefiting from your decluttering.
Finally, knowing what to get rid of is only part of the paper decluttering process. For a full-on look at strategies for knowing papers to keep, and for how long, check out my classic ebook, Do I Have To Keep this Piece of Paper.
.jpg)
Follow Me