Archive for ‘Tech’ Category
Back-to-School Solutions for the Space-Time Continuum
According to the Einstein page at Stanford University covering questions about Special and General Relativity:
This new reality was that space and time, as physical constructs, have to be combined into a new mathematical/physical entity called ‘space-time’, because the equations of relativity show that both the space and time coordinates of any event must get mixed together by the mathematics, in order to accurately describe what we see. Because space consists of 3 dimensions, and time is 1-dimensional, space-time must, therefore, be a 4-dimensional object. It is believed to be a ‘continuum’ because so far as we know, there are no missing points in space or instants in time, and both can be subdivided without any apparent limit in size or duration. So, physicists now routinely consider our world to be embedded in this 4-dimensional Space-Time continuum, and all events, places, moments in history, actions and so on are described in terms of their location in Space-Time.
Whew. That’s a lot. But I’ve got good news. This won’t be on the test! (We’ll leave it to the physics majors.)
But as a professional organizer, I often have to solve problems that involve time (and the management of tasks) and space (and the excising of clutter and the rearranging of the molecules of what remains). So, in this second week of looking at solutions that help our students go back to school, I’m sharing two products I praise often for handling the “time” part of the equation, and a few new delights for the space aspect.
TIME AND RELATIVITY
Getting firmly back onto “clock time” is key to the back-to-school process, and not just for little kids. Parents, teachers, and college students are just as much in need of time management support as little ones.
Getting control over the clock, especially after the lazy, hazy, crazy days of summer (and whatever these last 18 months have been) means really having a sense of time as it passes. Getting the “feel” of how long a quarter hour or ninety minutes really is can be hard, not just for kids, but for people with ADHD and various executive function disorders, and for any of us who’ve had a “flexible” relationship with time over this recent while.
It’s not just kids (or adults working in loosey-goosey fields) who have trouble with time. I’ve worked with engineers and scientists — professionals for whom precision is essential — on their productivity skills. We’ve started with an exercise where I tell them to begin a task we’ve discussed, and I will stop them after they’ve worked for eight minutes. I’ve seen two things happen.
When doing administrative work, like expense reports or employee reviews, these clients struggle. 90% of them have looked up at me early, insisting that surely it’s been eight minutes already. For about a third of those, they are certain at least that much time has passed before even the five-minute mark! They may as well be kicking the back of my seat and whining, “Are we there yet?”
In contrast, when these same clients are set free to work on their passion projects, to delve into whatever science-y, engineering-y thing they love (think: the Professor from Gilligan’s Island), they are often shocked when I call, “Time!” Sometimes, in just eight minutes, they’ve forgotten I was even there! (I try not to be offended by this.)
I guess Einstein was really right about time being relative, eh?
When you’re not “in flow,” when you’re focused on the time but not enthusiastic about the task, time passes slowly. If you don’t get into the flow state, into the groove, you’re constantly checking on the time and not embracing the task with your whole heart and mind, a recipe for dissatisfaction and unfinished work.
Or, you find ways to self-soothe, to do anything but what you’re supposed to, and you get into a flow state but doing the wrong thing. An analog clock, one that shows you the time as it passes, can be a comfort, to assure your “monkey mind” that you won’t be forced to do something boring and distasteful forever. The clock makes time a concrete concept; if you can see that you only have to do your workout routine for 20 minutes, your brain will back off of the obsession with how long it’s taking to do those downward-facing dogs or lunges or whatever.
Conversely, if you are in flow (on work or homework and hopefully not scrolling through social media), it can be hard to effectively transition from what you’re doing now to what you’re supposed to be doing next. Again, an analog clock with a gentle alarm can help you do this.
Also, friend-of-the-blog Dr. Melissa Gratias has a great post, “What is a “Task Transition” and How Can It Make Me More Productive?” on this very topic, and while the advice is geared for grownups, you can modify the instructions to help students get better at transitioning between projects.
For more on flow, check out the “Sidebar on Flow and the Unpronounceable Mihaly Csikszentmihalyi” in my post from last March, Flow and Faux (Accountability): Productivity, Focus, and Alex Trebek or watch Csikszentmihalyi’s superb TEDTalk, below.
Longtime readers know how much my profession loves one particular kind of analog clock/timer.
Time Timer
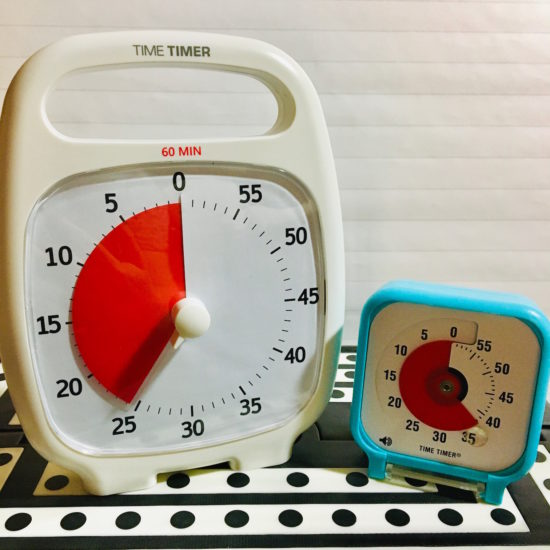
Time Timers aren’t just clocks. They have three important features:
- They’re analog. Most clocks and timers these days are digital, and for a lot of people, digital time is pretty amorphous. 11:12 and 12:11 don’t feel appreciably different.
- They’re visual. Digital clocks don’t show you the passage of time, they just show you numbers. You can ask Siri or Alexa to tell you when 45 minutes are up, but depending on where you are in the flow state, not really sensing the passage of time can lead to anxiety. But all of the Time Timer products (including the Original, the Plus, the Mod (my favorite!), the watches, and the apps) have a colored disc that shows the passage of time so you or your kids can have a more sensory experience and see time passing.
- They’re not distracting. You don’t hear Time Timers tick like most analog clocks or timers. There’s an optional audio alert when time is up, but otherwise, there’s nothing to steal your focus.
There are many different ways to corral the benefits of analog clocks, especially the Time Timer, into your back-to-school process. For example:
Busy parents are trying to get their kids up, get themselves put together, make sure some kind of breakfast is attempted, pack lunches, sign permission slips, and get everyone out the door. That’s a lot to do, and mornings can be a slog. Setting up a colorful Mod in the high-traffic kitchen keeps everyone’s eyes on the prize.
Got tiny humans who take way too long on morning grooming, meaning that making the bus is an iffy proposition? Setting the Time Timer PLUS 20 Minute on the bathroom counter will let them see that washing the breakfast off their faces, brushing their teeth, combing their hair, and getting dressed need to be accomplished in a bit more orderly fashion and look…that’s another five minutes or more of the red disc disappearing! It’s helpful at both ends of the day, because an orderly bedtime ritual (with a combo dry-erase board and TimeTimer) can make mornings flow better, too.
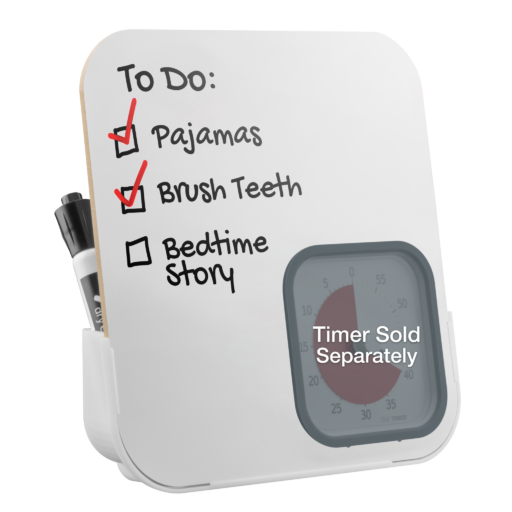
Note: I’m not sure what kind of societal norm we’ve developed to keep clocks out of bathrooms, but Paper Doll is coming out firmly against that. As someone who has occasionally been known to hold a book in my left hand while lackadaisically holding the hair dryer in my right hand, I think an analog clock, particularly a Time Timer, belongs in the corner of any bathroom counter-top to keep our attention where it belongs. (Speaking of bathrooms, last November, when we were in the thick of the pandemic, I wrote Organize Your Health: Parental Wisdom, Innovation, and the New Time Timer® Wash. Given Delta, Delta+, Lambda, and whatever Greek letters might come our way, it’s worth revisiting.)
Are your older students (in high school and college) going to be taking standardized tests this year? SATs? ACTs? GREs? LSATs? M-I-C-K-E-Y-M-O-U-S-Es! (Sorry. Got carried away for a minute.) These timers are ideal for practicing timed sections of those exams.
And, of course, Time Timers are a great way for high school and college students, as well as office workers, to get (and stay) in the flow when using the Pomodoro Technique, whether you’re using the standard 25 minutes of focus/5 minutes of break method, or a modified 45 minutes of work/10 minutes of break approach.
For more ideas, check out how the Time Timer can be used:
- In education (for students, teachers, and administrators)
- At home
- At work
- In “special needs” circumstances
Academic Planner: A Tool For Time Management®
If you’ve been reading Paper Doll for even a little while, you should be familiar with the Academic Planner: A Tool For Time Management®, the brainchild of my colleague (and fellow Cornell University alumna) Leslie Josel of Order Out of Chaos. Last year, when Leslie’s latest book launched, I interviewed her for Paper Doll Peeks Behind the Curtain with Superstar Coach, Author & Speaker Leslie Josel.
Back in ye olden days (that is, when Paper Doll went to school), middle and high school students didn’t generally have planners. The more organized of us had top-bound spiral notebooks, as though we were junior reporters (or youthful spies) and we used them as assignment notebooks. Teachers recommended faithfully copying down each assignment before leaving the classroom. If these instructions were followed, you’d get home at the end of the day with a page or two of clear notes of what pages you had to read, what problem sets you had to complete, and what essays needed to be written.
Unfortunately, assignment notebooks are like to-do lists. They tell you what to do and when it needs to be finished, but provide no context. (Maybe students should read my post from last month, Checklists, Gantt Charts, and Kanban Boards — Organize Your Tasks?)
So, somewhere in the 1990s, middle and high schools started giving out school-themed paper planners for students to track their projects. It was an improvement, just like planners adults used. Those planners gave kids space to write due dates, but no guidance for keeping track of all the granular details of a complex teenage life—not just classes, homework, projects, and exams, but extracurricular activities, part-time jobs, and family obligations!
This is where the Academic Planner: A Tool For Time Management®, a Family Choice Award-winner, comes in. Leslie’s patented calendar layout helps students see their school assignments right along with their after-school activities so they can plan when they have time to get work done and not merely know that they have to get it done.
 © 2021 Order Out of Chaos
The planner has a wide variety of features and benefits:
- Instead of having to write course names over and over as assignments come up, the planner has unique subject pages at the front and the back so students only have to record class subjects (for which 7 subject boxes are provided) once! If it’s written once and always there, you can’t forget it!
- The planner has oodles of space to enter all Monday-Friday school/after-school activities from 2 p.m. until 9 p.m. as well as weekend obligations. This makes it easier for students to plan and manage their time and tasks.
- The pages of the planner line up with the grid of classes on a class-by-class basis, so it’s easier for students to record their weekly schedules and review them. (This is a plus for all those schools that use those weird modules so that every week’s schedule is different!)
- The planner lays out the days of the week horizontally across the top of the weekly two-page spread instead of putting half a week, stacked, on either side. This is much more like the kind of layout most adult paper planners use, and the grid format makes it easy to enter and view assignments and due dates.
- Because a weekly view gives a pretty constrained sense of what needs to be accomplished, the planner also has monthly pages and large pages for writing complex assignments and activities.
See it in action:
In addition to the planner itself, there are a variety of downloadable extras, including a project planning guide, a study planning guide, printable academic planning worksheets, and an accessories pack with a page marker, a monthly tab sheet and a sheet of student stickers.
The whole kit-and-caboodle is $19.99. (If you’re in the US, be sure to use the code FREESHIP60 when you check out to get free shipping on all orders above $60.) You can also get a pack of extra stickers and accessories for $10.79, if you’re so inclined.
Personally, I think adults would get more enjoyment out of their paper planners if they felt at ease buying stickers. In a cool stationery store in London in 2019, I bought a packet of stickers with motivational messages and cool graphics, like luggage tags to mark vacation days. Adult coloring books became a self-care powerhouse. Why not stickers?
Paper Doll thinks adults would get more enjoyment out of their paper planners if they felt at ease buying stickers. Adult coloring books became a self-care powerhouse. Why not stickers? Share on XFinally, as we wrap up the “time” section, I want to point out again that Leslie’s book, How to Do It Now Because It’s Not Going Away: An Expert Guide to Getting Stuff Done is top-notch for high school and college students needing support on time management and productivity. It’s one of only two books I recommend when parents ask for organizing advice for their students. The other is Donna Goldberg’s classic, The Organized Student: Teaching Children the Skills for Success in School and Beyond. It’s also superb, but was published in 2005, so unlike Leslie’s book, there are few tech solutions. (It’s also much more geared for tangible organizing vs. Leslie’s, which focuses on tasks, time, and overcoming procrastination.)
SPACE: THE FINAL (and limited) FRONTIER
Last week, in Vibrant and Vertical: Organizing Paper for Back-to-School, we looked at products for helping students of all ages manage their paper. Today, we’re focusing on organizing space, particularly for college students in dorm rooms, where space is in short supply.
Flat-Plug Power Strips and Surge Protectors
If you’ve moved a college student into the dorms, you’ve probably noticed two things about the space. First, it’s at a premium and you can’t afford to waste an inch of it. Second, the room wasn’t designed by professional organizers, which means that it’s not optimally functional.
For example, the built-in heater is right next to the desk, putting the expensive new computer at risk. The short cord for the mini-fridge limits where in the room you can actually put it. And the electrical outlets are all behind desks and beds, so a traditional extension cord plug needs up to two inches of space to accommodate the plug head!
Aha! But did you know there are power strips and surge protectors with flat-head plugs, so instead of poking straight out, they extend to the side, taking up minimal room, allowing furniture to sit, if not flush against the wall, much closer?
I like this tiny Anker Power Strip with USB PowerExtend. Not only is it designed with a flat plug, it has a 5-foot extension cord, two outlets, and two USB ports.
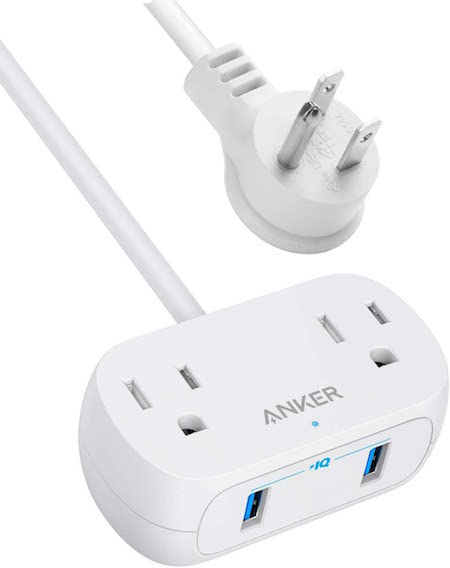
At only 3.3″ long and 1.8″ thick, this isn’t going to power everything in the room, but it’s ideal for bed-side or desk-top items you need to charge, and at $12.74 from Amazon, it’s an inexpensive solution to the “I can’t plug it in!” frustration.
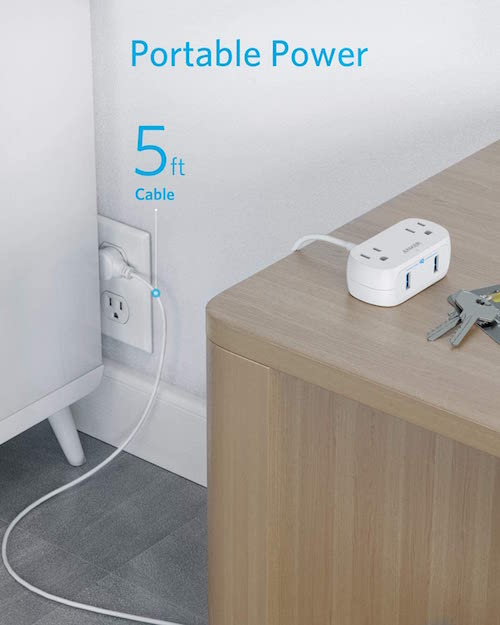
The Anker Power Strip comes in black or white, and in 5′, 8′, and 10′ lengths, but for some reason, the black versions are more expensive than the white ones at every length.
If you want an actual surge protector and one that accommodates charging multiple devices, there are a variety of options. I like the style and functionality of this Tessan Power Strip Surge Protector.
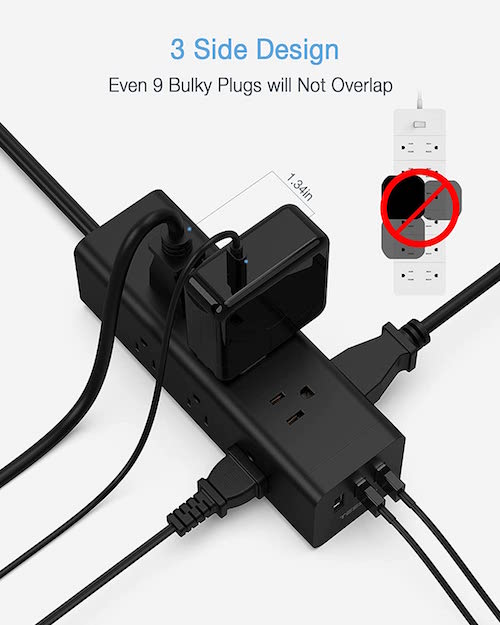 In addition to the flat plug, it has nine AC outlets and 3 USB ports, and a 6.5′ cord. But what appeals to me in particular is the functionality of the design in how the outlets and ports are laid out, with three outlets on the two sides and top of the surge protector, and the three USB ports on the small front end. By not squishing everything on the top surface, there’s more room to use those occasional oversized charging plugs. It’s $19.00, and in the reverse of Anker’s odd pricing, the white version is more expensive, at $24.99.
USB-USB-C Adapters
I recently purchased one of the gorgeous new 24″ iMacs. When I got it, I was so focused on the front:
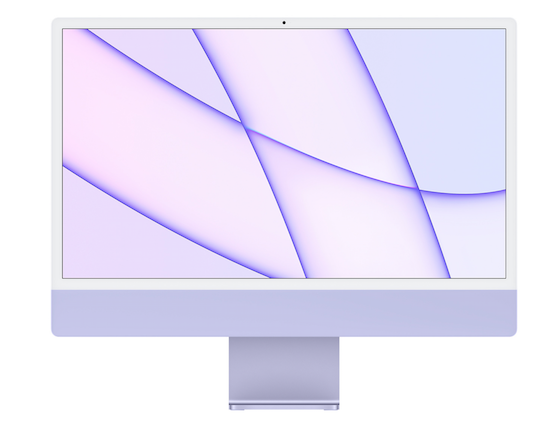
that I didn’t really pay that much attention to the specs or the photo of the rear view:

If you’re an old-time iMac user, you may (or may not) peek at the lower left corner of the rear of the computer and see the problem. You see, on my old iMac, I had four USB ports, two Thunderbolt ports, and an ethernet port. On the new iMac, I have just two itty-bitty, teeny-weeny USB-C ports and two ittier-bittier Thunderbolt 3 ports.
The problem? Computers don’t come with CD drives anymore, so I have an external one with a USB connection. And I have a 2TB external hard drive for backing up locally, also with a USB connection. I have a USB Fitbit charger, a little USB fan for hot days, and a USB podcast-quality external microphone. And now none of them fit my new computer!
Now, this isn’t a tragedy. I use an old-timey Space Bar monitor riser with two front-facing and three rear-facing USB ports, and two front-facing USB charging-only ports, and I just need to plug the new iMac into the old riser. But during the transition, I really need something to make everything fit in a tiny, tidy way. (And the Space Bar monitor riser is ancient, so I can’t count on it forever.)
So, if you’ve got a high school student or college student with a new computer and a lot of (slightly) older devices and chargers, you don’t need to rush to purchase a desktop space-hogging USB hub adapter. Instead, get a sense of how much your student needs to modify the space part of the space-time continuum.
There are miniature adapters, sans cables, you can plug in to the USB-C ports of your new devices and plug your older USB items into them. I purchased a Syntech USB C to USB Adapter 2-pack in Rose Gold (to coordinate with the purple iMac, of course) for $10.99.
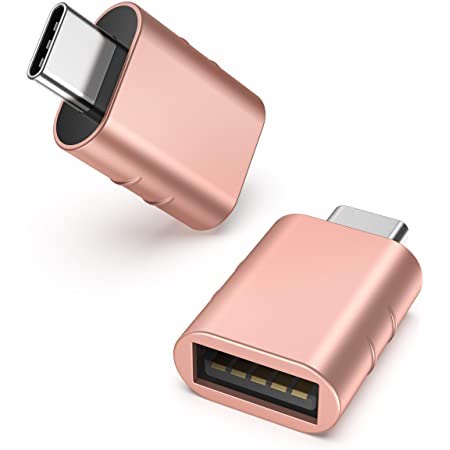
Instead of shelling out for a big hub that I probably don’t need, for a little more than $5 each, these little 1.08″ long x 0.65″ wide x 0.32″ high doohickeys save space and minimize the number of cables in my space.
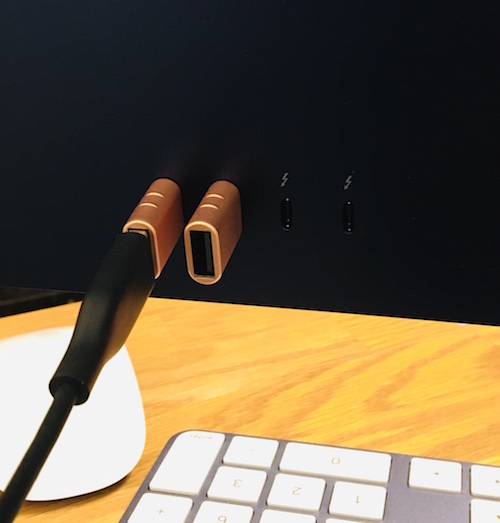
If you’ve got a dorm-based student, looking for space-saving items for electronics, check out the wide variety of tiny USB-to-USB C options.
I hope you and your families have a great school year. Good luck taking up your share of the space-time continuum!
Disclosure: Some of the links above are affiliate links, and I may get a small remuneration (at no additional cost to you) if you make a purchase after clicking through to the resulting pages. The opinions, as always, are my own. (Seriously, who else would claim them?) For more information regarding how Best Results Organizing handles affiliate links, please see the affiliate section of the site’s Privacy Policy.
Paper Doll To the Rescue: How To Save Wet Books & Documents
For something that’s supposed to be so good for us, water can cause quite a bit of trouble.
If you drop your cell phone in water, people will rush to tell you to stick it in rice, as though your Samsung or iPhone was a nice piece of baked salmon. It seems everyone has heard and shared that little hack for rescuing wet electronics.
For what it’s worth, you actually shouldn’t put your soaked phone in rice. Phone experts say airflow, not rice, is the key. Apple agrees. Desiccants and air-tight pouches can also help.
So, save the San Francisco Treat for your dinner table, OK?
There’s a common expression when people are talking about all their drawers and piles of papers and books. They say, “I’m drowning in paper.” But what happens when your paper drowns?
Have you ever dropped your book in the tub? Failed to zip your backpack up all the way and had a book land in a puddle? Had someone overzealously splash you while you’re reading poolside?
Ever have your garbage disposal eat a fork, spring leaks, and send all the water running down your drain through a cracked pipe and into your cabinets, soaking books on the other side of the wall? (Yes, that is TOO a thing that happens. Stop looking at me like that.)
What happens when a book gets wet? Well, the first thing that happens is cockling. That’s the official term for when paper (especially bound paper) gets wet and bulges out in certain places, presenting a warped, wrinkled, puckered, or creased surface.
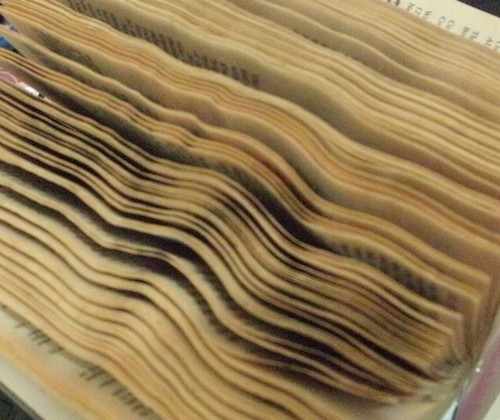
The worst part isn’t the cockling though. (C’mon, people, stop laughing at the word “cockling!”) The biggest concern should be mold. Mold can begin growing within 2-to-3 days, and because mold spores can flourish wherever conditions are warm and wet, you want to jump on solving your wet-paper problem right away!
I should note, Paper Doll is an expert on organizing paper, not restoring it. But I’ve sure had some interesting requests over the years. One client, whose entire library was along a leaking outside wall, wanted to “save” mold-covered books by taking nail scissors and cutting along the edges of the pages to rid them of mold. (No, this wasn’t possible. Not all mold is visible, and mold can be damaging to one’s neurological and respiratory systems. Don’t play around with mold!)
And clients have often asked how to restore important (though not necessarily financially valuable) books, like family Bibles, which have seen better days. For a book with serious financial or sentimental value, please seek the expertise of a professional book restoration service. Check out the website of the The American Institute for Conservation and do a zip code radius search on their Find a Conservator page.
RESTORING WATER-DAMAGED BOOKS
How you deal with a water-damaged book depends on whether the water left your book damp (as if it had been in a sauna), wet (as if you were caught in the rain between your parking space and your building) or soaked all the way through (like the most miserable camping trip, ever)!
If your book is damp, experts advise that you:
- Hold the book gently by the spine and shake the book side-to-side to rid it of any excess water.
- Gently remove any debris. (This works better if you’re trying to get stray leaves out of the book dropped in a shallow puddle; if you spilled your milkshake on the book, you’re not going to get bits of chocolate off of the pages so easily.)
- Cover the surface of wherever you’re going to dry the books with either absorbent paper (like unprinted newsprint — no, NOT actual newspaper!), absorbent towels, or plastic sheeting. This way, as the book dries, the surface you’re using won’t get damaged. The more books you have to restore, the more space you’ll need, as this is often a multi-day process.
- Stand your book up and fan it out so no part is open more than 60°. Official advice will say to stand the book on its “head” or “tail” which just means that you’re not resting the book on its spine or on the part where it opens. Fanning it out means just that — if viewed from above, it’ll almost look like a fan.
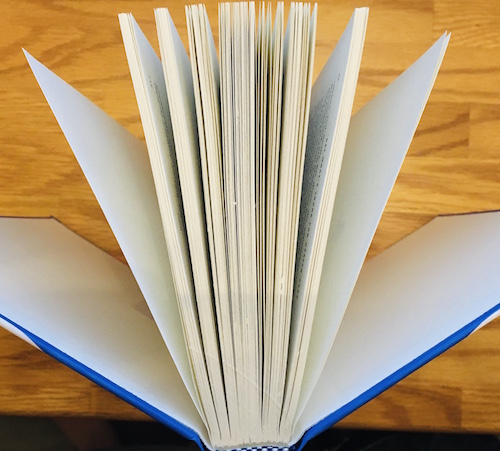
- If it’s mostly the book cover (of a hardcover book) that’s damp, but not the actual text of the book, put some absorbent paper towels between the “boards” of the cover and the pages. Change as necessary (when the paper has absorbed all it can).
- Use fans in the room to circulate air so the book will dry, but don’t point the fans directly at the book.
- If you have a dehumidifier, this is the time to pull it out! Air conditioning is good, too. But none of the air blowing on the book should be so strong as to make the pages flutter.
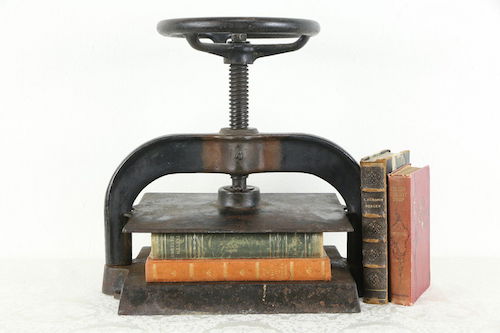
- Once the book is completely dry, lay it on its back cover, sandwiched between two wooden boards, and place something heavy (like a few bricks or an old-fashioned, massive hardcover dictionary) on top of it, making sure the spine (of the previously damp book) isn’t smushed by the weight. Or, you can use a book press, if you happen to have one of these babies hanging around.
RestorationMaster suggests that for paperbacks (which are usually more slender than hard cover books), you can hang the book on a bit of fishing line or string to help it air dry. (But only do this if the book isn’t soaking wet, or the its own weight could cause the book or its binding to tear.)
If the book is wet, think about the value of your time vs. the value of the book. If it’s a $300 textbook, your willingness to carry on may be different from what it would be if it’s a paperback novel.
- Cover your work surface, as described above.
- Lay the book flat and open it carefully (so as not to rip any of the wet pages) and start interspersing (interleaving, in book restoration talk) paper towels about every 20 pages, working from the front to the middle of the book. Once you get to the middle, flip the book over, and repeat the process from the back to the middle.
- Leave the book flat for about an hour so the paper towels can absorb some of the water. (If your book got that wet, chances are good some of your other stuff got wet. Go check on them.)
- Hour is up? Stand the book up, fanned, on the “head” or “tail” as described in the “damp” section, above.
- Switch out the surface covering and paper towels as they soak up the water, and periodically repeat the process until the book is “only” damp.
- Now follow the directions for damp books, above.
It’s hard to envision some of these steps, so I was delighted to find this video from Syracuse University, where I attended graduate school many, many years ago. Their Department of Preservation and Conservation illustrates how to save damp and wet books from becoming wrinkly, moldy goop.
(For more information, you may also want to peruse the Disaster Recovery Manual for the Syracuse University Libraries.)
If your book is soaked through, meaning it fell into a pool or your house flooded to the point that your book was submerged, this is really a job for professionals. The instructions below describe what they’ll do, not what you should do. Unless you are a restoration specialist, you are likely to be out of your depth. That said, there are two possible measures:
1) Air-Dry (For those of us for whom humidity makes us resemble Art Garfunkel, “air-dry” already has some unfortunate connotations!)
This is basically an advanced version of the solution for “wet” books above, with a few changes:
- DON’T OPEN THE BOOK (to the interior). Don’t fan the pages.
- Put paper towels between the front and rear covers and the interior of the book.
- Use those fans! Turn on the A/C. Get out the dehumidifier. And be patient.
2) Freeze!
WAIT! Stop pulling the Eggos and last night’s leftovers out of the freezer to make room. Freezing books keeps mold and mildew from growing and gives professional restorers some extra time to plot out their attack.
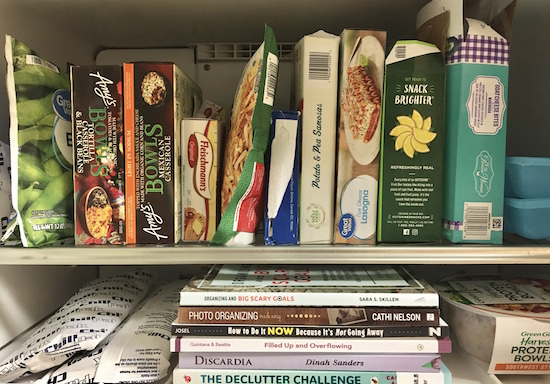 But to save soaked books, restorers use rapid freezing methods at temperatures down to -20°F (-28.9°C) so ice crystals won’t form on the books. Unless you’ve got a seriously fancy-pants freezer, your Frididaire probably isn’t going to cut it.
Once the wet books get frozen, restorers use vacuum freeze-drying to remove moisture, similar to how food is freeze-dried.
The water in the damaged book goes from being a solid (picture microscopic ice cubes) to a gas (think: water vapor) without ever turning into liquid.
This is called sublimation. (Is this starting to remind you of high school chemistry class? Or maybe you soaked your high school chemistry textbook and never read anything the rest of the semester?)
By skipping the liquid stage, there’s less of a chance of the paper cockling, the cover (boards) warping, or the ink running. This is good. But again, this is really the work of a professional.
That said, a number of resources, including WikiHow, advise that you can repair a wet book by freezing it in a regular household freezer. (Scroll down on the linked page to see their Method #2.) They advise removing excess water by interleaving small sets of pages with white paper towels, as described above, and then putting the damaged book into a zipper-lock plastic bag, and sealing it. (They warn, “Do not perform a vacuum seal, however; you want some air to be able to reach the book’s pages, and some space to be between the texture of the bag and the book itself.” OK, then!)
WikiHow says to keep the book in the freezer 1-2 weeks, depending on how long the book is. (So, go the full fortnight if it’s all 963 pages of Anna Karenina, which, coincidentally, Paper Doll just finished reading. I wish I could have frozen the chapters on wheat threshing, let me tell you!)
Then, when you pull the book out, you’ll go back to the methods for “damp” and “wet” books above, because you, my friends, do not have a vacuum freeze-drying machine for books. You got a lot of the water out, but as the book defrosts, there will still be moisture!
Anna Gooding-Call of Book Riot notes that the ice crystal problem (obviated by the fancy vacuum freeze-drying used by professionals) is a bigger deal. She notes, “To a certain extent, you might not be able to avoid this because you are a normal human being and you have a normal human being’s freezer. Ice can wreck your book for the same reason as it can wreck your fleshy body: freezing water expands and ruptures things. Set your freezer to its lowest setting—as in, the warmest temperature relative to how freezy it can possibly get—and check frequently. If you have a no-frost function, use it!”
The Houston Chronicle has similar advice about freezing, but notes that if there are any coated pages in a doused book, such as in a section of illustrations or photos, take extra precautions. Because coated pages may fuse together if not separated, their article advises putting a sheet of wax paper between every coated page to isolate each one.
Interleaving, fanning, freezing. This is a lot of work!
For what it’s worth, WikiHow also has instructions for rescuing your damp books using a hair dryer. After removing excess water, they recommend laying the book down on an absorbent towel and aiming the dryer at the pages, top-to-bottom, a few at a time, and not moving onward until the pages you’ve worked on are dry.
I once tried this dryer method, but it still yielded a LOT of cockling, and in the end, I had to reimburse the public library for a new copy anyway. Reader, beware.
Beyond that, my undergraduate alma mater, Cornell University, specifically says NOT to use heat to dry books! Cornell’s exact (final) words on the subject are:
CAUTION
Do not use artificial heat to try to speed the drying, as this will lead to dimensional distortion.
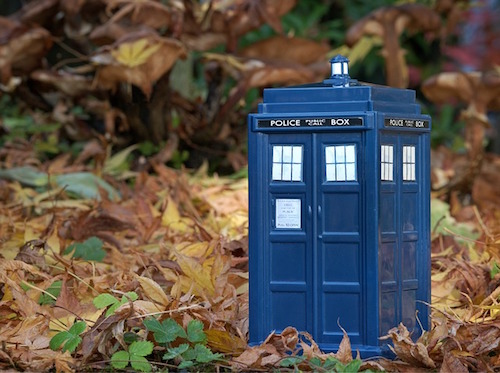 Undergrowth Doctor Who (MaxPixel)
“Dimensional distortion” sounds like something that’s better handled in Doctor Who than the Paper Doll blog, so we’ll just leave that right there.
RESTORING WET DOCUMENTS
Let’s say you haven’t soaked a book, but perhaps you were working on your family filing and a tiny human or furry friend got over-excited and upturned your glass of water. Most of the solutions for books will work just as well for individual papers.
The Library of Congress has a page of advice for emergency preservation of museum collections of paper, and this guidance is easily applied to your important documents at home:
- Create your safe workspace (away from the tiny humans, furry friends and, your beverages).
- Lay your wet papers flat on clean absorbent towels or unprinted (newsprint) paper. Periodically change the towels as they absorb water, and until your documents are merely damp.
- DON’T try to separate soaking wet sheets of paper. Wet paper is heavy and sticks together; if you try to separate the pages, they are likely to tear. Instead, just leave them in quarter-inch high stacks until most of the water has been absorbed by the towels or has evaporated.
- Once the pages are only damp, you can try gently prying them apart. Then interleave clean, white paper towels between the documents.
- Lightly weigh the documents down to flatten them and discourage cockling.
- Keep the air flowing in the room, but do not blow fans directly onto your papers. Not only would they cockle or ruffle, but they might blow away into the hands of those tiny humans or paws of the furry friends, and then you’ll have bigger problems than soaked papers.
The Library of Congress also advises against air-drying coated (glossy) paper. Instead, freeze the documents immediately using the same (home-based) methods as described for books.
MORE PROFESSIONAL ASSISTANCE AND GUIDANCE
This post should cover your casual book and document restoration needs. If you represent an association, government agency, museum, or other “collection” and need guidance with regard to restoration and conservatorship, try these resources:
American Institute of Conservation (AIC) and Foundation for Advancement in Conservation (FAIC) (including their downloadable documents on caring for books, photographs, and paper)
Canadian Association of Professional Conservators’ Find a Conservator
Canadian Conservation Institute (offers a free emergency telephone line for damage to paper collections)
Northeast Document Conservation Centre (NEDCC)
The National Archives of the United Kingdom, “How To Deal With Wet Documents”
Stay safe! Stay dry! And keep your phone out of the Rice-a-Roni!
You Are Invited to the 2019 Productivity Summit!
What did you accomplish today? Was it everything you’d hoped?
What do you think of when you hear the word “productive” bandied about? There’s a commonly-held but false belief that productivity is just about getting a lot of things done. But productive has two definitions: it can mean both prolific (quantitatively measuring how much gets done) and useful (qualitatively measuring how worthwhile and valuable an endeavor is).
Being productive means not just accomplishing a lot, but accomplishing the right things.
How many times have you gotten to the end of your day and realized that you’d been incredibly busy, completing many tasks (both the ones you planned as well as putting out small fires), but you didn’t feel fulfilled? Perhaps you read lots of blogs (like this one) and books, and have incorporated some of the advice. Maybe you theme your days or time-block your work projects. Hopefully, you eliminate as many interruptions as possible. But you know there’s more you could be doing. You know you could be doing better.
I’m excited to announce that I’m going to be participating in a special project, the brainchild of my colleague Ray Sidney-Smith, whom I met a few years ago when we were getting certified as Evernote consultants. Ray knows how to figure out what someone needs to know and presents that material in a way that’s easy to absorb. So Ray came up with the Productivity Summit!

Ray says “The 2019 Productivity Summit is going to be the most productive two days of your life,” and from what I’ve seen, I believe it!
I’ve attended a variety of internet-based conferences and summits on topics ranging from organizing and time management, to ADHD and hoarding, to writing and publishing. The material can be great, but it can often feel a little hokey, as it’s obvious those other virtual summits are just pre-recorded presentations released on a “drip” schedule, with no opportunity for attendees to ask questions or interact with the speakers.
The 2019 Productivity Summit is a LIVE, two-day remote conference with more than 40 expert speakers presenting in real-time about personal productivity, technology, organization, and business development. And your own Paper Doll will be one of them!
PROGRAMMING TRACKS
The 2019 Productivity Summit has four concurrent tracks of programming:
- Productivity – This track focuses very specifically on how to be more personally productive using the speakers’ recommended principles, strategies, and techniques.

There are some real powerhouse talents in this group, including Canadian rockstar and friend-of-the-blog Mike Vardy, the author/coach/podcaster known as The Productivityist. Where Mike is, the fun follows. I’m also excited to hear what Keep Productive’s Francesco D’Alessio has to say about Notion, a (geeky) up-and-comer that some people thinks give Evernote a run for its money. And Thanh Pham from Asian Efficiency is also on-deck, and his take is always a must-seeand must-listen.
- Technology – This programming track is focused on what and how to use specific technologies to get things done.

As much as I’m truly a Paper Doll, I know how technology is key for making work and life run more efficiently. My colleague Stacey Harmon is my go-to for Evernote coupled with David Allen’s GTD. From the ergonomics of productivity to leveraging systems to specific technologies, this programming track is for those who want to geek out as well as those who just want stuff to work so they can get on with their lives.
- Organization – For this track, it’s about the nitty gritty of getting your home or office more organized – it will cover the physical, intellectual, and psychological skills for dealing with clutter and disorganization.

Hey, that’s me up there!
If you follow organizing blogs or the professional organizing industry, you’ll recognize most of the people participating in this programming track. There’s industry standard-bearer Barbara Hemphill, fellow Certified Professional Organizers Kim Oser, Dawn George, and Kacy Paide. We’ll be joined by sharp and savvy NAPO colleagues like Andrea Hancock, Terri Blanchette, Penny Bryant Catterall, and coach Alexis Haselberger. Topics we’re covering range from the economics of clutter to how to organize your digital resources, from conquering fear of letting go of what’s on your desk to trying to go paperless when you can’t let go of the paper. Me? My presentation is called Organize for Maximum Productivity When You Work From Home.
- Business Development – This track is for those looking to build or grow their businesses more effectively and efficiently.

This is another power-packed lineup. These speakers will cover general business leadership topics like improving focus, growing sales, and developing entrepreneurial mindsets, but also delve into niche issues like video marketing, podcasting, and publishing. My longtime colleague, Nicole Chamblin is first up on Saturday morning, so I’ll be checking her out while I wait in the wings.
PRODUCTIVITY PANELS AND KEYNOTE AND DIGITAL INTERACTIVES, OH MY!
In addition to these concurrent programming tracks, there will be panel discussions across specific time slots. On Friday, October 4, 2019, summit host, Ray Sidney-Smith, Google Small Business Advisor for Productivity, will lead a panel of productivity technology experts entitled, “The Future of Productivity Technology.”
Then, on Saturday, October 5, 2019, Demir Bentley of Lifehack Bootcamp and Lifehack Tribe, will be keynoting the Summit with his presentation, “The Biggest Cover Up In Productivity History.”
There will also be a Digital Interactives area where speakers will be placing education-oriented quizzes (not the Facebook-style kind), polls, and more so you can engage with what you learn at the Summit. Finally, each day will end with with live, virtual networking events for summit attendees.
THE DETAILS
The 2019 Productivity Summit is free to attend live, and it’s all accessible through your Web browser. Visit the 2019 Productivity Summit page to see all the participants and topics, and I bet you’ll be as impressed as I am.
Register and get complimentary replays of the sessions through Sunday evening (Eastern time), October 6, 2019 , so you can watch missed sessions or rewatch sessions you found especially helpful.
Want more time to watch? You can buy access to the 2019 Summit video replay library. As I write this, early bird pricing is still available (until 9/13/19 4:59 PM US EDT); it goes up as the summit nears, and will rise again after the complimentary replays end.
Reach the summit – the 2019 Productivity Summit – and learn how to get more of the right things done.
The Pareto Principle, the Internet of Things, and Paper: A Printer to Make You Smile
Do you hate your printer? OK, hate is a strong word, but let’s talk.
My first printer, a noisy dot-matrix Imagewriter II, was part of my first Mac purchase in December 1985. It had a sleek white housing, took continuous-form feed (or fan-fold) paper (which, at the time, we likened to paper towels), and took black ink only. It had a few simple lights and buttons that didn’t require reading a manual to understand. It was sleek, did what it was told, and aside from being incredibly heavy, fit well with my student life requirements.
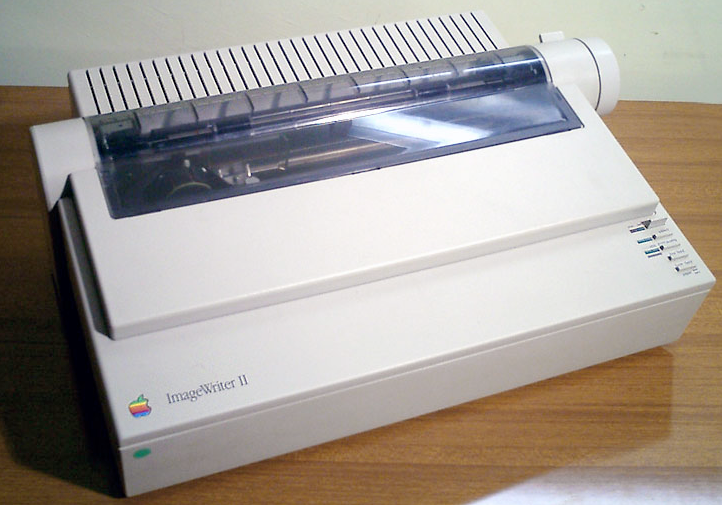
I’ve had a few printers in the past three decades, but none as pleasing as that Imagewriter II. Epsons and Canons and HPs, oh my! They’ve frozen, their drivers have mysteriously failed, and they have crankily refused to print with black ink when the cyan (that’s yellow, y’know) was not tippy-top. My current printer, since it was about six months old, refuses to print unless I unplug it from the power supply and plug it in again before printing. Every. Darn. Time.
You’d think there would have to be a better way! Well, one 27-year-old German industrial designer thought so, too.
PAPER
Ludwig Rensch had an idea. What if printers weren’t horrible, awful, frustrating pieces of technology that we depended upon for providing tangible representations of information, but were instead easy to use and nifty to gaze upon, and did what we needed?
His prototype? Paper: A Printer You Actually Want
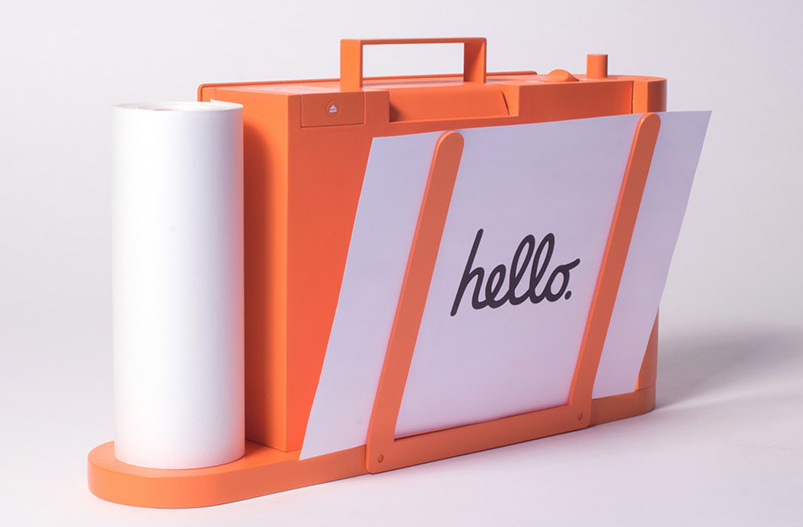
In Rensch’s words:
Paper is a machine that can print, scan and copy in a pleasant way. It communicates its function, provides clear feedback and uses physical controls to operate the key functions with ease.
Seriously? No randomly blinking lights that are reminiscent of Morse Code but have no clear meaning?
No refusal to print in black and white unless three other color inks are full?
No ugly metal and plastic blob that makes your kitchen or living room feel industrial?
Well, that is a breath of fresh air.
THE BASICS
Instead of the black and grey boxes we’ve come to know, Rensch’s Paper is a brightly colored, lightweight, all-in-one printer/scanner/copier.
Imagine having a traditional flatbed printer or scanner but then turning it on its side. In lieu of a traditional stack of copy paper, Rensch’s Paper prints or copies to a continuous sheet (sans tractor-feed holes) on an upright paper roll with pages cut one slice at a time, much like Berg’s Little Printer, which I wrote about in Indulgences, Unitaskers and Paper Doll’s Take on the Little Printer.
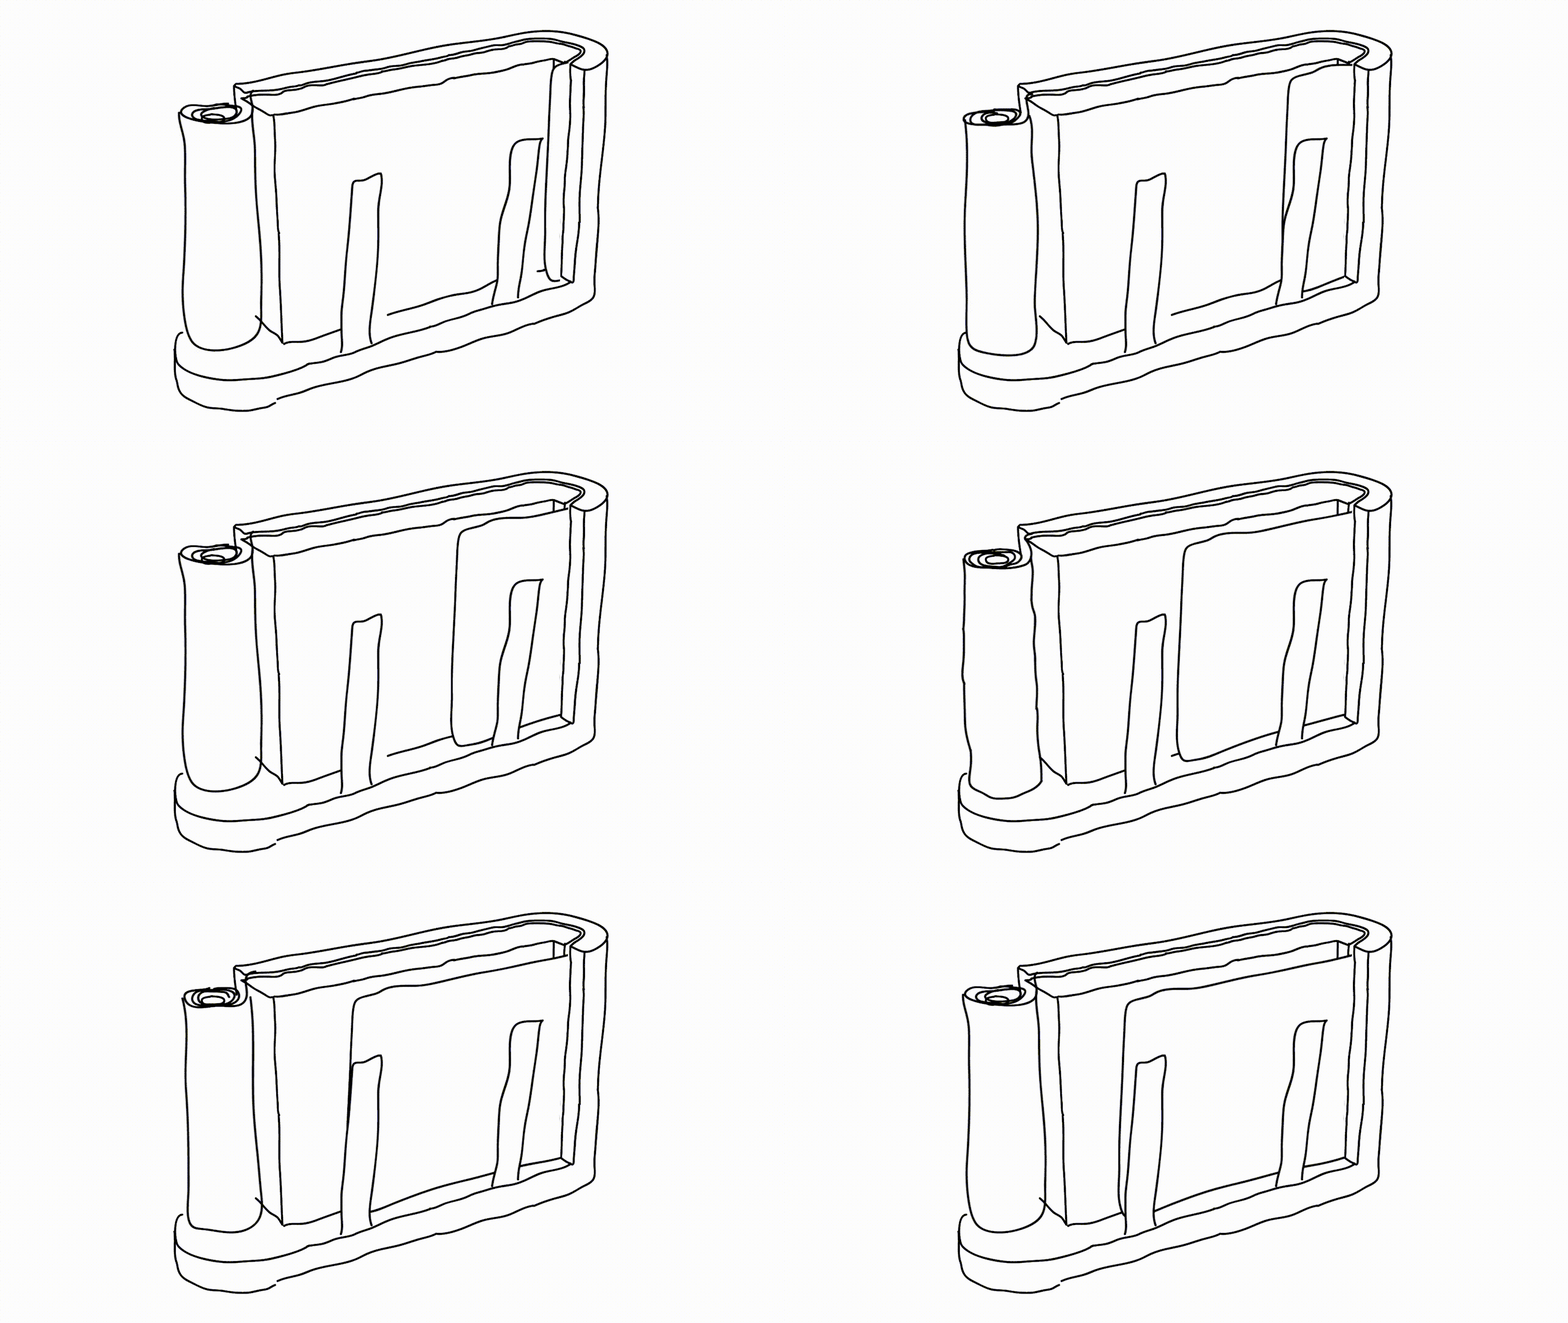
Instead of black or grey plastic and metal that’s suited for office space, Rensch designed something that adds some quirky color. (Although Paper Doll, herself, has a lifelong history detesting the color orange, this blog will not hold that against Paper.)
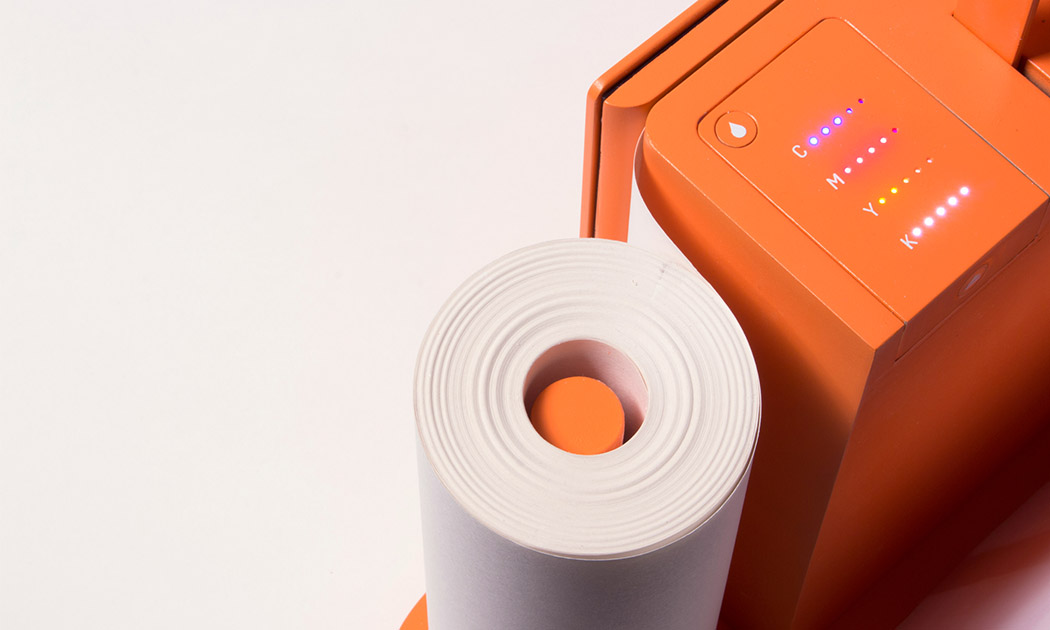
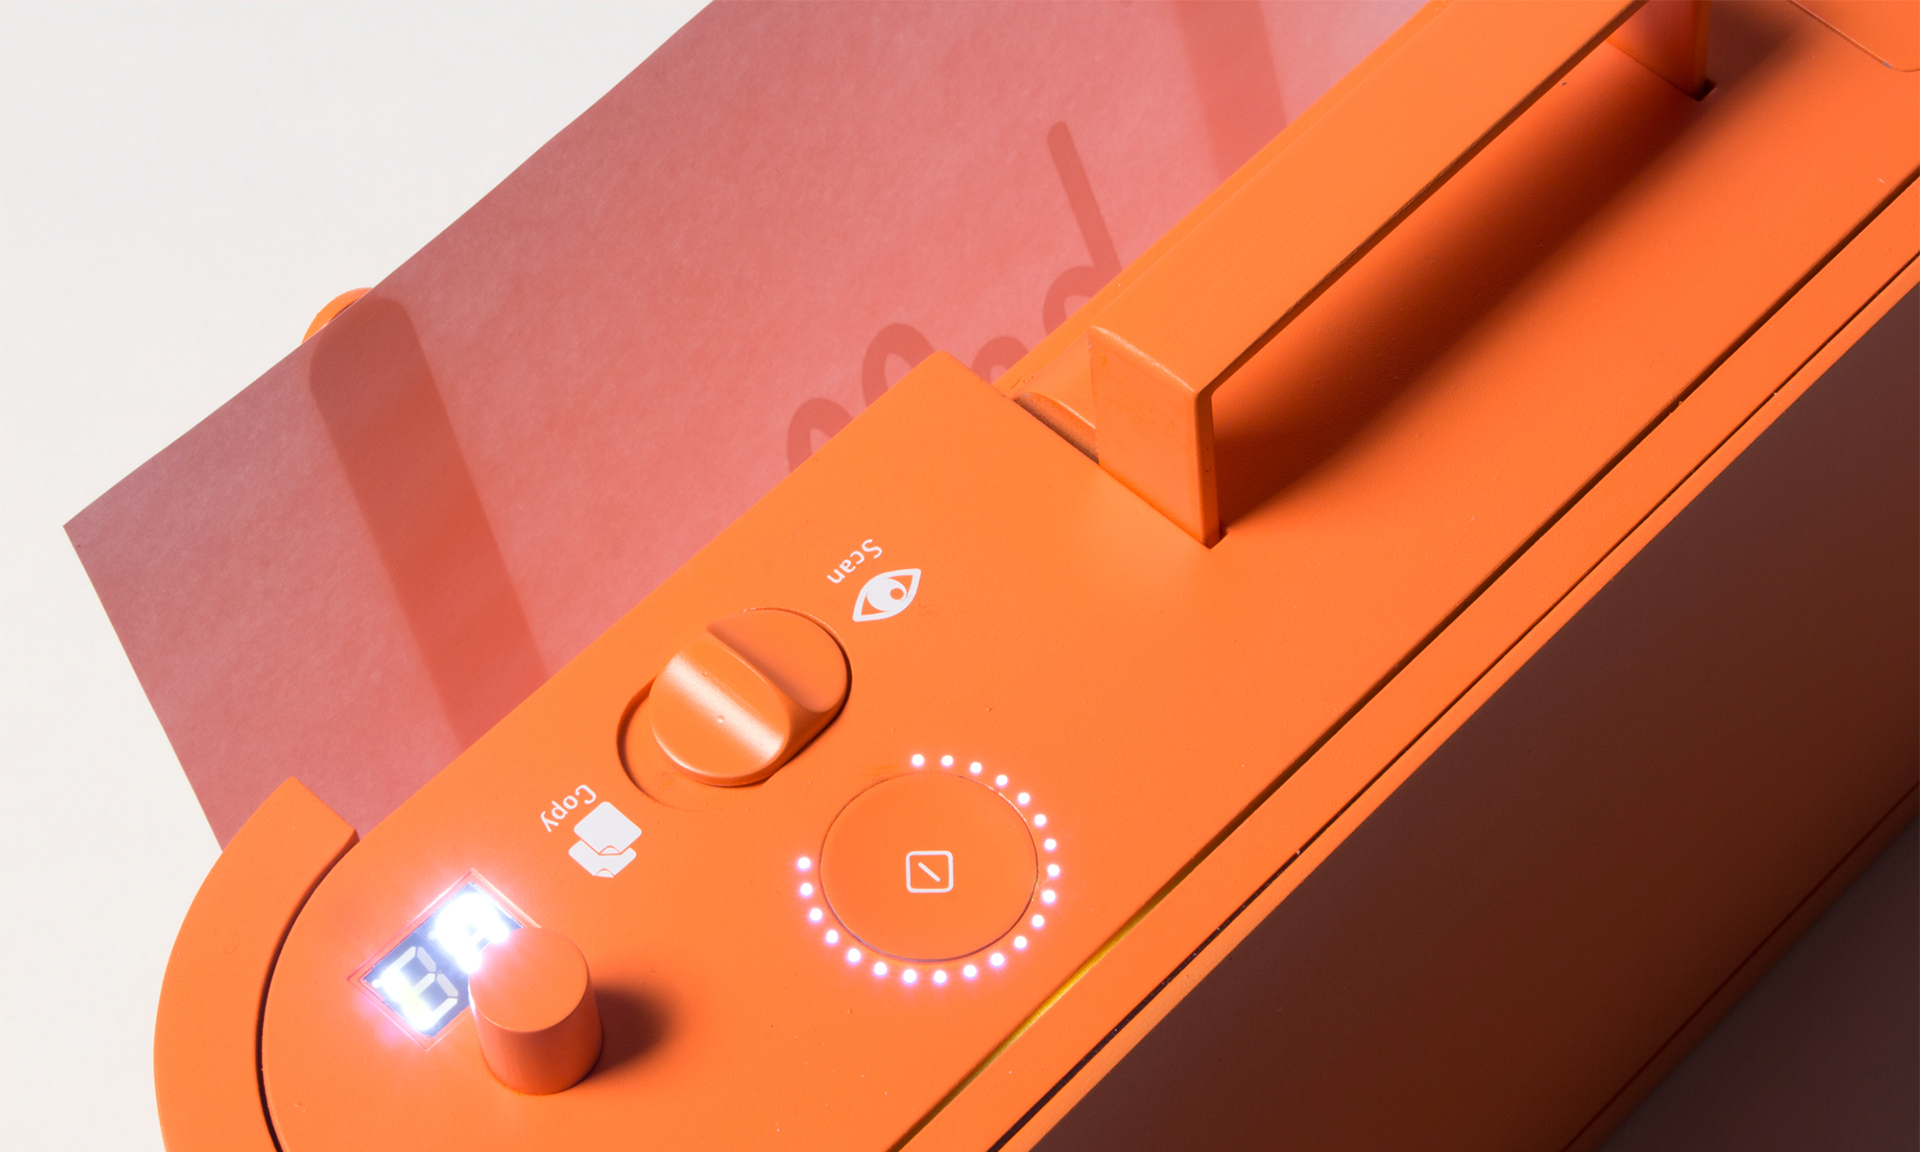
The revised design makes it more compact, space-saving and mobile. There’s just one switch to select “scan” or “copy,” the LEDs let you know the status of Paper’s ink levels, and there’s a handle on top so you can pick it up at a moment’s notice without feeling like you’re carrying all your worldly possessions like in the closing scene from Fiddler on the Roof.
THE PRINCIPLES
As a professional organizer, I was delighted to see that Rensch developed the user interface to follow the Pareto Principle: 80% of your success comes from 20% of your effort. In organizing, we usually take that to mean that 80% of the time, we wear 20% of our clothes (wearing and washing, and storing them for easy access and wearing them again), while kids play with 20% of their toys, and so on. We focus on that to show how, when we discard some subset of the 80% were rarely use or touch, we regain space without regretting the loss of what we’ve donated or tossed.
Rensch says:
This is where the paradox of technology kicks in. Devices become incredibly complicated. Microwaves, Remote Controls, TVs, Cars, Ovens, Printers, Coffee Machines – they all have features that the majority of the owners never use. That is because they don’t know how or why, and they’re not willing to spend time and energy to learn how to use something. Especially in the days of streamlined services and apps, that make life so easy without instructions or efforts, it seems ridiculous that one has to read a user’s guide to heat up some food.
Rensch applied the Pareto Principle, considering the likelihood that 80% of the time, we only use 20% of the features of office appliances like printers, copiers, and scanners, so why create bulk and disarray with more than is needed? To achieve his goal, Rensch started at the beginning: he defined a printer’s key functions, analyzed the required procedures and simplified everything until he had created an easy-to-learn, simple-to-understand, aesthetically pleasing, and minimalistic product.
THE INTERNET OF THINGS…USED BY REGULAR PEOPLE
Rensch designed his Paper printer/scanner/copier as part of his graduate thesis Interacting with Things, which looked at how machines can be used more intuitively, and he asked three basic questions:
- Is it possible to transfer the quality of a digital user experience to an everyday object?
- Can we use physical feel to improve digital experiences?
- Are we able to make the information and the opportunities of the internet more tangible and experience them in physical things?
Then, he applied his concepts to three designs: Paper, PostPoster (an interactive graphical poster that uses a specialized conductive paint to generate sounds), and Musikbox 1188 and its app, a Bluetooth loudspeaker that lets you listen to music from your friend’s phone, tablet, or computer even if your friend (and her gadgets) are on the other side of the world.
The ever-expanding concept of the Internet of Things, upon which Rensch’s work is predicated, is key to understanding his designs. The Internet of Things, or IoT, is like where your Nest programmable thermostat or your “fridge of the future” can talk to your phone or computer and to one another to make your life more enjoyable. The thermostat can increase the A/C on a hot day so it’s just perfect when you walk in the door, but also send you an alert if your furnace is acting weird and the pipes might burst in winter. Meanwhile, your fridge can detect when you’re low on milk, your ingredients are about to expire, or you’re lacking what you need for the recipe you programmed in for Saturday — and then auto-order more groceries!
While most designers are eager for this Rise of the Machines and are welcoming our new programmable toaster overlords, the rare detractors are usually concerned with the security of IoT. Rensch, however, is more concerned about the humanity of it (per his thesis):
It’s the age of the smartphones. Like no other technology in the recent decades, they become part of our lives. Services offered in the internet allow us to do really complex stuff in no time, with no effort and in pleasant ways, for instant [sic] sell a bike to someone, find directions in foreign places and do business on the go. Static information that was bound in books and maps is now fluid and accessible from everywhere at everytime.
But these developments also must be viewed critically.
Even these miracle-machines have their down-sides. We all know people who are sunken into their Smartphone screens, absorbed by virtual worlds. And from time to time, we’ve been that person. All the Apps and Services are good and useful on their own, but to take care of everything only with our phones is distracting us from the outside world and our environment. Interactions with screens demand an enormous amount of concentration and leave the human motor functions and haptics unused.
Paper looks a lot like a throw-back to the days of mechanical buttons and dials, making use of the user’s fine motor skills to tune in the desired solution with basic physical controls and verify them with simple light signals. In that way, it reminded me of an old radio, where you turned the dial and when you hit upon an AM or FM station clearly, the tiny light would shine brightly.
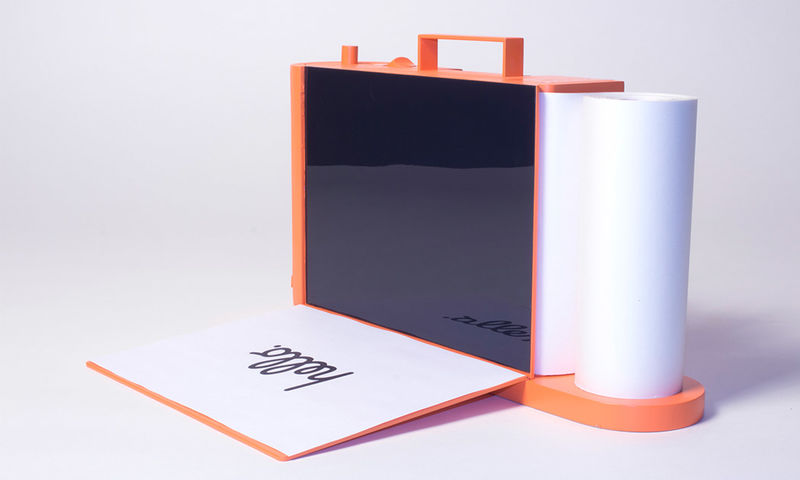
Paper could work manually, only, but Rensch designed it to operate as an Internet of Things device — but better. According to Rensch, the device is meant to be seen as more of an “aesthetically pleasing creative tool that brings together the analog and digital worlds for transferring content from one to the other.”
Paper hasn’t left the virtual world behind. It can be operated via its own app on your mobile device or at a website in your computer’s browser.
To really appreciate the experience of using Paper, which to me, harkens back to my first experience with the design of Apple products, check out the video.
IN THE REAL WORLD
Of course, and I’m sure you expected this, there is sad news for those of us eager to try Paper out. You see, Paper is not-ready-for-prime-time because of the economics of the Office Supply Industrial Complex. Your frustrating HP or Epson is frustrating because it’s cheap, and it’s cheap because the companies know they can hook you with the low-price printer and weigh you down with printer ink made only for your style of printer, forcing you to come back time and again for a cyan you don’t really want or need.
Without Big Ink money to subsidize the development, manufacturing, and distribution of Rensch’s Paper, this pretty little thing won’t be on desks (or kitchen counters) anytime soon. We can only hope that the big guys will take Rensch’s approach under advisement, and give us a printer/scanner/copier we’d actually enjoy using.
The 2016 NAPO Organizers’ Choice Awards
Organizing is about losing (getting rid of things that no longer serve your goals, whether that’s clutter or bad habits) and winning (freeing up space in your home and office, time in your schedule, and peace in your thought processes).
Every year, the attendees of the National Association of Professional Organizers’ NAPO Conference and Expo vote for the best of the best among exhibitors. Categories in the 2016 NAPO Organizers’ Choice Awards include the best residential and business products, the best residential and business services, and an overall “Best In Show” award for whatever really captured the attention of the professional organizers and productivity experts in attendance.
And the winners were…
BEST RESIDENTIAL PRODUCT: Time Timer (modeled by Heather Rogers)
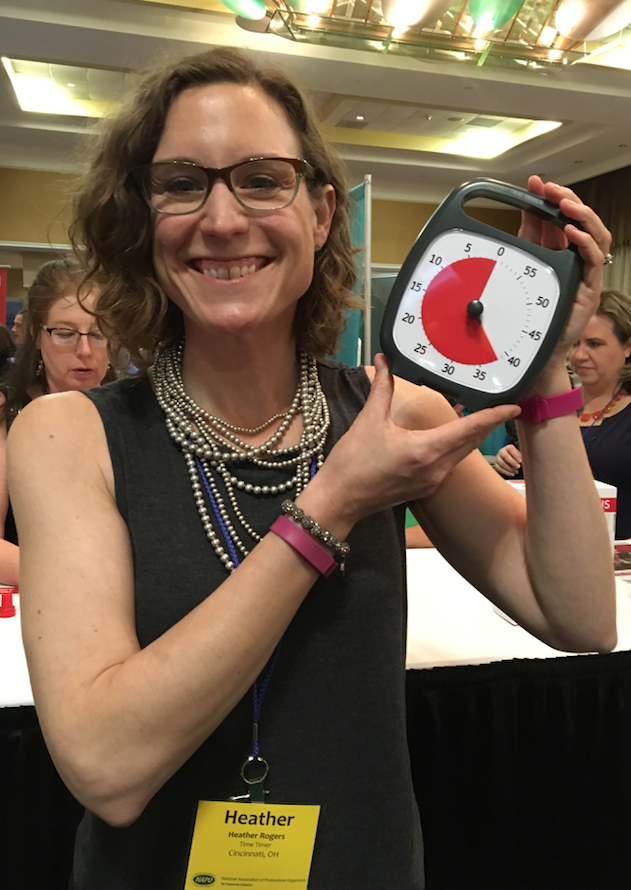 Few time management products could be considered more of a classic than Time Timer, which was already a beloved tool when I started my professional organizing business more than 15 years ago. At that time, back when dinosaurs roamed the earth, I owned one of the original Time Timers, an analog timer with a patented thick, red, circular “fanning-out” disc-like covering that diminished in size (from a maximum of 360° coverage for an hour) until time was up, and the red portion disappeared (hiding behind the clock display).
It was obvious that Time Timer provided a superlative way to explain the passage of time in a variety of circumstances — for teaching children the concept of time, for giving all participants in a discussion group equal time speaking (without needing an orchestra to “play them off”), for keeping meetings on task and on time, and for helping clients with ADHD and other time-related challenges master their appreciation of the passage of time. Let’s let Time Timer tell it:
The Time Timer product line has expanded in a variety of ways. From the original boxy Time Timer, there are now six varieties:
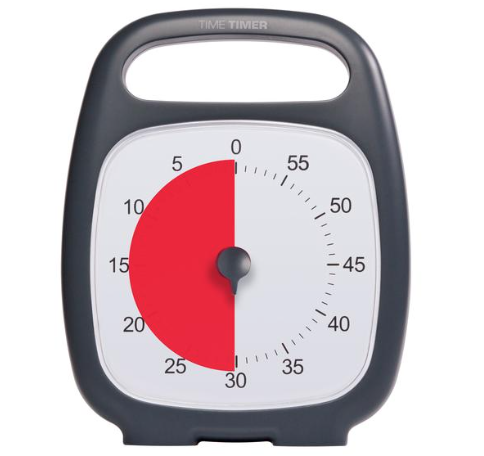
- Time Timer PLUS, with a quick-grab handle, a rugged case, and a durable clear lens to protect its patented red disk, measures 5.5″ x 7″ and requires one AA battery. It’s whisper-silent.
- Time Timer 3″, tiny enough to be tucked anywhere
- Time Timer 8″, perfect for your desktop, bedside, or anywhere you’re working
- Time Timer 12″, ideal for an office or meeting session, so you can see it from across the room
- Time Timer MOD is a 3.5″ x 3.5″ version that adds a little color to your productivity. The MOD features a colorful, removable, silicone cover for an extra layer of protection, like a thick smartphone skin. You can purchase the MOD with a Sky Blue, Charcoal Gray, or Lime Green cover, and there’s a Berry cover available separately.
- Time Timer MOD Sprint Edition ties in with the Jack Knapp book, Sprint, and comes with a Quick Start Guide highlighting the key principles of the “design sprint” framework developed by Google teams.
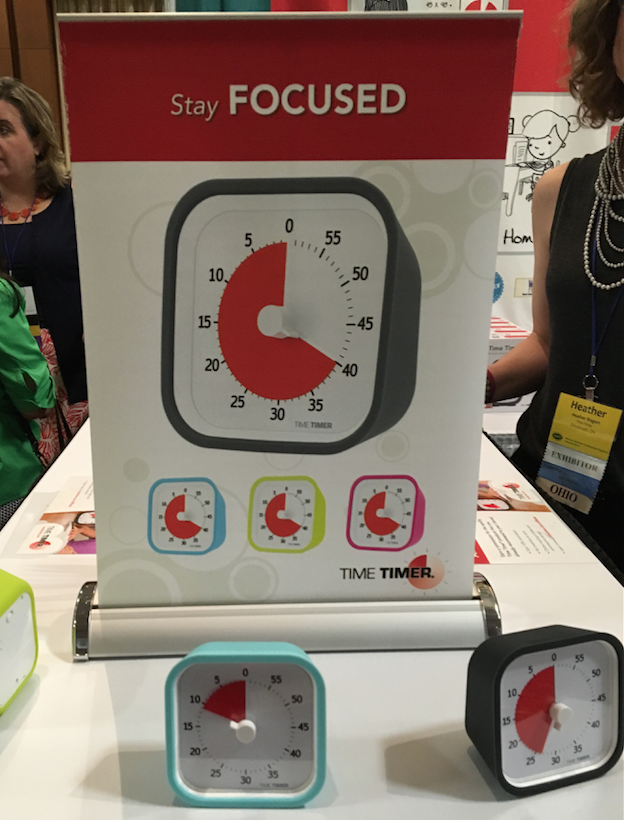
These Time Timers range from $29 to $39 on the Time Timer website.
Over the years, the Time Timer line branched out to include watches for a personal approach to managing time, from staying on task at work, home, or while doing school work to remembering to take medications or transition to the next location or task.
- Time Timer Watch PLUS Small — The small watch comes in Berry, Sky Blue, and Lime Green, with clock, timer, and alarm functions, vibrating and audible alerts, repeatable time segment settings (for interval training, Pomodoro productivity, etc.). The small watch has a soft silicone watch band designed to fit wrist circumferences of 4.75″ to 7″.
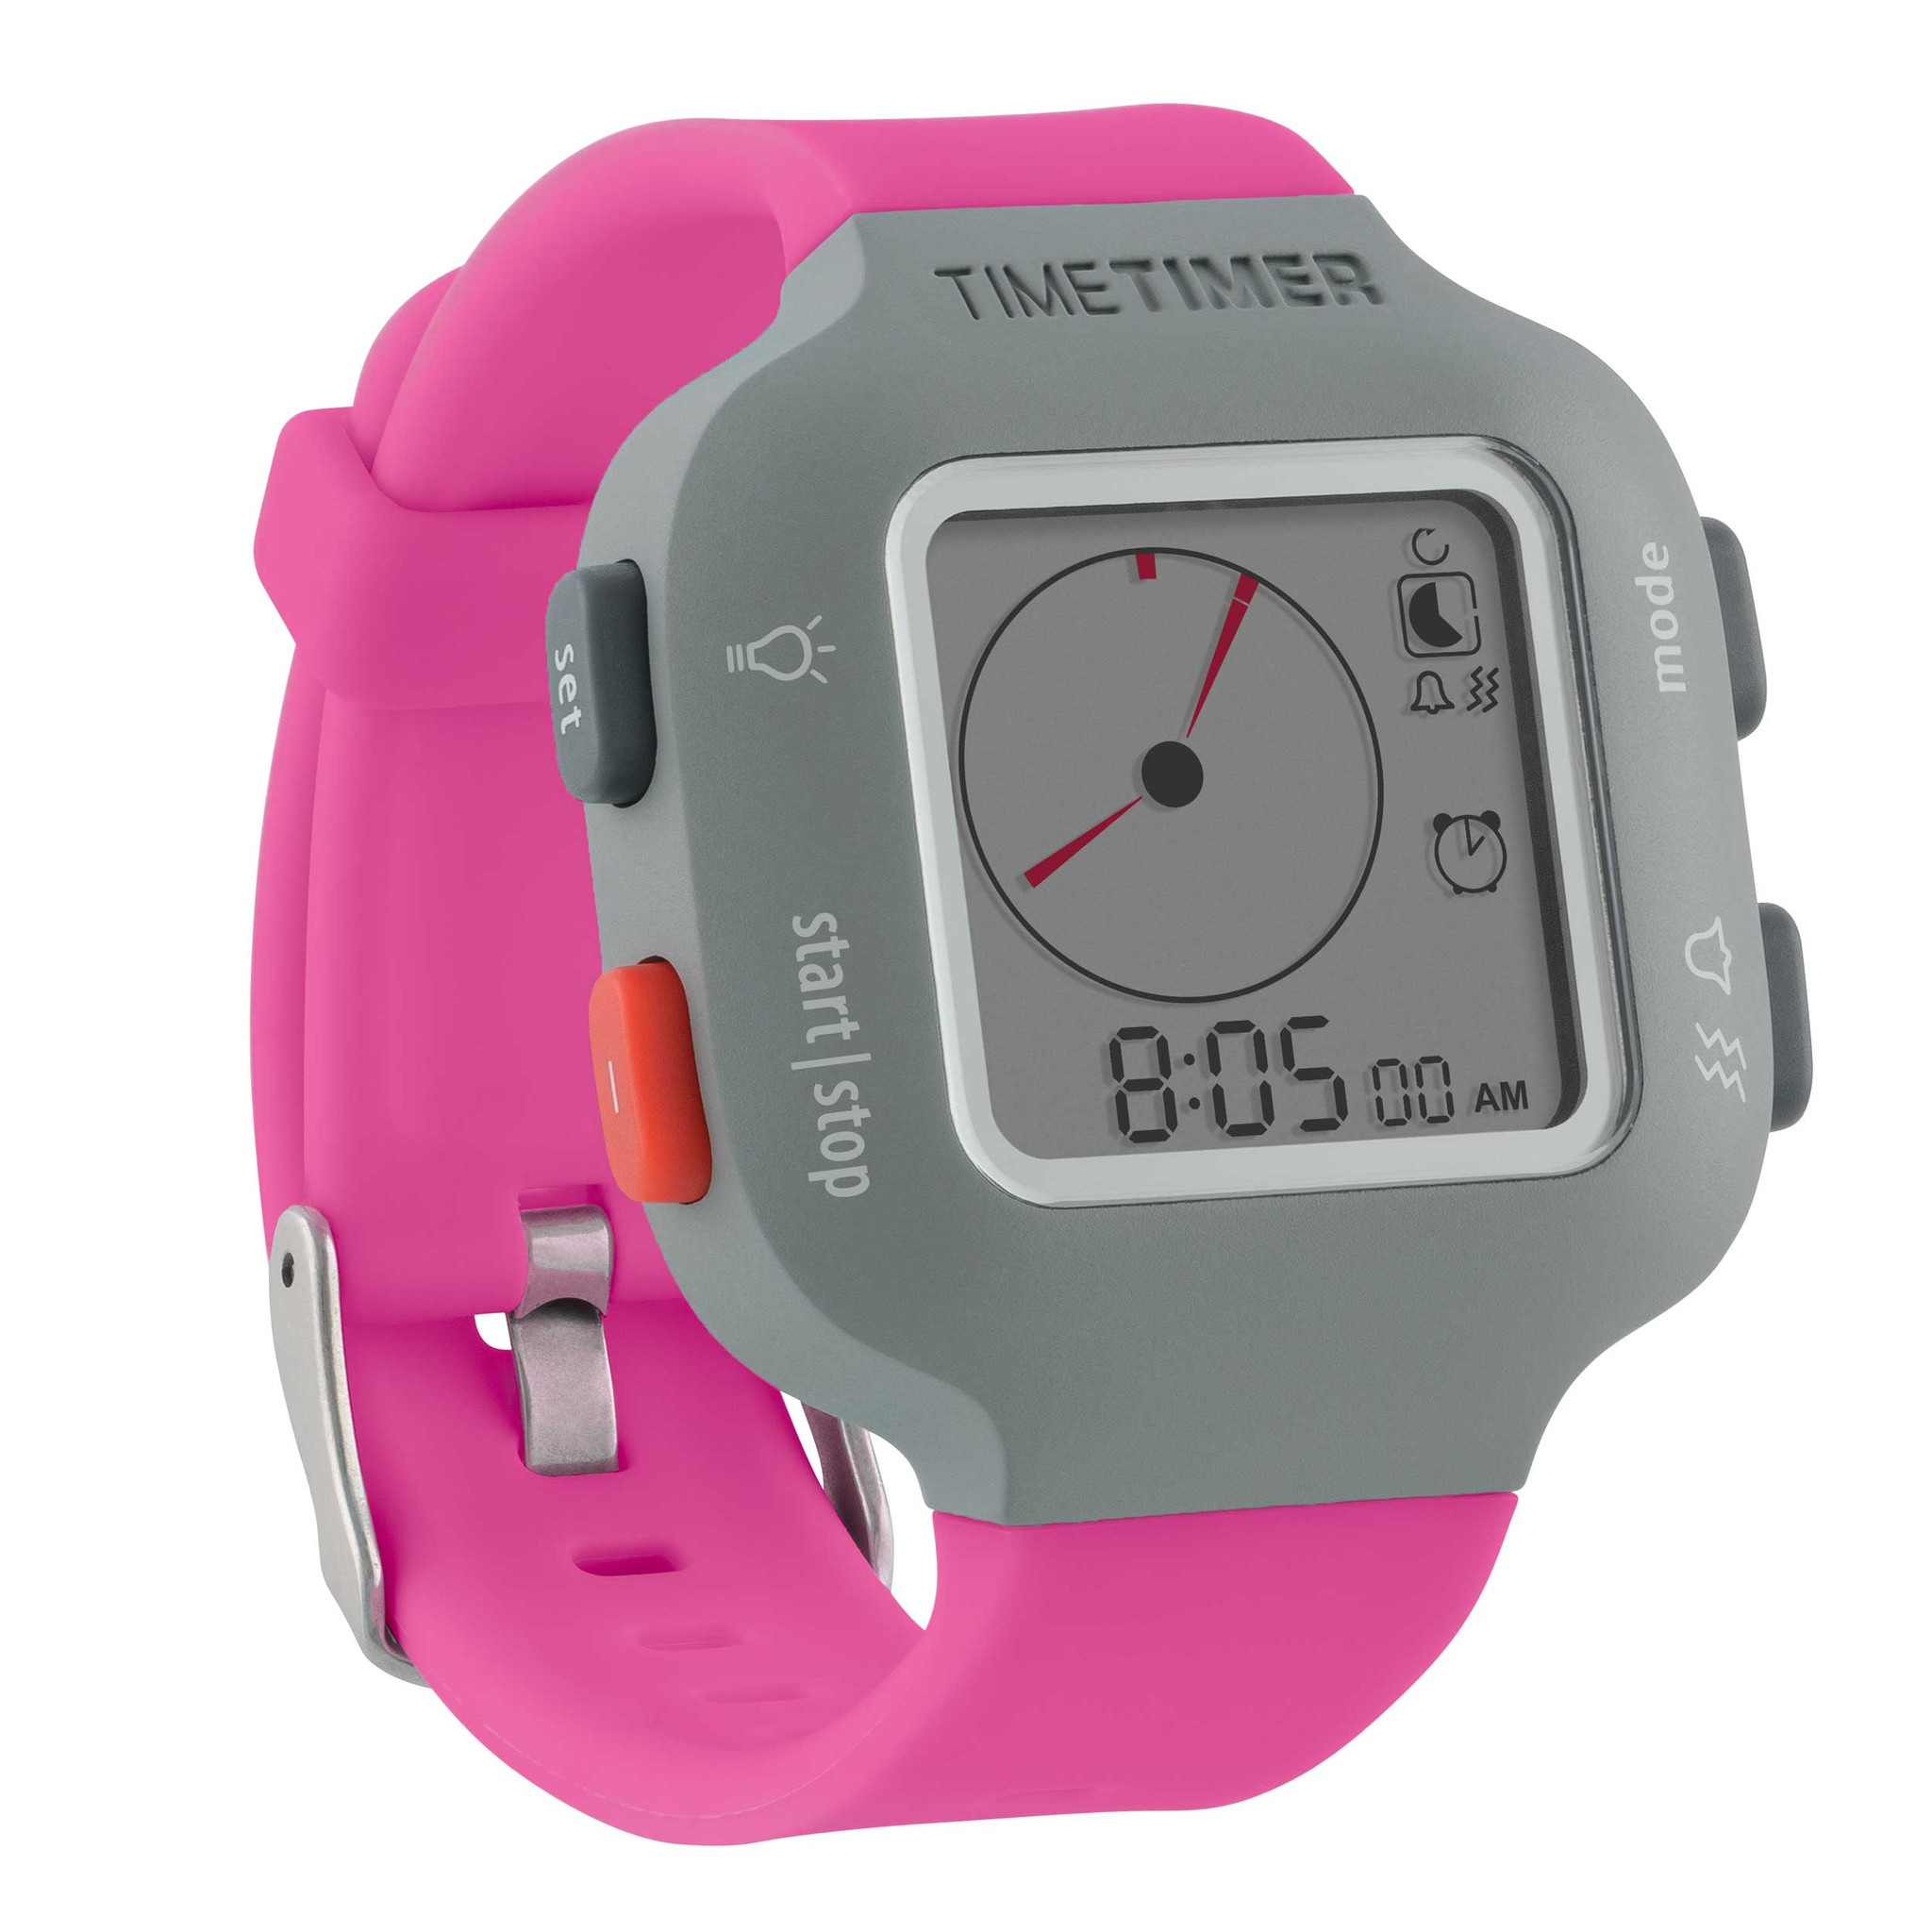
- Time Timer Watch PLUS Large, for larger wrists, has all of the same features, but measures 5.5″ to 8.25″ and comes only in Charcoal Grey.
Both styles of watches are $84.95.
Finally, because the need for time management doesn’t just live in the tangible world, there are Time Timer apps for the iPhone, iPad, Android phones, as well as Mac and Windows apps, offering customized timers. Prices range from $0.99 to $19.95.
BEST BUSINESS PRODUCT: Fujitsu ScanSnap
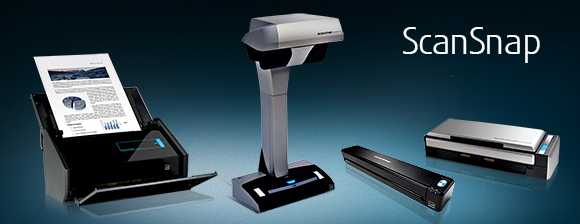
Longtime readers of Paper Doll know that good paper management sometimes means determining which information should exist in digital form, and that means mastering the skill of scanning.
Two years ago, in NAPO2014: Wirelessly Scanning the Horizon — What’s New in Scanning?, we looked at the Fujitsu ScanSnap iX500 Desktop Scanner. With an output resolution of up to 600 dpi for black and white (and 300 dpi for color), the ability to scan single-sided or duplex, a 25 page-per-minute scanning speed, a 50-page automatic document feed, one-button searchable PDF creation, and wireless scanning to Mac, PC, iOS or Android devices, the iX500 is still the belle of the scanning ball as far as professional organizers and productivity experts are concerned.
But the iX500 is only one member of the ScanSnap family, which also includes the mobile, handheld Fujitsu Document Scanner ScanSnap iX100. This little guy is only 14.1 ounces, so it lets you scan receipts and contracts on a business trip, school notes from the library or college dorm, or recipes and plastic ID cards from anywhere to your PC or Mac as well as well as your iOS or Android device. Via USB or Wi-Fi, the iX100 lets you scan to PDF (or even searchable PDF, if you’re using your computer), JPEGs, editable Word and Excel docs (again, on the computer), and send your scans via the ScanSnap Cloud feature to your Dropbox, Evernote, Google Drive, and other cloud services.
Paper Doll has often covered the best ways to decide if and what to scan, in classic posts like in Get Organized Month: Paper Control 102–Advanced Topics & Office Hours and Paperless vs. Less Paper: 6 Ways to Reduce Paper Consumption. However, I recognize that when it comes to the intricacies of the technical side of scanning, I am definitely not the ultimate expert. That’s why, on your behalf, dear readers, I rub elbows with someone who is. (Actually, in this person’s case, he’s super-tall, so his elbows would probably clock me in the ear, but you get the idea.)
If you’re new to going paperless, you definitely want to become familiar with Brooks Duncan of DocumentSnap. Start with his blog post, Going Paperless in 5 Easy(ish) Steps, and move on to his website for others of his gems:
- DocumentSnap Blog — from scanning into Evernote (and exporting out of it) to creating your own private cloud to document search, Brooks is your guy.
- Sign up to get his Paperless Cheat Sheet (linked from the front page) so that you can approach scanning in the right way.
- If you’re going to go the ScanSnap route, look into his Unofficial ScanSnap Setup Guide ($5 each for Mac or Windows, $8 for both.)
- And finally, if you’re thinking of scanning to the cloud, check out Brooks’ Paperless Security Guide, which, at $7, is a steal.
In addition to Time Timer and ScanSnap, the two big productivity stars, other winners of the 2016 NAPO Organizers’ Choice Awards included:
BEST BUSINESS SERVICE: NAPOSure
NAPOSure offers customized professional insurance for practitioners in the organizing and productivity fields. This includes coverage for property, loss of income, professional liability, auto, and employee bonding.

Because the federal government is slow to assign new NAICS industry classification categories, many professions that have existed for multiple decades (including professional organizers and productivity experts, coaches, ADHD specialists, and a variety of technology-related professionals) lack aAICS categorization, which makes it difficult to ensure appropriate professional insurance. For years, professional organizers were categorized by insurance companies as interior designers, even though that coverage approach was, at best, inappropriate. NAPOSure was the first insurance designed and customized for professional organizers.
Metropolitan Organizing’s Geralin Thomas has an excellent short post on How To Get the Best Insurance Coverage for Your Organizing Business, including selecting the appropriate types and levels of coverage.
BEST RESIDENTIAL SERVICE: 1-800-Got-Junk
We know that even if our clients are comfortable with purging the excess from their homes, not everything can find its way to a logical and useful next “home” via consignment or donation. Sometimes, stuff is broken, too far out of date, or otherwise too damaged to be of use to anyone, and that’s when 1-800-Got-Junk comes to the rescue. If you’ve got something non-hazardous that “two strong, able-bodied crew members can lift,” then they can get it out of your space.

This full-service junk removal company offers the upfront pricing, convenient pickups, and responsible disposal services that make professional organizers and our clients feel confident using. 1-800-Got-Junk was voted Best Residential Service, because they’ll pick up your household detritus, including old appliances and TVs, mattresses, furniture, carpets — even hot tubs! But they also service businesses, and will remove “junk” and recycle computers, monitors, and printers from your office space.
BEST IN SHOW: Lock & Rollin’ Flooring Solutions
I’m a generalist, working with both residential and business clients, but I specialize in paper and information management. So, I’m not often involved with garage and attic organizing systems, or other “heavy-duty” tools. However, clients are often looking for recommendations, and it was interesting to learn about Lock & Rollin’s Flooring Solutions.
Designed to help turn attics and crawl spaces into safe storage options, Lock & Rollin’ uses 32″ lightweight slats which slide together to form adjustable lengths of roll-out flooring that fit between attic joists. The creators state that it holds up to 250 pounds per square foot while being lighter than typical attic flooring, like plywood, so it should be easy enough to lift and carry, and they say it’s resistant to mold, mildew, and termites.
Lock & Rollin’ was surrounded by crowds throughout the conference, so all I could see while craning my neck was something that looked like a seriously heavy-duty Transformers-style yoga mat. At the risk of associating myself with an annoying “As Seen on TV” late-night commercial, as someone who fears falling through an unfinished attic floor, I found this video to be both explanatory and intriguing.
Congratulations to all the NAPO2016 Organizers’ Choice Award Winners!
Disclosure: Some of the links above are affiliate links, and I will get a small remuneration if you make a purchase after clicking through the links. The opinions, as always, are my own. (Who else would claim them?)
Follow Me