Archive for ‘Paper Organizing’ Category
How to Use Timers for Improved Productivity and Focus — Part 1
Everyone seems to agree that January slogged on, but people are shocked that we’ve suddenly arrived in April, with February and March having disappeared in the blink of an eye.
The truth is, most people aren’t very good at gauging the passage of time. In her A Working Library blog, Mandy Brown wrote Out of Time about writing, taking breaks, and resting. Prompted by another author’s piece about having gone on a retreat to find time to focus and recommending an analog timer (unsurprisingly, a Time Timer), Brown ordered one, but suffered frustration because she couldn’t get it to work. She kept putting in batteries and trading them out for others, finally ending the anecdote with:
I thought perhaps the timer didn’t like rechargeable batteries—some devices are persnickety that way—so I went rummaging around the house for a regular battery, found one in the toolbox, swapped it into the timer, turned the dial. And waited.
And waited.
Nothing.
I gave up, and went to fix lunch.
About a half hour later, as I was putting dishes away, I heard a steady beep from somewhere upstairs.
It was the timer, going off.
The damn thing had been working all along.
I just didn’t think it was working fast enough.
Time often fails to work as we think it should. It drags on, or it disappears. But of course, time is uniform; time is a constant. There are always 60 seconds in a minute, 60 minutes in an hour, 24 hours in a day, and so on. We are the ones with the problem, not time. We lack motivation and procrastinate. At first, the time available seems endless; then we panic and finally settle down, but allow ourselves to be interrupted, and the available time is suddenly gone.
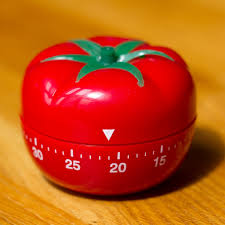
In one of my most popular posts, Frogs, Tomatoes, and Bees: Time Techniques to Get Things Done, we looked at what we need to understand about our problematic time behaviors, and at nifty system solutions, including the Pomodoro Technique and its offshoots (Tocks, 90-Minute Blocks, 52/17 Method, and Flow State).
The exact number of minutes may vary, but the strategies remain the same:
- Do a brain dump to know everything you have to work on.
- Break large projects and concepts into smaller, distinct tasks so you can identify specific activities from which to choose.
- Prioritize what’s important to find the essential next task to tackle.
- Start that task and stay focused.
- Take a break. (Not sure how or why? Read Take a Break — How Breaks Improve Health and Productivity.)
- Lather, rinse, repeat.
Some methods may also involve noting what internal or external disruptions occurred. (Did you get hungry and wander off for a snack? Did a stray notification steal your attention and take you down a social media rabbit hole? Did your kids or co-worker need help finding something right in front of their eyes?)
To improve our use of time, we can incorporate short-term accountability, bringing in co-working buddies to body double and keep us focused and on-task.
- Paper Doll Sees Double: Body Doubling for Productivity
- Count on Accountability: 5 Productivity Support Solutions
- Flow and Faux (Accountability): Productivity, Focus, and Alex Trebek
Other methods involve giving ourselves rewards. Some digital apps support Pomodoro-based work using gamification, rewarding focus and completion. Maybe you’re not a carrot person but a stick person, and need a negative consequence for not sticking with it?
No matter your method, there’s one more commonality to all of these approaches: keeping track of time! And for that, we get the biggest bang for our buck by using timers.
WHY AND HOW TO USE TIMERS FOR PRODUCTIVITY
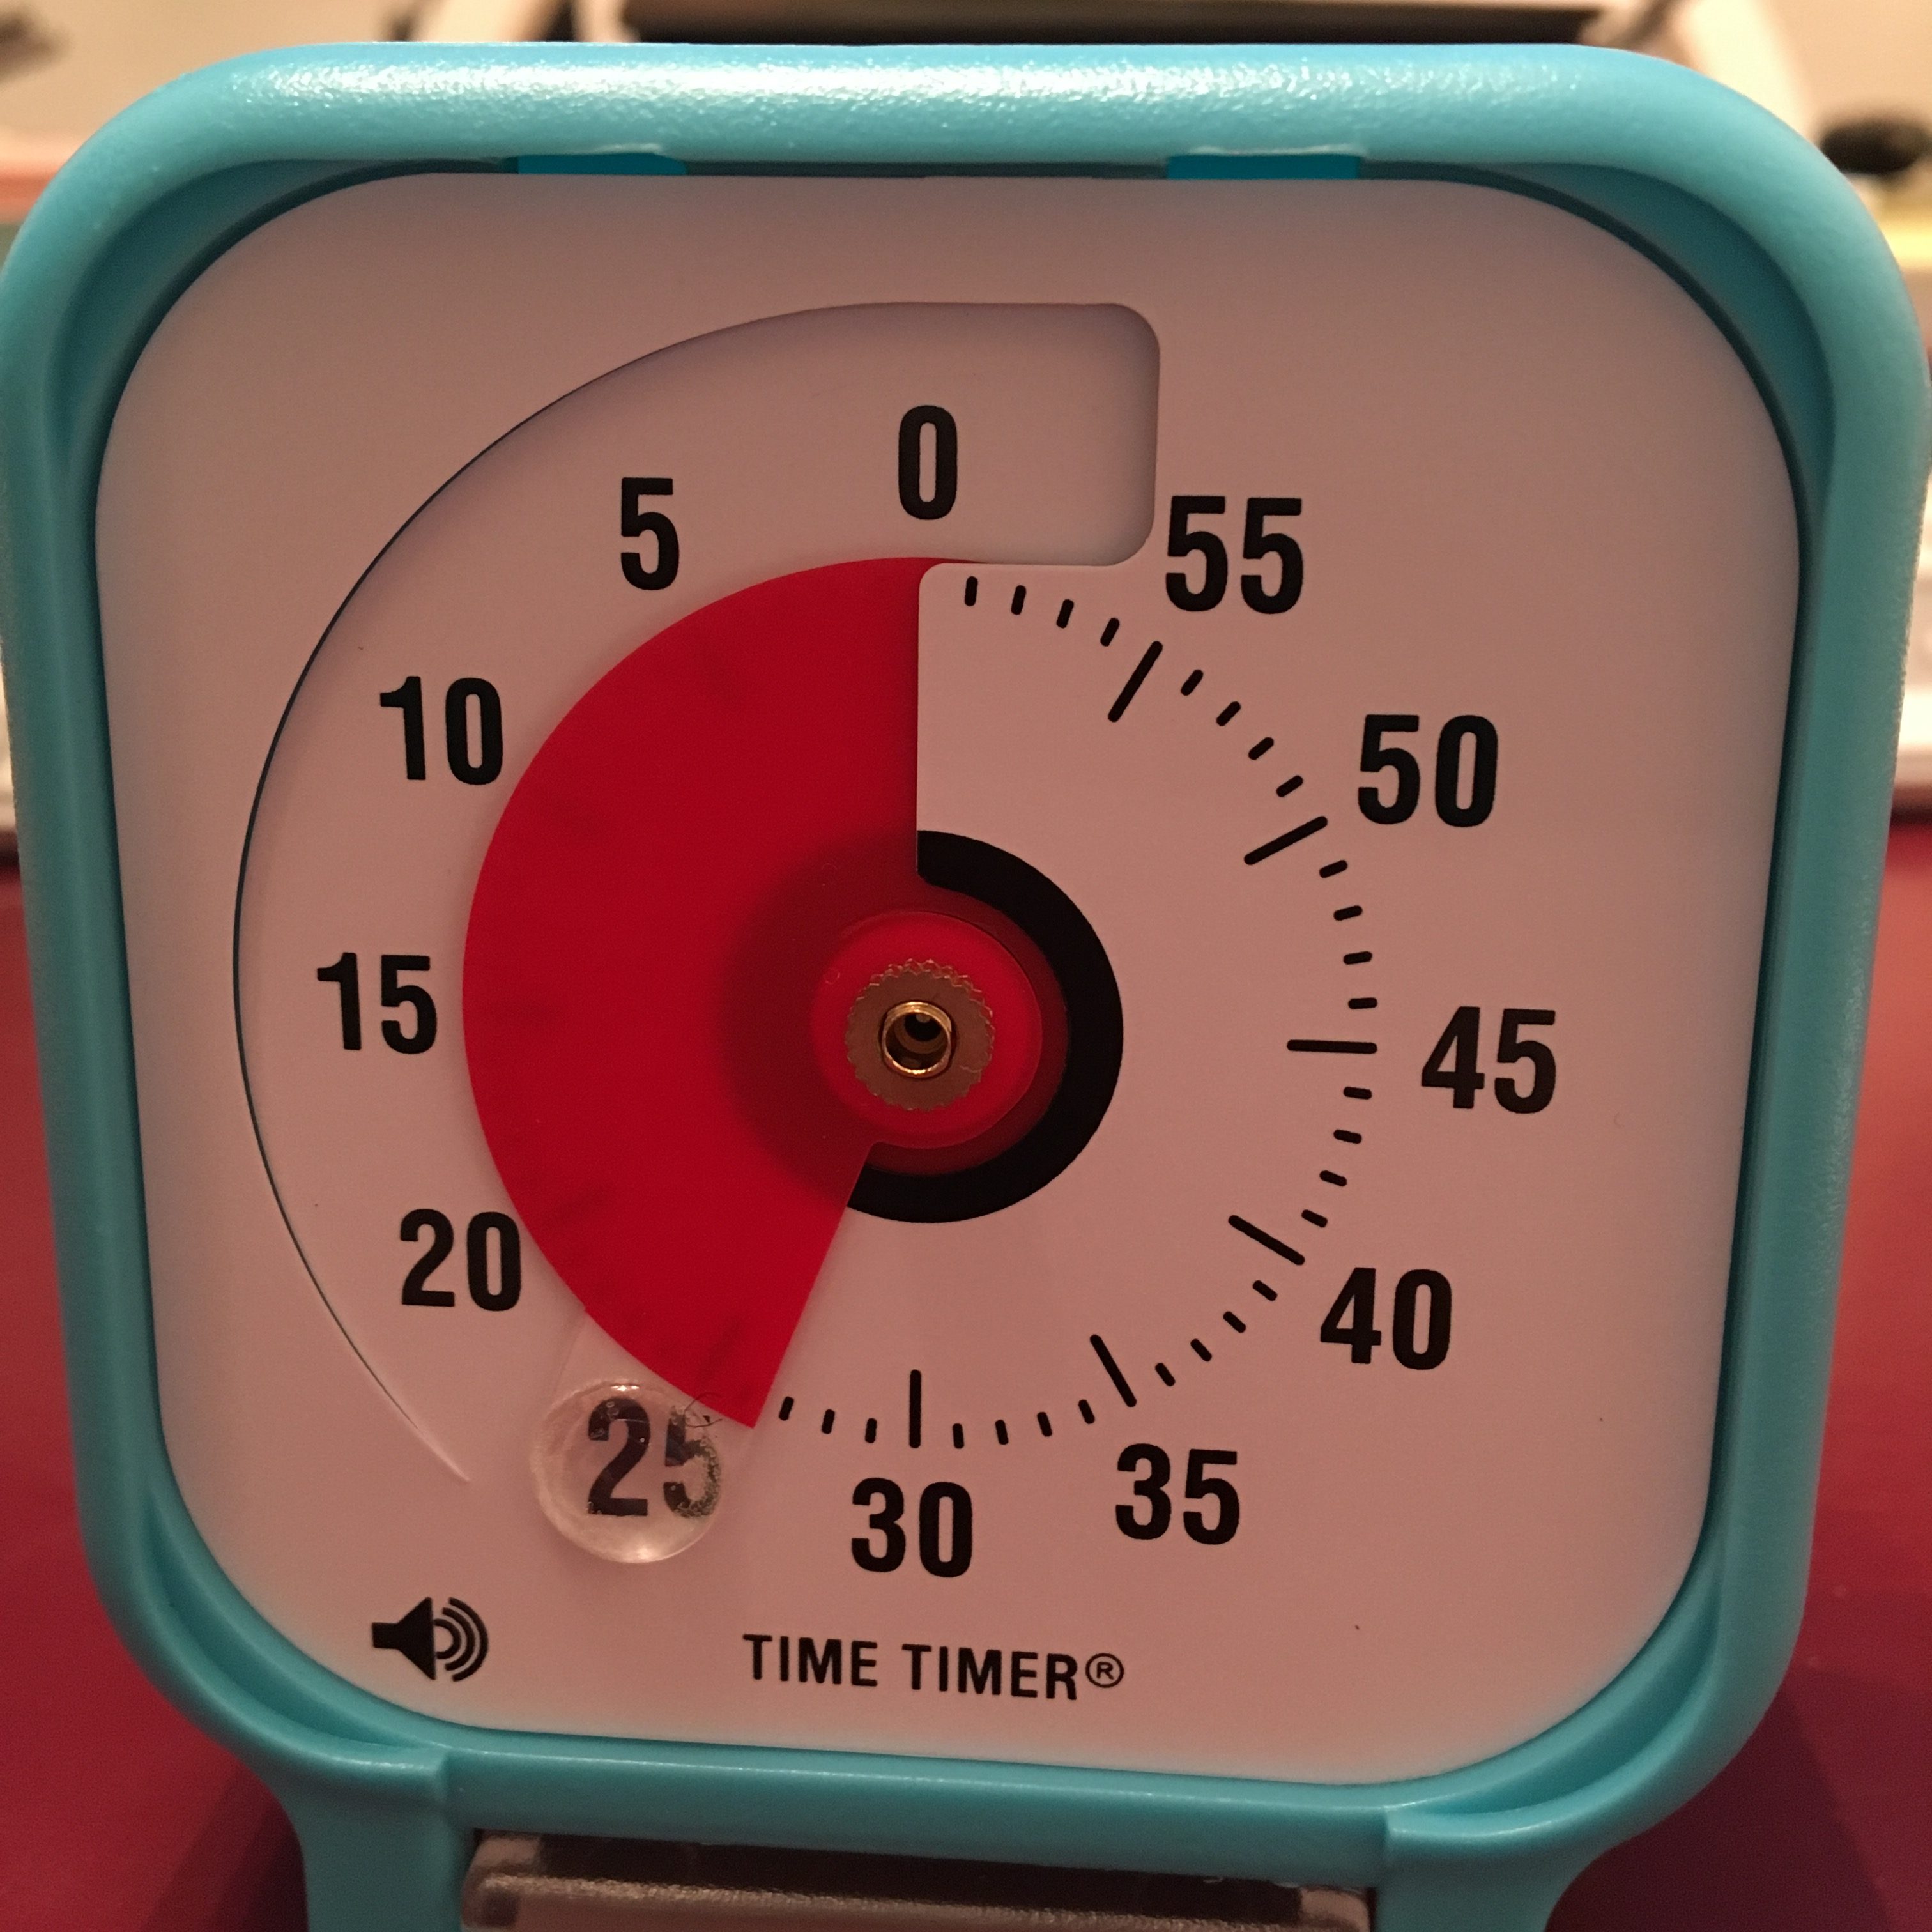
“C’mon, really?” clients ask, giving me the side-eye when I pull out one of my visual timers. “Can’t I just work until I get it done?”
Sure. Maybe. But probably not, especially if I’m not there with them.
If telling yourself to get down to work — and working a certain amount of time and not getting distracted but also not hyper-focusing to the point of getting burned out, eye strain, and a headache — actually worked for everyone, then time management wouldn’t be a “thing.”
Timers help us in all manner of ways, at work at and home. At its most basic, a physical timer or a visual digital timer/app creates a tangible representation of time passing so you can see and feel time.
Use Timers for Productivity at Work
You’re probably not shocked at the idea of using a timer, but you may feel silly employing one. Do you think that unless you’re a professional athlete, a surgeon struggling to perform a procedure within a safe time span, or a special effects master overseeing synchronization, that timers can’t help you?
There are many ways to improve your productivity at work with the help of timers.
For yourself
- Avoid falling into the email rabbit hole — Set a timer so you don’t “come to” three hours later in the midst of an email-induced stupor, wondering why you just read an entire newsletter about artisanal butter when you were just looking for a sign-up email to send to your colleague.
- Time block your tasks like a pro — We’ve talked extensively about time blocking here at Paper Doll HQ. The only way to make sure you have time for all of your priorities is to schedule time on your calendar — the space where time lives — for attending to them.
But your calendar isn’t the only tool you need for time blocking. It tells you when you’re supposed to start a task, but how will you remember when to move to the next thing?
Want to tackle your bookkeeping and still have time for a snack? Set your timer, get it done, and reward yourself with something yummy like an apple. Or cheese. Or cookies. (As they say on TikTok, we listen and we don’t judge.)
- Prevent perfectionism paralysis — When societies were agrarian, we knew we were “finished” when we’d reaped the harvest; most modern work ends with deadlines — or (seemingly) never ends at all. Give yourself a hard stop on tweaking that PowerPoint so you don’t turn a simple deck into a TED Talk that nobody asked for. When the timer buzzes, you’re done. Move on with your day (and your life).
- Keep deep work from locking you in the deep freeze — You’re focused, you’re in the zone — until you look up and realize that it’s dark outside and you forgot to eat lunch or pick up your kid from soccer practice. A timer keeps you from pulling a Christopher Nolan-style time dilation.
For your team
- Prevent your meetings from dragging on like Martin Scorsese’s “The Irishman” (run-time: 3 hours and 29 minutes!) — Keep a visual timer in sight so everyone knows when the meeting should actually end, not just when it starts to improve satisfaction and engagement. Otherwise, the Monday status meeting begins to feel like a hostage situation.
If you’re the one moderating the meeting, install and set up the Zoom timer in the app:
- Add the Timer – Clock, Agenda, Countdown & Stopwatch to your paid Zoom account
- Using the Zoom Timer App
(Google Meet has a similar option you can add to the Chrome browser. While Microsoft Teams does not have a built-in timer, you can integrate third-party timers into a PowerPoint presentation or add one to the meeting itself.
- Help participants in your virtual meetings keep it snappy — Have you ever been on a Zoom call where someone talks in circles or drones on? Use a timer built into the screen and the meeting won’t devolve into a filibuster.
- Help team members segment their time for time tracking — Use timers to track how long tasks take and identify areas for improvement.
Having a timer go off (no more than) every thirty minutes or hour to prompt logging/tracking activities will help team members be more aware of how they spend their time, and make them (and you) less likely to get distracted by low-urgency, low-importance tasks. (For more on the benefits of time tracking, see my recent post, How to Use Time Tracking to Improve Your Productivity.)
However, it’s important that you don’t use timers to micromanage your team. A timer can be a powerful tool, but the moment you use it to time someone’s bathroom breaks or note that they come back from lunch two minutes after the buzzer, you’ve veered from Motivational Mama to Big Brother.
Use Timers to Improve Personal Time & Daily Living
- Keep your meals from turning into messes — The number one most common reason for using a timer at home is for cooking, and yet people really underutilize timers. Baking brownies? Sure, you’ll set the timer for 25 minutes. You know that it’s important to measure how long something should cook when there’s a recipe in the cookbook or the back of the box.
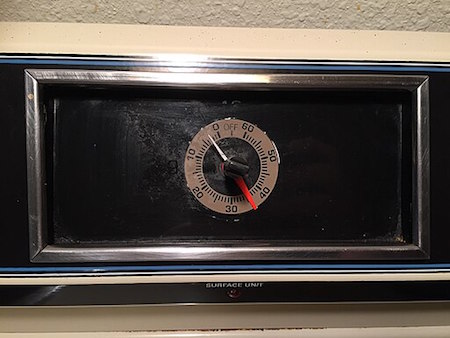
Kitchen Timer of HotPoint Electric Range, Steven Pavlov, CC BY-SA 4.0, via Wikimedia Commons
But how often do you set a timer to make sure you don’t get distracted and walk away altogether? Have you ever put the pasta in the boiling water or started the soup, only to get pulled away from the stove by your kids, a telephone call, a story on the news? Have you ever just turned your back on the stove to scroll through your feed and totally lost track of time until you heard the unmistakeable splish-splash of a pot boiling over?
It’s not really true that a watched pot never boils, but it is absolutely true that an unwatched pot boils over before you’re ready. And an monitored oven or air fryer will turn whatever you put in it into ash.
There’s a reason your microwave has a timer built-in. The manufacturers know that you’ll set a timer for something set to cook for a long while, but that you’ll overestimate your ability to get back in two minutes and forty seconds and completely forget that you were cooking.
If you’re not going to watch your food cook (and you are forgiven for not wanting to do that), set a timer. Use the timer built into your oven or just shout out, “Hey, Siri, set a timer for 7 minutes!”
And honestly, if you are sometimes so distracted that you don’t know why the alarm is going off, even if you set it fifteen minutes ago, you can say, “Hey, Siri, set an alarm for 7 minutes and call it ‘Pasta'” so that when you look at your phone to turn off the alarm, you’ll know what’s what.
- Save your laundry from shrinkage and wrinkleage — Modern washers and dryers have all sorts of bells and whistles. Well, bells and music, at least, with their deedle-deedle-ding musical trills as the washer changes cycles. However, if your laundry machines are in the basement and you’re on the second floor, you might not even hear those twinklingly annoying “dulcet” laundry tones.
And if, like me, you have a practical but not very modern washer/dryer set-up (the kind without myriad settings and just normal/delicate/heavy duty settings), your dryer may have one loud ear-splitting BUZZ to alert you that your clothes are dry and absolutely nothing (but the absence of white noise) to let you know that your washer is done. And again, if you’re not right by your laundry area, you may not even hear that.
But do you know what you always hear?
Your phone, because it’s never more than a foot away from you for long, and usually it’s within arm’s reach. Get to know how long your washer and dryer cycles are and create alarms for them: 17 or 35 minutes or whatever. Name the cycles something simple, like “Get clothes from dryer” or “Switch clothes from washer to dryer.”
The next time you start a load, just slide the toggle to ON and you’ll be alerted just about when your laundry is ready for you. This way, you’ll have no wet clothes sitting all night in the washer growing mold, and no set-in wrinkles from clothes that could have been folded or hung.
- Get a shower time reality check — Ever take a shower so long you accidentally turn it into a spa day?
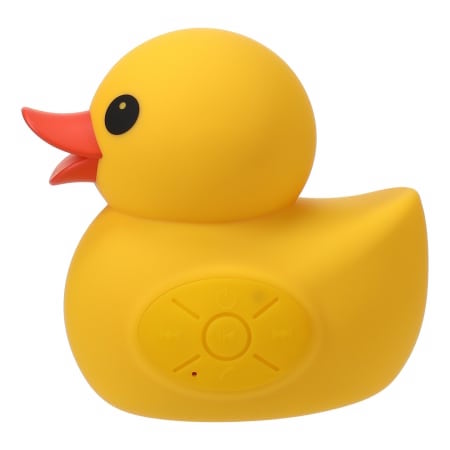
A timer keeps you from running your water bill up like you’re auditioning for The Little Mermaid. An alternative to keeping a regular timer in your steamy bathroom is investing in a Bluetooth shower speaker connected to your cell phone, with an alarm set to play a favorite song. There are a lot of popular, inexpensive shower speakers that look something like this:

Though I have to admit that I’m pretty partial to the aesthetics of this Ernie-approved rubber ducky version:
- Make it out the door…on time (for once) — Somehow, getting dressed and grabbing your keys takes exactly as long as the time you don’t have.
The underlying problem may be that you are always trying to do just one more thing. Or perhaps your physical space’s disorganization holds you back. Maybe you don’t have a good morning routine, or it could be that you’re subconsciously trying to sabotage yourself because you really don’t want to go to work or Jazzercise or your mother-in-law’s house.
But if you truly want to get out the door in time, a timer can help keep you focused on the “time benchmarks” of your day, like when to be done with breakfast and get in the shower, or when to make sure you’re putting on your shoes or grabbing your bag.
A timer is you in the present, sending a message to yourself in the future, which will be received by your future present-self as a message from your past self. (Christopher Nolan has nothing on Paper Doll!)
- Limit doomscrolling before bed∫— Set a timer so you don’t accidentally binge-watch TikTok or Instagram until the sun comes up, causing you to regret your entire life.
And if you tend to doomscroll in the morning and forget to get out of bed, setting a series of morning timers (annoyingly two minutes apart) can’t hurt.
- Speed-Clean Like a Sitcom Montage — Set a 15-minute timer and pretend you’re in a time-lapse TV-cleaning montage. Bonus points for using Eye of the Tiger as your background music.
This works especially well if you want to play 52 Pickup with your kids. Chores are boring; competition (against their siblings, against you, or even against their all-time best score) makes them more challenging. Let’s face it — hours between getting home from school and bedtime can be messy. Set a timer to see who can pick up the most number of things (that don’t belong there) and put them away; the winner gets to pick the background music for the next day’s challenge.
Running around to find things to pick up will either wear your kids out so that they’ll sleep more soundly or make it more likely that they’ll (eventually) put things away after using them; either way, it’s a win, teaching them that it’s not your responsibility to follow them around playing maid!
- Convince your kids that bedtime is not a negotiation — Maybe your third-grader seems more like a tiny corporate attorney when bedtime approaches, acting surprised by the deadline and immediately offering wheedling compromises.
A visual timer lets kids see how much time is left before bedtime, so they can’t argue with Father Time. The idea of 8 o’clock is pretty abstract. Make it more tangible.
When I was growing up, I knew what time I had to go to bed based on what time a particular TV show ended, but with streaming more popular that broadcast, that sense of time in increments of hours and half-hours and even segments between commercial breaks (the served me well when I worked in television) is meaningless to today’s kids, when not only can you start a show at any moment you want, but you can pause it and finish it the next day (or never).
- Pacify the “Just One More Game” gamer — If you, or your partner, roommate, or kid always needs “one more round” of their game before stopping, a timer makes it clear when it’s time to save and quit for the day. It’s harder to argue with a timer alert than a person, and more difficult to resent a non-human telling you it’s time to pack it in.
- Keep screen time from turning into screen day — Whether it’s kids, spouses, or yourself, a visual timer helps prevent an innocent 30-minute YouTube break from spiraling into an entire season of The Office.
To summarize, whether we are at work or at home, we can use timers:
- To make sure we focus.
- To make sure we don’t hyper-focus (or goof off) too long.
- To remind us to take breaks and remember to rest.
Of course, this is just the beginning of the productivity magic of timers.
As this series continues, we’ll look at what makes a great timer — for the way your brain works and for improved productivity for particular tasks. It’s not that tangible timers or digital timers are better, per se, but they each have different positive attributes and potential pitfalls, depending on the purpose for which you’re blocking out time.
As we move on, I’ll share classic, beloved timers as well as the newest and niftiest options for both analog/tangible timers and digital timers/apps, and help you figure out which will help you achieve your productivity goals.
Now that you can envision a wider variety of circumstances for using a timer to amp up your productivity, please share if there are other circumstances you use timers to help you buckle down and focus or, alternatively, keep you from worrying that you’ll hyper-focus right through dinner. What has worked for you, your work team, or your family?
Paper Doll Investigates Birthday Freebies: The Hidden Cost of Free Stuff

My birthday was last week. I don’t need to say exactly how old I am; let’s just say I was born sometime between the Pleistocene Era and the invention of the internet. I came into the world with big mouth (as evidence below) and a fondness for sharing my thoughts.
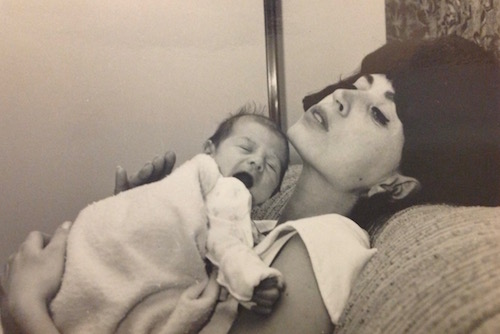
Paper Doll and Paper Mommy, mid-March 1967
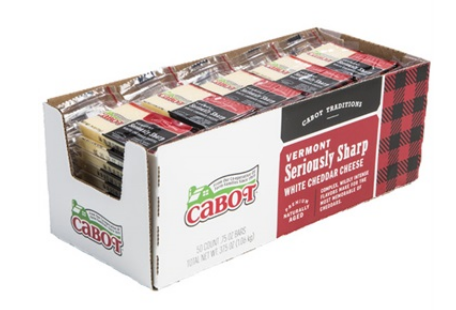
Birthdays are nice. They come with gifts and cake. In my case, they come with cheese, too. All my favorite people know how much I love cheese, and Craig, my friend since grad school, has started a tradition of sending me a box of 50 mini (3/4-ounce) wrapped Cabot Seriously Sharp white cheddar cheeses every year through Vermont’s Dakin Farm.
In the 21st century with relatively little effort on one’s part, birthdays can also come with freebies. So far this month, I’ve received emails and texts alerting me to the following birthday freebies and discounts:
Birthday Food Freebies
- Auntie Anne’s — one free hot pretzel
- Bad Daddy Burger Bar — one free burger, salad, or sandwich
- Ben & Jerry’s — one free scoop of ice cream
- Chicken Salad Chick — one free meal (I get the Pimento Cheese on a croissant!)
- Fresh Market — one free (gigantic) slice of cake
- Jimmy John’s — one free sandwich or wrap
- Krispy Kreme — free 3-count of Original Glazed doughnuts
- Moe’s Southwest Grill — one free order of queso (cheese!) or guacamole
- Publix — one free container of ice cream or a cake “bar” from the bakery
- Regal Theater — one free small popcorn
- Starbucks — one free drink or snack
- Waffle House — one free classic waffle
Birthday Non-Food Freebies
- The Container Store — 15% off
- IKEA — $10 off any purchase of $10 or more
- Kohl’s — $5 off
- Lane Bryant — $20 off any purchase of $20.01 or more (Ample-bosomed ladies, this is definitely the big ticket winner!)
- Target — 5% off any shopping trip (and yes, I acknowledge Target’s “issues”)
- World Market — $5 off as well as a separate 15% off
By now, you may be wondering, what does this have to do with organizing?
FREEBIES: A DOUBLE-EDGED SLICE OF CAKE
I didn’t have to go to much effort to secure these freebies and discounts. Most apps and reward programs ask for your birthday when you sign up. We can debate whether giving up our month and date of birth to a corporate entity is an invasion of privacy (and whether it’s worth it to get a Bloomin’ Onion or a Chocolate Thunder from Down Under).
By the time my inbox finished shouting “Happy Birthday!” I felt less like the birthday girl and more like a walking coupon book. Birthday freebies, and freebies in general, feel like a win. And when I nibbled a bite of cinnamon coffee cake or try on a deeply-discounted article of clothing I coveted, but didn’t want to splurge on, I felt like a winner.
But these freebies can come with strings attached — financial, organizational, and productivity-related strings.
Obviously, birthday freebies are a marketing tool. We generally ignore that, though, as we all get that little dopamine rush when someone (even a random corporation) recognizes our birthday.
And we all love “free” things, even as we recognize that being the object of a marketing campaign means that, while we are not necessarily paying for something with money, we are paying with our loyalty and our attention. As the saying goes, if you’re not paying for it, you’re the product.
Advertisers are buying our attention; rewards programs are buying our loyalty. Conversely, my grad school friend Craig is only getting my good will and my resplendently awful — or awfully gouda — cheese puns in my thank you cards.
Maybe you feel like you’re wise to the freebie game, but there are some sneaky gremlins hiding among the balloons and presents.
The “I’ll Just Spend a Little Extra” Trap
Let’s say your freebie gives you a free fancy burger, like the Fried Mozzarella Burger at Bad Daddy’s Burger Bar. (It’s my go-to, with the Impossible Burger pinch hitting for the meat version.)

You’re probably not going out to eat by yourself. Yes, you may make a Starbies run on your own, but you’ll probably bring your spouse or significant other, your kids, your bestie, or whomever is available so you don’t have to eat dinner alone while scrolling your phone. On one hand, this prompts a social activity; on the other, depending on the economics of those with you, you may be digging into your wallet. (I mean, when it’s not your actual birthday; on that day, people are likely to treat you.)
Second, everything on this particular menu is standalone. Who eats a burger (even a plant-based one) without fries or onion rings or, in this case, fried pickles? So, you’re going to pay for that. And when you’re having a burger, are you really going to wash it down with water? You probably want a cola, or perhaps an adult beverage.
And hey, it’s your birthday! (Or, at least it was when you found out about this freebie). On your birthday, or whenever you’re dining out for a special occasion — even if that special occasion is just that you’re dining out — you’re going to want a delicious dessert, too, even if it’s not your habit to get dessert.
Last week at the Greek restaurant, my dining companion had a Bananas Foster cheesecake and I had a baklava cheesecake. And I barely looked at the price because it was a special occasion.
It’s rare to get a free food item and not end up buying a beverage, a side dish, or a dessert. Suddenly, that “free” molten lava cake costs you $24.99 in dinner, beverage, tax, and tip. That “free” milkshake? It came with a $15 burger and a side of buyer’s remorse.
When you get a freebie, what you “spend” is almost certainly going to dig into your financial budget, but it’s also draining your calorie or carbohydrate budget.
The “Gotta Catch ‘Em All” Effect
Freebies create a sense of urgency: “If I don’t grab this TODAY, I’m missing out!”
I received some of the notices on the first of the month and they are good for all of March; others I received on my birthday and are good for thirty days after. Just a few of the meals are only good until the middle of the last week of March, and one, for Starbucks, had to be used on my birthday. (My dinner with a friend at my favorite Greek restaurant just happenned to be next to Starbucks, which made that easy, but some years, I’ve been known to take a Starbucks run at 10 p.m. just to grab my freebie.)
If you aren’t organized in your approach to taking advantage of them, you may feel pressured to go out chasing your freebies like they’re Pokémon and — spoiler alert — you can’t catch ’em all.
This attitude can lead to impulse shopping. You plan to just use the $5 off at a store to buy something you want, but maybe when you get there, the item you had in mind isn’t in stock. Or maybe you didn’t have anything in mind (beyond getting something worth $5), so you roam the aisles and end up buying something random you didn’t need because you’re not going to be cheated out of your opportunity to get something for free!
This doesn’t just apply to birthday freebies, of course. Sometimes you’ll see a great deal in an ad, and you’ll think, “Ooh, SuchAndSuchAStore is having a 30% off sale; I have to go!” But unless you were already interested in buying something that you know they have, and you were just waiting for a convenient time to go, that sale is sneaking into your subconscious, and you’re not going to leave the store without some purchase, even possibly something you didn’t (and still don’t really) want or need.
The Clutter Conundrum of Freebies
Your voicemail is full. Why?
Your junk drawer called — it’s staging an intervention. (Speaking of which, this is a good time to plug a classic Paper Doll post, Is Your Junk Drawer a Drunk Drawer? 3 Steps to An Organized Junk Drawer.)
Oh, and your pile of free T-shirts called — it’s tired of being the wardrobe for your imaginary gym life.
This is less of a problem with birthdays freebies, as you already participate in the rewards programs of all of the companies inviting you, their loyal customer, to partake of their largesse in wishing you a glorious natal day! And what they’re offering you is something in the general area of what you already want — food you like or the kind of merchandise you already buy.
But if you’ve ever gone to a conference, a convention, a fair, a festival, a workshop, or anyplace that they were giving away free swag, you know what those kinds of freebies that pile up:
- pens — The ink will dry up before you’ll ever use them
- canvas bags — Your trunk is already overloaded with more canvas bags than any amount of groceries you could possible tote in them — or even afford. You don’t need to adopt every orphaned tote bag on the planet!
- keychains — How many keychains does a person need? That’s why the extras end up in your junk drawer!
- T-shirts promoting somebody else’s business, so that you becoming a walking billboard (which is why you never wear any of them in public)
- candles — It may be adorable or smell delicious until you realize you’ve collected enough unused free candles to illuminate the final season of Stranger Things.
The Time-Suck Spiral of Freebies: What Is Your Time Worth?
Hunting down all of your freebies takes time and energy.
Let’s go back to what I said about feeling that you need to “catch ’em all.” That prompts you to run errands to places you might otherwise have skipped. For example, while I love Ben & Jerry’s ice cream, the only Ben & Jerry’s ice cream parlor is downtown, and I don’t get there very often. If I want their ice cream (and when don’t I?) I could go to the corner grocery store and buy a pint; but with self-induced pressure to use up all my freebies, I could be tempted to come up with a reason (OK, an excuse) to go downtown.
But I’d be missing something important. My time has value!
I don’t have any errands to run downtown. Do I need to use up the time and gasoline to go there just to get a scoop of ice cream?
Consider this: if you’re driving twenty minutes for a free coffee or pastry, is it actually free?
Develop a Freebie ROI Rule. Discern what the return on your investment is, in order to figure out if it’s worth the effort.
To be fair, it might be. If you’re an overworked, over-scheduled parent, taking advantage of a food freebie like a coffee or an ice cream doesn’t just mean you’ll get a food treat at no cost. It means you get a reason — or yeah, an excuse — to put yourself first. That round-trip drive, and that time to a far-away store or coffee house and the time to enjoy it, might very well be the only “you” time you get all week. You have this stranger on the internet’s permission: take inner peace where you can get it.

The only way, for sure, that you will know whether it’s worth your time to collect on your freebie is that if you make sure you remember that your freebie is an option, not an obligation.
HOW TO ENJOY FREEBIES WITHOUT THE CHAOS
It doesn’t seem like birthday freebies were this chaotic a decade ago, or even just before the pandemic. It feels like it’s really become a key marketing technique to get people into restaurants and stores. Embrace them, but employ caution.
Be Organized
At the start of March, I made an inbox folder and routed all birthday freebie/discount-related emails to it. Once I had several, I made two lists, one for edible freebies and one for merchandise freebies.
Most of the emails alerted me to freebies in the apps, but this is one of those times where Paper Doll really prefers paper. I printed the pages of the emails with essential info: QR codes, bar codes, deadlines, and crucial legalese. I made note of the expiration dates in the upper right corner of each printout, separated officers by food and non-food, and sorted them with the earliest expiration dates on the top of the stack.
Of course, I could have just as easily routed the emails to Evernote and set a pre-deadline reminder on each note. A short list of the freebie and expiration date maybe organized enough for you.
On my actual birthday, I got a whole new slew of alerts, and followed the same procedure, so what I needed to attend to the soonest was at the top of each clipped stack.
I’m keeping the folder in the car, so if I unexpectedly find myself near the place to redeem the freebie, I’ll have what I need.
This doesn’t mean I’ll absolutely take advantage of each birthday freebie; it just means I won’t miss any opportunities due to the clutter or chaos of announcements in random places.
Be Selective
Prioritize freebies you genuinely want or will use.
There are some apps or accounts I have because I needed to take advantage of a very specific discount or availability of something that I’ll never need again. Maybe it was for buying a gift for an ex-boyfriend who is no longer in the picture. (Who’s to say?)
Just because you have the opportunity to use a freebie (really and truly) doesn’t mean you have to. You have options:
- Ignore it — Toss out the mail or close the app, and just don’t think about it. (Yes, if you’re a Frugal Felicity, that may be difficult, but Paper Doll gives you permission.)
- Go halfsies — Don’t feel like you have to make an immediate decision. Look up the restaurant menu online and if something appeals to you, order just the free item in the app and arrange for curbside pickup so you won’t be tempted to eat/buy more than you want. For a store, surf the app or the website and see if there’s anything you were already planning to buy. If so, let the idea percolate and see if it boils over or your better angels turn off the burner. If not, let the freebie expire.
- Arrange to let a friend use the freebie or discount. — Even if you have to go there with your friend, you get the benefit of their company without the obligation to spend from your financial or caloric budgets.
Declutter as you go. If a freebie isn’t useful, set it free or find a way to make it a blessing for someone else. But as you do acquire tangible things with your freebies, make an effort to toss whatever is being replaced.
Set a Spending Limit
Decide in advance how much you’re willing to spend when redeeming a “free” item.
This might be a monetary amount you’re comfortable with because of your actual budget, or you may just want to keep yourself from going hog-wild with temptation.
Sometimes when I’m bored or in the neighborhood and waiting for an appointment, I’ll go into Ollie’s Bargain Outlet, a sort-of factory discount store and window shop for entertainment value. But I will set a dollar limit in advance — usually $15, but sometimes even $5 or $10. I can afford more, thank goodness, but I’m much more discerning if I’ve got that limit in mind. If I really want to spend more, I know I can, but the limit forces me to be mindful, and I’m more likely to leave without that impulse purchase. (And of course, I can always come back the next day if I’m hankering for a purchase.)
Similarly, you may want to set a caloric budget when taking advantage of an edible freebie. I’m diabetic, so I already know that I have a limited number of carbs I want to eat at a meal. If I’m going to a restaurant with amazing desserts, I’ll probably opt for seafood for dinner to use my carb count for cake; if the desserts aren’t tempting, I am much more likely to get pasta or something else equally carbalicious.
That free caramel macchiato will feel less like a win when you add a muffin, a sandwich, and a reusable cup that’s destined to live in your car’s cup holder.
If you have (or would like to have) more willpower when dining out with a freebie offer, organize your ordering plan around your food budget.
Schedule Strategically
Just as you’re being judicious with your financial resources or nutritional boundaries, be just as cautious and wise when scheduling how and when you’ll take advantage of freebies.
Don’t cram a dozen freebie redemptions into one weekend!
If you’ve never seen the Gilmore Girls episode called A Deep-Fried Korean Thanksgiving, Lorelai and Rory end up racing to four different Thanksgiving celebrations in one day. At Emily and Richard’s, there a get-dressed-up traditional meal. At Lane’s house, Mrs. Kim’s holds a strict, Korean dinner. At Sookie and Jackson’s, there’s a farm-to-table feast complete with Jackson’s wild and turkey-frying family, and at Luke’s diner, they settle in for a real family meal.
They found it fun (like freebies), but stressful (also like freebies).
If you’re sprinting through the mall like you’re on Supermarket Sweep, maybe it’s time to rethink your freebie game plan.
Spreading redemptions out will have three benefits.
First, you’ll have less stress. You’ll be fitting freebies into a carefully considered calendar instead of feeling like you’re battling Black Friday crowds.
Second, you’ll be less likely to bump up against the margins of your willpower (re: your financial and caloric budgets).
Third, the special delight of your birthday will last longer. Won’t it be more fun to celebrate each day of your birthday month (or the weeks following your actual birthday) if there’s a little treat each day?
Turn Down the Guilt
If you were raised with few resources, you may feel guilty or uncomfortable not taking reaping the financial benefits of free things. But, again, some free things have strings attached.
Your resources (of money, physical and mental health, and time) affiliated with the freebies have value, as does your sanity and chance to have a less chaotic schedule. And nobody gets to say how you spend your resources except you.
It’s alright to enjoy your freebies. It’s okay to let some offers go. It’s your (birthday) party, and you can cry if you want to, but you can also get $20 off a pretty bra at Lane Bryant or eat a free slice of cake if you want to, too!
Your birthday’s about you, not about proving you’re the reigning champ of Birthday Freebie Bingo!
FINAL BIRTHDAY FREEBIE THOUGHTS
There’s a yummy Italian restaurant, Provino’s, with six locations in Georgia and one here in Chattanooga. They’re known for their buttery garlic knots and free birthday dinners:
We have made quite a name for ourselves when it comes time for a birthday celebration. Come in on your birthday and get the Spaghetti Classica with marinara or meat sauce or if you choose take $14.50 off any menu choice, this includes our famous salad, garlic rolls and a birthday dessert. (Please show I.D.)
This is why there’s always a massive crowd in Provino’s lobby waiting to get in. There are only 365 days in year, which means there’s a good chance on any given day, that it’s a lot of people’s birthdays, and as previously noted, when you are getting a free meal, you’re pretty likely to want to take people with you.
On the plus side, free food and festivity! (Also on the plus side, those garlicky, buttery knots.) On the downside, the crowds mean there may be a long wait. Only you know which matters more to you.
Don’t let a handful of free offers turn your birthday into a part-time job. The real gift is your time, so spend it wisely — and maybe on cake. Or cheese. Or cheesecake.
Paper Doll’s Ultimate Guide to Organizing Yourself to Get a REAL ID
On Friday, I renewed my driver’s license. Typically, that wouldn’t be blog-worthy.
I’ve lived in Tennessee for more than three decades, and generally I’ve been able to renew my license at a little kiosk that looks like an ATM. I’d verify some information on a screen, get a new (horrible) photo taken, and pay with my debit card, all in the vestibule of the DMV while avoiding the packed waiting area.
Not this time, though. I wasn’t merely renewing my license; I made an appointment to apply for my REAL ID, and had to engage with the DMV representative behind the glass barricades.
WHAT IS A REAL ID?
In 2005 (and yes, that really was twenty years ago), Congress passed the REAL ID Act in the long shadow of 9/11-related security concerns. The Act did the following:
- Set clearer standards for government-issued photo IDs — So, if you have a driver’s license, your great-grandmother has a non-driver ID card, or someone you know has different government-issued ID card, they will all fall under an established and uniform set of security standards so everyone will be on the same page.
- Prohibited various government agencies (including the TSA) from accepting forms of identification that don’t meet the new standards. For quite some time, TSA agents had some wiggle room in letting people on airplanes even when/if they didn’t have proper identification (such as when they lost their wallet or had their ID stolen, and showed up at the airport desperate to make a flight). No more.
- Added an extra layer of security to the process of flying — Having uniform requirements for flying makes it much harder for someone to use false documents to board an airplane or gain access to secure facilities.
Basically, the REAL ID Act established minimum security standards for state-issued driver’s licenses, permits, and ID cards to reduce identity fraud.
REAL ID: A LONG TIME COMING
Dear Paper Doll Readers, you know I always try to share information with you in good faith, but ever since I originally blogged about the REAL ID, the US Department of Homeland Security has turned me into the boy who cried wolf.
Originally, the federal government wanted the new regulations to go into effect in 2008, but many states and territories opposed to the immense effort it would take to comply.
First, not all states had required photos for driver’s licenses; conversely, REAL IDs require facial image capture and states need “an effective procedure to confirm or verify a renewing applicant’s information.” To anyone who has watched too many episodes of Law & Order and other police procedurals, it’s a bit surprising that not every state was verifying that faces and names matched!
Second, states would have to confirm Social Security account numbers with the Social Security Administration and cross-check to make sure old or expired licenses were “terminated” in other state’s systems before taking effect in the state where someone was applying.
Third, states were going to be required organize and maintain the documentary evidence submitted. For example, each state would be need to either retain paper copies of documents for a minimum of 7 years or scanned/capture images of those source documents for a minimum of 10 years.
Fourth, states must limit the validity of all driver’s licenses and (non-temporary) ID cards to 8 years; some states had previously kept IDs valid for ten years.
Lacking professional organizers to keep their processes straight, state governments were not particularly keen on having make these changes! Kerfuffles ensued. From 2012 through 2018, states and territories acted in fits and starts.
Eventually, the federal government announced that it would require REAL IDs effective October 1, 2020. However, as we all know, 2020 didn’t exactly turn out as anyone planned, and the CARES Act (remember that $2.2 trillion COVID stimulus package?) delayed the start to September 30, 2021. Later, after several more changes to documentation and funding regulations, the date was pushed to May 3, 2023.
And now, finally, the official date appears to be on the horizon: May 7, 2025, which is (as of this writing), 57 days away!

If you already have a REAL ID-compliant license or other identification, you’re good, but if your license wasn’t due to renew over the past five years or so, you might have figured there was no need to rush to upgrade. But now, it’s time to pay attention.
WHY MIGHT YOU NEED A REAL ID?
Now that you understand why the government has been working toward this change for the last twenty years, you may wonder how it affects you. Why might you need a REAL ID?
1) You Need a REAL ID to Fly
As of May 7, 2025, in order to board an commercial aircraft, your identification must be REAL ID-compliant. Some people seem to believe that flying for particular purposes makes the new law inapplicable to them, but just to be clear, the REAL ID Act will apply no matter what kind of commercial flying you will be doing, including:
- business travel
- vacation/pleasure travel
- heading to college (or taking your children to/from college)
- accompanying minor children during a custody transferral
- traveling to care for ill relatives
- getting health care from specialists in distant cities
- looking for houses in a city to which you’re moving

United Airlines Red Carpet, courtesy of 1950sUnlimited, CC BY-NC 2.0
Do you need a REAL ID to fly on a private plane?
Yes!
Even if your non-commercial flight has private screening or you travel through a private FBO (fixed-base operator), the REAL ID act still sets — and the TSA must enforce — a minimum security standard for all air travel.
Do you need a REAL ID to fly on Air Force One?
No, but that’s because it’s categorized as a military (not commercial) aircraft used for official government travel. Journalists and politicians authorized to fly on Air Force One go through such thorough vetting by the Secret Service that gathering documents to secure a REAL ID will seem like a walk in the park.
Do you need a REAL ID to fly a crop duster?
Nope.
A crop duster is an agricultural aircraft, so flying in one is not considered commercial airline travel and therefore doesn’t fall under the REAL ID requirements. However, to work as an agricultural pilot, you must earn a private pilot license, a commercial rating, and a tail-wheel (conventional gear) airplane endorsement, and get specific agricultural aviation training. That seems like a lot of extra effort to just to avoid going to the DMV to get your REAL ID.
Do you need a REAL ID to fly firefighting aircraft (like air support to drop water or fire suppression chemicals on a fire)?
Sometimes, actually, yes. These aircraft, like those operated by Cal Fire during the recent fires, are sometimes considered commercial aircraft. I was surprised, too.
If you’re not familiar with these aircraft that drop water or pink suppression chemicals, may I point you to the CBS TV show Fire Country, or if you’re feeling up for something sappy but wonderful, the star-studded aerial firefighting movie Always, a remake of a WWII-era film A Guy Named Joe.
Do you need a REAL ID to fly on a rocket like SpaceX, Virgin Galactic, or Blue Origin?
Yes! These non-NASA rockets are considered commercial flights. Pack your REAL ID.
But no, you don’t need a REAL ID to go hot air ballooning like Dorothy in The Wizard of Oz, as there are no TSA checkpoints in the sky!
Can’t you just use a passport to fly? What about a Trusted Traveler card?
What a smartypants you are! In order to fly, you must have a REAL ID-compliant document, which includes a US passport or passport card (the acquisition of which already requires the kind of documentation required for a REAL ID).
However, most Americans do not have valid passports. Currently, only ~45% of Americans hold one. If you have a passport, you’re set; if not, and you aren’t likely to do international travel, a state-issues REAL ID is a more economical choice.
Trusted Traveler program cards, like Global Entry, TSA Pre-Check, NEXUS, SENTRI, and FAST are REAL ID-compliant, but are pricier than a driver’s license and may not be applicable to your lifestyle.
What about a state-issued Enhanced Driver’s License?
Michigan, Minnesota, New York, Vermont, and Washington issue these for land or sea border crossings with Canada, Mexico, and the Caribbean. They require the same documentation and count as REAL ID-compliant; if you have one, you already know it. But if you don’t, and unless you live in these states and don’t have a passport, go ahead and upgrade your driver’s license.
2) You Need a Real ID to Enter Secure Federal Buildings
If you have reason to enter any secure federal buildings, you’ll need REAL ID-compliant documentation.

Panorama of United States Supreme Court Building at Dusk courtesy of Joe Ravi, CC BY-SA 3.0
You may be thinking, “When the heck will I ever have to go into a secure federal building? I’m not a judge or legislator!” However, you might go to a federal building to:
- apply for or renew certain federal benefits — For example, some Social Security Administration offices are in federal buildings.
- access services at a VA facility — While most VA medical centers won’t require REAL ID, some administrative offices do.
- attend an immigration or visa appointment
- work in or visit a federal agency — If you’re a contractor or consultant, or if you’re applying for a federal job, or if you need to visit the IRS, EPA, or Department of Labor, know that such offices are in federal buildings
- attend a public hearing or town hall — Agencies hold open meetings for the public on policy matters.
- attend a government conference or training — Federal agencies host public events, seminars, and professional development sessions.
- retrieve records or conduct research — Agencies like the National Archives or Library of Congress require in-person access to certain records.
- serve on a federal jury or grand jury
- give testimony in legal proceedings — And no, if you’re accused of a crime at the federal level, you can’t get out of being tried for that crime just because you don’t have a REAL ID.
- report to a federal probation or parole office
- visit an inmate in a federal detention center
The REAL ID Act doesn’t require you to present identification anywhere it’s not currently required for accessing a federal facility.

So, while all federal buildings have security, they don’t all count as “secure federal facilities.”
You don’t need a REAL ID to visit the National Archives museum or its reading rooms, but you do need a valid form of identification to enter the research rooms. Similarly, you don’t need a REAL ID to visit the public areas of the Smithsonian Institute.
3) You Need a REAL ID to Enter Nuclear Power Plants
Do you work in a nuclear power plant?
Are you a government employee whose job it is to inspect nuclear power plants? Engineers, safety inspectors and maintenance crews often have to visit plants for inspections and upgrades.
Are you a government regulator from the Nuclear Regulatory Commission or the Environmental Protection Agency?
Are you a vendor or contractor for a nuclear power plant? Whether you restock the candy machines or service the bathroom plumbing or do public speaking events for the staff, you’ll need a REAL ID-compliant document to gain access.
Are you a first responder? Emergency personnel, firefighters, and HAZMAT teams often train in nuclear facilities.
Are you an energy industry professional or a policymaker taking a tour? Are you a journalist? A researcher? You’ll need that REAL ID!
Are you a teacher or professor planning on taking your students to visit a nuclear power plant? If you’re taking third graders on a tour of a nuclear power plant — wow, that’s weird — they wouldn’t need to be REAL ID-compliant, but if you’re a college professor, your age 18+ students would.
Are you Homer Simpson?
One assumes this also applies to Mr. C. Montgomery Burns (Homer’s boss) and sycophantic Smithers. However, Mr. Burns is a billionaire, and they seem be getting a lot of special treatment lately. Your mileage may vary.
WHEN DON’T YOU NEED A REAL ID?
- If you’re a kid — Children under 18 are not required to have REAL ID-compliant identification.
However, I strongly encourage you to make sure your college-bound students get their IDs as soon as they are able, particularly if they attend school more than a few hours’ drive away. From Spring Break to getting home for a family emergency or a funeral, help them be prepared.
- If you’re showing ID to vote — You can’t be required to show a REAL ID to vote.
The REAL ID Act is for maintaining security, so as long as your assigned polling place is not on an airplane, in a secure federal building, or in a nuclear power plant, you should not be required to have or show a REAL ID-compliant identification. (For more on IDs for voting, see my post, The Ultimate Guide to Organizing Yourself to Vote.)
What if you aren’t a US citizen?
If you’re a tourist, you’ll have a passport, which serves the same purpose. If you are neither a citizen nor tourist but are lawfully present in the United States, you can obtain a REAL ID, provided you can demonstrate your legal presence and meet other requirements.
Remember, this doesn’t just include citizens of the 50 states and Washington, DC. If you live in Guam, Puerto Rico, American Samoa, the US Virgin Islands or the Northern Mariana Islands, the REAL ID Act applies to you, too.
REAL ID MINIMUM DOCUMENT REQUIREMENTS
To be a valid REAL ID-compliant state-issued ID (whether a driver’s license or other identification card), it must include the following:
- Full legal name
- Date of birth
- Gender*
- Driver’s license or identification card number
- A digital photograph
- Address of principle residence
- Signature
- Physical security features designed to prevent tampering, counterfeiting, or duplication of the document for fraudulent purposes.
- A common machine-readable technology, with defined minimum data elements.
*Until recently, the gender marker on a passport could be M, F, or X. However, the current administration has announced that the X marker will no longer be allowed on renewed/new passports issued and the marker must match the individual’s assigned sex at birth. However, at least right now, states can make their own rulings regarding gender markers on REAL IDs.
Remember, REAL ID is a set of standards, not a national identification card. Each state issues its own unique licenses and ID cards.
SO, HOW DO YOU GET A REAL ID?
First, gather your documents. You will need to present the following types of original or certified documents to your state to apply for a REAL ID.
- Proof to establish citizenship or legal presence — Again, if you have a passport or passport card, you’re covered. Otherwise, you’ll need official documentation, like:
- a birth certificate
- US Certificate or Consular Report of Birth Abroad
- a valid, unexpired Permanent Resident card issued by DHS or INS
- a certificate of citizenship or naturalization
- an unexpired employment authorization document issued by DHS
- an unexpired foreign passport with a valid US visa and approved I-94 form
- Proof of your full Social Security number — Find your official Social Security card. If you’ve lost yours, replace your Social Security card as I explained in How to Replace and Organize 7 Essential Government Documents before applying for a REAL ID. However, my state gave me the option of alternatively showing a W-2, 1099, or payroll check stub bearing my SSN.
- Two proofs of residency of the state in which you currently reside — My state offered more than a dozen options, including a recent home utility bill, a vehicle registration, a voter registration card, an IRS tax return, a bank statement, and a variety of other financial and insurance documents.
- Documentation of any name changes — due to marriage, divorce, adoption, change of name (associated with a gender reassignment or otherwise, etc.), explaining a discrepancy between the names on all your forms of proof.
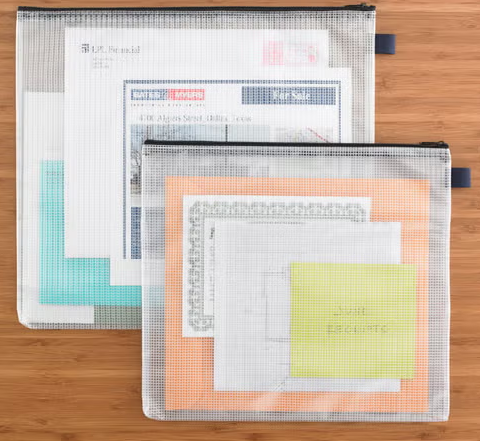
Safeguard your documents; don’t just put them in a manilla folder where they can fall out or damaged by inclement weather. I used a teal Container Store vinyl zippered document pouch because it looked like it might rain.
Next, make an appointment to apply at a local branch of your state’s Department of Motor Vehicles or equivalent. You must apply in-person, and it’s possible that only some (or even one) DMV location in your community will process these applications. Don’t just show up when you have a free afternoon, unless your idea of fun is rubbing elbows with random strangers in uncomfortable plastic seats.
Make yourself look presentable. You’ll be showing this ID all the time. (Also note: you’ll be required to take off your glasses for the photo, so try not to squint.)
Give yourself ample time to arrive. (I was told to arrive 15-minutes before my appointment. I got stuck behind a train and was only 10 minutes early.)
Be prepared to check in on your phone using a QR code. Many people were befuddled by this process and it delayed their appointments.
Be kind; the DMV staff goes through a lot. The wonderful representative processing my application spilled some serious tea about the way some people behave. (People apparently show up for their appointments while on drugs. People get high and then suddenly feel the need to renew their licenses? Seriously?)
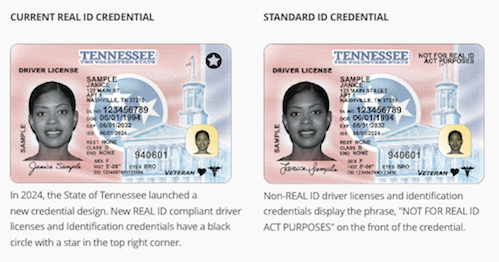
HOW DO I KNOW IF MY ID IS A REAL ID?
Look in the upper right-hand corner of your ID. Do you see a star that looks like any displayed below?

No star? It’s not REAL ID-complaint. (In addition to the star, Enhanced Driver’s Licenses will have an image of the United States flag and the word “Enhanced” at the top of the card.)
For further information, check the Department of Homeland Security‘s REAL ID Frequently Asked Questions page.
Because my papers are organized, it took me about five minutes to gather my documents, and another five to make the appointment online. Even delayed by the train, I arrived ahead of my 2 p.m. appointment.
When my number was called a few minutes later, I was walked through the process of providing all of my documents, signing required statements, and getting my photo taken. At one point, all of the women behind the counter and several applicants stopped to call attention to a very handsome man with a dazzling smile (who looked quite a bit like the actor Donald Glover) getting his ID photo taken.
Dani Pudi, Betty White, and Donald Glover Doing the Anthropology Rap
I was back in my car at 2:21 p.m. It had taken longer to fix my hair for a good DMV photo than to apply for my REAL ID.
Getting organized makes obtaining a REAL ID REAL(ly) painless.
Global Day of Unplugging 2025: Phones and Apps to Reduce Phone Use and Improve Your Life
Do you get shaky when your phone isn’t in your hand? Are you chronically online? Do you need a digital detox?
A year ago, I wrote Celebrate the Global Day of Unplugging. In that post, I explained the observance’s purpose, to bring attention to the importance of taking a break from 21st-century technology, embracing silence, and interacting directly with others. I also did a deep dive into the mental and physical dangers, as well as the damage to our productivity, wrought by the oh-so-compelling devices we carry everywhere.
We examined why it’s so hard to step away from our phones, from dopamine-dripping design to always-on culture, and explored tips for de-centering phones in our lives. It focused on lifestyle changes as well as ways to alter phones settings to make them less compelling. I mentioned some apps for reducing screen use and a phone designed to make essential work easier but social media less appealing.
The next Global Day of Unplugging is from sundown this Friday, March 7, 2025 to sundown on Saturday, March 8, 2025.
According to Backlinko, in 2025, American adults spend an average of 4 hours and two minutes a day on phones. We are spellbound! (Cell-bound?)
Reducing screen time (and replacing it with a phone-free activity) can decrease depression and anxiety and improve social connections. What could you accomplish if someone gave you back even one of those four hours? What dreams could you achieve? (What literal dreaming could you do if you weren’t doomscrolling into the wee hours?)
Most of the strategies I shared last year required willpower. Today, we look at tech that maximizes functionality but inserts friction to minimize the seductive draw of our phones.
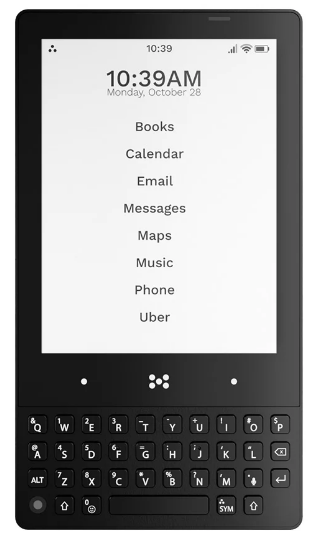
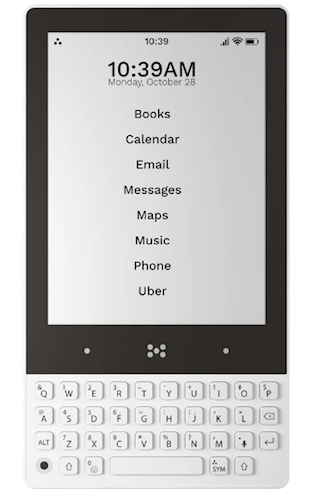
MINIMAL PHONE
Minimal is an upgraded version of the phone I previewed last year. Resembling an early Kindle more than a modern phone, it use an E-Ink Touch display to reduce eye-strain and promote healthy sleep.
It’s higher tech than a flip phone, but less inviting than a typical smart phone. Fewer hits of dopamine means you’ll only grab it when you need it instead of when you want it, and you’ll want it less often. Plus, without blue light, it’s less destructive to your sleep patterns.
Some of the key features and benefits of Minimal are:
- The black-and-white E-ink display is designed for eye comfort — With a 4:3 aspect ratio for optimal viewing, 4.3″ screen size for productivity without distractibility, and 230 ppi for improved readability, you could use Minimal to read all day long (but don’t!) without eye strain.
- It dramatically reduces distractions — There are no intrusive blink-y features and bright colors. The more you focus on the actual work you need to do, the quicker you’ll be off your phone and spending time with family, friends, hobbies, or even your dream world.
- The QUERTY keyboard is tactile — Remember how powerful you felt when you used your BlackBerry? Wouldn’t you love that sense of accuracy and speed again? With a 74mm-width keyboard for comfort, a 35-key (plus hot-key) layout, and .25mm key travel (the depth a key can be pressed) for precision tactile sensation, you’re set up for old school power.
- Minimal is made for the long run — Too often, phone batteries die after about two years and the hardware stops being supported by the upgrades far too soon. Planned obsolescence is a huge part of most manufacturing models, but Minimal promises it will be supported by software updates for five years and is “crafted with quality materials…to stand the test of time.”
- Minimal still has all the essential Android apps you need — With full access to the Google Play Store, you can download any necessary apps (like Dropbox, CashApp, Google Maps, etc.) with no muss and no fuss. It supports Android Auto, can be linked via Bluetooth to fitness watches,,,, and supports contactless payments like Google Pay.
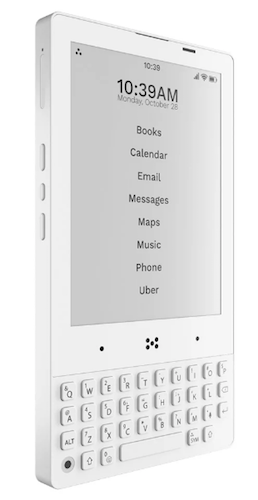
Minimal may be visually minimal, but it’s maximal when it comes to features:
- Along the top phone edge, there’s a microphone, phone speaker, and proximity sensor.
- The bottom edge has a 3.5mm headphone jack (for all of us who are tired of cordless ear buds falling into the street (or soup!), a USB-C port for charging, and an audio speaker.
- There are two cameras: a 5 MP rear-facing (selfie-taking) camera to the bottom left of the keyboard, and a 16 PM front-facing camera (with flash) on the back.
- Above the keyboard, there’s a simple navigation bar.
- Side buttons provide a fingerprint unlock power button, dual sim/expandable storage, volume up/down and an E-ink refresh button. (Note: Minimal does not support E-Sim.)
- Built-in goodies include a flashlight, compass, and gyroscope, and it supports Wi-Fi calling and hotspot functionality.
Choose 6 GB memory with 128 GB storage or 8 GB memory with 256 GB storage.
There are three versions of the Minimal Phone: Pebble (white), Onyx (black) and Fusion (black top with white key board). Minimal is $499.00, they’re offering $100 off of pre-orders. (Shipping is free world-wide!)
MINIMALIST PHONE (APP)
Not to be confused with the Minimal Phone, there’s also a Minimalist Phone, which isn’t a phone at all. Rather, it’s an Android app designed to reduce cell phone addiction by changing the user interface by which you see and launch your apps.
Minimal Phone replaces the default Android screen with a custom home screen which encourages more mindful use of phones and directs your focus to your most productive apps. Instead of being pestered by pop-ups, counters, bright colors, and icons on a traditional home screen, the mostly icon-free, minimalist user interface helps you recognize how unhealthy your usual phone usage patterns are (all those dopamine-seeking behavior!) and curb mindless scrolling.
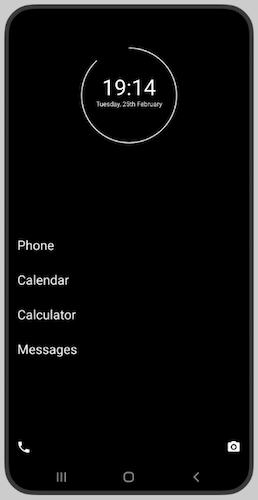
Note, Minimalist Phone’s monochrome interface isn’t the same as just setting your Android to black-and-white or your iPhone to greyscale. Instead, it also lets you view selected apps in black-and-white. Use it just where it’ll be the most helpful, while leaving color in place for apps like Maps, where color is essential.
Monochrome reduces screen time because image-focused apps (like games and social media) just aren’t that appealing in black-and-white. Reducing color and vibrancy curbs the impulse to “bed rot” and scroll until the sun comes up.
- Install Minimalist Phone as you’d install any other app from the Google Play Store; uninstall it just as easily to return to a traditional home screen. There’s no hardware or tinkering. Add your essential apps to the launch screen — but seriously, don’t add the time vampires!
- Minimalist Phone supports all versions of Android phones with operating systems v 6.0 and higher — dating back to 2015!
- It’s privacy-focused. Minimalist Phone “doesn’t sell any personally identifiable information (PII) to 3rd parties” and it’s GDPR-compliant, complying with stiff European privacy regulations.
- Maintain access to all of your apps; the non-essentials are just hidden to keep from going down a rabbit hole. If you want to open a hidden app or unhide an app, just access the phone settings through a gear icon on the app page and select Home screen> Hidden apps.
- The app links to your Google account, not your device, so you can use it on any/all devices linked to your Google neighborhood.
- Other features include app blocking (so you don’t need willpower), time limits, and mindful launch delays to prompt you to reconsider opening an app.
Minimalist Phone has a 7-day free trial, after which there are three different plan levels: monthly, annual, or a one-time purchase. Unfortunately, you have to download the app to see the pricing. (To change your plan, you must cancel it in the Google Play store or wait for the current period to expire, and then re-subscribe at a different level, or email them to request a change.)
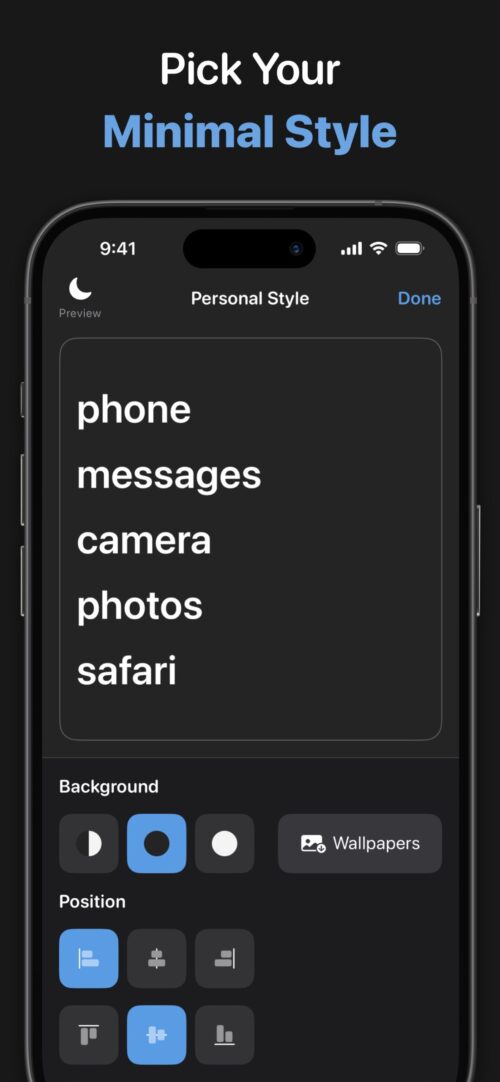
DUMB PHONE (APP)
We’ve had the “benefit” of smart phones for a while, but wasn’t life blissful apps and texting? Remember feature phones? Flip phones? We weren’t so stressed before we carried the power of a desktop computer in our pockets.
Enter: Dumb Phone. As with Minimalist Phone, it’s not a phone, but an app, and one designed to help you avoid (and conquer the cravings for) easy distractions and dopamine hits. If you liked the idea of the Minimalist Phone app but were bummed that it was Android-only, Dumb Phone has you covered — it’s for iOS users.
Michael Tigas came up with the Dumb Phone when he was creating features for the focusedOS app, which hides iOS distractions with one click; he hoped to further reduce all of the visual distractions that suck us into using phones longer than planned.
Apps are still on the phone, and they still work. They’re just not imitating street-corner floozies or three-card monte hucksters, begging for attention.
The idea is that if the icon and dopamine rush of tapping aren’t front-and-center, you’ll only use the apps you really need and want.

Download the app and add the Dumb Phone widget and wallpaper to your home screen. Then Dumb Phone takes your fancy, expensive, bells-and-whistles iPhone and transforms it into a minimalist-styled phone that:
- Simplifies your busy home screen — It eliminates photo-filled, graphics-heavy wallpapers, colorful icons, and notification badges, leaving just text-based buttons. Your phone becomes a sleek time traveler from the late 1990s.
- Breaks your “Oh, let me just grab my phone so I never have to be left alone with my thoughts” habit — Without all the “Hey, look over here!” yoohoos, you’ll use your phone when you want and need it, without unnecessary distractions.
- Gives you speedy access to your most important apps — Whatever apps you want to use frequently will be just one tap away, without having to swipe pages of screens.
- Access everything with just one hand — even with the largest iPhones, your thumb can reach everything!
With the Dumb Phone app in place, tweak it make your phone less seductive.
- Make the home screen minimalist (but not unappealing) by picking either a Light or Dark theme.
- Select the font and font sizes, positioning, color(s) if you want any, and more.
- Designate multiple “app launchers” for different periods of your life/day — Have one app launcher screen with work day apps; have another with NO work-related apps (so your brain can have real downtime without checking for emails from the boss during your toddler’s birthday party).
Dumb Phone’s basic level is free. It costs $2.99/month to upgrade, or $9.99/year at a discount, or $24.99 for a one-time purchase to gain access to all functionality and configurations. Get it on the iOS App Store.
Dumb Phone’s blog is also full of advice for curbing the addiction to specific apps. (Sigh, TikTok, I’m looking at you.)
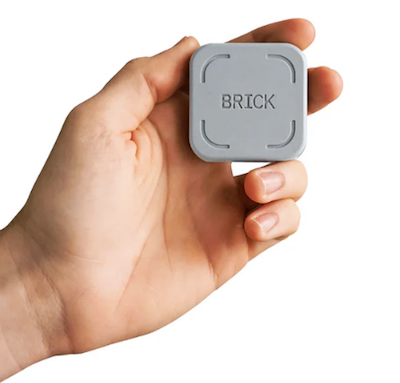
BRICK (DEVICE)
Brick is neither a phone nor an app. But it is an actual device. It’s a bit like a chastity belt for your phone, and the key is kept out of convenient reach.
The creators, two college students, looked at the concept of distraction-free flip phones, which had hardly any useful tools, and modern smart phones, which have all sorts of useful apps, but ceaseless distractions. Where’s the middle ground? You can’t just leave your phone at home if you still want to be able to hail a ride share, make contactless payments, map your way to the right street, or tell someone you’re running late.
Brick’s creators felt that an app or software solution (like Apple’s Screen Time limits that blocked you from using distracting apps wasn’t the way to go. You could always do an end-run around your carefully-made plans, just like when you put the chocolate in a high cabinet to discourage yourself from snacking but find yourself climbing a step-stool at 1 a.m.
Instead, by having a physical device acting as a “key,” and the key is elsewhere, temptation is easier to ignore.
Taking the notion of bricking your phone (a colloquialism for making a device useless), they found a way to make your phone brickable, but not permanently bricked.
Buy the Brick device, then download the Brick app from the iOS App Store, create an account, and follow the steps in the set-up guide. From there, create up to five custom “modes” (like “work mode” or “home mode”), to limit what apps you can access during specific times of day. (You can even block specific websites in Safari.)

To (temporarily) brick your phone to focus on what’s important, tap the center Brick icon on the screen and press the phone to the Brick. Alternatively, if you don’t have the Brick device with you, you can “remotely” Brick your phone: just hold down on the Brick button in the app for 5 seconds.
However, you still need the physical device to unBrick your phone.
The video of how it works can’t be embedded, but you can view it on the Brick site. Other features:
- View your history — Track how much time you spend Bricked each day.
- There’s no battery, so there’s nothing to charge.
- Brick doesn’t track which apps you use, nor does it access any of your data.
- You can use one Brick with any number of phones; you could also buy multiple Bricks to assign to one phone so that you could have one at your office and one at home (or your significant other’s home) to cover lots of different life situations.
- Brick supports iPhones running iOS 16.2 or later; an Android version is expected in the future.
It comes in grey and white, and has anti-slip silicone surface and a high-grade magnet in the bottom to ensure it stays securely in place, wherever you decide to put it — on the fridge at home or a whiteboard or filing cabinet in the office.
Think carefully about where your Brick(s) should live so you don’t counteract your productive work time by searching all over your home, office, or car when you’re ready to switch modes. You don’t want to finish work, head to the airport, and realize your vacation-related apps are bricked and your Brick is back in the suburbs or at your office.
Buy the brick for $59 and you get complete access with no subscriptions or fees; there’s a 30-day money-back guarantee. If you buy two Bricks, you get 10% off and free shipping; for three or more Bricks, you get 15% off and free shipping. You can also sign up for email and get a “mystery” discount.
LIGHT PHONE
A Light Phone is a bare-bones, 5G/4GLTE, unlocked cell phone with just a few non-negotiable tools. Rather than changing the way you launch apps, it’s specifically designed for “going light” so your quality time has fewer distractions and more quality in it.
Light Phone III has a black-and-white E-Ink screen, similar to the Minimal Phone. Because these screens don’t emit blue light, they won’t impact sleep patterns; it can also be read in direct sunlight. To clear the screen between different pages, the E-Ink screen “refreshes,” flashing the screen between black and white, making previous information go “poof.” There’s also a screen light for being able to view the phone at night.
Use it to make calls and send text messages. When you have a voicemail, there are no floating badge notifications, just an asterisk next to the digital clock. Tap to see your recent (unanswered) interactions, then return the message with a call or text (or, y’know, don’t).
Press the large center button on the right side of the phone to access the toolbox menu, your key to navigating to the Light Phone’s various settings and tools, and back to the home screen.
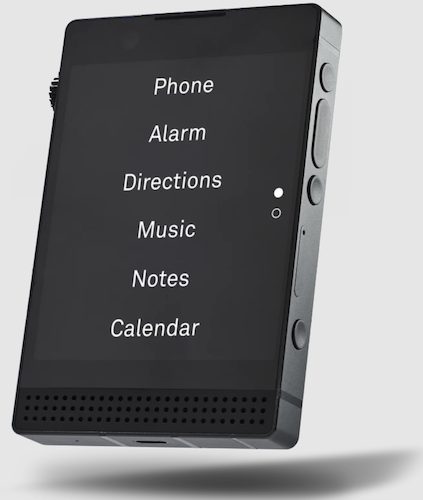
Manage your Light Phone from a dashboard on the website to import contacts or add/remove optional tools. Adjust brightness with an analog wheel (like a radio dial) on the phone’s left side.
The Light Phone’s other tools include an alarm, timer, calculator, music and podcast apps, notes, calendar, directions, and a phone directory. The updated Light Phone III also has GPS, a fingerprint ID power button, Bluetooth, a noise-cancelation microphone, camera (with a two-step shutter button), and flashlight, can be used as a hotspot and it supports voice-to-text.
Light Phones operate on the Light operating system (i.e., not Apple or Android) and requires active, compatible nano-SIMs and work a standalone devices; they don’t need to connect with a smartphone (though you can use them to complement your usual iPhone or Android phone when you need to take a break). Either swap your SIM between your Light Phone and other smart device, or get a second phone number assigned to the Light Phone, as you prefer.
The older Light Phone II comes in black or light grey, and includes a free SIM card for $299; the new Light Phone III is $799 but is currently $599 on pre-order and will be available June 2025. (Light Phone II will continue to be available Light Phone III launches.) There are colorful cases to fit the Light Phones.
The three Light Service plans are limited to the United States and run on AT&T cell towers:
-
- $30+tax/month for unlimited domestic calls and messages with 1GB of data
- $45+tax/month for unlimited domestic calls and messages with 5GB of data
- $70+tax/month for unlimited domestic calls and messages, plus data for hotspot usage.
However, because the Light Phone is unlocked, you don’t have to use Light Service; use a SIM from your own carrier and keep your service from AT&T, T-Mobile, Verizon, Ting, Mint, or US Mobile.
Changing how your phone works is great, but in the end, the best solution to toxic scrolling and phone addiction isn’t to change your phone, but to change yourself. Here are some apps that give keep your behavior accountable.
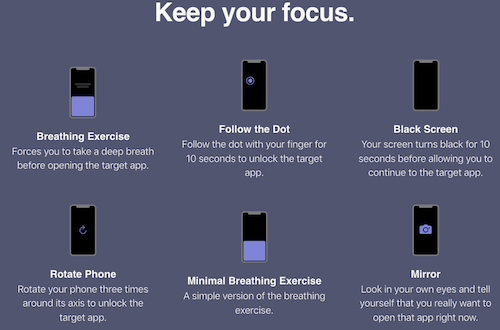
CLEARSPACE (APP)
Clear Space calls itself “a lever for you at your best to influence you at your most distractable.”
Personally, I think it’s more like tollbooth, requiring you to pay a toll that prompts you to slow down and consider your route.
Clear Space recognizes that dopamine cravings will be less powerful when you pause, creating a virtuous “atomic” habit to replace an unappealing one. Aligning intentions with actions can be hard, but Clear Space offers accountability in three ways:
- Before you can use an app, you must do a centering exercise. The screen guides you through a prompt to breathe, do a push up, or similar, and then tells you how many times you’ve visited the apps you’ve cordoned off (and where you are in your scrolling budget), and provides a motivating quote.
![]()
- Set a session length for using any app or block some altogether, and ClearSpace will literally do an intervention before the social media addiction monkey gets on your back.
![]()
- Pick specific apps in which you want avoid getting entangled.
Clear Space redirects those impulse clicks (like the Reese’s Peanut Butter Cups I grab when I’m waiting too long in the cashier line) and prompts you to think before you click. It retrains you to stop impulsively opening apps “to check” them; instead it encourages you to stop, breathe, and think about what you really want to achieve.
Clear Space also provides data insights to analyze app usages patterns and track your progress over time.
Clear Space is free and available for iOS and Android phones, as well as a Chrome extension for the web.
Check out Clear Space’s great productivity blog posts to help break phone addiction.
STEPPIN (APP)
Steppin gets you off your butt, locking you out of your social media accounts until you go for a walk! Created by Paul English, the founder of the travel search engine Kayak), Steppin has you trade steps for screen time.
In other words, if you want to scroll, you have to roll! (Oy. Sorry.)
- Identify which apps you want to limit (social media, games, streaming videos, or whatever steals your focus) and use the app blocker controls.
- Set your own rules — For example, set a minute of app time for every 100 steps you take; decide how often you want the limits to refresh. Customize goals to fit your focus: reducing screen time, motivating yourself to get fit, or achieving digital wellness. Re-set available screen time daily, weekly, or not at all.
- Earn your screen time — The more you walk, the more screen time you unlock.
- Track your steps seamlessly across your favorite fitness trackers — Steppin syncs with the built-in step counter in your iPhone and integrates with Apple Health App. Hitting step goals reinforces the habit, and habit tracking motivates you to maintain a healthier) balance.
 You can also connect Steppin to your Apple Watch, Oura Ring, Fitbit, Google devices, or Garmin tracker, and your privacy is protected: “Steppin uses Apple’s Screen Time API to enable app blocking without storing sensitive personal data.”
Steppin is currently free, but may have an annual fee in the future. Find Steppin for iOS in the App Store or for Android at the Google Play Store.
(A similar app, promoting fitness and discouraging chronic scrolling is the iOS-only Fitlock.)
ONE SEC
The One Sec app uses powerful research on phone (and specifically, social media) addiction to halt mindless instant gratification in its deeply-scrolled tracks:
- Configure One Sec to make you think twice, prompting you to explain the purpose for each attempt to access social media apps. Do you really want to go to Instagram or are you seeking an escape from work, stress, or boredom?
- Trigger One Sec to stop you whenever you open Facebook, Instagram, Twitter, WhatsApp, TikTok or any other app on your iPhone or Android device. You can also block/limit web sites!
- Set an intention for your social media use. If you planned to just check if people are reacting to your blog post share, One Sec will check in with you in one-to-five minutes to make sure you haven’t gone down any rabbit holes.
- Visualize your “open attempts” data in graphs to motivate further progress.
- One Sec prompts you to take healthy pauses to focus:
One Sec is free for iOS, Android, and Mac browsers and can be synced across devices.
This is only a sampling options to get some accountability from your phone when it’s hard for you to summon the willpower to step away from the addictive aspects of modern technology.
Just last week, Rhys Kentish, a London-based app designer, announced the Touch Grass app. When it launches later this month, the iOS app will require users to go outside, take a photo of themselves touching grass, and upload it before they can access distracting apps. (It’s based on a Gen Z slang expression: when someone is melting down or acting weird, they are told to “touch grass” to get fresh air and gain perspective.)
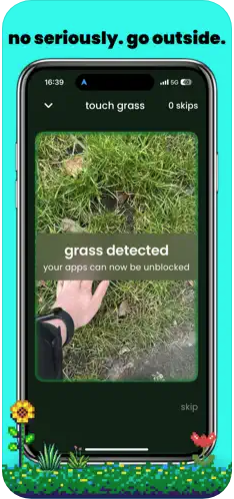 Whatever it takes, right?
Take Note: Paper Doll’s Guide to Organized Note-Taking for Learning and Creative Projects (Part 3)
Two weeks ago, in Take Note: Paper Doll’s Guide to Organized Note-Taking (Part 1), we looked at the wide variety of situations in which you might take notes, and took a side journey into the relative merits of handwritten vs. digital notes.
Last week, in Take Note: Paper Doll’s Guide to Organized Note-Taking in Lectures & Presentations (Part 2), we explored solutions for taking notes when someone is imparting information to you verbally: in class, watching a webinar, attending a conference, and in collaborative meetings. Some variation on these methods work for casual note-taking situations, like when you’re learning about a diagnosis or treatment, you’re hearing about a new program at a PTA meeting, or even when you’re fielding information on a phone call.)
Whether you want to capture information for a later test, to improve your professional (or passion project) success, or help your team hit its action items, taking notes ensures that information can be captured, processed, learned, and acted upon.
Using my colleague Linda Samuels’ rubric, we looked at how to “listen, capture, and engage” with information using text-based note-taking (e.g., the sentence method, outlining, and the Cornell Note-Taking Method) and visual note-taking (e.g., mind mapping and sketchnoting).
We also harkened back to the idea that not all note-taking depends on information coming to you verbally. When you’re studying printed material as part of coursework, doing academic research (like a term paper on Alexander Hamilton) or writing a non-fiction book (like the history of sandwiches), you will need to take notes on what other people have written to achieve your goals.
You may also create notes from scratch, not based on someone else’s concepts (presented verbally or in writing), but invent something totally new with the help of the elves in your brain. You might write the score for a Broadway musical, engineer the schematics for a cool invention you aim to patent, or draft a novel about vampires from Jupiter or grandmother protesting injustice, or vampire grandmothers…
With modifications, you can take notes using the methods we discussed last week, but there are also note-taking methods that help you create and organize notes on non-verbal content.
ANNOTATION
Picture yourself studying for an exam or preparing to give a speech to your colleagues. However much material you already know, there’s going to be a larger chunk of the unknown printed in books, journal articles, and online.
The advantage of taking notes on what you’re reading is that you can take it at whatever speed you need to make sense of the information and organize it, combined with your own thoughts, without having all the inbound knowledge outpace you. The main disadvantage is that, unlike when a speaker accents what’s important (with voice, body language, or saying, “Hey, you numbskulls, this is going to be on the tests!”), text may not give you a clue as to what is vital.
Sure, textbooks may have concepts in bold or italics, but novels will not; if you’re reading the Federalist Papers, there’s no formatting to clue you in on what Alexander Hamilton (yes, him again!) thought was key. And if you’re researching to support your creative endeavors, only you know what will hit the spot.
Key Benefits of Annotating
Annotating enhances comprehension by allowing you to actively engage with the text, identify key points (either what the writer thinks is key or what is key for your purposes), ask yourself questions (so you can find answers in the text or in other resources), and record your own thoughts.
Annotation can lead to a deeper understanding of the printed word, making it easier to recall information later and prepare for discussions, writing assignments, or drafts. Annotating your notes reaps the following benefits:
- Improved comprehension — By highlighting important information and adding notes, you’re forced to actively process the text, leading to better understanding and retention.
- Critical thinking — Annotating pushes you to question the author’s arguments, identify biases, and form your own interpretations. In fact, as described in the New York Times article, How Students and Teachers Benefit From Students Annotating Their Own Writing, annotating improves metacognition, or thinking about how you think about something.
- Active engagement —The very act of writing notes as you read encourages focused attention and deeper engagement with the material. You’re less likely to let your eyes glaze over if you’re annotating the material.
- Organization of ideas — Annotations can help you identify the main points, structure of the text, and see how different concepts relate to one another. Sometimes it happens as you are annotating; other times, the act of annotating creates the magic that helps you see how things are connected later. If you’ve ever seen the TV show The Good Doctor, this is the way we see Dr. Shaun Murphy arriving at life-saving connections.
- Customization — You can add your own thoughts, reactions, and connections to the text, making the reading experience more meaningful. Whether you’re studying for a test or bringing concepts together to write a book, you can add your own metaphors or connections (and references to pop culture!) to make it resonate.
- Preparation for writing — Annotations are first drafts. They’re the key to making someone else’s first line of research into a foundation for your own work, whether you’re writing essays for Medium, research papers for a class, or a work project where you need to analyze and synthesize information from varied sources.
Analog Methods of Annotating
Marginalia
If you’ve ever scribbled notes, comments, or questions in the margins of a book, you’ve been annotating. You’ve done the active reading and critical thinking referenced above, and created a personal dialogue with the author of which only you are aware. (That’s OK, some authors are cranky and don’t welcome questions.)
Marginalia are great for when you want a quick reference for future review of the material. Last week, I was in a book club Zoom for the National Association of Productivity and Organizing Professionals’ Authorship and Publishing Special Interest Group (no surprise, we call it the NAPO A&P SIG), discussing On Writing Well: The Classic Guide to Writing Non-Fiction by William Zinsser.
Our leader, my colleague Deborah Kawashima, had extensive marginalia, and used those notes to lead the discussion — and to find related material when members brought up points.
I can’t bring myself to write in books — my first job was working in a library, and books are so sacrosanct to me, I can’t bear to even make a pencil notation. I use sticky tape flags combined with handwritten notebook pages for the short term (like a book discussion) and either handwritten or digital notes when working on a blog post or book project.

Transparent Sticky Notes
I wrote extensively about the benefits of see-through sticky notes in my blog post See Your Way Clear: Organize With Transparent Sticky Notes.

To summarize, they give you flexibility when taking notes on written material. You can add non-permanent markings (especially good with library books or borrowed materials), take extensive notes without cluttering the page with marginalia, and reposition them, either on the original text, or as applicable, on your drafts or mind-maps.
Traditional Handwritten or Typed Notes
If you’re taking notes on printed resources to research an article, book, or presentation, you might need room for your mental gymnastics. Taking your notes in a bound notebook, on a sheaf of loose paper, or in a digital document will give you the ample space you need.
You’ll also be able to organize your notes — with clear headings, bullet points, numbering or outlining systems, and any kind of doodles (even marginalia on your notes) you like. The physical act of taking the notes will increase retention.
And yes, in case you’re about to remind me that I talked about how typing/digitizing lecture notes tends to reduce comprehension and memory because you tend to transcribe rather than process, I’m not flip-flopping. When you type what you hear, you don’t process it. But when you type what you read, you translate and process anything that’s not a pure quote.
Additional Analog Annotation Methods
You can also annotate without writing actual sentences, employing:
- Before beginning to read, write down what you know about the subject on a blank piece of paper.
- After you read, add new the information you’ve gained with a different color pen or marker.
- Before you read the next time, review the sheet. (Lather, rinse, repeat.)
Parish recommends storing finished sheets for periodic review and rewriting for clarity.
Digital Methods of Annotating
When taking notes on analog content, analog note-taking may be the best approach. When the material you’re studying, researching, or investigating is already in digital form, it’s often easier to annotate digitally. Some of the more popular digital annotating tools are:
- Adobe Acrobat Reader is best for annotating PDFs. It features highlighting, comments, on-screen sticky notes, drawing tools, and text markup.
- Notability is best for handwritten and mixed-media notes. It can handle handwriting, text, audio recordings, sketching, and PDF annotation. If you use an iPad and want to blend digital and handwritten annotation, Notability is ideal.
- Hypothesis works best for annotating web articles, blogs, and research. It’s a web-based tool for highlighting, adding comments, and collaborative notes on PDFs and online materials. It’s for students, researchers, writers, and teams.
Analog or digital, as with note-taking methods for verbally-presented material, annotating written material is just the beginning. Whether you “listen, capture, and engage” or “read, capture, and engage,” you still have to engage, and that means keeping your notes organized and connected to one another and the central purpose of your work. For more on annotation:
Annotating Texts (The Learning Center at the University of North Carolina)
The Art of Annotation: Teaching Readers To Process Texts (Cult of Pegagogy)
More Than Highlighting: Creative Annotations (Edutopia)
Why you should annotate your books (Johns Hopkins Newsletter)
Zettelkasten
Do you know Zettelkasten, also called the slip-box method? It was developed by Niklas Luhmann, a German sociologist, to reduce researcher overwhelm and create a network of interconnected ideas, rather than one simple, static archive of information in separate silos.
David B. Clear, Zettelkasten — How One German Scholar Was So Freakishly Productive, in: The Writing Cooperative, 31 December 2019, CC BY-SA 4.0, Link
How Zettelkasten Works
Zettlekasten was designed to be analog, using garden-variety index cards. (Obligatory link to The Humble Index Card: Organize Your Life, Then Organize Your Cards.) But with modern computing, you can link digital notes notes to one another easily, as with the internal links in Evernote. Here are the basic steps:
- Capture notes, each with practically microscopic bits of information — A note should have only one fact, concept, or idea. Brevity is the soul of Zettelkasten; so, no long, convoluted, Paper Doll-style paragraphs. Let’s say you’re writing a book: in the analog version, you’d have one quote to prove your point. At first, that quote is isolated.
- Link your notes together — Each subsequent note you take gets connected to related, already-existing notes, forming a network of ideas, a Charlotte’s Web of notions.
- Use unique identifiers — In an analog system, this means you’ll use a system of numbering or indexing the notes. In a digital system, your tools (like Evernote or Obsidian) will offer backlinks, the digital equivalents of the red yarn connecting the bad guys in a mystery movie’s murder board.
- Create “fleeting” (temporary), “literature,” and permanent notes —
- Fleeing notes let you quickly capture raw thoughts that come to you on your own, scratchpad-style. Think of them as shower thoughts.
- Literature notes are one step up; they serve to summarize key ideas from whatever resources you’ve used: articles, journals, books, lectures, etc., but in your own words. (So, don’t copy & paste, but also, don’t use AI.)
- Permanent notes are the refined, interconnected insights that build on the ideas you’ve collected and/or created.
- You may also create “meta” reference notes, which help you think about how your Zettelkasten comes together.
Develop a personal knowledge system (PKS) — Over time, your Zettlekasten becomes an idea-generating machine. It represent what you know, and what you might want to share. It could be everything your freshman needs to write a term paper for Social Studies or the amazing non-fiction self-help book that earns you a place at the top of the best-seller lists — or a series of brilliant stand-up routines George Carlin developed, as explained in this video.
How to understand Zettelkasten
Think of Zettlekasten like the Six Degrees of Kevin Bacon game. Each note you take is an aspiring Hollywood star, just needing to be linked to someone bigger. Let’s say I’m writing a chapter on productivity.
- One lone note about time management is like an indie actor, good but totally isolated and unlikely to reach stardom.
- If I add a note about prioritization techniques, like a link to my well-established character actor Paper Doll Shares Presidential Wisdom on Productivity with the bit about the Eisenhower Decision Matrix, it’s in a movie with my time management note — one degree of separation.
- But let’s say I have a third note about Parkinson’s Law (“Work expands to fit the time available to complete it.”), link it to both the general time management note and the Eisenhower Decision Matrix note, and suddenly they’re all in a Marvel summer blockbuster about productivity!
(Hey, it could happen!)
The point is that a good Zettelkasten is not merely a random collection of notes, but an ever-growing network of interconnected concepts; developing it over time sharpens your thinking and makes your knowledge base not only more expansive, but more powerful.
Zettelkasten is perfect for researchers, authors, deep thinkers, and anyone developing a huge body of networked knowledge. If you’re writing your thesis, a series of books, or building lifelong learning, Zettlekasten is your man (well, system) for less overwhelm, more creativity and retention, better organization, and increased productivity (if handled deftly),
What are the drawbacks of Zettlekasten? It’s freaking complicated if you’re using an extensive numbering/indexing system connecting all the moving parts.
Some of the best tools to develop your own Zettlekasten include:
- Index cards of uniform size (so, go 3 1/2 x 5 or 4×6, but not both)
- Obsidian (for backlinking and networked thought)
- Roam Research (outline-style, with powerful linking capabilities)
- Logseq (a privacy-focused, open-source alternative to Roam)
For more on how Zettelkasten might fit into your note-taking (and organizing) style, read:
The Zettelkasten Method: A Beginner’s Guide (Goodnotes)
Try the Zettelkasten method to manage information overload (Atlassian)
Getting Started: The Introduction to the Zettelkasten Method (Zettelkasten)
Ahrens’ Smart Notes
Sometimes, you need to build an easier mousetrap. Sönke Ahrens, a German author, took Luhmann’s Zettelkasten ideas and modernized them for his now-classic, How to Take Smart Notes: One Simple Technique to Boost Writing, Learning and Thinking.

Ahrens looked at Zettelkasten and said “Jeez, Louise, that’s a lot of complexity with numbering and indexing!” (Well, he said it in German.)
So, the Ahrens’ Smart Notes Method is a simplified method designed for knowledge workers (particularly academics, researchers, and writers) who want to create a structured knowledge workflow without going hardcore into the Zettelkasten approach.
Ahrens’ system focuses less on numbering or indexing of notes and places a much heavier emphasis on summarizing concepts (wherever possible) in your own words. It encourages you to write as you go, rather than taking the fleeting notes and the literature notes and then going back to write your permanent notes.
Ahrens advises creating notes with your own interpretations at an earlier stage so your notes are really first drafts. Less structure, more trusting your gut earlier on.
The Feynman Technique
Physicist Richard Feynman’s system is a learning method, not about note-taking, per se, but baked into his process for helping people understand complex topics is a way to take notes that spur the learning process.
- Write down the concept you’re trying to learn about.
- Explain it in simple terms — On the internet, you’ll often see someone say ELI5 — text-speak for “Explain it to me like I’m five-years-old.” How would you explain what you’re trying to learn to a kindergartener, or at least someone who is an absolute non-expert?
- Identify areas of confusion or gaps in your knowledge — What are you struggling to simplify? If you can’t explain it, then you don’t really know it yet.
- Review and refine your notes — Keep rewriting your notes until your explanation is crystal clear. Picture yourself writing the answer as an exam question, or presenting it on a webinar.
Feynman’s approach is less about note-taking for capturing information than for processing it until you understand it. It’s ideal for students, journalists, speakers, authors, and anyone who needs or wants to both acquire knowledge and put it to use, ostensibly to eventually communicate it to others — even if that communication is solely to pass a test on the material — or use it in their own lives. It can be an academic study aid, or a system for pursuing knowledge on a more lofty level.
Using the Feynman system encourages more active engagement with the content instead of passively copying key phrases out of a book or re-reading lecture notes. It also prompts you to seek clarity, cutting away the excess so your notes are focused and uncluttered. As a professional organizer, Paper Doll approves!
Some good tools for taking Feynman-based notes would be:
- Traditional notebooks (though it may kill trees)
- GoodNotes — especially if you’ll be using an iPad or tablet)
- Evernote — use a combination of handwriting and sketching for clarifying explanations; if you spent your time in the Microsoft environment, OneNote is a similar option.
- Notion (for refining the explanations over time)
- Flashcard apps to help reinforce key ideas over time and find them again. Examples include Anki (free, open-source), Quizlet, and Kards.ai.
DIGITAL NOTE-TAKING PLATFORMS
Beyond options for general academic purposes (and those mentioned in these three posts), there are too many specialized digital note-taking platforms to mention even a representative number.
For casual, situational note-taking on your phone or organizing notes for travel, Apple Notes, Evernote, OneNote, and Google Keep suffice.
Creative writers and journalists alike benefit from Scrivener to keep their research close to their writing; novelists might like Campfire for character notes, world-building, and plotting. Know someone composing musical notes? Try 7 Best Music Writing Software Programs for DIY Musicians or Resources for Creating Your Own Sheet Music.
HYBRID NOTE-TAKING: A MARRIAGE PERFORMED BY A ROBOT

AI’s role in note-taking will continue to expand in ways we can’t imagine. Right now, we can feed our notes (whether handwritten or typed) into an AI to yield notes on our notes.
You could record a lecture, interview, or meeting and ask your favorite AI for a transcript so you can focus on just key concepts and then go back to flesh things out. After reviewing the transcript, you could ask the AI to write an outline or summary.
Last week, I uploaded the link for the podcast I did with Frank Buck and asked ChatGPT to outline and summarize our conversation. It was revelatory. I stored links, the actual video, and the outline in Evernote to link to other podcast appearances. If I uploaded the audio file, with the click of a button, Evernote could transcribe the entire conversation!
Did you know that your (paid) Zoom account’s Smart Assistant can not only transcribe any Zoom call, but can summarize the chat messages and identify action items? Whatever audio or video recordings you create in any setting, you can turn around and use a variety of AI platforms to transcribe, summarize the discussions, identify next steps, and draft an email to your boss explaining why you deserve a raise!
You can have an AI interrogate your own notes to help you find specific research material without having to hand-search with Command-F. Imagine you’re writing a book and have 1000 research notes in PDF form. Upload them to a tool like Google’s Notebook LM, and instead of having the AI find content from all over the web (and risk AI “hallucinations,” false content), you can have it just provide you with snippets of research specific to what you want to write about that day. Scarily, you can even have “conversations” with the AI about the notes you’ve taken!
Nota bene: the future (of note-taking) is going to get weird.
Follow Me