Archive for ‘Vital Documents’ Category
Paper Doll’s Ultimate Guide to Legally Changing Your Name
It’s June, the traditional month for weddings, and after weddings come honeymoons, “thank you” notes, and at least for some people, name changes. Ms. Jane Independent may become Mrs. Jane United, or even Mrs. Jane Independent-United.

Image by Engin Akyurt from Pixabay
By the rules of etiquette, Mrs. Her-First-Name is only used for widows; instead, women were supposed to be Mrs. His-First-Name His-Last-Name, subsuming her entire identity under his.
Personally, Paper Doll does not think that is cool at all and is glad this has fallen out of fashion. Then again, Paper Doll can’t imagine ever changing my last name to that of any fella, no matter how much he resembles George Clooney, and certainly not making any part of my name disappear until my beloved has shuffled off this mortal coil.
But I digress.
WHY DO PEOPLE CHANGE THEIR NAMES?
The point is that people change their legal names for many reasons:
- Women, when marrying, often take their new spouse’s last name. They also may append the new name to their old name, with or without hyphens. This ensures that at least part of her name matches her spouse’s name, and if they have children, it creates a new, cohesive family identity.
- Men, when marrying, can also take their spouse’s names in place of their own, but this is still uncommon. However, men changing to a mutually-hyphenated last name such that Spouse Onename and Spouse Othername jointly take the surname Onename-Othername, is becoming more common. Some couples invent new last names altogether.
- Women, when divorcing (and, given the above name change experience, men) often change their names. Many revert to what is colloquially called their “maiden” names. (Birth name, or family name of origin sounds a little more 21st-century, eh?) However, a colleague of mine disliked her family name of origin and rather than returning to it after divorcing, chose a completely new last name.
- Minors may get name changes when one parent remarries, thereby creating a cohesive family identity; this may or may not be related to an actual legal adoption by the step-parent.
- Victims/Survivors of domestic violence and/or stalking may change their names to escape danger.
- Some people change their names to conform to their gender identity. The Olympian formerly known as Bruce Jenner is Caitlyn Jenner. The film performer Ellen Page is Elliot Page. (Note: referring to a person by a name with which they do not identify is called “deadnaming” and it’s unkind. Please don’t do that.)
- People change their first or last names because they just don’t like them.
Hippie Baby Boomers born to Silent Generation and Greatest Generation parents changed their names from Ethel and Norman to trippy ones like Energy and Nomad. Kids born to hippie Boomer parents changed Moonbeam to Madison or Space to Spencer. Some parents give their kids names that are so awful, they demand change. And, of course, some folks just want to separate from past connections (e.g., bad parents, bad exes, bad decisions, etc.) and change their full names.
- Celebrities may legally change their names when they get married while continuing to perform under their prior names, giving them some separation between public and private identities.

Studio publicity still, Public domain, via Wikimedia Commons
Given that Elizabeth Taylor was married eight times to seven men, it would have been very confusing if her credits had changed after each honeymoon! And I’m dubious that Elizabeth Taylor Rosemond Hilton Wilding Todd Fisher Burton Burton Warner Fortensky would have fit on a marquee.
Cherilyn Sarkisian La Piere Bono Allman had her birth father’s name, her step-father’s name, her first and second husbands names, but in 1978 she opted to simplify things and do the paperwork one last time — and since then has been known as Cher. Perhaps if she “could turn back time,” Cher would have changed her name earlier?
Jennifer Lopez dated Ben Affleck. Later, Jennifer Garner married Ben Affleck and legally became Jennifer Affleck. And then Jennifer Lopez married Ben Affleck, and she legally became Jennifer Affleck. Meanwhile, everyone still knows Jennifer Lopez as J.Lo and Jennifer Garner as America’s Sweetheart. Yet somehow, only Ben Affleck didn’t have to worry about re-monigramming his stationery!
- People in the Witness Protection program get their names and entire identities scrubbed. Whether they are bad guys getting off easy or good guy whistleblowers or just unfortunate witnesses, people in WitSec have one advantage. The government does the paperwork for them!
WHAT KINDS OF NAME CHANGES ARE ALLOWED?
For your signature block in your work email or for friends to mail you birthday cards or to give the Starbucks barista your name, you can give your birth name, your married name, your non-de-plume, or your nickname. (Actually, in the case of Starbucks, it doesn’t matter; they’ll either get it wrong or make up a name for you.)

GoToVan from Vancouver, Canada, CC BY 2.0, via Wikimedia Commons
Do you have to change your name legally? In some states, just using your new name makes it legal (enough), as long as you don’t have much in the way of financial dealings or international travel or a desire to make people and organizations refer to you by your preferred name. And if you’re newly married, your marriage license might suffice.
However, when you’re struggling with identity theft, traveling internationally, or dealing with legal or financial matters, you must be able to prove that you’re really you with valid ID: Social Security cards, birth certificates, passports, etc. And for those to be kosher, you definitely need your name change to be legal.
First, know there are rules about when you can’t change your name.
- Your name change can’t be for a fraudulent purpose or to commit a crime. If you’re on the lam or trying to avoid paying your debts to Big Eddie (or, y’know, Wells Fargo), you can’t legally change your name. You also can’t do it to escape financial or criminal liabilities, or civil litigation.
- You can’t take celebrities’ names in order to profit off of their identities.
- If you’ve been convicted of certain types of felonies (in some jurisdictions), you can’t change your name to avoid public scrutiny or requirements to register as a sex offender.
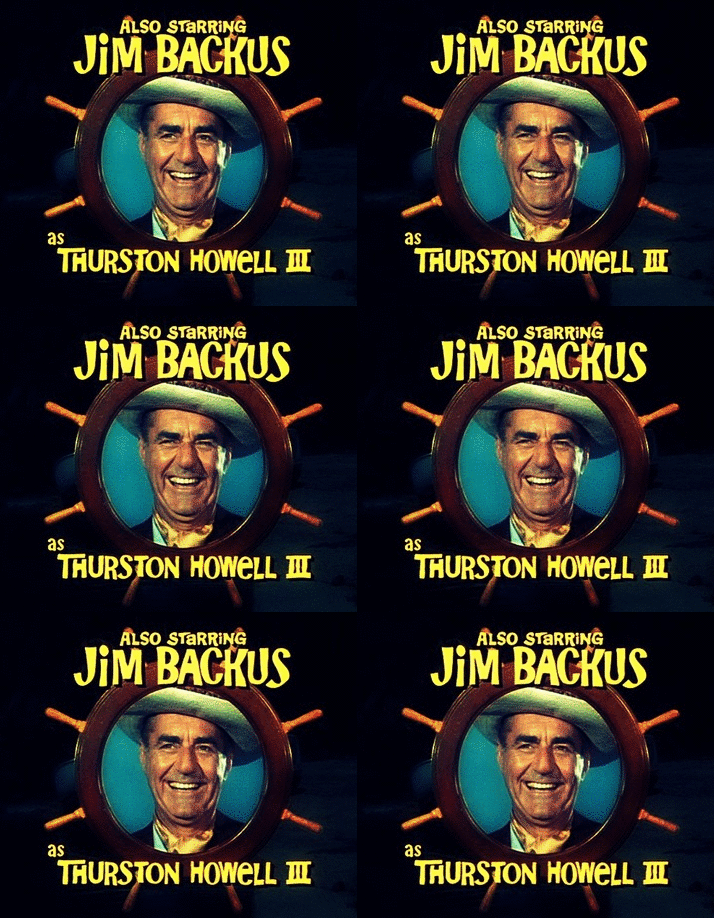
Next, there are rules about what you can change your name to be. Other than Roman numerals following your name — Thurston Howell III is OK — you can’t change to a name with a numeral in it.
Of course, each state has its own regulations. In 1977, the North Dakota Supreme Court refused to allow Michael Herbert Dengler to change his name to 1069 (pronounced as “one zero six nine”, lest you think he intended something unsavory), so he moved to Minneapolis. The Minnesota Supreme Court was similarly dubious, but ruled that “Ten Sixty-Nine” would be allowable.
You can’t change your name to a symbol. Yes, I know about Prince. But, number one, he didn’t actually change his name legally. Number two, you are not Prince.
You also can’t change your name to something that is generally offensive. No racial epithets or slurs, no hate speech, and usually no potty-mouth words (though judges usually have some latitude with regard to that last one).
WHAT’S THE LEGAL PROCESS FOR CHANGING YOUR NAME?
Legally changing your name requires paperwork and patience. Be prepared to locate your essential documents (check out How to Replace and Organize 7 Essential Government Documents to get started) fill out forms (by hand and online), jump through investigative hoops, and then use new identifying documentation to get other identifying documentation.
You’ll also need to tell everyone you know about the change. In the pre-COVID era, the process might take six to twelve; however, courts are still so backed up that in some municipalities, it’s taking much longer.
Name Change By Court Order

Gavel: Creative Commons/U.S. Air Force photo by Airman 1st Class Aspen Reid/af.mil
If you’re changing your name for any reason other than a revised marital status, you’ll have to get a court order to do so. (Changing your name because of marriage or the dissolution of one has a separate procedure — of which, more later.)
In general, this process requires a combination of the following procedures, depending on where you live:
File a petition with the court — This involves completing paperwork which will be called some variation on the title Petition for a Name Change. Different jurisdictions have different regulations — you might have to address a civil, probate, or superior court. The petition explains the name to which you wish to change and the reason for the change.
Submit a filing fee. The filing fees in the United States vary by state, and sometimes county, and range from a low of $25 in Alabama to a high of $435 in California. (Some states have waivers for people in dire financial circumstances, so be sure to ask.)
Submit a form for a Court Order Granting Change of Name for the judge to sign.
Publish a notice of petition to the public. In general, when you change your name, you have to announce the intended name change in a number of newspapers in your community. Most commonly, you can publish these in the classified sections of “penny saver” newspapers to save money. Usually, the notice must be published multiple times over successive weeks.
Note that victims/survivors of domestic violence or sexual assault may request to have the publication element waived. Similarly, some states (including California, Colorado, Maine, and Nevada) eliminate publication requirements for name changes done to align with gender identity. Obviously, individuals in witness protection do not have to publish their notice of petition.
Once you receive an affidavit that the ad(s) have been published, submit this to the court with the other forms. (I must admit that I’m sometimes surprised that putting a notice on your Facebook or Instagram account isn’t considered adequate for this purpose. I can’t imagine anyone but private detectives and bounty hunters reading the classified of these papers that most people let moulder on their front lawns.)
Special circumstances
Fingerprint image by ar130405 from Pixabay
In addition to the above, you may also have to:
- File a legal backer form, authorizing notification of creditors re: name change.
- Undergo an FBI background check (for which you will pay a fee) if you live in Colorado, Connecticut, Florida, South Carolina, or Texas. Depending on the court you petition, a judge may require a background check in California or Maine.
- Have your fingerprints taken if you live in Alabama, Colorado, Maine, North Carolina, and Texas. And yes, there are additional costs.
- Acquire an Affidavit of Consent, if required in your area. If you’re changing a minor child’s name to match the name of a new step-parent and newly-married parent, irrespective of whether the new step-parent will legally adopt the minor, you’ll need an affidavit of consent.
- Send an Affidavit of Service of Notification to appropriate authorities if you are classified as an alien resident, a former convicted person, or an attorney. (How’s that for a strange combo platter?)
Next steps for your court order
Got all those essential forms signed and notarized by the court clerk in your jurisdiction? Scan and/or make copies and put them in a safe place (like a fireproof safe or safe deposit box) and submit the originals for approval.
You may have to attend a court hearing to defend your reason for changing your name if a creditor, ex, or busybody sees the publication of your notice and objects to the name change.
If the court approves your petition, you’ll get a court order called an Order Granting Change of Name which serves as legal proof of your name change. You’ll need this document, and usually your original birth certificate or proof of prior name, in order to make lots of other changes.
Important note: In some states, people seeking a name change due to domestic violence have the right to have their records sealed. If this is your situation, please confer with an attorney or a domestic violence agency to obtain information and assistance regarding your state’s regulations.
Name Change By Marriage (or Divorce)
Mazel tov on getting married! (Condolences…or mazel tov, depending on your feelings, if you’re getting divorced.)
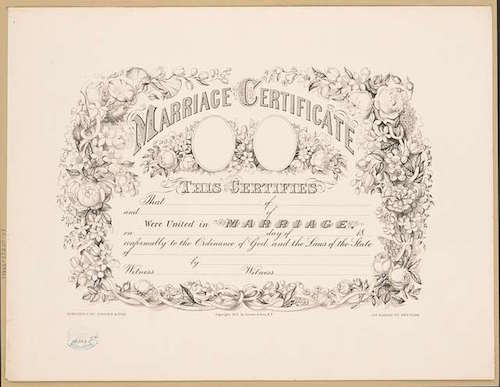
Getting married doesn’t, per se, legally change one’s name, though the process is smoother than seeking a court order.
Do, however, decide in advance what you want your name to be. If your marriage license says FirstName Oldname Lastname but you intend to live as First Name Oldname (hyphen) Lastname, you’re going to have to get the license right before you can move forward.
(Honeymoon travel warning: the TSA takes name-matching seriously. If your ticket says Mrs. Madison Newname and your passport or driver’s license says Ms. Maddie Oldname, you’re at the mercy of the TSA. Don’t imagine you can roll up to Security with your the-ink-is-barely-dry marriage license, an embossed invitation, and catering bill and expect to make the flight. Book honeymoon travel under your pre-marriage name and leave the name change paperwork for when you get back.)
If you’ve divorced, your divorce degree should serve the same purpose as a certified marriage license; be sure the divorce decree covers it if you intend to revert to the name you went by prior to your marriage. (If you decide to give up your married name after the divorce is final, petition the court for an amendment to the divorce decree.)
Name Change to Match Your Gender Identity
For people who are trans, the process involves a getting a legal name by court order, but it’s not quite as simple as described above. It’s also necessary (and sometimes complicated) to change one’s gender marker, the official designation of gender on certain state and federal documents (like driver’s licenses and passports).
Gender markers may be “male,” “female,” or “X” (for non-binary), though only Oregon allows you to petition for a change of gender marker at the time of your name change, and not all states allow a marker change. However, the federal government now recognizes X and you can change the gender marker on your passport; later in 2023, it can be changed on other documents.
Changing a gender marker may or may not require changing your name legally. Seven states and two territories require proof of surgery, court order, or altered birth certificate to change gender marker on driver’s licenses, while fourteen states require proof of surgery or a court order to change the designation on a birth certificate. And four states (Montana, Oklahoma, Tennessee, and West Virginia) don’t allow amending gender markers on official documents.
This can get complex, so check with your state and review the incredibly-detailed PDF Identification Documents and Transgender People: An Overview of the Name and Gender Marker Change Process in the United States for guidance.
WHAT TO DO ONCE YOUR NEW NAME IS OFFICIAL
Once you’ve legally changed your name, there’s still more paperwork to be done — and before you can start, you’ll have to make sure you’ve got your (paper)ducks in a row.
- If you got married, obtain official (certified) copies of your marriage license. (You’ll know they’re official if they’ve got raised “bumpy” seals.) Request them from the municipal office where you registered and filed for your marriage license (that is, where you got married, not necessarily where you live). You’ll get one official copy as part of your licensing fee, but you’ll have to pay for extras.
- If you filed with the court for a name change (or got divorced), obtain certified copies of the court order or divorce decree.
- Whatever your reason for changing your name, the next steps will require proof of your former name, so before you get started, make sure you have official copies of your birth certificate, too.
Start with Uncle Sam
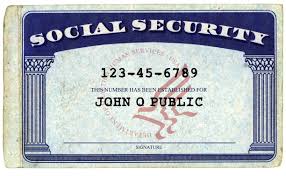
Social Security Card — Contact the Social Security Administration at 800-772-1213 or go into a local office; just don’t fall for any emails or junk mail promising to get you a new card for a fee. The Social Security Administration doesn’t charge for new cards due to name charges. (Heck, you get 10 free replacement cards in a lifetime!)
Follow the prompts and the automated system will walk you through the steps for filling out an SS-5 and getting a new card. Alternatively, you can follow the instructions on the Social Security Administration’s web site. Fill out the application and provide official copies of documents proving your legal name change, your identity, and either your U.S. citizenship or immigration status. (You can also change your gender marker.)
*Note: If you immediately move to a new state after getting married or securing a court-ordered name change, the Patriot Act requires that you change the name on your Social Security card before you acquire a new driver’s license.
Passport — The U.S. Department of State has different requirements for issuing passports reflecting name changes, depending on whether one’s last passport was issued within the last year or earlier, and whether you have documentation to prove (via marriage license or court order) your name change. Review the linked page and follow the steps to determine if you can submit your documentation by mail or must apply in person, and whether there are fees associated with your situation.
Now handle state and local documents
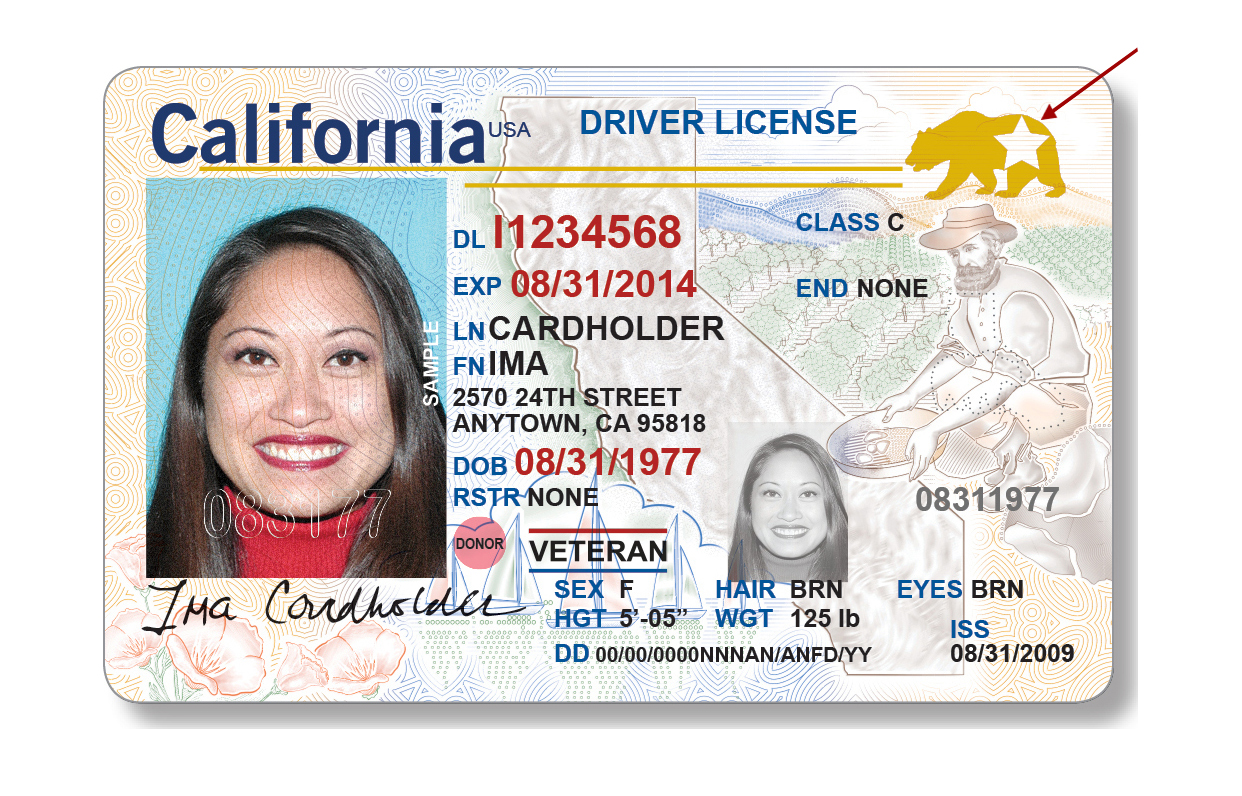
Driver’s License — Each state has different regulations regarding how quickly you have to change your name on your license. South Carolina and Wyoming expect you to change your driver’s license to reflect your new name within ten days of your wedding, which might put a crimp in a two-week honeymoon.
Other states have similar, though less urgent, deadlines. Apparently, you can double or halve your weight, dye your hair purple, switch to blue contact lenses, or grow a beard, and their are no requirements to contact the DMV, but if you use your new name, the DMVs of the USA get uniformly cranky! Call or check your state’s web site for regulations, make an appointment (vs. attempting a walk-in), and bring certified copies of your marriage license, divorce decree, or court order.
Voter Registration Card — Contact your board of elections or pick up a voter registration form at your public library or Department of Motor Vehicles. Alternatively, visit National Mail Voter Registration Form to report a change of name on your voter registration. (Note, New Hampshire, North Dakota, and Wyoming do not participate.)
Tell Everyone Else
With the government out of the way, notify everyone else. There’s less urgency to this, especially as “officialdom” wanes; I’ve arrange the list below in declining order of importance and urgency.
To save time filling out forms, you might want to consider acquiring a uniform name change form, such as Nolo’s Declaration of Legal Name Change. (It’s currently free.) Then notify:
- The US Post Office — This isn’t legally required, but you’ll be getting mail in your old name and new name for a while, so make sure your mailbox label lists both or that your post office knows about the new identity. (Don’t assume that your postal carrier pays attention.)
- Insurance companies — Update your health insurance policy and cards first, then automobile, renters/homeowners, etc.
- Human Resources and/or Payroll at your place of employment.
- Banks — Order checks and deposit slips bearing your new name.
- Brokerage houses where you hold investment or retirement accounts. If you’re listed as a beneficiary on someone else’s accounts, encourage them to update their records.
- Credit card companies
- Utilities and other essential services
- Other companies with which you have accounts, particular those you pay or which pay you
- State or other licensing agencies for operation/ownership of firearms, boats, planes
- Internal Revenue Service and your state and local tax authorities
- Veteran’s Administration, if applicable
- Offices of public assistance, like SNAP
- Professional licensing or certification organizations
- Friends and associates (so they know how to address you)
- Doctors, dentists, therapists and other health professionals
- College alumni associations
- Clubs, gyms, and other memberships
Contact your attorney about updating your estate documents with your new name. This may include wills, health care proxies, mortgages, leases, trusts, Power of Attorney documents, etc. See How to Create, Organize, and Safeguard 5 Essential Legal and Estate Documents and The Professor and Mary Ann: 8 Other Essential Documents You Need To Create to get started.
Check your credit report at AnnualCreditReport.com to make sure nobody has fraudulently opened accounts in your old name.
If the thought of doing this all on your own gives you a headache and writer’s cramp, help is available. Many professional organizers who specialize in paper management (like me!) will sit by your side and walk you through filling out paperwork. You can also avail yourself of specialized services:
- Newly Named
- Hitch Switch
- MissNowMrs
- Legal Zoom Name Change Service
- National Center for Transgender Equality ID Documents Overview
- TransSocial Name and Gender Marker Change Assistance
- Transgender Map Legal Name Change Guide
Disclaimers
Note to Canadian readers: The process in Canada varies by province, but appears to be similar (with the exception of there being no publication requirements); there are special circumstances for reclaiming an indigenous name. Please confer with legal experts in your province.
Paper Doll reminds readers that I am not a lawyer and nothing in this post should be taken as legal advice.
Lost & Found: Recover Unclaimed Money, Property, and Savings Bonds
 Treasure Chest by Immo Wegmann on Unsplash
There are many reasons to keep your paperwork organized, but I think the most compelling one is that many VIPs (very important papers) are the equivalent of money.
Your Social Security card, for example, is key to proving who you are, and if someone gets his or her hands on your card (or even just the number) and a little bit of other information, you may suffer from years of financial strife due to identity theft.
A lost last will and testament means that a family could have to spend months or years lacking access to resources promised to them because of the difficulty of proving the deceased’s intentions for funds and possessions.
If you lose your birth certificate, you may not be able to replace other essential documents if they go missing or get destroyed in a fire or natural disaster.
Lose your passport without enough time before an international trip, and your vacation or work plans could be scuttled, leaving aside the potential for identity theft of a more-than-financial nature.
Paper Doll has covered a wide variety of topics over the years on accessing lost documents, creating essential ones you lack, and keeping them all safe so they are not lost in the future. These posts include:
Ask Paper Doll: Do I Really Need A Safe Deposit Box?
How to Replace and Organize 7 Essential Government Documents
The Professor and Mary Ann: 8 Other Essential Documents You Need To Create
Protect and Organize Your COVID Vaccination Card
A New VIP: A Form You Didn’t Know You Needed
Today, we’re going consider options for recovering lost property. Consider it a treasure hunt!
RECLAIM LOST “PROPERTY”
When I say “property,” what do you think of? Perhaps real estate?
Maybe that reality show Property Brothers with Canadian twins Drew and Jonathan Scott?

When you hear “lost property,” it’s possible you think of the boilerplate language on one of those claim tickets you get when you leave your coat at the fancy coat check room at a swanky venue.
So What Is Unclaimed Property?
The term unclaimed property is what you’ll hear most often when searching for lost money in various types of accounts. Unclaimed property usually refers to funds that a government (federal, state, or local) or business owes you because you’ve, quite literally, left it unclaimed.
It’s possible that you’re so organized with your paperwork that you feel affronted that I’ve implied you might have just haphazardly left money sitting around. But I’m not saying you’re absent-mindedly leaving piles of cash wrapped in newspapers like Uncle Billy in It’s a Wonderful Life. (By the way, that $8000 deposit that ended up in Mr. Potter’s hands would be work $121,762 in 2023! Maybe Uncle Billy should have tied the money to one of those strings around his fingers.)
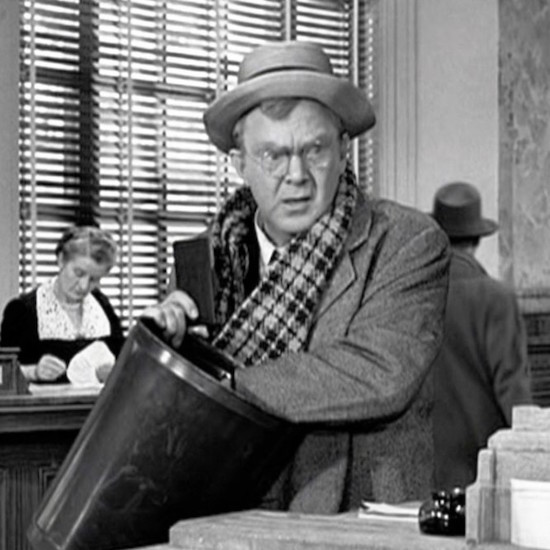
Thomas Mitchell as Uncle Billy, searching the bank’s trash cans for the lost Savings & Loan deposit.
There are all sorts of reasons money may get separated from its rightful owner.
Perhaps you put a security deposit down on an apartment when you were in college, but after graduation you were heading across the country to start your first job. Your roommate returned the keys to the landlords, got the OK that you hadn’t left the place in a horrifying state, and similarly disappeared into the adult world, leaving no forwarding address for either of you.
In many cases, by law, your security deposit was placed in an account (perhaps interest-bearing, perhaps not) and should have been returned to you when your lease ended. If your landlords were playing by the rules, rather than deciding to take the money and run, they should have turned it over to the state.
Similarly, it’s common to have to pay a deposit when opening an account for certain utilities. While some utilities keep these deposits until you move and close your account, others have (little-advertised) rules stating you can request your deposit be returned after a set period of good payment history. Sometimes, however, if you don’t actually request your deposit back, it just sits there, eventually going unclaimed, and being sent to the state.
When I helped one of my clients, a gentleman in his 60s, search for unclaimed property in his name, we found a life insurance policy that his parents took out in his name when he was an infant. It had long since stopped increasing in value, so he claimed it and cashed out.
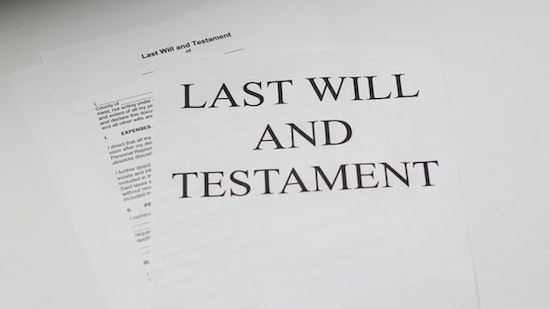
Or maybe your Great Uncle Horace left you oodles of money in his will, but his last valid address for you was three states and 22 years ago? (My condolences on Horace. We always heard good things about him.)
Unclaimed property can be in the form of cash, uncashed checks (including stock dividends), insurance policies, abandoned bank accounts, forgotten security deposits, or even tangible property in the case of safe deposit boxes.
Life gets busy. It’s OK. Don’t play the blame game. Instead, play finders keepers and locate your missing money!
Where Can You Find Your Unclaimed Funds?
Unfortunately, there’s no central repository for all unclaimed property. Instead, you can search in each applicable state’s unclaimed property office.
Start with Unclaimed.org, the website of the National Association of Unclaimed Property Administrators.

Once there, scroll down and select your state by clicking on the location on the map. If you are from a United States territory like Puerto Rico or the U.S. Virgin Islands, or from one of several Canadian provinces (Alberta, British Columbia, New Brunswick, or Quebec), click on the appropriate link below the map, or use the yellow “Select Your State or Province” button. This will take you to a specific unclaimed property office, like the Office of New York State Comptroller’s Search for Lost Money page or Tennessee’s unclaimed property search (with a snazzy alternative address of ClaimItTN.gov).
To begin your search at any of these state sites, provide whatever information you have available, but at least a first and last name (or, if you’re searching money owed to a company or non-profit, the entity’s legal name). Some state search sites will also ask for a city in order to narrow the parameters.
If you want to search for multiple states simultaneously (let’s say you have lived in many locations, or you’re searching for abandoned accounts for a relative who has passed away and are unsure where they might have had lived), visit MissingMoney.com.

MissingMoney.com allows you to just type a first and last name, and all possibilities for that name, across all state databases, will come up.
Whether you use a state search or a multi-state search, the resulting page should provide a series of options. If you find a listing for yourself (or a relative), you’ll likely see some combination of the following information:
- the name of the owner of the unclaimed property
- any co-owner’s name, if applicable
- the last known address of the owner (possibly including the street address, city, state, and/or zip code, though some states hide some of the information)
- the state in which the unclaimed property is held (if you’re doing a multi-state search)
- the amount or value of money being held (which may be listed as an exact dollar amount, a range (like $50-$100, or >$500), or “undisclosed); if the property is tangible rather than monetary, you may or may not get a clue to what it might be.
How Do You Claim Your Funds?
If you find a match for unclaimed property on your state’s page or through MissingMoney.com, you’ll need to file a claim to prove that you own the account or property. Similarly, if you are claiming it on behalf of a relative who cannot act on their own behalf or a person who has passed away, you must prove their connection to the property as well as show that you are the party authorized to file a claim.
Whatever search method you choose, as long as you go through a government web site, know that searching for the unclaimed property is free, as is filing your claim. (Please don’t get scammed by a site promising to funds that are due to you anyway. While some services are valid and may relieve you of labor searching for large 5- and 6-digit recoveries, I encourage you to exhaust all free options first.)
Each state or province will have its own rules regarding claim submission. While most prefer you to submit your claim online, some still let you submit by mail. Answer all of the questions to the best of your ability, and assuming you are able to substantiate that you have a right to the funds, the account will be processed in due time and sent to you.
For individuals, businesses, and non-profits, you will have to submit proof of identity, address, and ownership. For individuals, your identity can usually be proven by a scan/copy of your driver’s license, passport, or Social Security number; please be cautious about transmitting your Social Security number through the mail and be sure you are using secure web sites marked HTTPS.
Proof of ownership of property will vary. Options might include your Social Security number, employment pay stubs, W2s or 1099s, or utility bills.
If you’re making a claim on behalf of someone who is living, you will need to provide the appropriate documentation, which might included a copy of a child’s birth certificate or legal adoption order (if the money is due to someone under 18), proof of a claimant’s age, and a court document or other signed legal documents proving you have the authority to act on the actual owner’s behalf. These could include letters of guardianship or conservatorship, a trust agreement, or a Power of Attorney document.
If you are making a claim on behalf of someone who has passed away, you’ll have to submit a death certificate as well as a will or other court documents, like a Small Estate Affidavit and a Table of Heirs. (These are state-specific.)
What To Do Once You Get Your Now-Claimed Funds?
After you submit your claim, if you are able to sufficiently able to prove your right to the funds, you will eventually be sent a check. Verifying your identity and rights to the funds can take a while, though many states try to complete the processing within thirty days.
Once you receive your money, usually by check, deposit the funds as soon as possible. Do not run the risk of losing the check and starting the whole process over!
Depending on the source of the funds, you may have to pay state and/or federal tax on the claimed money.
For example, if this is a deposit returned to you, you would not owe tax on the amount of your deposit, but tax might be due on any interest the account earned. The same is true regarding funds from abandoned bank accounts; the principal would not be income, but interest would likely be taxable. Of course, if the money would initially have been taxable had you received it on time (such as with stock dividends), it will still be taxable, but as income in the tax year in which you are receiving it.
What About Unclaimed Money in Other Countries?
Are you a fancy-schmancy world traveler? Maybe someone in your family lived abroad?
Unfortunately, there’s no central repository for tracking money left behind in your Tunisian bank account or a security deposit your mom paid during her semester abroad in Paris. (You may find some solace in the links collected by the Global Payroll Management Institute.)

However, the US government’s Foreign Claims Settlement Commission does oversee unpaid foreign claims for covered losses. That’s government-speak for money you are owed for lost funds or real property in the following circumstances:
- a foreign government “nationalizes” your property (whether that’s the money in your account or the house you owned)
- damage to property you owned that was caused by military operations
- injury to civilian and military personnel
If any of these apply to you, review the Unpaid Foreign Claims page and fill out a certification form (linked on that page). There’s also a link for Standard Form 1055, if you’re filing on behalf of someone who has died.
LOST SAVINGS BONDS
Once upon a time, it was popular to give United States savings bonds as gifts when people got married, had babies, graduated from college, got confirmed or Bar or Bat Mitzvahed, or otherwise had a rite of passage.
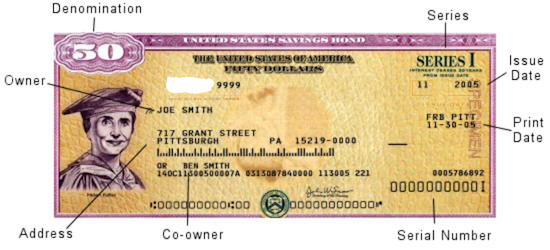
In ye olden days, you’d go to your bank to buy a savings bond, and get a receipt for your purchase as well as a paper certificate to give to the recipient. With the old EE savings bonds, you could purchase a bond at half the face value, and then a few decades later, your investment would double to the face value. If you waited a little longer, the bond would keep earning interest, at least for a while. (If your bonds are more than 30 years old, they have likely stopped earning interest.)
Nowadays, savings bonds are registered electronically, which makes everything much easier. However, with the old bonds, without the certificates in hand, the process gets complicated.
The problem was that these called SAVINGS bonds — but people often treated them as if they were called “throwing-them-in-a-box-hidden-under-the-bed” bonds. That’s fine for a while, but once your bond stops earning interest, it would make sense to cash it in and find another wise investment option. That’s hard to do if you don’t have the bond.
What Should You Do If You Can’t Find Your Savings Bonds?
If you’re sure you have savings bonds, but can’t find your paperwork, you have a few alternatives:
- Check your safe deposit box or fireproof safe — Free, except for the value of your time.
- Search through those boxes of stuff your parents or guardians gave you when they retired to Boca or Shadytime Retirement Village. Again, free except for the value of your time.
- Ask your family members to check their safe deposit box(es) and/or fireproof safe(s) and send you (via secure shipping) your bond certificates — Depending on whether you live across the street or across the country from your loved ones, this will come at variable cost in terms of their time, delivery service fees, and you getting roped into providing IT support for your parents now that they’ve got you on the phone.
- Contact the Feds — If you can’t find your bonds, or know they were definitely lost, stolen, or damaged, this may be your only alternative.
If you’ve lost your original savings bond’s nifty tangible certificate, you have two options:
- replace your original bond with a digital* bond (held in your Treasury Direct account); or
- cash in your bond (possibly losing value if you decide to cash it in before it has reached maturity)
*Note: If your lost bond is a now-defunct HH bond, you can get a substitute paper bond. For EE or I-series, they must be digital
If you’re really lucky, even if you’ve lost the actual bond, someone in your family may have kept track of the serial number of the bond. If not, you’ll have to help the government perform a search. Go to the U.S. Treasury’s website at www.TreasuryDirect.com and fill out Form 1048 to locate savings bonds registered all the way back to 1935.
Random Treasury Trivia
EE savings bonds took the place of World War II-era E-series or “Liberty bonds,” which date back to WWI!
HH-series bonds, popular as gifts for GenXers and Millennials, only came in the paper format and existed from 1980 through 2004, and they stop earning interest in 2024. That’s next year. Yes, really. So it’s a good time to start looking for your HH bonds! I-series bonds were introduced in 1998.
Interested in buying bonds but not sure how they work? Treasury Direct has a whole page comparing EE and I-series bonds. Be sure to check out the rules and options for buying savings bonds.)

On Form 1048, you’ll be asked to provide as much information as possible, including the:
- Issue date (or a range of dates, if you are uncertain)
- Bond certificate serial numbers (if you have them)
- Inscription information on the bonds, including names, addresses as Social Security numbers.
- Whether the bonds were lost, stolen or destroyed. If the bonds were stolen and a police report was made, you will need to append that, as well. The government wants to know all the gory details, so if your Great-Aunt Gertrude started a food fight at Thanksgiving and your savings bonds were drowned in gravy, explain. Or, y’know, explain if your town had a flood. Whatever.
- If you are not the named party on the bond certificate, you will have to explain your right to access the bonds; for example, are you the parent or guardian of a minor, the conservator or legal representative of another adult, or the executor of the will of a now-deceased party? (Note: if the person named on the bond is deceased, you will also need to include a certified copy of the death certificate.)
- Then, you’ll have to state whether you want substitute (digitally-held) bonds or payment in return for cashing in your bond.
You will need the form to be certified by a Notary Public. Review Paper Doll’s Ultimate Guide to Getting a Document Notarized for your options.
Finally, mail the form to:
Treasury Retail Securities Services
P.O. Box 9150
Minneapolis, MN 55480-9150
What If You’re Not Even Sure If There Were Savings Bonds?
All of the above tells you what to do if you know you received the bonds, but they’ve since been lost, stolen, or destroyed (as in irretrievably folded, spindled, or mutilated…or drowned in gravy).
But maybe you’re not sure if your hazily-recalled bonds ever existed? Maybe you (or someone on your behalf) purchased bonds but they never arrived. Maybe you got hit on the head with a falling anvil and can’t remember if you ever had a bond, or maybe you think a deceased loved one owned savings bonds but you can’t find them?
If any of the above situations apply, visit the Department of the Treasury’s Treasury Hunt link. Enter your (or your loved one’s) Social Security number and state, and if there’s a match, the site will let you know what to do next to locate matured savings bonds, those that are uncashed but no longer earning interest.
This just scratches the surface of the unclaimed funds, property, and financial instruments that can be recovered with a little bit of effort. Invest a few moments to let your fingers do the walking and see if you can recover what’s been lost.
If you DO find money owed to you, please come back and share the story (but not confidential information) in the comments.
A New VIP: A Form You Didn’t Know You Needed

Brown Plush Bear Patient Photo by Kristine Wook on Unsplash
As a professional organizer for 20 years, I am rarely stumped by organizing-related questions, especially those having to do with vital documents or what I call VIPs (very important papers). However, a client recently presented me with an article making a recommendation for a particular document, and it sent me down a rabbit hole of research.
THE USUAL SUSPECTS: VIPS AND HOW TO MAINTAIN THEM
Over the past years, we’ve discussed (at length) the essential documents everyone should have and how to organize and keep them safe. Posts covering these topics have included:
How to Create, Organize, and Safeguard 5 Essential Legal and Estate Documents
The Professor and Mary Ann: 8 Other Essential Documents You Need To Create
Ask Paper Doll: Do I Really Need A Safe Deposit Box?
Paper Doll’s Ultimate Guide to Getting a Document Notarized
Over the years, we’ve looked at documents granted by a government entity, like birth and marriage certificates, divorce decrees and custody documents, citizenship and military separation papers, passports, and Social Security cards.
We’ve also reviewed essential documents you must create for yourself (or with assistance), including home inventories, insurance policies, estate planning documents (like wills and trusts, pre- and post-nuptial agreements), and living wills (also known as advanced medical directives).
And, for ensuring that your loved ones can take care of you (and you can take care of them) in the event of incapacitation, we have always accented the importance of having both a Durable Power of Attorney for finances and Durable Power of Attorney for healthcare (known in some states as a healthcare proxy).
BEHOLD: THE POWER OF ATTORNEY
A Durable Power of Attorney for financial decisions is necessary if you are unable to make financial decisions or take financial actions on your own. This might occur if you are ill and lack the cognitive capacity to make your own decisions (such as if you’re comatose, heavily medicated, or experiencing some sort of dementia), but it might also come in handy in other circumstances.
Imagine that you are taking an around-the-world cruise or hiking in the Himalayas. In such cases, communication may be spotty or impossible. If the stock market were tanking or a financial opportunity of great importance occurred, or if your return were delayed and you needed to make sure your child’s college tuition was paid or some other financial arrangement was secured, knowing that someone with your Power of Attorney for financial concerns was handling everything would certainly put your mind at ease.
A Durable Power of Attorney for healthcare, or a healthcare proxy, is similarly important if you are unable to make your own healthcare decisions, pretty much for the same reasons initially outlined. If you are physically or cognitively incapacitated and need someone to make decisions on your care, it’s essential to have that paperwork in place.
And, as a periodic reminder to all parents who’ve recently sent their kids off to college, without a Power of Attorney for healthcare or healthcare proxy in place, if your away-at-school adult child were ill and had not granted you PoA for healthcare, the college’s health center or local hospital would not be allowed to provide you with any information about your child’s condition or care.
So, Power of Attorney documents are pretty darned important. You want them in place so that your spouse, partner, adult child, or trusted friend or advisor can be kept informed of your situation and can, if necessary, make decisions and take actions on your behalf.
This is the be-all and end-all of advice we paper specialists generally need to give. But guess what? We’ve been missing a pretty important document related to older adults!
BEYOND THE POA: THE DOCUMENT YOU DIDN’T KNOW YOU NEEDED
Let’s imagine your spouse is 65 or older. Or perhaps we’re talking about your parent, or another slightly older loved one. (I say slightly older, as now that Paper Doll has reached 55, the age of 65, when you can get Medicare coverage, doesn’t seem that far off.) Or perhaps you’re the one with Medicare.
You’d assume that as long as Powers of Attorney had been executed with regard to financial and medical decisions, then everything would be A-OK. Right?
Mostly. But not entirely.
It turns out that, by law, if you want someone (your spouse or significant other, your adult child, your caregiver, etc.) to speak to Medicare on your behalf, having a both a Durable Power of Attorney for financial issues and one for medical issues is not enough.
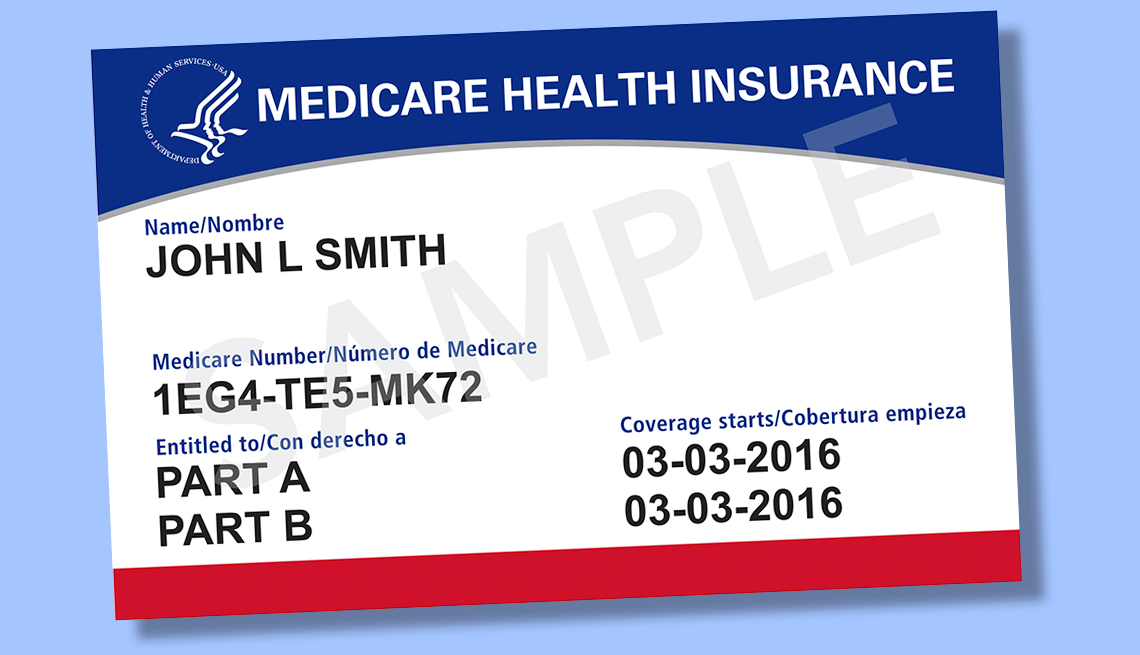
Perhaps because each state has a different variation on PoA forms, or perhaps because the government just likes to be wackadoodle, Medicare requires you grant prior authorization via a surprisingly under-mentioned form called the 1-800-MEDICARE Authorization to Disclose Personal Health Information Form or CMS-10106. (Doesn’t that just roll trippingly off the tongue?)
You must fill out the CMS-10106 well in advance if you want someone to potentially be able to discuss any of the following with Medicare:
- Medicare eligibility
- Medicare claims
- Plan enrollment (including part D or other drug plans)
- Payment of premiums
- Other information, including payments to beneficiaries
So, if you have Medicare, are you thinking “Whoops!” and wondering what happens if you have secured your financial and healthcare PoAs but haven’t ever filled out this authorization?
It turns out there’s a quirky loophole. If a person HAS done both of their PoA forms but hasn’t actually filled out this authorization form, it’s entirely not a catastrophe. That’s because the person who fills out the form has to be either one of the following:
- the beneficiary (that is, the person on Medicare)
OR
- the personal representative of the person on Medicare (that is, the person who has the Powers of Attorney, or otherwise has been granted authorization over your information).
So, yes, if you’re the person with the Power of Attorney for a Medicare beneficiary, you can authorize yourself to let Medicare talk to you about someone’s health and payment information. And if that seems a little weird to you, well, you’re not the only one.
The problem is that if someone hasn’t ever filled out the CMS-10106 in advance and their personal representative has to do it, it’ll take time to process because you have to MAIL it to Medicare.
That’s right — you can’t submit the authorization form online or even by fax. You have to mail it, like it’s 20th century, to a post office box in Lawrence, Kansas!
Ask Paper Doll: Do I Really Need A Safe Deposit Box?
This is part of a recurring series of Ask Paper Doll posts where you can get your burning organizing questions answered by Paper Doll, a 20-year veteran professional organizer and amateur goofball.
Dear Paper Doll:
I finally feel like a grown-up. I’ve read your blog long enough to know what papers I’m supposed to have. I’ve learned not to put things awaiting action on the front of the fridge, and how to put away my financial files. But my Boomer parents keep telling me that I should have a safe deposit box. Do I really need one? Can’t I just buy a home safe? And if I do need one, what should I put in it that I can’t just keep in my files or my wallet?
Signed,
Boxed-In About Adulting
First, I’m glad to know that readers are paying attention to the advice I give in posts like How to Create, Organize, and Safeguard 5 Essential Legal and Estate Documents and The Professor and Mary Ann: 8 Other Essential Documents You Need To Create. (And yes, trade in the fridge door for a Tickler File and you’ll be much more productive.) You have all the prerequisites for a degree in adulting, so consider this topic an elective.
Let’s start with the basics, whether you even need (or should want) a safe deposit box. This is one of those issues that depends on your life and lifestyle.
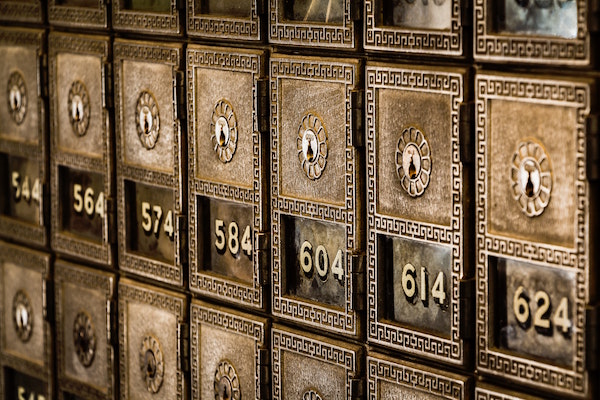
Safe Deposit Boxes Photo by Tim Evans on Unsplash
CONSIDER GETTING A SAFE DEPOSIT BOX IF:
You want a completely private location in which to store and review your documents or possessions.
You want to keep track of where your vital documents are located and want them all in one central location, perhaps because you change apartments or living situations (in the same community) with frequency and don’t want to worry about the safety of these items.
You want your loved ones to have easy access to important documents even if you are unavailable (traveling, ill, etc.) and have designated a Power of Attorney or have arranged to have a trusted co-renter of the box.
You want to protect your important documents (and possibly other possessions, such as fine jewelry, coin collections, medals, photographs, and written or photo/video home inventories for insurance purposes) from theft, fire, flood or natural disaster. But remember, you still have to insure valuables, and there’s no guarantee the bank won’t be burgled or burned down.
You have family heirlooms and precious documents that are too fragile or delicate to be left in the open in a home where children, pets, and circumstances could cause damage.
You are concerned that if a fireproof home safe is light enough for you to take with you during a disaster, it would also be portable enough for thieves to carry away into the night. Also, you recognize that they keys or combinations to home safes are much easier for thieves to crack than getting through brick-and-mortar bank security.
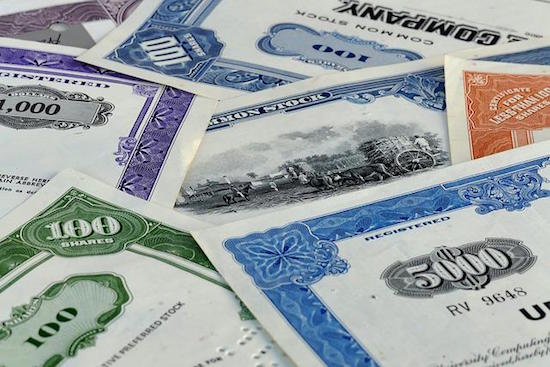
Stock Certificate Image by pictavio from Pixabay
So, maybe you’ve got stock certificates, Great Grandma’s diamond earrings, a collection of gold coins, or a bunch of rare baseball cards. Banks have video cameras and alarm systems, fire-protection and sprinkler systems, and high-tech locks; the vaults in which the safe deposit boxes are ensconced are reinforced and secured, designed to withstand not only bandits but natural disasters like wildfires, floods, tornadoes and hurricanes. Do you need or want that level of security?
SKIP GETTING A SAFE DEPOSIT BOX IF:
You relocate cities with frequency, whether due to work, family, academic, or volunteer obligations.
You aren’t sure you’ll be able to afford the ongoing safe deposit box rental prices. (Yes, you can just remove the items from box, but why start a system unless you’ve got a plan for keeping up with it?)
The main things you’d keep in a safe deposit box are things you might need to access quickly and urgently. Banks are closed on Sundays, most of Saturdays, evenings, and holidays. During the first year of COVID, many branches had limited hours, and some closed altogether, directing patrons elsewhere. You can cash a check at a bank branch down the street; you can’t retrieve items from your box at Branch A by going to Branch B.
You prefer to live off the grid and don’t want “The Man” to know where you are or what documents you possess.
The documents you’d keep in the safe deposit box would be copies, not originals, and you’re comfortable with scanning documents to the cloud or to a flash drive or hard drive. (If you’re not that worried about fire, flood or theft and have few vital documents and no collections, you may be willing to chance the cost of replacement fees.)
If any of these apply to you, a portable, fireproof, waterproof safe might satisfy your needs. However, as noted above, they can be stolen or safe-cracked. Be clear on your own situation.
WHAT YOU SHOULD/COULD KEEP IN A SAFE DEPOSIT BOX

Silver Safe Deposit Boxes Photo by olieman.eth on Unsplash
Your safe deposit box is a good place to store difficult (but not necessarily impossible) to replace items that you don’t need to access often.
- VIPs — Keep the originals of your very important papers specific to someone’s status as a human, like: birth certificates, adoption papers, marriage licenses, divorce decrees, citizenship papers, and death certificates. Consider keeping your Social Security card in your safe deposit box, too. (Either way, never, ever keep your Social Security card in your wallet! If it’s stolen, it’s like losing a one million dollar bill in terms of the potential for identity theft.) These documents can be replaced, but not quickly or without cost.
- Military records and discharge papers — for example, DD 214s. These documents may be required when applying for post-military jobs and for getting veterans-related benefits. If you’re not job-hunting or the veteran has not just passed away, quick access isn’t likely to be needed and a safe deposit box is a great, secure location.
- Copies (but not the originals, and not the sole copies) of your will, Power of Attorney, and Healthcare Proxy (Medical Power of Attorney) documents.
- The deed to your house and any other property you own. Similarly, it can be helpful to store settlement papers, property and title surveys, and other real estate documents you don’t want to lose in a household kerfuffle.
- The titles to your vehicles, boats, planes, space shuttles, etc.
- Paper certificates for any stocks or bond you own, including US savings bonds. Most stocks and bonds are held electronically these days, so don’t worry if you don’t have the certificates. (Digital shares are called book-entry shares; they aren’t fancy and calligraphied, but it’s easier to keep track of them.)
- A printed or digital home inventory. This may be as simple as a spreadsheet or as detailed as a combination video and electronic documents. You’ll want multiple copies kept safe in case you need to file a claim with your homeowner’s or renter’s insurance policy.)
- Printed or digital copies of important documents for your business, including contracts and other vital records.
- Any documents you consider private and/or sensitive that you wouldn’t want your kids, neighbors, houseguests, cleaning service, or other random people to find. This could be copies of a deposition from a divorce, ugly correspondence you are keeping as legal proof, or anything that would make for a juicy Lifetime movie of the week.
- Jewelry and collectibles — BUT ONLY IF THEY ARE INSURED! The FDIC doesn’t insure the contents of your box; that’s your responsibility. Don’t plan on keeping your entire jewelry collection in a bank’s vault unless you are the queen of a small nation. Just store pieces you wear on very special occasions or those you’re saving for the next generation.
- Family keepsakes you want to protect from toddlers, pets, or other potentially damaging sources.
- Any other documents or small items that would be hard or expensive to replace, and for which the bank seems safer than your own living space.
- Hard drives and/or flash drives, with mountable backups of your computer or important data.
WHAT YOU SHOULD NEVER KEEP IN A SAFE DEPOSIT BOX

- Large amounts of cash — Sometimes, it’s all about the Benjamins, but not when you’re looking at a safe deposit box.
I get it; the bank already has tons of cash lying around, so why wouldn’t it be smart to keep all your money hanging with its little green friends? There are a few reasons.
First, your cash won’t be earning any interest, and even if we weren’t experiencing an inflationary period, you’re wasting the incredible opportunity value of compound interest!
Second, as I noted, safe deposit boxes can’t be accessed on weekends, holidays, or after hours, so you’ll be limited as to when you can lay your hands on your cash. If you’ve got this much cash and want to keep it so liquid that you’re not willing to invest it in stocks, bonds, mutual funds, CDs, or retirement funds, at least keep it in a savings or checking account you can access, 24/7, with a debit card or transfer from online banking!
Third, hard, cold cash (and any other assets) that you keep in a safe deposit box (rather than a bank account) won’t be protected by the Federal Deposit Insurance Corp., nor covered under FDIC rules. Deposit cash in your bank account and it’s insured up to $250,000 per depositor per bank. However, plunk cash into in your safe deposit box and it isn’t insured at all!
Yes, currency in your safe deposit box is less likely to catch on fire, get stolen, or be accidentally donated than if you stuffed it in your mattress. But there’s little worse you can keep in your box.
- Your will — What’s possibly worse that keeping cash in your safe deposit box? Keeping the only legal copy of your will. Unless you’ve arranged for a co-renter, someone with signature access to the box and who knows where the key is, your family will be out of luck if you pass away.

Last Will and Testament Photo by Melinda Gimpel on Unsplash
Your loved ones would have to secure a court order to access the will and other contents of the box, and that requires the costly services of an attorney. Your attorney should keep the official copy, and other copies can be kept on file at home, with your executor, and/or in the cloud. While we’re at it…
- Original, sole copies of vital documents that your family might need if you become incapacitated — If you’re the only person with access to your safe deposit box and you have not designated someone as having Power of Attorney (or stored the only existing copy of the Power of Attorney paperwork in the box), lack of access to originals of your living will/medical directives and other life or end-of-life instructions could create a nightmare.
- Your passport, if there’s ANY chance you’ll need it urgently — Do you (or might you) work for a company that will require you to go abroad on a moment’s notice? Are you an international spy? (OK, I know, you can’t tell me if you are.) You probably figure that you would know if you’d ever need your passport urgently.

But trust Paper Doll; just because you’ve never needed your passport urgently in the past, doesn’t mean there aren’t a number of reasons you might in the future.
Back in February 2020, in Paper Doll on Narwhals, Fake News, and How To Get a REAL ID, I explained that by the 4th Quarter of 2020, everyone would need a REAL ID (driver’s license with star logo or a passport) to fly, or to enter federal buildings (to give testimony or participate in legal procedings in a federal courthouse) or nuclear facilities. (Hear that, Homer Simpson?)
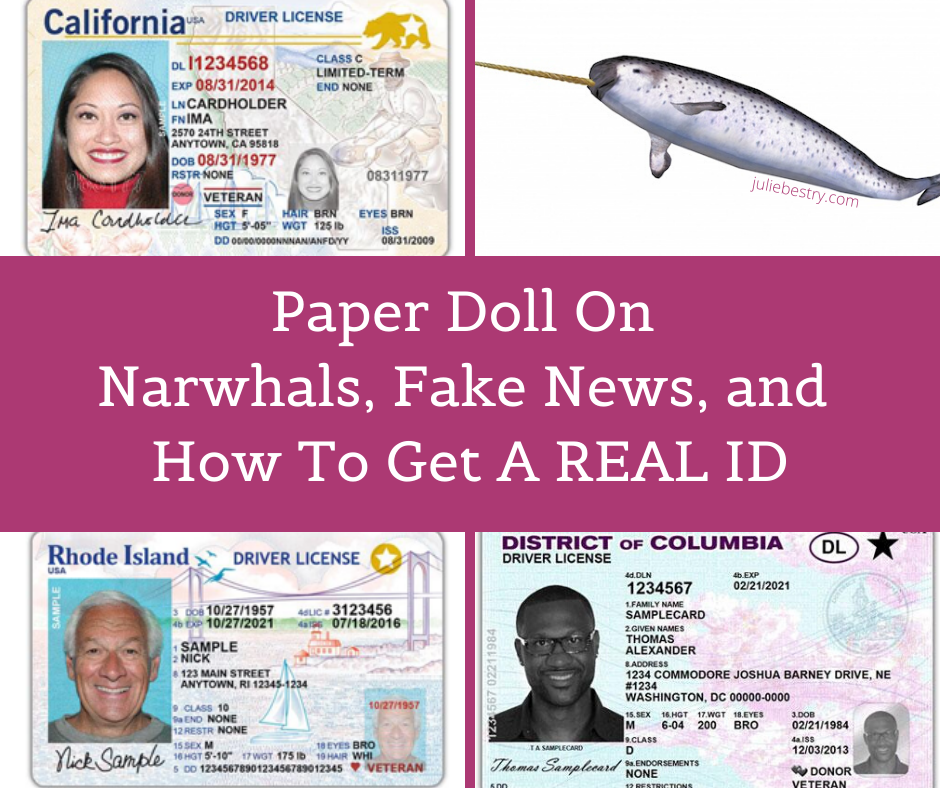
Due to COVID, that date has been pushed a few times, and is now rescheduled to May 3, 2023.
Maybe you’ve never used your passport before, or perhaps never used it without planning a trip 6 months in advance. But is it possible that you’ll have your wallet stolen the week before a domestic trip and your passport will be your only alternative?
Or might you need to enter a federal building (for perfectly legal, rational, wouldn’t-mind-being-seen-on-the-news-doing-so reasons)? Could an elderly relative get injured while on vacation in Europe or your college-age kid get sick while on Spring Break in Jamaica and you’d have to fly internationally at a moment’s notice? Consider the possibilities before putting your passport in the box.
- Uninsured valuables — Yes, your jewelry and collectibles are probably safer at the bank than in your rental apartment, house, or nursing home. But make sure you notify your insurance company so they attach a value-appropriate rider to your homeowner’s or renter’s policy.
- Spare keys — Dude! If you lock your keys in the car or lock yourself out of the house, it’s probably not going to be during banker’s hours! Think of the person you trust most in the world; now ask yourself if your mother (or MY mother) would trust that person. If you’d trust them to drive your car or babysit your kids, that’s a good indicator of someone to whom you can give a spare key.
- Anything illegal — You shouldn’t need Paper Doll to tell you this, but don’t put stolen goods, fireworks, drugs, toxic or hazardous substances, or anything that’s a no-go with the law.
HOW TO GET A SAFE DEPOSIT BOX
Before you rent a safe deposit box, figure out everything you’re going to want to keep in it. Gather everything up and lay it out someplace safe from the prying, sticky hands tiny humans (or furry friends), like on your dining table or in the guest room.
Knowing how much you have will help you determine how large a box to get. Rental rates of vary by size, as well as by bank or credit union, region of the country, and other factors, and can range from as little as $20 to several hundred dollars per year, so don’t “over-rent” on the space you need.
Box depths are standard (generally about 18-22 inches), but height and width dimensions vary. The smallest boxes are usually 3″ x 5″, but unless you have very few documents, you’d have to roll your papers to make them fit. Medium boxes range from 3″ x 10″ to 10″ x 10″. The largest safe deposit boxes in consumer banks and credit unions tend to be about 15″ x 15″, though larger specialty boxes can be arranged at banks that cater to clients who have large financial holdings.
Select a bank branch convenient to your home or work. Don’t quibble over a few dollars if you’ll have to schlep across town. Consider when you’ll want to access the box, either for retrieval or for putting items in.
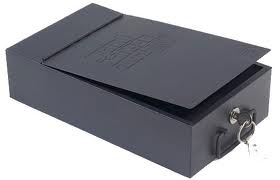
Ask about policies and fees. What are the key replacement fees? Charges for drilling boxes if keys are lost? (Safe deposit box keys are TINY! Put them somewhere safe and where you’ll remember to find them!) Is there comfortable (or any) seating available in the vault, in case you need time to go through the contents of your box and need to sort documents?
Think carefully about whether you want to share access with a co-renter, like your your spouse, parent(s), adult child(ren), business partner(s) or friend(s). You can’t just designate someone as a co-owner and give them a key. They’ll have to sign the signature card and show photo ID both at the time of rental and to gain access.
Remember, if you don’t have a co-renter, your Power of Attorney designee can act on your behalf for financial and other urgent matters and can access the box for you, but PoA designations cease upon your death. Eventually, the executor of your will can gain access (depending on the probate and estate procedures of your state), but this can be a lengthy process. If your possessions and documents are relatively simple, you’re probably better off naming as co-renter someone (like Paper Mommy) in which you can place great trust.
Make an appointment to rent and “move into” your box. Be prepared to fill out some forms, sign a lease agreement, and pay for the initial rental term. Make sure co-renters are available to come to the appointment as well.
Bring your photo ID. Co-renters? Samesies!
Bring the items you wish to store. Before you leave the house or office, create an inventory list, and bring a copy of the list with you. As you place the items or documents in the box, check them off your list.
Take a photo of the items in the box. Take a photo and/or adjust your list whenever you add or remove documents or possessions.
Bring gallon-size zip-lock plastic bags for protecting items in case of floods or sprinkler system malfunctions. If your box is high enough, safeguard delicate non-flat items from water damage with plastic food containers. Put a your name and contact information inside the container so that items can be identified as yours in the aftermath of any disaster.

Keep your key somewhere safe and memorable.
Don’t be like my dad. When we emptied out his office, as I described in The Great Mesozoic Law Office Purge of 2015: A Professional Organizer’s Family Tale, we found an envelope with my father’s familiar scrawl in red ink: “This is the envelope for the key to Eva’s safe deposit box in Miami, which we closed.” Eva was Paper Mommy‘s mother; she died in 2001. He would never have been able to find the envelope if the key had been needed, but kept an empty envelope telling us where the key had been!
Even if someone unauthorized has your key, they won’t be able to access your safe deposit box, as proof of identification and signature is required in tandem with a key. Key loss, however, may require drilling of the box — and that can be pricey!
REMINDERS AND CONSIDERATIONS
Possessions can be damaged or stolen. Faulty sprinkler systems, actual fires, floods and yes, even bank robberies, can lead to loss or damage of your items. So maintain an inventory at home of the contents of your safe deposit box, just as you might keep a home inventory of your possessions in the box.
The contents of your box will NOT be available 24/7/365. There’s a reason they’re called bankers’ hours — generally 8a – 5p, Monday through Friday, with some wiggle room on Saturday mornings and occasional late Friday hours. Don’t put something in the box that you might need to access quickly or urgently.
Access to your safe deposit box can be frozen. The IRS can block your access if you’re in a dispute with them. If law enforcement officials (including the Department of Homeland Security) believe you and/or the contents of the box are related to illegal activity (drugs, guns, explosives, or stolen items), a court order can be issued to give law enforcement access to the contents of your box.
Your safe deposit box can be declared “abandoned” — If you stop paying your rental fee, don’t maintain communication with the bank, and nobody in your family or overseeing your estate knows you had a safe deposit box, the contents of the box will eventually be turned over to your state’s Unclaimed Property division. Make sure your loved ones or legal representatives know you have a box, where it is, and the location of the key.
Protect and Organize Your COVID Vaccination Card
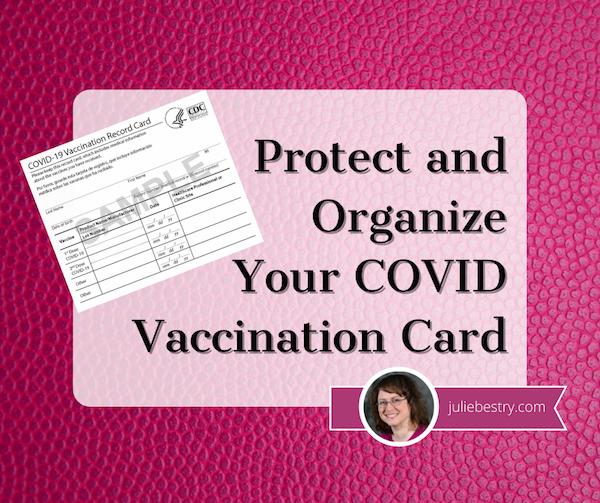
Throughout 2021, I’ve received a lot of questions from clients and readers regarding the best way to protect COVID vaccination cards from damage and where to store them for easy access.
WHY KEEPING YOUR VACCINATION CARD SAFE AND ACCESSIBLE IS ESSENTIAL
Let’s start at the beginning, even before COVID. While there’s been a great deal of hubbub lately about having to prove one’s vaccination status for work or to go various places, any adult knows that there have always been a variety of reasons one has had to prove they’ve had proper vaccinations.
Have you ever registered a child to attend school? Vaccination requirements date back to the mid-19th-century, when states began requiring proof of immunization against smallpox in order to register for school. Dating back at least as far as the WWII era, American schools have required proof of immunization against other communicable diseases. And while each state generally has its own laws regarding exactly what shots must be administered (and what medical or other exemptions exist), there are commonalities across all states.
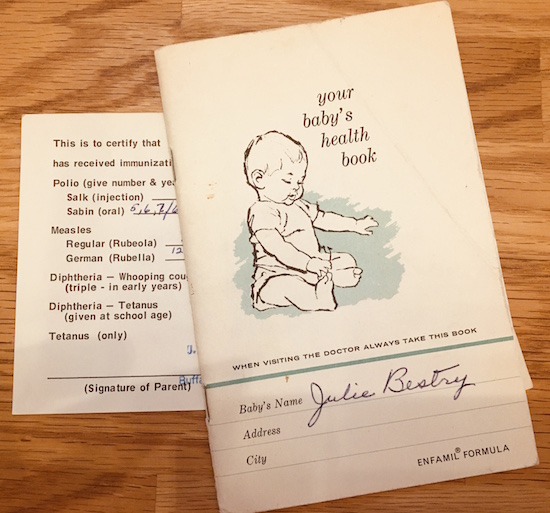
For their children to attend kindergarten, parents usually have to provide documentation from physicians that their children have received the following immunizations:
- Diphtheria-Tetanus-Pertussis (DTaP, or DT if appropriate) — required in all 50 states
- Haemophilus influenzae type B (Hib)
- Hepatitis A
- Hepatitis B (HBV) — required in 43 states
- Measles, Mumps, Rubella — required in all 50 states
- Pneumococcal conjugate vaccine (PCV)
- Poliomyelitis (IPV or OPV) — required in all 50 states
- Varicella — required in all 50 states
(Note: Paper Doll is not a medical practitioner. Speak with your physician(s) regarding the requisite inoculations in your state appropriate for your family members. The CDC has a printable immunization schedule for your reference.)
To attend college, students have to prove they’ve been inoculated against a variety of contagious diseases. Students born before 1957 don’t have to have the MMR because, back then, measles, mumps, and rubella existed as separate shots. Students born before 1980 were generally never inoculated for varicella (that’s chicken pox to you and me) because the immunization for that horrible, itchy, scarring, illness (which can cause painful shingles later in life) didn’t exist yet.
In general, college students have to get the Meningococcal B immunization. (Take meningitis seriously; I know a guy who had meningitis in college, and he lost hearing in one ear.) College students are also advised to be get the vaccinations for HPV and the flu.
Summer camps and extra-curricular athletic programs generally require the same proof of vaccinations as elementary and high schools do, for both employees and campers/participants, with the addition of tetanus boosters. As an aside, we’re all supposed to get tetanus boosters every 10 years. (Considering most of us keep thinking 1980 was just 20 years ago, please check with your physician regarding the last time you actually had a tetanus booster.)
Certain jobs or professions require vaccinations. Obviously, there are requirements (by state) for healthcare workers. Because different illnesses can be airborne, water-borne, or spread by wounds or bodily fluids (OK, let’s all pause to say “Ick!”), hospitality and restaurant workers often have to prove that they’ve received their inoculations for Hepatitis A and B, the flu, and tetanus/diptheria/pertussis. Again, states vary, but teachers are generally required and/or advised to receive all of the same inoculations as students in kindergarten through college.
Vaccinations are required for travel to and from the United States (and many other countries). For travel just about anywhere, you should be sure to be have your DPT, MMR, polio, varicella, and flu shots, but for travel to many nations, you may need to get vaccinated against cholera, malaria, hepatitis A and B, typhoid, rabies, and/or yellow fever. (The CDC has nation-by-nation pages.)
 Photo by Tmaximumge from PxHere
And, of course, there’s COVID. The longer part of the population goes unvaccinated, the more opportunity the Delta, Delta+, Lambda, and other variants have to mutate, evolve, grow, and become more dangerous. So, every day, more schools, employers, governments, and nations are requiring COVID vaccinations, and thus, proof of vaccinations.
For the variety of reasons explained above, you may need to prove you’ve been vaccinated against contagious illnesses. If you are unable to do so, you (or a member of your family) may not be able to attend school, get a certain job, or avail yourself of a variety of travel or entertainment options. In some cases, you can get inoculated again for certain diseases; for others, that’s not possible.
If your pediatrician is still in practice, you may be able to get copies of your records. Paper Doll was delivered by a physician born in 1894 and my pediatricians have all long since retired. But because Paper Mommy was diligent in maintaining family medical records and passing them along, it was easy for me to handle my own information when registering for college and graduate school and for verifying immunizations later in life.
For others, though, lack of organized systems for maintaining medical information presents a problem, which is why this blog has had so many posts over the years regarding organizing medical records and why it will continue to do so.
HOW & WHERE SHOULD YOU KEEP YOUR COVID VACCINATION CARD?
Can you keep your vaccination card in your wallet? Obviously, yes.
But should you keep your vaccination card in your wallet? That’s a more complicated question. Here’s what I suggest you do.
1) Take a photo of your COVID vaccination card. (But no, don’t post it to social media. Your birth date and other personal information on your card is fodder for identity thieves, so don’t post it, or your driver’s license or other ID, on “the socials.”)
Take a photo of your COVID vaccination card. (But no, don't post it to social media. Your birth date and other personal information on your card is fodder for identity thieves, so don't post it, or your driver's license or other ID,… Share on XLabel the photo with your name (or your family member’s name, if you’re keeping records for your spouse, kids, or parents) and date. Something like:
COVIDVax-BenedictCumberbatch-April2021
Once you have your photo or scanned copy, don’t just count on it living in your camera roll. Save it to one or more of the cloud solutions you use often, whether that’s Dropbox, Evernote, OneNote, iCloud, GoogleDrive, or something similar.
Create a folder for Vital Documents or VIPs (very important papers), and you can gather all of your other photos/scans of essential documents, from your birth certificate to other vaccination records, all in one logical place.
2) Think about your lifestyle and how often you will be needing to show your vaccination card. If you are a frequent traveler, you’ll need to show your card often, and may want to keep it in your wallet or purse. If, however, you are working remotely and live somewhere that proof of vaccination hasn’t (and isn’t likely to) come up with frequency because you’re avoiding crowded, indoor spaces, you can file it away.
This is a good time to get aware of the rules of where you live and where you’re going. For example, New York City announced last week that COVID vaccines will be required for anyone wishing to enter restaurants, bars, or gyms; in California, they’re weighing the same types of requirements for using indoor amenities.
In France, the law requires that anyone wanting to go to a bar or restaurant must have proof of COVID vaccination. As of this past weekend, in Italy, you’ll need your proof of vaccination to gain access to indoor seated dining at restaurants and bars, museums, exhibitions, cultural sites, sporting events, swimming pools, gyms, concerts, fairs, conferences, amusement parks and other venues.
3) File your card away if you’re not going to need to carry it around. For many people, the most logical place to file your proof of COVID vaccination will be in your family filing system, in your personal medical file. That might be in a regular file drawer, or in something like the Smead All-in-One Healthcare & Wellness Organizer.
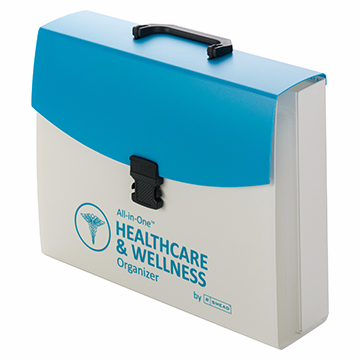
However, if your file is bulky even after you’ve pared it down to your actual medical records, you may want to store your vaccine card with your other VIPs (very important papers), like your birth certificate and Social Security Card, in your fireproof safe, for quick and easy access.
IN WHAT SHOULD YOU KEEP YOUR VACCINATION CARD?
The best way to protect your vaccination card is to find a clear, flat, snug container. At the most basic, you can grab any zipper-lock sandwich bag, which protect your card from moisture, germs, and general schmutz. However, you won’t get a great fit.
The official CDC COVID vaccination card is 4″ wide by 3″ high. A typical zipper-lock sandwich bag rang from 6 1/2″ x 5 7/8″ to 8″ x 5″, yielding a lot of extra space. The half-height snack bags are 6 1/2″ wide x 3 1/4″ high, which offers a slightly better fit, but still with wiggle room, so you’ll either have unused space or be tempted to fold the bag over onto itself.
If you’re going to be keeping your vaccine passport card in a manila folder or three-ring binder, amid your other personal or family records, a plastic sheet protector will generally do the trick. However, sheet protectors are open at the top end, so if you’re going to be carrying your records around (say, if you’re a college student moving at the end of each semester or school year), it’s not a perfect solution.
You might have an old badge holder around the house, if you’ve ever attended a conference or had a job that required an ID to get into the building. I dug through some old NAPO conference paraphernalia and found this badge—but only for photographic purposes.

The clear plastic badge holder seems almost ideal and it comes with a lanyard for wearing around one’s neck, which keeps hands free and prevents accidental loss. However, aside from the fact that the ribbons are permanently affixed and the sticker on the front isn’t going anywhere without making a gummy mess, the top of the badge holder is open. Without a snug fit, a vaccine card could fall out and get lost.
Personally, I’m more inclined to recommend one of the following inexpensive solutions. I started by searching Amazon and found a wide variety of basic options.
Clear vinyl plastic sleeves made to accommodate the CDC cards fit all the requirements. I believe no particular brand is better than any other, but as an example, Amazon carries Mljsh (yes, really, no vowels) CDC Vaccination Card record holders.
The sleeve is waterproof and has a re-sealable zipper. The inner dimensions are 4.31″ wide x 3.11″ high to accommodate a laminated card. A package of two costs $5.28.
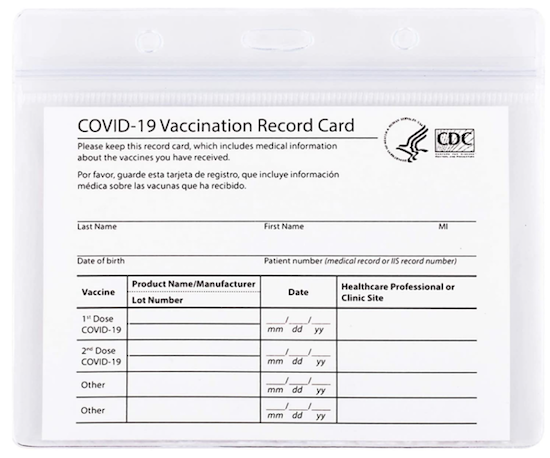
What I like about this particular card is that at the top, there are three slots/punctures so that you can attach your sleeved vaccine card to a lanyard or one of those retractable badge holders, the kind that makes that satisfying zip-line sound when retracting — Zzzzzwwwwjjjjzzzzz!
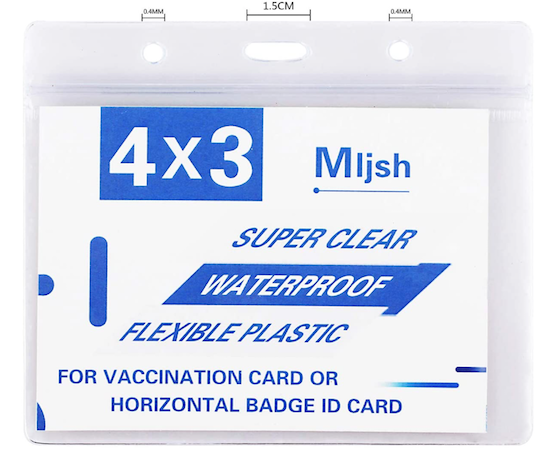
Again, Paper Doll is brand-agnostic regarding what card holder you choose, but I do like the fact that this one has both the plastic zipper top and the punched holes for accommodating a lanyard. However, there are so many options that it would be hard to select a wrong card holder.
If you need color in every area of your life, instead of picking a clear vinyl solution, you could choose something like Gurcyter’s more colorful design.
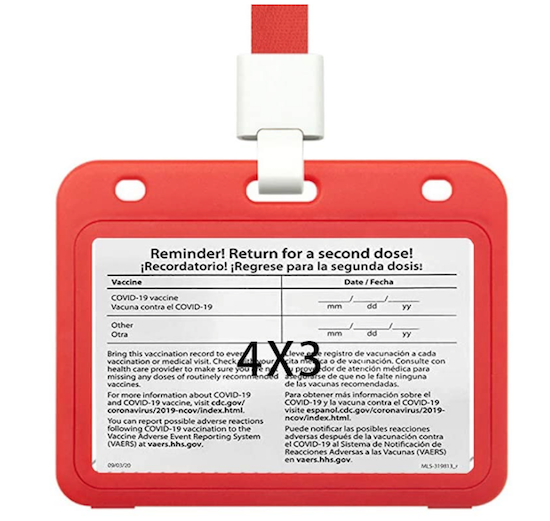
The front and back split open to allow you to center your vaccine card, and you get to choose from among five colors (red, dark blue, light blue, green, or yellow), and it comes with a matching 18.1″ ribbon lanyard.
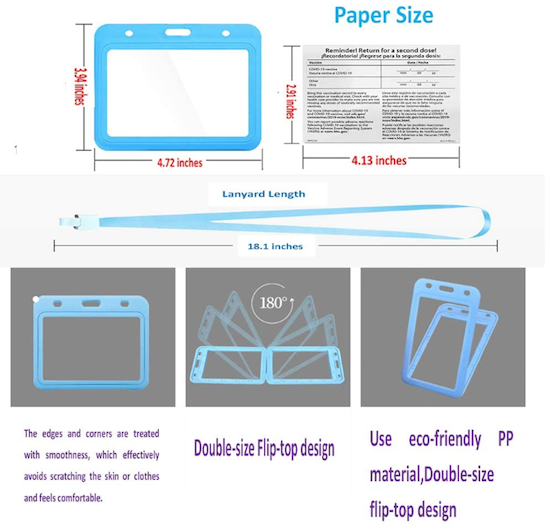
One holder is $6.99. Note, however, that the Gurcyter version is a little bit squished vertically, with the interior of the holder measuring 4.13″ wide x 2.91″ high, wide enough for a standard CDC card, but .09″ (2.2mm) shorter. So, if you pick this option, you might need to trim a little white space on one or both sides. (The things people will do for fashion!)
If you’re doing a lot of traveling, you might want a combination passport and vaccine card carrier. There are a number of colorful combination holders, like this Ciana faux leather, bi-fold passport and vaccine card holder for $5.99.
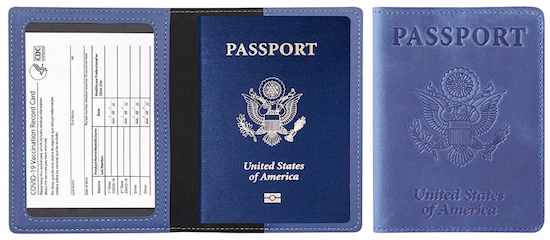
It comes in twelve colors (brown, burgundy, carbon-fiber black, dark blue, green, grey, light blue, pink, purple, red, rose gold, and turquoise), with a see-through compartment for your vaccine card and a sleeve for your passport.
Of course, Amazon isn’t the only place to find these solutions. A quick search of “vaccine card holder” or “vaccine card protector” will yield a number of options. As with masks, which are utilitarian but became fashion statements over the past 18 months, the creative people at Etsy have come up with solutions for every taste and style.
If you’d like to aim for a classier vaccine card holder, the Familiar Paws Etsy shop has leather vaccine card holders with a key ring for $12.99.
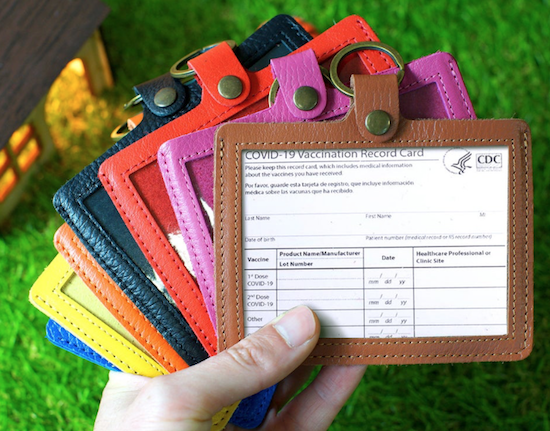
The front of the vaccine card is visible through the clear plastic window, and you can select from among a variety of soft, full-grain genuine leather options in one of eight colors (orange, navy blue, brown, pink, black, red, yellow, and aquamarine). At the top, the leather tab folds over a key ring. (Familiar Paws offers personalization with names or initials for an additional cost.)
For something cozier, Etsy shop QueentopazCreations uses Rifle Paper Company fabrics to create cloth vaccine card wallets.

The card wallets come in six fabric designs (Strawberry Fields, Garden Party, Wildwood, Garden Party/Rose, Rosa Periwinkle, Citrus Floral Teal, and Herb Garden) and in two sizes: 4″ wide by 3″ high, for $13, or 4 1/4″ wide by 3 1/2″ high, for $15.
Each cloth wallet sleeve has stiff interfacing and a plastic insert to protect your card from bending. My only concern is that absent a zipper-lock mechanism, you’d want to make sure your card fits snugly in the wallet and won’t fall out.
Etsy also has some splashy and fun (if sometimes potty-mouthed) vinyl vaccine card holders, and more than a few options that say, “Proof of Fauci Ouchie!”
I’d be hard-pressed to encourage any client to spend more than $15 for something to hold a vaccine card, but if you’re the sort of person who buys $300+ shoes and can turn anything into a status symbol, Fashionista.com has a piece on vaccine passport cases and lanyards for keeping your cards fashionably handy (for ridiculous-to-me prices of $100-$500)!
TO LAMINATE OR NOT TO LAMINATE?
When the vaccine first became available, social media buzzed with suggestions for laminating COVID vaccination cards. It’s easy to understand why; paper is easily torn or damaged if it gets wet, and laminating paper protects it from both. However, there are some concerns with laminating your COVID vaccine card.
First, it’s becoming increasingly clear that booster shots may become necessary. If so, we may need to present our original vaccine cards to have more information added to the two lower lines where “other” is printed. Laminating the vaccine cards would prevent new information from being added; the vaccine site would probably end up having to give you a new card, which would obviate going to so much effort to protect your current one.
Second, if done incorrectly, laminating plastics and adhesives can damage your card. So, if you’ve got a laminator but haven’t ever cracked open the box, maybe starting with a vital document isn’t the best notion? Big box stores like Staples and Office Depot have offered to laminate vaccine cards for free, but obviously that’s designed to tempt you into the store to shop.
WHAT IF YOU LOSE YOUR VACCINATION CARD?
The federal government is not keeping a master list of who has been vaccinated, but the individual states are. So, if you lose your vaccination card, don’t panic! Each state has its own computerized vaccination registry. Just contact your state’s department of health to request a replacement; you will likely have to provide some personal information and request the documentation in writing or through the state’s website.
The CDC has a list of contacts for the immunization information systems (IIS) in each state. Not only can you request replacement cards through your state’s system, but you can get copies of your child’s immunization records for all the purposes described earlier in this post.
If you got your vaccination at a national pharmacy chain, you can contact them directly. For example, if you were vaccinated at Walgreens or CVS, the pharmacy chains can check their internal records and replace your card. Also, for most such retail pharmacy chains, you are able to create an account online and access your COVID-19 vaccination records directly.
Meanwhile, because the first thing I told you to do, up above, was photograph your card, you do have some level of proof of which vaccine you received and when.
FINAL NOTE
Nothing in this post should be considered controversial. We live in a society that has rules. “No shoes. No shirt. No service.” We have to wear seat belts and carry car insurance. Income tax filings are due (generally) on April 15th. And historically, to promote the general welfare and safety of students, campers, employees, customers, and citizens, rules are put in place by schools, camps, businesses, and governments.
Just as we have to show that we have a valid driver’s license to operate a motor vehicle or a passport (and visa) to enter a foreign country (or return to our own), there are times that we have to prove that we have been inoculated, whether it’s against polio and smallpox, or against COVID. Today’s post, like many others I’ve written, simply ensures that you know the best ways to protect and organize your vital documents.
I hope you will do all that’s necessary to stay safe, healthy, and organized.





Follow Me