Archive for ‘Paper Organizing’ Category
The Humble Index Card: Organize Your Life, Then Organize Your Cards

When was the last time you used an index card? Chances are, you don’t give a lot of respect to the humble three-by-five, but we owe so many of our systems, including almost every type of categorization and computerization, to what first got plotted out in a precursor of the little cards we know so well.
Index cards, of a sort, have been around ever since the 1760s, when Swedish botanist Carl Linnaeus, the father of modern taxonomy (the science of classification), figured out that he could name, categorize, and keep track of animals, plants, and minerals. All that Latin nomenclature, with genus and species and sub-species, needed to be written down somewhere, and Linnaeus figured out how to square it all away.
I know, it’s hard to believe someone had to invent an index card, but realize that file folders weren’t even invented until the late 1800s, filing cabinets came to market in 1898, and paper clips showed up around 1900. If you crave more about the history of office supplies — and I mean, who doesn’t? — you might like to check out:
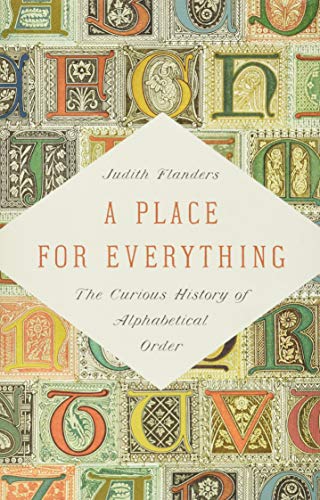
A Place for Everything: The Curious History of Alphabetical Order by Judith Flanders (which is about so much more than just alphabetical order, and provides some eye-opening backward glances into how hard it was to organize information throughout most of recorded history).
The Perfection of the Paper Clip: Curious Tales of Invention, Accidental Genius, and Stationery Obsession by James Ward, which offers intriguing narratives (with a British twist) on how all our office supplies were developed.

In the world of Evernote and OneNote, of CRMs and productivity apps, the humble index card often gets lost in the shuffle (if you’ll pardon the card pun). But there are a variety of ways to organize information and knowledge to help you lead a more orderly life — inexpensively, easily, and without internet access.
I have nothing against using the web and all the magical apps available to help you achieve your goals, but Paper Doll would be doing a disservice not to note the old-school ways you can organize your life with index cards. And of course, while I’m at it, I’ve got a deep dive on options to help you organize those index cards to keep clutter at a bare minimum.
WHAT CAN YOU DO WITH AN INDEX CARD?
Think back. What was your earliest interaction with index cards? Was it Grandma’s recipe for your favorite cookies, perhaps with an oily thumbprint in the upper corner of a card covered with her curling scrawl? Maybe you learned how to do geometry proofs with each card bisected vertically? Or perhaps you studies for the SAT vocabulary section using index cards as flash cards?
In this digital age, you can still do so much with a package of 3″ x 5″ index cards from the dollar store. Off the top of my head, you can use an index card or stack for:
- Address Collections – The problem with a print address book is that once you fill up a “popular” letter (M? S?) until all the blanks are filled, or if one of your vagabond friends has used up an entire page of one letter of addresses for her travels hither and yon, you need to acquire a new address book to make up for the oodles of scribbles and cross-outs. Sure, using the Contacts app in your phone is ideal, unless you’ve somehow failed to back your phone up to the cloud, in which case, one accidental trip through the washing machine can erase a lifetime of contacts. But index cards were a simple, inexpensive precursor to a Rolodex and continue to make an appealing alternative to digital address apps. Using one card per person/family lets you keep track of addresses, phone numbers, email addresses, the names of newly-arrived babies, and so on. When one card has enough cross-outs and re-writes, just replace it with a new index card rather than a whole new address book.
- Customer Relationship Management (CRM) — Yes, a CRM software program is the gold standard for new businesses, and I wouldn’t encourage you to start a business by keeping this kind of information on paper. But if you’re the kind of person who just doesn’t embrace technology for everything, using an index card with your client’s name, phone number, birthday/anniversary, and key preferences might be a good way to help you get started. When your customer reaches out to you, or vice versa, you can put a date on the line, with a quick note about the conversation, letting you trace the history of the relationship over time.
- Expense Logs — In the olden days, we wrote checks and then noted information about the transactions in our check registers. Paper Doll still uses a register for every transaction, but is prompted by receipts (from debit card transactions, mostly) to remind myself what to log. However, just carrying an index card in your wallet gives you an easy way to keep track of your financial activities in the moment. Write the date, the amount, and a one-line description of what you bought. If you tend to use cash, this will help you track your expenses without need of logging into your bank account; if you use your debit or credit card, mostly, this offers assistance for keeping tabs on your day-to-day spending (as using plastic doesn’t “feel” like money, and you may not realize how much outlay is going on).
- Meals and Snack Logs — Are you on any kind of eating plan? (The word “diet” is so last century!) Whether you’re keeping track of protein grams and carbs for nutritional reasons, calories for health, or exact foods to figure out a mystery allergy, index cards offer a quick solution.
- To-Do Lists — Start your day with your three most important goals on an index card. When you have only three inches by five inches of real estate, you’re going to be pithy and get to the point. (Sure, you can use a Post-it® Note, but lined index cards give you a little more formality.) I like to pick 1 big task, two medium-sized tasks, and three small tasks, but even these should fit on a “today” card.
- Wanna-Do Lists — Yes, if your friend recommends a book, movie, restaurant, or podcast, you can pull it up in your phone, but only if your phone is handy. (And then, how much more likely are you to then be distracted by your phone and ignore your friend?) Keeping a running list on a card or two in your wallet or purse lets you pull it out when the context is right — when you’re trying to find somewhere to eat on Saturday night or roaming the bookstore (or even surfing online) to find something to read.
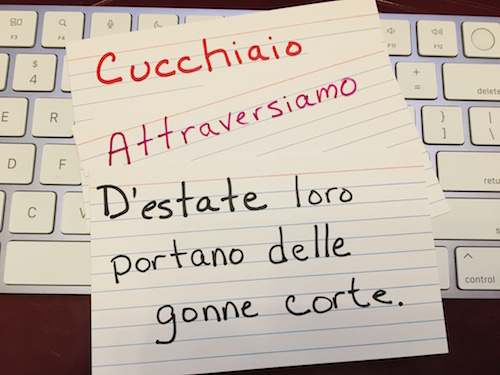
- Flash Cards — I love my Duolingo for learning Italian, but to remember attraversiamo, già, and sempre, or to distinguish among ora vs. poi vs. allora, you can’t beat a flash card. Whether you’re learning bones and ligaments in medical school, national capitals and top exports in geography, or embracing those definitions for the SAT verbals, flash cards are inexpensive and easy to make, quick to shuffle, and require no battery charge. Plus, research shows that we remember what we hand-write, with greater context and nuance, than what we type.
- Recipes — This one can’t surprise you. For a century, families have passed down handwritten recipes on index cards.
- Household Inventories — Sure, you’ll create the best, most complete inventory if you video your possessions and log them in software like HomeZada or Sortly, or even in a self-created database in Airtable, but if you want to do a quick-and-dirty inventory of your space, noting descriptions, model numbers, serial numbers, etc., an index card inventory is a great start.
- Research — Whether you’re writing a report for Social Studies or looking up some genealogical records, index cards provide a way of encapsulating information. You can use numbers and letters to code which things are related to what. My 7th grade English teacher taught us to create an outline (with Roman numerals and letters, breaking down each section), putting each bibliographic item on its own card with its own code, and then each fact or quote got a card, linking it to the outline and to the bibliographic source. Not only did I use this method (with small modifications) in college and graduate school, but I incorporated into research I’ve done for my ebooks and other publications. The size of the index card forces you to focus on bite-sized pieces of information.
- Maps for Creative Endeavors and Adventures — Writing a novel? Use index cards to keep track of the essential traits of each character, and then map out your plot points, and put it all up on a bulletin board. (This method is actually the model for the popular Scrivener software.) Planning a vacation and can’t decide among all the options? Make a card for each alternative, with essential information like dates and times each museum or attraction is open, then sort by location (Paris, London, Madrid? Niagara Falls, Buffalo, Rochester?) and order by priorities. Bring the stack with you on your trip, and if weather or a venue closure blocks your plans, you’ll be able to pick the next priority in the stack!
SPECIAL USE OF INDEX CARDS: THE HIPSTER PDA
Have you ever heard of the Hipster PDA?
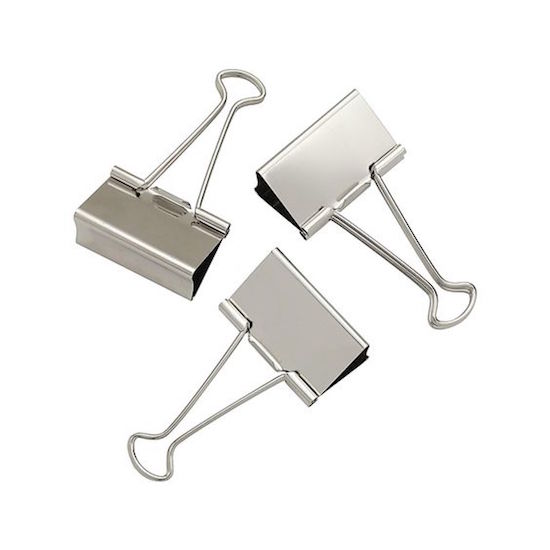
Back in 2004, Merlin Mann, writer and founder of the productivity website 43 Folders, (somewhat) jokingly turned his back on the increasing complexity of what we used to call personal digital assistants (like those pre-iPhone Blackberry and PalmPilot devices). He put forth the idea of using a small stack of index cards and a binder clip to gather essential information and keep it at hand.
Teo, CC BY-SA 2.0, via Wikimedia Commons
While Mann may have been applying the concept with a bit of tongue-in-cheek goofiness, the followers of David Allen’s Getting Things Done: The Art of Stress-Free Productivity (GTD) approach picked up the idea of the Hipster PDA and ran with it. In GTD, one of the focuses is on keeping context lists, so that when you’re at the office, you have an Office list; when you’re at the supermarket, you have a Piggly Wiggly list, and so on.

While most people are keeping that kind of list in the reminders app of their phone, fans of the Hipster PDA have a context card for each item or task to be slotted where appropriate.
The Hipster PDA requires only index cards (used vertically or horizontally, as you prefer) and binder clips. If you want, you can use multi-color card packs to color-code different features or contexts. There are even crowdsourced templates all over the web (here’s a set at DIY Planner) and on Pinterest to help you use index cards to create the productivity approach of your dreams.
HOW CAN YOU KEEP YOUR INDEX CARDS ORGANIZED?
The answer may seem almost ridiculous. After all, a simple rubber band around a packet of index cards should be enough to keep them from spreading out across a desk drawer, a high school locker, or an office. But if you’ve ever come across an old stack of index cards, wrapped in a rubber band like that, you know that rubber bands dry out and break. That’s why the Hipster PDA uses binder clips.
For many, the main drawback to using index cards is the potential for disorganization or card clutter. However, there are a variety of solutions you can use, whether you want your card stack to be mobile or just neatly arranged on your desk our counter. I’ve gathered alternatives for corralling 3″ x 5″ cards, as they are the most standard, but you should be able to find similar solutions for 4″ x 6″ and sometimes even 5″ x 8″ index card storage.
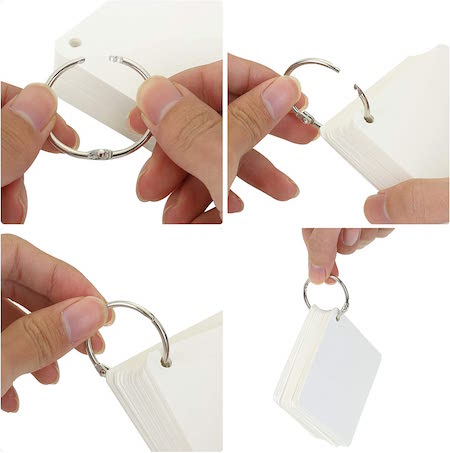
Note card rings — Don’t be tempted to think you can organize your cards with traditional keyrings, the kind where you have to pry the metal apart with your fingernails or a key. Use a search term like bookbinder rings or loose leaf binder rings. You want the kind that lets you push inward from both sides and then pull the sides apart to grant you access. Depending on the thickness of your card stacks, you might want to get an assortment of sizes. A few dozen rings (which you can always use for other purposes) won’t run you much more than $5 or so.
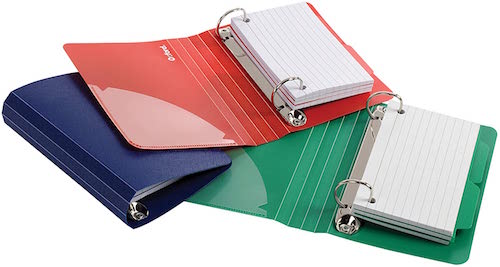
Index card binders — If you want your cards to have a little more protection, you can opt for a miniature binder, similar to the kinds of three-ring binders you’d use for loose-leaf paper. This Oxford Index Card Binder has a poly cover, two rings, and two poly dividers. It’s available in red, blue, or green for about $13.
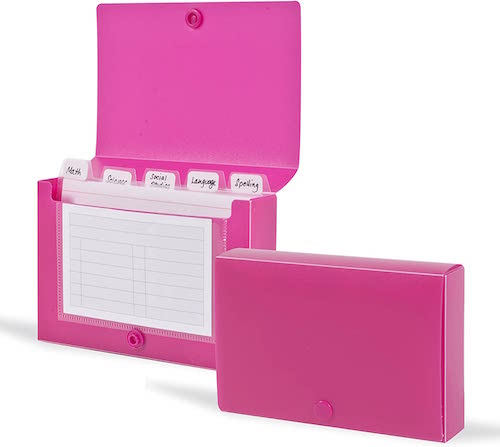
Index Card Cases/Boxes — If you have small stacks of index cards you want to keep attractively but make portable, another option would be a poly index card case or box. I really like these colorful ones from DocIt. Each poly case (available in blue, pink, grey, or green) has a snap closure, holds 100 cards, and includes five dividers with adhesive label tabs. You can buy one for about $5, or packs of four ($12.99) or 24 ($35.99).
If you want a greater variety of colors for a similar price, check out these four-packs from Emraw. Note that these aren’t accordion-style; I find that accordion-style index card cases hold fewer cards, and chances are you won’t need the kind of mini-sections they enable.
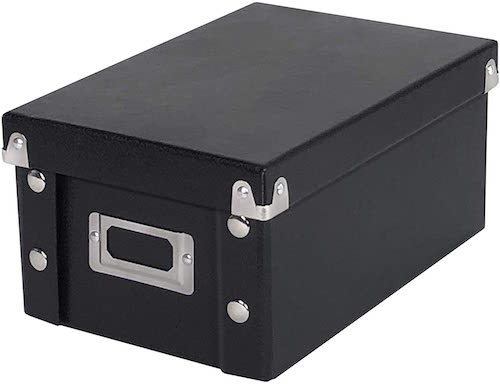
Plastic Index Card File Box — This is probably what you used in school, and it’s a stalwart of the office supply arena. Plastic is water-resistant, durable, inexpensive, and won’t rust, and these kinds of card file boxes usually fit easily in a drawer or on your desktop, but are light enough (with secure enough closures) that you can pop them in your backpack. But, of course, it’s plastic, and not everyone likes petrochemical products. (Plastic = petroleum = dead dinosaurs.) You can buy a brand name version at any big-box store, or get one at your nearest dollar store for no more than $3-4 each, or try this Alfion set of four for about $16.99 from Amazon.

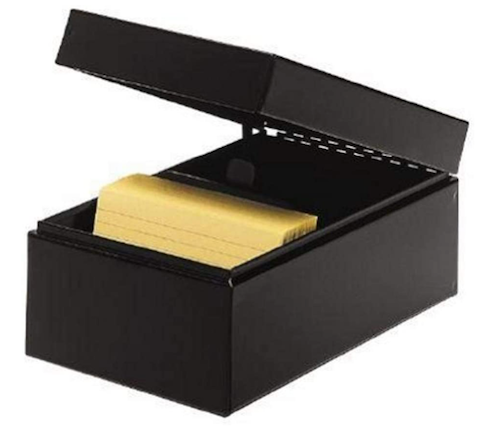
Metal Index Card File Boxes — I grew up with Paper Mommy‘s gravy-brown metal index card file box housing one set of her recipes. The metal version isn’t as lightweight as the plastic ones, and they usually lack a secure closure, making them poor options for mobile card storage. They also tend not to be very pretty. However, with a little creativity (and some paint, washi tape, or contact paper) you can make your card box match your personal style.
You used to be able to find metal card file boxes in the same size/shape as the plastic file boxes above, but in recent years, larger/deeper metal cases have become more popular. This Steelmaster card file box has a 900 card capacity and is 8 1/2″ deep; it costs $26.60 at Amazon.
Collapsible Card File Boxes — If your need for card file storage ebbs and flows, you might want to consider a collapsible index card file box. This one from Snap-N-Store holds 1100 3″ x 5″ index cards. The box is made of sturdy fiberboard with a water-resistant laminate cover, metal snaps and steel-reinforced corners. It runs $10 at Amazon.
Decorative Solutions — While the above solutions are standard, you should be able to find a wide variety of “fun” options for organizing your index cards if you search beyond office supply stores.
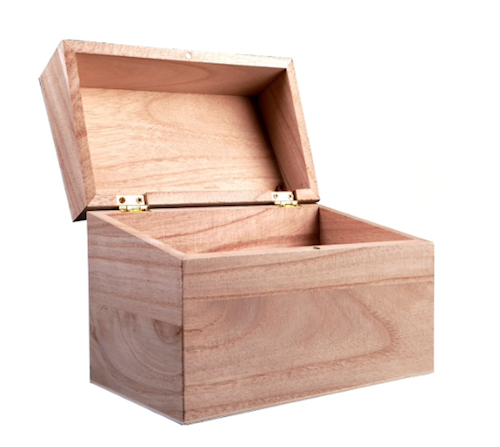
If you want an old-fashioned wooden file box, perhaps as a gift box already filled with recipe cards, your best bet is to haunt Etsy or specialty craft shops; the search terms “wooden recipe box” should pull up something useful. I found this ArtMinds® wooden recipe box for $6 at Michael’s.
I have to say, however, that my favorite index card storage option, from an aesthetic perspective, is the Oxford at Hand Note Card Organizer. Each metal organizer has a non-skid base to keep it in place and prevent it from squeaking against your desktop or countertop. It’s designed to hold 3″ x 5″ cards and comes with 25 matching dot-grid cards, but of course you can use any card style.
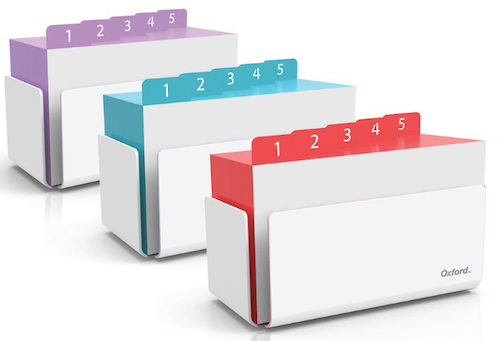
The Oxford at Hand Note Card Organizer comes in Charcoal Grey as well as three designer colors: Coral, Shoreline Blue, and Orchid Bouquet. They run $22.75/each, but must (unfortunately) be ordered in sets of 6 or 12 if you buy directly from Tops Products (Oxford’s parent company). However, you can get a single case in the Charcoal Grey and Shoreline Blue versions on Amazon for $12.99/each. (I’m still searching for a vendor selling just one in Orchid Bouquet, so please write in if you see them anywhere!)

Of course, there’s so much more to be said about index cards (sizes, styles, patterns), storage, display options, and uses, but we’ll have to save that for another time. Do you have a strategy for using index cards that I didn’t mention? A favorite storage solution for cards that I didn’t include? Please share in the comments below!
Disclosure: Some of the links above are affiliate links, and I may get a small remuneration (at no additional cost to you) if you make a purchase after clicking through to the resulting pages. The opinions, as always, are my own. (Seriously, who else would claim them?) For more information regarding how Best Results Organizing handles affiliate links, please see the affiliate section of the site’s Privacy Policy.
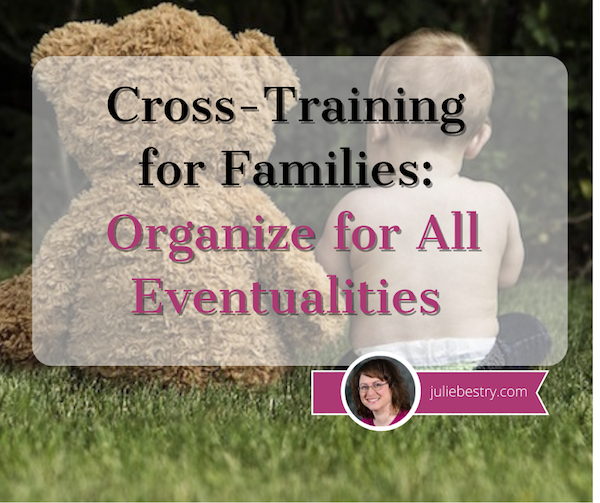
Cross-Training for Families: Organize for All Eventualities
WHAT’S THE DEAL WITH CROSS-TRAINING?
The term cross-training appears to have originated in the fitness and athletic world. One’s usual sport strengthens certain muscle groups and develops a specific set of skills; training in different disciplines, allows you to address other muscle groups, gain and sharpen different skills, and create a more well-rounded overall performance.

Photo by Marta Wave from Pexels
Cross-training in business yields the same kinds of benefits. Let’s say you work for a widget-making company. (“Hi! I’m <insert you name here>. I work for a widget-making company!”) Your job might be to oversee the complicated machine that cuts out the widgets; your friend down the factory line has a complementary job, making sure that the widgets are quality-controlled to meet international widget-production specifications.
If your company is run smoothly, each employee must be crackerjack at his or her job. But what if there’s only one person who knows how to do a specific thing? What if that person wins the lottery and quits, or gets hired away by a competing widget maker? Sure, the company can hire and train a new widget quality-control specialist, but until that happens, a manager with prior experience might have to step in, reducing the time the manager can, well, manage.
But what if the staff were cross-trained so that in addition to knowing your own job up, down, and sideways, everyone had at least a little training at other people’s jobs? Wouldn’t that make things better?
When I worked in television, I was a program director at local network affiliates. My assistant and I each had our separate spheres of influence, but the truth was that on most days, I was handling managerial tasks (research, contract negotiation, meetings with syndicators, etc.) and my assistant was handling day-to-day operations (maintaining the film vault, overseeing satellite operations, quality-controlling programming tapes — because this was in ancient times, before programming all lived inside computers).
Ours was a two-person department; without cross-training on the intricacies of satellite operations and whatnot, my assistant would never have been able to call in sick, take a vacation, or move onward professionally without things grinding to a stand-still. Cross-training saves butts!

Photo by Christina Morillo from Pexels
Major advantages of cross-training in business include:
- Better efficiency, because the more people have a good handle on how to do any one thing, the better it will get done.
- Improved flexibility, because the organization as a whole can be nimble.
- Clarity for emergency response planning. Back-up plans can save companies and that can save lives.
- Better “coverage,” so that if there are greater needs in one area (like greater demand for boxing up widgets) employees from other departments can fill those roles.
- Better integration and institutional knowledge across the company. If you only know how your department works, and are fuzzy on the operations of the rest of the business, not only does it hold you back from spotting potential problems and making suggestions (for the company’s benefit), it keeps you from achieving personal growth by seeing what other possibilities exist for you.
- Better morale. The more you know how to do, and the better you are at it, the more self-confidence you’re going to have.
- More satisfied customers. If you are involved in client/customer-facing work, cross-training means you can respond wisely, deftly, and quickly to questions, yielding more confidence in the company and in you as an expert.
Cross-training in your family, especially with regard to essential paperwork, information, and rituals, has the same benefits. Think about what happens when one parent is the main caregiver for a child but has to leave for a business trip or to help an ailing grandparent. The other parent (or other adult in the household, if there is one) needs to step in and step up!
Cross-training in the family has the same benefits as with companies.
- Better efficiency, because the person who usually pays the electric bill, does the carpool drop-off, or renews the car insurance policies may not always be available without difficulty or overwhelm.
- Improved flexibility, because the family as a whole can be nimble.
- Clarity for emergency response planning. You back up your computer; shouldn’t you have backup for when you’re headed to give a career-defining speech and the school calls to say your child just threw up?
- Better “coverage,” so that when one adult in the family is overloaded, the other can pick up the slack without having to explain what to do, how to do it, what the pitfalls may be, and who may complain (about the color of the frosting or how the sandwich is cut).
- Better integration and “institutional” knowledge across the family. It’s not 1957; it’s unreasonable to expect that one member of the household is “in charge” of all things related to the kids or that one (other, or the same) person is “in charge” of all financial, legal, and organizational goings-on.*
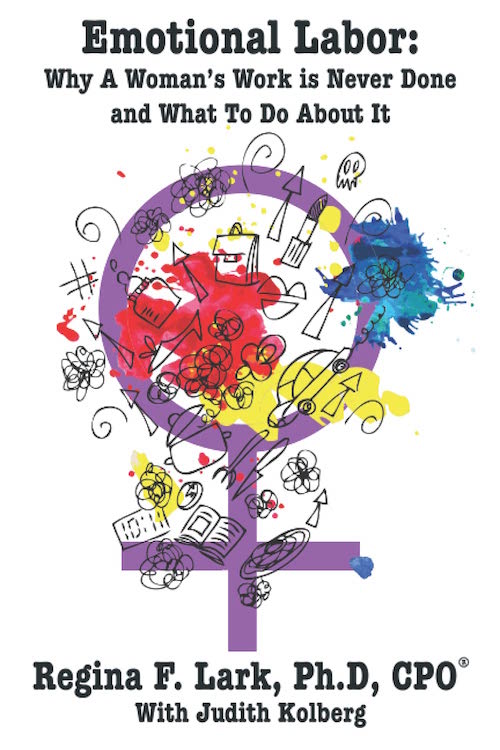
*This is a really complex topic. Being a caregiver for children and running a household, even when one works outside the home for pay, involves not only the physical labor but the mental load and emotional labor of anticipating cognitive, emotional, and other needs of stakeholders (but instead of CEOs and shareholders, it’s tiny humans and life partners). I’m excited to note that my colleagues Regina Lark, PhD and Judith Kolberg have written Emotional Labor: Why A Woman’s Work Is Never Done. It was just released, and deals more specifically with this concept.
- Better morale. It’s a reality. The more active a part of your family you are (or your partner is), knowing everything from which lullaby scares away the monsters to which color notebook into which the teacher requires permission slips be inserted, the happier everyone will be.
- More satisfied “customers.” OK, your kids and your spouse/partner, and maybe even other members of your household (like aging parents) want to feel confident that you’re a full-fledged member of the family, that you know what you’re doing and that you want to be there doing it.
Cross-training rocks!
SO WHY DO PEOPLE AVOID CROSS-TRAINING?
If cross-training is so great, why do people groan and avoid it? (I’m so glad you asked!) The sticking points are the same at work as they are at home, though they are expressed differently.
Inertia
At work: businesses tend to focus on urgent priorities, so even if there are directives from on-high requiring quarterly cross-training sessions, management often finds a way to avoid taking time away from meeting deadlines to carve out slots in the schedule for cross-training.
At home: same deal. Your life is busy. Maybe you read a blog post like this, or your professional organizer calls your attention to a problem waiting to happen.

Baby & Teddy Bear Image by StockSnap from Pixabay
Or you hear a horror story about spouse who went on a business trip and the at-home parent couldn’t find the right sleeping stuffie, and so the child cried for two days straight. Or you hear about a widowed friend of your parents who didn’t pay the insurance bill because they didn’t know it came to the deceased spouse’s email address, not via mail. These are cautionary tales.
Focusing on the benefits rather than the inconvenience will help everyone acclimate.
Learning curve on new material
At home and at work, nobody gets everything right on the first try. It’s human nature to avoid attempting something if you fear you won’t do it well. In the workplace, Impostor Syndrome may kick in, and an employee may fear attempting something outside the usual skill set, fearing the inability to get it right immediately might lead to firing. And at home, someone might feel nervous about being slow to succeed at a task one’s partner already does well.
When you invite your partner to join in household cross-training, acknowledge that you have different skill-sets and you may not be equally adept at everything. The point at home isn’t to be perfect, it’s to be perfectly satisfactory as a back-up.
Job security
At work: If you’re the only one who knows how to do something, you may feel like you have job security. (Of course, the flip-side of this is that management will tend not to promote you if you’ve convinced them nobody else can master your area.)
At home: While most people aren’t afraid that a spouse will divorce them if they don’t pick up right away on how to use the digital password manager, we all feel a little anxious about being seen without our halos.
Fear of higher expectations, higher workload, and being taken advantage of
At work: It’s a reasonable fear that if you know how to do more, you might be expected to do more. To some extent, this can be a positive thing, allowing you to do your own rendition of “This little light of mine, I’m gonna let it shine!” This is your chance to step up!
But if your workplace tends to be firmly on one side of the continuum, anywhere from moderately dysfunctional to toxic, you’ll want to watch for signs that you’re being taken advantage of, and be prepared to negotiate for better pay and benefits (or depart for greener pastures with your newfound skills).
At home: Unlike in businesses, where capitalism is the basis of everything and mutual loyalty can be a dubious concept, families are based (or should be based) on love, mutual respect, and loyalty. The point of family cross-training is to strengthen the family, for the benefit of everyone!
Focus on how improving skill training and sharing knowledge will support the healthy growth of the partnership and create a financially and emotionally sound foundation for the kids, the parents, and everyone in the family.
AREAS FOR FAMILY CROSS-TRAINING
Your family is unique, so I won’t presume to know everything you should consider when cross-training. However, this list should get you started.
Organize financial paperwork together
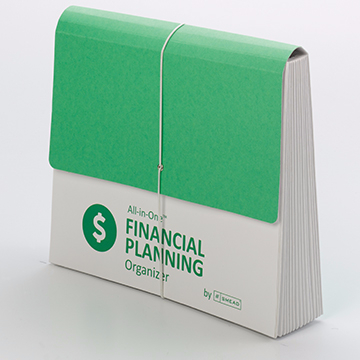
Smead All-in-One Financial Planning Organizer
Get clarity on the status quo. Do both partners know the following:
- What household, credit card, and other bills does the family receive?
- What is the frequency of the billing? (Sure, most utility bills come monthly, but your water and sewer bills may be quarterly. Some insurance premiums are paid monthly, others quarterly; car insurance is often paid every six months.)
- When do the bills usually arrive? (The partner regularly paying the bills may have a gut sense of these dates and know there’s something wrong if the Capital One bill doesn’t arrive by the 10th; with the postal service continuing a massive slowdown, the other partner might be in for a shock if the bill arrived days or weeks late.)
- How do the bills arrive? Via U.S. mail on paper? Via email notifications prompting logging in? Are the bills auto-paid?
- How are the bills usually paid? If you were in the hospital and your partner sat down to pay the bills, not knowing that a particular bill is auto-paid could lead to an expensive double-payment.
- What’s the typical amount of each bill? If you don’t have a chat about these things periodically, you or your spouse might not notice an error in billing or a significant jump in costs.
This probably won’t be a one-time cross-training event. Discuss these issues, then consider spending one month with the partner who usually doesn’t handle the bills taking care of things and “reporting” back; alternatively, you can go through the process side-by-side. The key isn’t to micromanage, but to support one another for common financial goals.
Once your kids are tweens/teens, you might want to include them in some aspects of this cross-training so that they understand the complexities of household finance.
For more guidance on organizing financial paperwork, you might want to start with a classic Paper Doll post, Financial Filing—Scrapbooking snapshots of your money’s life.
Know your household computer set-up
Depending on your ages/generations, you and your partner might be a digital immigrant (a person born or brought up before the widespread use of digital technology) or a digital native. If one of you has discomfort with technology, you’ll need patience to approach these topics. If both of you are digital immigrants, consider hiring someone to help walk you through making sure you’re fully trained on how to achieve your computer-related goals.
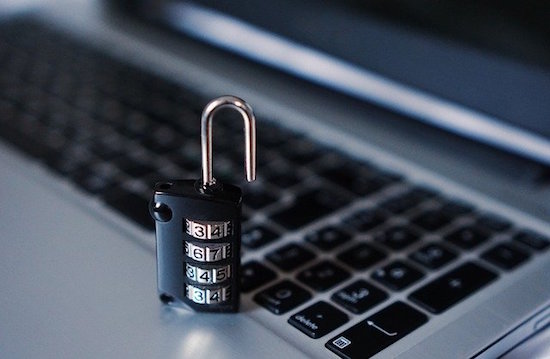 Computer security image by TheDigitalWay from Pixabay
- How and where do you keep the essential passwords? It does no good for your partner to be willing to pay the bills if, in an emergency, they can’t log into the credit card or auto loan account.
- Are you happy with your password management system? (Do you HAVE a password management system?) Know where to find all the passwords that allow your household to run smoothly.
- Do you know (and know how to use) your computer backup system? From family photos to your browser’s bookmarks/favorites to all of your documents, everything needs a backup. I recommend a belt-and-suspenders approach, with local back-up to an external hard drive and cloud back-up via one of the popular backup companies. (I use Backblaze.) For more on backup, you might want to read a guest post I wrote for Alexa Bigwarfe’s WritePublishSell.com called 9 Ways to Keep Your Writing Safe.
- What about all your household tech? Do you know your DSL/Cable modem configuration URL (and the user name and password)? What about security settings for your internet router? If you (or your partner, or the internet tech) set up your Wi-Fi password eons ago, would you be able to find it to set up a new device?
Do you know the state of your estate?
From wills to beneficiary lists, from a Power of Attorney for financial decisions to your healthcare proxy, from your advanced care directives to how much (and what kind) of life insurance you have, chances are good that one person in your family took point and the other is only vaguely aware of what’s going on. Or, maybe you haven’t gotten around to squaring any of this away yet?
Either way, start with making sure you’ve both read up on the topics. You can begin with:
How to Replace and Organize 7 Essential Government Documents
How to Create, Organize, and Safeguard 5 Essential Legal and Estate Documents
The Professor and Mary Ann: 8 Other Essential Documents You Need To Create
Nobody ever likes talking about death. But talking about your estate documents, and maybe even working together to create them in the first place, is the first step to knowing that your family is safe and covered in case of the worst eventualities.
Other ways you can cross-train in the family
There’s obviously so much more than financial and legal paperwork and information to consider when cross-training. Your entire family might want to sit-down to brainstorm ideas. Some possibilities:
- Medical issues — Does everyone (or at least every adult) have a working knowledge of what to do in a medical emergency? My friend has Type 1 diabetes, and her 10-year-old has known, from an early age, how to help his mom by fetching a juice box to raise her blood glucose. Kids should know how to make a phone call to 9-1-1 and how to identify themselves, their address, and some basic information to relay about their parents.
- Medical care — Do you and your partner both know the pediatrician’s name and phone number? Where to find the First Aid kit? What medication you and your kids regularly take, so they can convey this in case of an emergency?
- Parenting essentials — This could be a blog post (or a book) all unto itself. From favorite sippy cup to which kids (and the kids’ best friends) have specific dietary requirements and preferences, from the name of the kids’ teachers to how to contact their friends’ parents (in case one of the tiny humans independently decides to get off the bus and go to a friend’s house without informing you), there’s a lot of essential information and skills that go into parenting. The grownups in the house need to share that wealth of information with one another!
- Laundry and household care — Are there sneaky tricks to getting household appliances to work properly? If something in the basement makes a weird, loud teapot-whistle sound, would you know that it was the sump pump having run out of distilled water? Does it do any good if your partner knows that and you don’t? (So much NOPE!)
- Auto care — Does one partner always handle the interactions with the mechanic? Maybe you need to share the knowledge so that you can speak authoritatively when you’re pressed to make a pricey decision.

Photo by MART PRODUCTION from Pexels
HOW TO PROPOSE FAMILY CROSS-TRAINING
You are the expert on how your family and household works. This post is just designed to give you an idea of how you can not merely share the load (and the information) but do it in a way that ensures your family’s immediate and long-term security. Whether the stakeholder is your toddler (who is sobbing that “that’s the wrong bedtime book”) or the finicky garden hose, the mortgage company or your partner’s grandmother, having a complete sense of what gets done — when, where, and most importantly, how — is essential.
I encourage you to share the concepts of this post with your partner. Talk about the benefits: efficiency, flexibility, clarity for emergency response, better coverage when one family member is overloaded, more integrated family “institutional” knowledge, greater morale, and a happier constituency of family members.
But don’t just talk about the benefits. Speak honestly about potential fears and reasons for avoidance (including inertia, worries about learning curves, the sense of “job security” and higher expectations). Ignoring them won’t make them go away, but talking may be just what you need to conquer those challenges and support your family team.
WHAT IF YOU’RE ON YOUR OWN?
I get it; not everyone has a partner. There are a lot of single parents, widows or widowers whose children are “grown and flown,” and just random singletons (like Paper Doll). That doesn’t mean that you’re completely on your own. Think about who you’d call in an emergency. To whom would you reach out if you needed someone to watch your tiny human? Who would you trust to log into your accounts and pay your bills for you?
These may not all be the same person. You may need to do cross-training with a number of someones: your ex, a sibling in another city, a best friend, a professional organizer trained in financial organizing (whom you can find through NAPO and AADMM), an accountant, an attorney, a hoc nanny, and others. The key is to start thinking now:
Who can be you when you can’t be you?
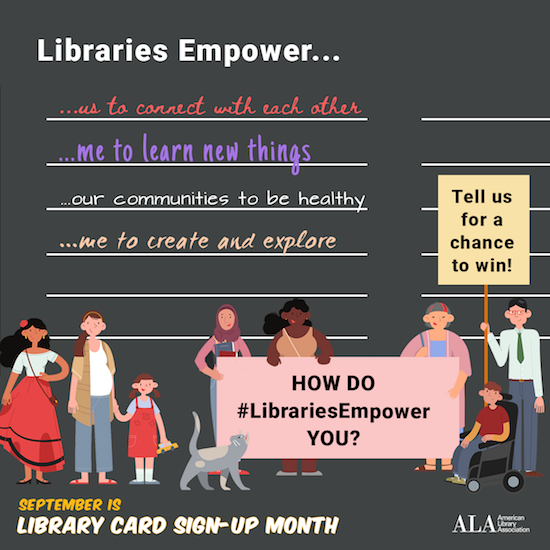
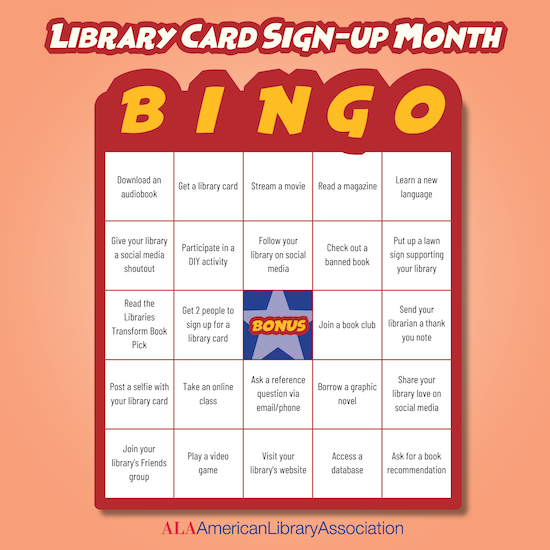
A Professional Organizer’s Take on National Library Card Sign-up Month
September is National Library Card Sign-up Month, and I want to make the case that library cards are your passport to a better and more organized life.
WHY PAPER DOLL LOVES LIBRARIES
I love libraries. My first real job, from my sixteenth birthday until I left for college, was as a page at the Clearfield Branch of the Erie County (New York) Public Library. My job involved helping patrons find books (back when we had paper card catalogs and no computers) and checking books out (back when the system involved using an overhead camera to take a photo of someone’s paper library card and the “borrow” card for the book).
However, the bulk of my job involved shelving books and “reading” shelves. The latter involved starting at the beginning of a section (for example, non-fiction) and making sure each book belonged after the one before it and before the one after it, per the Library of Congress classification system. I often think that this was the ideal training to become a professional organizer.
Back then, local public libraries had relatively few types of holdings: books, maps, record albums, and a truly dinky collection of audio cassettes. Libraries have come a long way, baby!
I marvel at systems I learned then, which I now use professionally, like organizing toddler books in dishpans, with book covers facing outward (record store-style) so that little hands can flip each book forward or backward without destroying a bookshelf. Because toddlers can’t read, they have no use for the spines of books, but a series of dishpans (filled with vertically arrayed, face-out books) allows tiny humans to recognize and access their favorite titles.
I have seen many beautiful libraries in cities all over the world, but my favorite is the A.D. White Library at my alma mater, Cornell University.

For most of history, libraries were closely guarded bastions of knowledge, and access was limited to those whose religious, academic, or financial positions allowed them to be considered worthy, but few libraries of significance were truly open to the public. In general, most libraries were subscription-based, where one paid for access, similar to how we use Netflix and Audible these days.
And even though public libraries had to close their doors to the public for much of the first year of the COVID pandemic, they did not turn their backs on their patrons. Most libraries offered curbside pickup; you could reserve your books online and then call (or, if your library was really fancy, use an app) to alert the staff of which pick-up parking space you were using, and diligent, masked librarians would verify your card, check you out over the phone, and deliver your “borrows” to your car’s trunk or hatchback. Most libraries also continued to offer programming for students, seniors, and other constituencies virtually.
To my mind, one of the greatest benefits of modern society is access to tax-supported public library systems. I consider my library card, my voter registration card, and my driver’s license as three keys to my sense of freedom (of intellect, of democracy, and the ability to work, play, and have an empowered life).
I consider my library card, my voter registration card, and my driver's license as three keys to my sense of freedom (of intellect, of democracy, and the ability to work, play, and have an empowered life). Share on XBut that’s me. You’re probably wondering why you should care about libraries, and more importantly, what this has to do with organzing.
WHAT CAN A LIBRARY CARD OFFER YOU?
So, what magical powers does your library card bestow? Your library card, what bibliophiles and library peeps like to call “the smartest card in your wallet,” grants access to a vast array of offerings.
Items to borrow
Although some special collections and reference materials can only be read in-house, the majority of tangible items at libraries circulate. This means they can be borrowed and taken home for at least a week, and sometimes up to a month, including:
- Printed materials (and no, it’s not just books and magazines anymore, though libraries still have huge collections of those):
- print books (including large-print books for the visually impaired)
- audio books
- books on CD
- books in Braille
- magazines
- trade journals
- graphic novels/comic books
- sheet music
You can reserve materials that are currently out (or at another branch). In most cases, if your library is able to send you a digital notification of a reserved item’s availability, there will be no charge; for older libraries still using postcard systems, your reservation may be about the cost of a postage stamp.
Also, your library is likely to be a member of one or more systems through which you can request an interlibrary loan. That means that even if your library system doesn’t have a resource you want or need, you should be able to have them request it from a different system, possibly even across the country! (See? Libraries are cool!)
- Electronic entertainment and educational materials
- vinyl phonograph/record albums (though these are often in library system archives, the hipster appeal of vinyl has librarians bringing these out for display)
- CDs (whether music, language CDs, or books on CD)
- DVDs (including movies, courses, exercise, and how-to videos
- Digital materials — Your library likely gives you access to a variety of digital downloadable services through the web or a free app. So, whether you want to satisfy your insatiable desire for mystery audiobooks while you’re getting your 10,000 steps a day or suddenly need to borrow a stress-reduction video while you’re stuck in the airport when your flight is delayed, all you need is your library card number, digital device, and some decent WiFi. Not all libraries have the same services, though these seem to be the most widespread:
- OverDrive offers an absolutely massive collection of premium audiobooks, ebooks, and music that can be downloaded to your smartphone, Kindle, tablet, or computer via your browser or the Libby app.
- Hoopla has collections of thousands of ebooks, audiobooks, graphic novels/comic books, movies, television shows, and music. You can download content to your device or stream it, and it works with computers, tablets, and phones. (Personal note: I downloaded Frommer’s and Fodor’s guidebooks to Italy and the UK to use when traveling, and it was amazing to have thousand-page guidebooks at the ready with no extra schlepping.)
- Kanopy-affiliated library patrons can download or stream a wide variety of movies, including modern flicks, documentaries, foreign films, classic cinema, independent films, and educational videos.
- Less common library offerings include AcornTV (classic and modern UK television shows and movies), IndieFlix (part of the library-friendly RB Media offerings) for independent films, and other services.
As with print resources, you can usually put ebooks and audiobooks on hold if there isn’t an immediate availability. You might be wondering why, if it’s digital, there’s not endless access. That’s because libraries purchase licenses to electronic media, much the same way you purchase an individual ebook or audiobook. Buying a license for each copy of a digital work ensures (or at least tries to ensure) that authors and creators get their fair share.
- Digital educational platforms — While every library has different offerings, there are some particularly common and popular ones, including:
- LinkedIn Learning (formerly Lynda.com) normally requires a paid LinkedIn membership, but if you’ve got a library card at a system associated with LinkedIn Learning, you won’t have to pony up any money for the technology and creative courses offered for current and aspiring professionals. Learn a language, gain computer skills, or study project management or leadership development, all from your digital device.
- Infobase has collections of how-to and documentary programming, newsreels and archival films, speciality educational films in business and economics, social sciences, arts and humanities, STEM (science, technology, engineering, and math), and health and wellness. Infobase also has career skill resources for creating resumes, interviewing, and finding jobs.
- Language education — While my library system uses Transparent Language, your public library may offer Mango, Rosetta Stone, or any of a variety of other platforms to help you separate your Ciao from your Shalom.
- Academic and career preparation resources — My library system uses the Peterson’s prep materials for standardized tests and college and career searches. You may have access to other resources for the high schoolers and job searchers in your life.
- Database Access — Public libraries subscribe to an amazing array of financial, medical, legal, and other databases (including LexisNexis, PsychInfo, EBSCO — even the Chilton Auto Repair Database!) which are made available to patrons.
- Genealogical support — I don’t know much about genealogical research. (That’s why I wrote Paper Doll Interviews the Genealogy Organizers.) But libraries have everything from maps and directories to digital access to resources like Ancestry.com’s Library Edition and state archives.
It doesn’t stop there, though. Just a sampling of some of the other things you may be able to borrow from your public library system, either for circulation or in-library use, include:
- Museum passes — Call ahead to see what museum passes your library maintains and ascertain whether you’ll need to make reservations to borrow them.
- Eclipse glasses — During the last solar eclipse on August 21, 2017, I was surprised to find that my library had arranged for loans of eclipses glasses. The next solar eclipse visible in North America will be April 8, 2024, so check with your library well before then to make sure you put a hold on yours!
- Board games
- Classic games, like chess, checkers and backgammon
- Computer and video games
- Video game controllers
- Headphones — Because it’s easy to forget your ear buds before an impromptu library trip and nobody wants to wear borrowed ear buds (ew), so go old-school with the over-the-ear kind.
- Tools — Over the last few decades, more and more public library systems have started a lending library of tools, ranging from socket wrench sets to power sanders, saws to stud finders, cordless drills to hedge trimmers. Take a peek at the visual tool catalog of what I can borrow from the downtown branch of my library.
Free (and almost free) library services
Computer Access — Almost all public libraries offer computer access for free; you’ll only pay for pages you choose to print.
Wi-Fi and Wired Internet Access — Not everyone has high speed internet access. In addition to there being a huge economic divide between those who can and cannot afford internet access, there are also infrastructure issues. Many rural areas of North America lack dependable internet and even cell service.
Because of these issues, during the pandemic students were often attending their remote classes in the parking lots of schools and libraries (which remained shuttered, but there were employees inside, keeping the WiFi going). Remote workers also had a tough time accessing essential tools. Libraries are an inexpensive alternative to setting up your workspace at the coffee house.
Tech Support — Many libraries offer free courses in basic computer and web skills. Also, some librarians are able to provide guidance on common computer issues.
Homework Help — Librarians won’t do your children’s homework, but they’re fonts of information regarding selection of the appropriate resources. Many public libraries also have homework assistance hot-lines and online homework help.
Tax Prep Assistance — Libraries don’t supply tax advice directly, but AARP and other community organizations provide volunteer, pro-bono tax preparation assistance at most branches. And even though many people file digitally now, tax forms are usually made available to patrons who want to noodle the math with paper and pencil.
Delivery — Not everyone is able to get to the library. Elderly, housebound or disabled patrons can often request to have library materials delivered to them. Contact your local library for available resources and review the offerings of the National Library Service for the Blind and Handicapped.
Children’s Entertainment — Public libraries have story hours, magic shows, movies, puppet shows, arts and craft activities, and other events to keep children engaged while giving parents some breathing space.
Quiet Spaces — OK, this isn’t a service, per se. But sometimes, you need a place to go to center yourself, read, or just disconnect. Libraries are safe, temperature-controlled, and, unless you’re sitting right next to the children’s area, fairly serene. Obviously, this is more difficult when we’re in pandemic mode, but libraries were known for their shhhh-iness long before quiet cars on rail transportation existed.
Low-cost Services
In addition to free services, libraries provide a number of services are supplied at at limited cost. These include:
- Printing
- Photocopying
- Faxing — Stop laughing. It’s shocking how often something like this crosses my Twitter feed:
Always fun to hunt down a fax machine in the middle of a pandemic because when you need a HELOC Payoff letter from @CitizensBank you first have to time travel to 1987.#thisiswhybanksarefailing
— Peter Shankman (shankman.eth) (@petershankman) October 21, 2020
- Scanning
- Notary Services — Call your library branch in advance to find out if and when the services of a notary public will be available. If a member of the library staff is a notary, you may not even be charged.
- Passport Services — New and renewal applications for passports can be confusing. Many libraries provide assistance with applications and photo services by appointment.
- Meeting rooms — Libraries maintain private rooms for not-for-profit endeavors, and the cost is usually limited to making sure the room bookings are serious. Rooms may be booked for:
- Book Clubs
- Game Groups for children and adults. (Pokémon card trading clubs having been going strong for decades!)
- Community Meetings
- Guest Lectures and Classes — Years ago, Paper Doll took courses in origami and in how to use the library’s electronic book borrowing systems to transfer books to Kindle and Nook. (I remain more proficient at the latter than the former. Folding cranes is hard!) I’ve also taught classes and workshops on organizing at public libraries, and chances are good that you can find one of my colleagues teaching similar workshops wherever you are.
Libraries around the country lend Santa suits and prom dresses, cake pans and artwork, knitting needles and selfie sticks:
18 Weird Things You Can Borrow from Your Public Library
200 Things You Can Check Out of a Library Besides Books
The downtown branch of my own public library has an entire floor set aside as a “maker space” with 3D printers, laser cutters, an HTC Vive virtual reality booth, a sewing lab, a soldering bench, Agile co-working spaces with white boards and projectors, a photography studio — and a state of the art recording studio!!!
This is not Marian the Librarian’s public library, and Chattanooga is not even a big city. It’s just one that values libraries. Check out (pun intended) what your own library system has to offer.
SO HOW DOES GETTING A LIBRARY CARD HELP YOU GET AND STAY ORGANIZED?
Maybe I have convinced you that libraries are the bees’ knees, but you still don’t get what it has to do with organizing?
Self-decluttering
From a professional organizer’s perspective, the best thing about libraries is the opportunity to allow yourself to trust that you need not maintain the entire world at your house.
Those four hundred issues of National Geographic making your guest room floor buckle, but which you never approach except to dust? The library has them, too, for whenever you want to learn about the mating habits of the elephants of the Serengeti, but you’ll never have to dust them. (The Nat Geos, I mean, not the elephants. Well, those too.)
Of course, I’m not saying to give up purchasing books and magazines, but understand that there’s an alternative to becoming an accidental collector of books you’ll never read (or never read again).
If you are overwhelmed by clutter in your space, but have a voracious hunger to read (or listen to music, or watch movies), check your public library’s collections first before running off to Amazon or your local indie bookseller. (But do support your local indie booksellers when you find things you want to own. This has been a hard time for them, OK? OK!)
Having a library means you can have access to any printed book, ebook, or audiobook, or tangible item (DVD, CD, graphic novel, magazine) without it permanently taking up residence in your home. Clutter often develops because we have too much stuff and no place to permanently store it, and we keep it forever because we don’t have the time or inclination to deal with it.
Library resources come with a built-in decluttering mechanism: due dates! Sure, you can renew things online, but in general, things need to be returned to the library. You don’t have to make the difficult decision as to whether it should stay or go because it’s not yours! It belongs to the library.
Or, if you prefer, think of it as yours, but stored (and dusted, repaired, and maintained) by the nice folks at the free (with your tax dollars) self-storage location called The Public Library!
And you don’t have to worry about digital items you borrow. Ebooks, audiobooks, movies, and music all “return themselves” automagically.
Just make sure you develop a system for keeping track of the tangible items you borrow. I recommend having one bookshelf or counter in your house where you keep all library items. If you have kids, help them get in the habit of returning items to that shelf or space when they’re not using them. (Oh, and let your kids help you get in the same habit. Kids love “catching” parents neglect an organizing task, and it helps reinforce the standards you’re trying to teach them.)
Money-saving
Rather than spending lots of money for books you’ll only read once, or perhaps not even finish, or for accessing any of a huge variety of tangible and digital resources, you can take advantage of the benefits of the public library.
Adore a book or piece of music beyond measure? Consider the library experience to be your free ice cream taste test; then purchase it with the knowledge that it’s something you love and will keep forever and share with others. But you don’t have to shell out money for entertainment and educational experiences you’re not sure are the right fit. And you don’t have to feel guilty, because you know the authors and creators will still be getting paid through the system of library licenses.
Still not sure about the benefits? How about saving and organizing those little green pieces of paper in your wallet? This simple form will automatically calculate the financial value of your library card in terms of annual savings. (Of course, the cognitive, emotional, and societal values are priceless.)
SO GET YOUR LIBRARY CARD
I always ask new clients a variety of questions to make sure they have life essentials: “Do you have a calendar? A file system? A will? A fire extinguisher?” On the advice of my friend, internet-famous librarian extraordinaire Jessamyn West, I also ask, “Do you have a library card?”
I’ve even been known to drag friends to sign up for a library card when I visit them in their new cities. (Shoutout: Hey, Chris, I’m looking at you!)

National Library Card Sign-Up Month is the perfect time to get a card for yourself or your kids.
1) Locate your public library.
2) Fill out an application, available at your branch or on most library web sites.
3) Show valid ID with your current address. If you’re new to town and don’t yet have a photo ID bearing your address, most libraries will accept two items showing your name and street address (but not PO box), such as current utility bills (e.g., telephone, gas, electric or cable), voter registration cards, or other mail with postmarks from the past 30 days.
4) Use your new library card often. Plan a weekly visit with your family and explore your library’s offerings. Develop a ritual for going to the library and your children will grow up appreciating all that libraries have to offer. Let your kids help you mark down due-dates for returning tangible items.
5) Set up a library shelf in your house where all the items you borrow from the public library “live” when they’re not being read or used. Having a set location where library items belong when not in use prevents them from going missing and assures you’ll be able to return them on time.
Happy National Library Card Sign-Up Month!
Rhymes With Brain: Languishing, Flow, and Building a Better Routine

Are you having trouble getting back in the saddle?
Yes, I know, this is not your first rodeo. You’ve had to get back into a routine before: after the easy pace of summer, after the winter holidays, after vacations.
But perhaps this feels a little different? Maybe you’re distracted because this is the first time you’re headed back into the office after a year and a half of working remotely? Or perhaps you’ve realized that you can’t keep working from your kitchen table anymore, and it’s time to really get back into a routine.
There are a few reasons why you might be feeling at loose ends. First, you might be stuck in the past. It happens to all of us. Last week, in Emerson, Angelou, Ted Lasso, Tashlich & Zen Monks: Letting Go for a Fresh Start, I walked you through rituals and mantras for helping you let go of past mistakes and frustrations.
A LESSON ON LANGUISHING
Perhaps the problem isn’t the past, but the present. Over the summer, the New York Times got a lot of attention for a piece called Feeling Blah During the Pandemic? It’s Called Languishing. (Depending on where you’re located, you might have more luck with this link to the piece.)
Some people have flourished as a result of the past 18 months; people who’d lost time with their families due to long work hours, commutes, and work travel were sometimes able to bask in the joy of remote work; others were able to put energy into side hustles that became true callings and got to leave careers that weren’t fulfilling.
Meanwhile, of course, many others have found working and just getting through life to be agonizing. This has been a period of distress, whether a constant onslaught or troubles that come in waves, worrying about keeping themselves and their families healthy, coping with financial strife, and being expected to work and act as if all of this {picture me waving my hands all around} was remotely normal.
So, for some, after the initial period in Spring 2020, life has been a collage of yoga positions and perfectly golden sourdough bread. For others? Let’s just say Edvard Munch could easily time travel from 1893 to 2021 and paint The Scream all over again. (Except he’d have needed to draw a mask.)

But in between flourishing and drowning, the Times article found that many of us are having trouble gaining traction because we’re languishing. It’s not depression or anxiety, but in an excerpt of the piece, we see exactly what’s making it difficult for many to get back into a routine:
In psychology, we think about mental health on a spectrum from depression to flourishing. Flourishing is the peak of well-being: You have a strong sense of meaning, mastery and mattering to others. Depression is the valley of ill-being: You feel despondent, drained and worthless.
Languishing is the neglected middle child of mental health. It’s the void between depression and flourishing — the absence of well-being. You don’t have symptoms of mental illness, but you’re not the picture of mental healtheither. You’re not functioning at full capacity. Languishing dulls your motivation, disrupts your ability to focus, and triples the odds that you’ll cut back on work. It appears to be more common than major depression — and in some ways it may be a bigger risk factor for mental illness.
The author of the piece, Adam Grant, is a organizational psychologist at the Wharton School at the University of Pennsylvania, and his TEDTalk really clarifies what languishing is, and how it negatively impacts our motivation and focus, and thus, our productivity. It’s definitely worth watching:
Cheatsheet: the best predictor of well-being (and thus, I’d say, productivity) is not optimism, but flow. We’ve talked a lot of Mihaly Csikszentmihalyi’s concept of flow recently in Back-to-School Solutions for the Space-Time Continuum and in the spring in Flow and Faux (Accountability): Productivity, Focus, and Alex Trebek (where you also learned how to pronounce Mihaly Csikszentmihalyi).
Flow is that experience when you’re completely absorbed in what you are doing. Time and space and your annoying neighbor and the fight you had with your teenager and the stresses you’re feeling all dissolve, or are at least held at bay, and you are completely focused, without distraction, on what you’re doing. It might be a creative endeavor like playing a piece of music or writing a blog post; it could be playing with your child or dining with your family; and if you’re lucky when you’re sitting down to work, it’s whatever you’re supposed to be doing.
Grant advises us to have some small, achievable goals to work toward to chip away at languishing and give us the opportunity to achieve flow. I have a few more ideas to add to his.
So, having looked at how to let go of past troubles in last week’s post, now let’s look at how we can make your near future an opportunity for flow so you can get back in the saddle.
FLOW FACTORS THAT RHYME WITH BRAIN
Abstain
There are all sorts of distractions, from within and without. Some come at you, and some you go out of your way to pick up. You know what leads you down a rabbit hole. Maybe it’s social media. (OK, yeah, it’s probably social media.) Maybe it’s the news. Maybe it’s one TikTok or YouTube video someone sent you that leads to you watching the next and the next, and suddenly you’ve missed lunch.
I’m not saying that you should eschew all social media or news reports or videos. But instead of reaching for your phone first thing in the morning when you wake up, or while you’re eating breakfast, making it more likely that you’ll be late to your desk (and in a less chipper and more distractible mood), consider alternatives activities.
Retrain
From bed to desk, whether that involves a commute or a stroll down the hall, your brain needs buffer time. You definitely can’t be expected to go from zero to 60 with work (or life) mere minutes after you were in La La Land. Retrain your brain by selecting different types of sensory inputs from your usual fare.
Instead of starting with the news and social media, how about reading a book, a short story, or a few non-news-related articles while eating breakfast? What if you read a poem before getting out of bed, and then spent your shower-and-grooming time thinking about what the poem means, both the words on the page and what it means to you?

I’ve covered a number of ways to have more opportunities to read:
12 Ways to Organize Your Life to Read More — Part 1 (When, Where, What, With Whom)
12 Ways to Organize Your Life to Read More — Part 2 (Reading Lists, Challenges & Ice Cream Samples)
How To Make Your Reading Time More Productive With Book Summaries
If you complain that you never have time to read, this eliminates that problem along with the trouble of a whirring mind. You’ll “make” time by trading a task that swallows you up (like doomscrolling) for one that can give you gentle practice at immersion and flow. And if your prep time in the morning requires a lot of hands-on work (packing lunches, walking the dog), an audio book or a podcast can give you that immersion in an auditory instead of visual way.
If you don’t think you can focus on words and meanings longer than a tweet, explore listening to a genre of music that’s new to you. If you like rap, try Broadway. (Hamilton blends the two.) If you only listen to country, noodle the dial to a jazz station. Retrain — shake up your brain.
Restrain
If you’re not unwittingly seeking out obstacles to flow, both in advance of getting things done and once you’ve started, it may be others standing in your way. Perhaps one of the parents in the pick-up/drop-off line wants to gossip and (no matter how entertaining) doesn’t seem to understand that you’ve got a deadline, a doctor’s appointment, or something else that requires your immersive attention.
Build some muscles for restraining that tendency to go along to get along. I’m not suggesting you wear dark glasses and a trench coat so you won’t be seen by Social Suzie, but perhaps you can cut her off at the pass and let her know for the next few months, you have to be on a daily conference call at “oh-will-you-look-at-the-time?!” If she’s someone you do want to hang with, schedule a phone call, a Zoom lunch, or a weekend walk (to get your steps in) at the park. You don’t have to eliminate people from your life, just be more deliberate about what part of your life (and schedule) they can take up.
Constrain
Restricting how much space you take up for your work and resources means fewer attempts to find things, fewer guesses where something might be, and more time to do the important work on your plate.
If you’re working remotely, your whole house may be available to you for work, but that doesn’t mean you should take up all of that space. Sure, you could work on your bed, at your dining table, and with your computer on the coffee table when you’re on the floor with your back against the bottom of the couch. But should you? Nope.
Create an atmosphere where a space is designated for a task. If you do expense reports in the bedroom, you’re letting your financial brain seep into the space that should be for sleep, rest, and intimacy, making it more likely that math-y concepts will pop up into your mind when you’re trying to, um, do something else in that space. If you work where you hang with your family or binge-watch Netflix, you lose that delineation between work and life, making it harder to leave work at work, already made difficult when you’re working from home!
Contain
If you’re back to working outside the home, you already have a space assigned to you, whether that’s a desk in an office, a counter in the bank, a conveyor belt in the cashier line, or the cockpit of a plane. (If it’s the latter, can you hook a girl up with some of those Biscoff cookies? Yum.) And if you’re working from home, it just makes sense to promote one space in your home to your ideal workspace.
But either way, limiting the spread of your stuff is going to make it easier for you to focus and get into flow.
So, as you move to contain the things round you, you’ll want to clear your desk of excess and keep your workspace for the project or tasks you’re working on now, or at least today. Read the Paper Doll classic article, Clean Desk Club to make your deskspace functional, hygienic, and secure. If paper clutter is the problem, read If You’re Drowning in Paper, Build a RAFT.
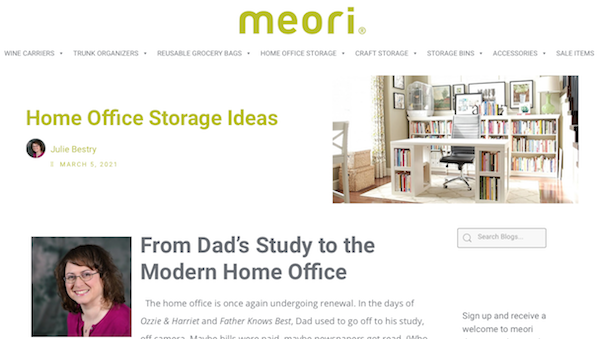
And for a detailed look at how to organize your home office so it’ll deliver opportunities for you to be comfortable and focused, explore the bonus-sized guest post I did for meori, Home Office Storage Ideas: From Dad’s Study to the Modern Home Office.
Containing and constraining aren’t just about tangible items. They’re also about how we schedule our time. If we have a long to-do list with nothing prioritized, no game plan, and no firm schedule, chances are, we’re going to spend more energy thinking about what we have to do than actually getting started.
Developing routines, where we can put the efforts of part of our days and weeks on autopilot, is a key. To help you contain your worktime and constrain your output to acheive the most good, start with the advice in these posts:
Playing With Blocks: Success Strategies for Time Blocking Productivity
Checklists, Gantt Charts, and Kanban Boards – Organize Your Tasks
Getting in the flow so you can get back to a (hopefully better) routine means setting boundaries in your time as well as your space. (That’s where that time-blocking post really comes in handy!) We all know that we never get enough done if we only do what we feel like doing. Most of us never feel like working out or vacuuming or writing monthly reports.
Just as our stuff has to have a place to live in our desk, our tasks need a place to live in our schedules. Merely giving them homes is a super way to jump-start ourselves back into the saddle if we were loosey-goosey with our schedules all summer (and even before).
We also depend on activation energy. Because the hardest part of what we do is the getting started, we have to incentivize ourselves to get going. There are all sorts of ways we can trick ourselves (a little bit) with rewards, like pretty desk accessories or a coffee break, but the problem is that action precedes motivation. We’re not usually psyched to get going until we have already started!
Action precedes motivation. We're not usually psyched to get going until we have already started, whether it's a runner's high or Csikszentmihalyi's flow. Share on XIf you are struggling to get back into the thick of it with your routines, the best way to “contain and constrain,” time-wise, is to borrow accountability support from others as described in:
Count on Accountability: 5 Productivity Support Solutions
Flow and Faux (Accountability): Productivity, Focus, and Alex Trebek
Maintain
One of the best predictors of future productivity is past productivity success. Stop and think about when and how you are good at maintaining your routines.
What is it that has helped you in the past?
- Interspersing short work sprints with breaks? Embrace the Pomodoro Technique.
- Deadlines? Borrow a friend as an accountability partner to give you some external spinal fortitude!
- Physical activity and/or time in nature to get your creative juices flowing? Block times for daily mid-afternoon walks. Research shows that shinrin-yoku, the Japanese concept of “forest bathing,” has a variety of benefits, including mental focus, increased energy, improved mood, decreased blood pressure and stress hormones, and boosted immunity.
Know where you excel. Every professional organizer and productivity expert will look at your systems and resources and ask some variation of “What’s already working?” The key is to build strategies on the foundation of your success and link future approaches atop them.
Attain (and Explain)
Remember how I said, earlier, that developing routines and going on autopilot helps? But I also said we should do it for part of our days and weeks. But we can’t be on autopilot all the time.
Our brains will atrophy if we don’t keep learning.
If you’re having trouble getting back into a routine, add something to your list that will energize your brain. For me, when I’m in the doldrums, practicing Italian with Duolingo peps me up. If I’m having trouble motivating myself to reply to a frustrating email or draft a blog post, a few challenging lessons in the Italian future perfect tense will have taken me out of the doldrums. (That’s a future perfect tense joke, readers. OK, yeah, more tense than funny.)
What can you do that will shake the cobwebs loose, improve your cognitive function, boost your self esteem, and get you revved up to sit at your desk and do the next important thing?
- Learn/practice a language.
- Look ahead in your child’s schoolwork and study the concepts (long division, the parts of a cell, the causes of World War I, the themes in War and Peace) so you can discuss them together.
- Find something you’re curious about and become an expert on some small element of it. You don’t have to know everything, but if you know one thing really well, it’ll give you confidence to explore all sorts of areas of your current work, and maybe help you consider bold, new options for work and life.
- Develop a skill, whether it’s silly or serious, visually creative or experiential.
Once you attain this knowledge or skill, you can share it with others. You really know you’ve learned something when you can explain it to someone else. And when someone asks you how you were able to get back into your post-summer, post-pandemic routine so easily, maybe you can answer them in Italian or in Ubbi Dubbi!
(Shoutout to all my GenX readers for whom “Zoom” will always mean “Boston, Mass 02134” rather than video conferencing.)
Gain
It’s impossible to get excited about doing the same thing every day, day in and day out. There’s a difference between being in a groove and getting stuck in a rut, between having a routine and things being routine. All these years later, I still feel sorry for this guy.
Gain momentum by jump-starting your enthusiasm. The easiest way to do that is to have a goal to look forward to or an achievement toward which you’re striving. As with learning a new skill, I know it seems counterintuitive to add something to your activity list when you’re trying to buckle down and commit to what’s already hard to accomplish.
Most of the time, I implore my clients to let go — of excess clutter, obligations that don’t meet their goals and values, outdated ideas that no longer fit who they’re trying to become. That’s logical; cutting down the excess lets you focus on your priorities.
We could eliminate excess, only work on the work tasks and projects we’re assigned (or which we’ve assigned ourselves), and keep our heads down and our noses to the grindstone. But with our heads down, we’ll never see the sun, and with our noses to the grindstone, well, I’m not sure, but I think we’d have sore, pointy noses.
But we’re not robots. Just as learning helps us expand our minds and gain confidence, having aspirations and goals gives our lives purpose. Consider the Japanese concept of Ikigai (sounds like icky guy), or “reason for living,” or Viktor Frankl‘s wisdom in Man’s Search for Meaning.
As humans, having something to aspire to in our work and in our lives, beyond a paycheck and the same-old, same-old, imbues our days (and thus our lives) with meaning. Think of something you’d like to achieve and build time into every week, preferably every day, as part of your routine, to move you closer to that goal. Maybe you want to write a book, plan the trip of a lifetime, train to be a Rockette — the what doesn’t matter, as long as it’s your what.
Embracing a gain in your life as you head back into a day/week/life of routines will be easier when you’ve planned space in your schedule for anticipatory joy.
Just be sure to reject perfectionism on the way to spelling out your gain. The key to improving your delight in getting back into a routine is that it will grant you space in your schedule to do everything that matters, including that aspirational entity that gives it all meaning. Think progress, not perfection.
Just want to say this thing I haven’t written is fantastic. Gets better and better the more I don’t write—it contains every conceivable line of inquiry yet has a single, easily understandable throughline. Prose is perfect. Can’t bring myself to destroy it by actually doing it
— ? (@samthielman) August 23, 2021
Take action every day. Get back in the saddle. Get back on the horse. It may not be your first rodeo, but it can be your best rodeo yet!
Emerson, Angelou, Ted Lasso, Tashlich & Zen Monks: Letting Go for a Fresh Start

THERE’S SOMETHING IN THE AIR
Officially, the summer doesn’t end until September 21st. But you just know that something is changing right now. For all intents and purposes, in the United States, Labor Day is the unofficial start of Fall (and pumpkin spice doughnut season at Krispy Kreme).

Growing up in New York State, we always started school the Wednesday after Labor Day, so you knew that the holiday weekend was the last time you got to stay up late, sleep in, goof around, and wear comfy summer clothes. Companies around the country that had lax Friday afternoon schedules went back to firm attendance expectations once the calendar flipped to September.
This year, sundown on Labor Day coincides with Erev Rosh Hashanah, the start of the Jewish New Year. (For those of you keeping track of such things, we’re ending the year 5781 and ushering in 5782.) And I think we can all agree that any opportunity to start fresh with a new year, whether it’s January 1st or a new school year, Rosh Hashanah or Chinese New Year, or the start of the new TV season (Monday, September 20th, the day after the Emmy Awards, baby!), is a good thing, psychologically.
Because of remote work, remote school, and nothing feeling remotely normal last year, it didn’t feel like we had a clean demarcation between summer and fall. This year, it’s shaping up, globally, to be another weird one.
But locally? As in — your job, your family, your little world? You can still have some control. You can embrace this period as the end of those fuzzy, mirage-like summer dreams and the start of a period of motivation, enthusiasm, and a bias toward action.
Speaking of which, before we get to the focus of today’s post, watch this TEDx talk about The Science of Taking Action to help rev your engines.
>
I encourage you to take the 9:47 to watch the whole video, but if you don’t have the time right now, know that Steve Garguilo‘s central lesson is, “Everything in life that is hard is just a series of things that are easy.” But you have to take that next step.
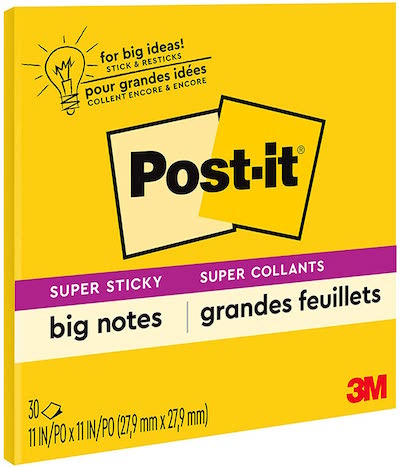
[FYI, Garguilo’s spontaneous foray in looking at a bias toward action began with some free Post-It Super Sticky Big Notes and a friend. They’re 11″ x 11″ squares, $6.49 for a 30-sheet pad in Bright Yellow, and great for brainstorming. (Friend sold separately.)
Though harder to find, Big Notes also come in Neon Green and Neon Orange, and in 15″ x 15″.]
But as usual, I’m getting ahead of myself. While you can always brainstorm, actually taking action requires a prior step.
To be productive and embrace new things, you have to let go of the old and unproductive ways of thinking and acting. In professional organizing, when my clients are dealing with tangible clutter, we have to do what I call a “Level 1 Purge” and remove as much excess as possible before grouping and containing what remains.
With time management coaching, this involves eliminating tasks and obligations that don’t resonate with someone’s values and goals so that they can say, “Hell Yes!” to the things that will bring more meaning to their lives and work.
And with everything, a huge part of letting go means decluttering mental and emotional clutter.
LET IT GO!
That tune from Disney’s Frozen isn’t just catchy. It’s good advice. (Well, at least the “I’m never going back, the past is in the past” and the part about letting go of perfectionism.)
It’s really difficult to start fresh with the weight of the past hanging over you. As I’m writing this over Labor Day weekend, I (and I expect, you), probably don’t want to be weighed down with heavy thinking and step-by-step instructions. Instead, we’ll look at approaches from different cultures and for different audiences — sectarian and non-sectarian, children and adults, highbrow and middlebrow.
Zen Meditations from a Panda Perspective
Many years ago, friend-of-the-blog Erin Doland introduced me to the 2006 Caldecott Medal–winner Zen Shorts by Jon J. Muth. In Muth’s books, three siblings meet Stillwater, an oversized panda bear carrying a red umbrella and speaking with a “slight panda accent.” In each chapter, Stillwater shares an anecdote with brothers Karl and Michael and their sister Addy to help them surpass an emotional obstacle. (The books have since been turned into an a delightfully soothing animated series, Stillwater, on AppleTV+.)
Muth’s telling of A Heavy Load is a version of my favorite Zen story. (I’ll summarize it here, but it’s absolutely worth getting the book, reading Muth’s words, and embracing the lovely illustrations.)
Two monks are traveling when they come to a swollen river that must be crossed. A wealthy woman’s servants attend to her belongings and thus cannot help her cross to the other side. Without comment, the older monk lifts the woman and carries her across, but after he puts her down, she doesn’t even deign to thank him. The two monks continue on their way, but his younger companion still ruminates on the woman’s rudeness and lack of appreciation. Eventually, the older monk says, “I set the woman down hours ago. Why are you still carrying her?”
Whoa.
When I was younger, I would do this. I’d ruminate and brood over indignities suffered at the hands of the “mean girls.” I’d kick myself over l’esprit d’escalier, the French term for thinking of the perfect reply, but just too late. And sometimes I’d be frozen in place by small errors, anything from typos to falling short on goals, even when nobody cared about those benchmarks but me.
It’s hard to let go, but sometimes rituals (actions) and mantras (sayings) can help us over the hump in letting go of counterproductive ruminations on our own shortcomings so that we can start fresh on a new project or class, or in a new season of life or a new “year” (however we define the year).
Tashlich
Tashlich literally translates to “casting off.” It’s a ceremony held in the afternoon on the first day of Rosh Hashanah. Jews who observe this ritual head the shores of a river or lake or a bridge over flowing waters, and throw in small pieces of bread* to symbolically cast off or throw away one’s “sins” or failings, the things they’ve done wrong in the past year.
*Bread isn’t good for the duckies and other wildlife, it seems, so there are a number of modern takes on tashlich that are more environmentally-friendly.

Tashlich is a physical ritual to representationally cast off what’s weighing you down. It’s not a magic hall pass. We’re still expected to apologize to those we’ve hurt in the past year and make amends to them between Rosh Hashanah and Yom Kippur, the next week. But Tashlich gives everyone who participates the opportunity to reject dwelling on our mistakes. We’re encouraged forgive ourselves and focusing on what we can do better.
Of course, you don’t have to be Jewish to develop your own ritual. Many faiths and cultures have “burning bowl” or similar rituals for writing your mistakes, your upsets, or as “Money Goddess” Morgana Rae teaches, “lessons you are done learning” (e.g., letting people stomp on your boundaries) on small pieces of paper and then burning them.
Paper Mommy doesn’t let me play with matches, so you could similarly write on a small piece of biodegradable paper and flush those troubles away. You can even teach children to let go of last school year’s mistakes or troubles by using sidewalk chalk to write or draw them out and then bring the river to them with a garden hose to wash everything away.
The point? Acting out such a ritual is more than just cognitive. It involves your whole body in saying, “I’m letting go of what I did wrong, what I let others do, and whatever stood as an obstacle to my moving forward.” Sometimes, our brains aren’t so smart until we get our bodies involved.
A (Famous Literary) Parent’s Advice to His Child
Starting fresh depends on being able to absorb the lessons of our mistakes while doing better the next time.
In 1854, Ralph Waldo Emerson wrote a letter to his daughter Ellen, who was away at school. In the 1880s, his letters were carefully preserved in a six-volume collection, and in 1939 (and again in 1943, 1959, and 1982), his advice was re-edited and re-punctuated. But the central notion of what he wanted his daughter to understand is this:
Finish every day and be done with it.
You have done what you could;
some blunders and absurdities crept in;
forget them as soon as you can.
Tomorrow is a new day.
You shall begin it serenely and with too high a spirit to be encumbered with your old nonsense.
It’s hard to argue with good old Ralph Waldo. Post this (or any of the various edited versions of his advice) near your desk, so you’ll see it before you close up shop on your work day, or on your mirror so you’ll see it before going to bed at night.
Give yourself permission not to be encumbered with your old nonsense!
Be a Goldfish!
Of course, not everyone wants or needs such a long message as Emerson’s to inspire letting go of self-imposed difficulties. If you need a short mantra to remind yourself to let go, Coach Ted Lasso has some advice that resonates.
Be a goldfish. Have a short memory for the times when you failed and things you can’t go back and change.
OK, in actuality, scientists have proven that goldfish can actually recall things for at least three-to-five months.
But the lesson holds true. Acknowledge what didn’t work, vow to do better, identify what specific steps you can accomplish to achieve your goals, create new systems (of which, more next week), and start fresh.
Oh, and an excellent way to let go is to embrace something that captivates and delights you. For me, an episode of Ted Lasso makes me grin until my face aches, fills me with unexpected laughter, and inspires me with lessons about forgiveness (and self-forgiveness). It’s a great show for reinforcing the idea of being supportive (and accepting support) so you can learn essential lessons and move forward.
Maya Angelous Wasn’t Speaking Only to Oprah
The amazing Dr. Maya Angelou is often misquoted or incompletely quoted on this topic of recognizing our past failings but moving beyond them. She actually focused on her own experience:
I did then what I knew how to do.
Now that I know better, I do better.
Of course, Oprah (being Oprah) managed to turn Dr. Angelou’s lesson around, turning it outward as actionable advice.
“When you know better, you do better.”
As you head into this “new year,” and start getting back into routines and begin making your ideas biased toward action, take the lessons you learned but leave behind the pain and the guilt.
And, as a bonus, directly from Dr. Angelou, here’s another great mantra to take with you after you’ve let go of what weighs you down:
Just do right.
Next time, we’ll look at more practical ways to get back into the swing of things. Until then,
Happy New Year!
L’shana tovah!
Have a great school year!
Enjoy fall!
And I’ll see you at Krispy Kreme!
Follow Me