Archive for ‘Digital’ Category
Seek (with Bluetooth) and Ye Shall Find: Tile and Stick-N-Find
Getting organized is about letting go of what you don’t need and arranging what you wish to keep so that you can find it when you want it. There are foolproof ways to keep from losing anything:
1) Designate a home for every item.
2) Don’t put things down; put them away. (In other words, follow step #1 and then use it.)
3) Practice mindfulness so that you can perfect your skills at step #2.
This process is all well and good unless:
- you live and/or work with other humans
- you have tiny humans who like to grab and hide your possessions
- you have tiny (and not so tiny) non-humans in your midst
- you aren’t always so good at mindfulness
- you are so busy corralling your fellow humans, tiny humans and non-humans that you don’t have the time or energy and OH MY LORD JUST FIND MY KEYS AND STOP PONTIFICATING!
Keeping track of small things, even when we’ve isolated homes for them, can be difficult. Years ago, we applauded (literally) a movement to attach little electronic doodads to keys, remote controls and other small devices. We’d clap, and a little alarm would beep to help us find the missing items. In theory, great. In practice, it made people feel like they’d woken up inside a commercial for The Clapper!
Technology has allowed for the development of more refined solutions like Bluetooth-supported tools to locate items with ease. Two options getting attention these days are Tile and Stick-N-Find.
The Basics: Tile is a small, white, flat-ish, plastic square with a hole carved in one corner. Thread key chains and zipper pulls (on purses, wallets, backpacks, or children’s jackets) through the hole, or use the enclosed double-backed adhesive on the reverse of a Tile to stick it to virtually anything. You can also just drop it in a pocket, your wallet’s change compartment or the bottom of a purse. Tile is waterproof, but even if your little ones lose their boots, I wouldn’t test the limits.
Tile is designed so that you never have to charge it or replace the battery. Instead, each lasts one year. Then poof, and you have to buy more. On the one hand, shopping for (and replacing) coin cell batteries is a pain. On the other, a new Tile is pricier than a new battery. Tile sends you an alert when it’s time to replace (and recycle) for a new year.
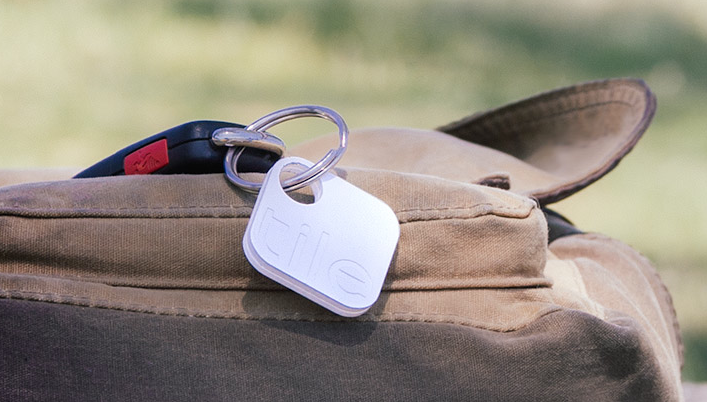
The Works: When you pull Tile out of the box, you depress the “e” on the face of it and then go to your mobile device. Once you’ve downloaded the free app, go to the Add a Tile screen and hold your new Tile up to your iPhone. The app then automatically adds the Tile to your account. Currently, Tile works with iOS products like iPhones (5c and 5s) and iPads (3rd and 4th generation, Mini and Air). Because it functions with Bluetooth 4.0, it’s not yet supported to work with Android, Blackberry or Windows devices. You can have up to ten Tiles on any one account, but it’s not clear to Paper Doll why there’s a limit since you’re paying for each individual Tile, anyway.
Can’t find your keys in your pile of clutter? Use the app to make your Tile’s teeny built-in speaker sound an alarm. Your kid left his backpack…somewhere…and it could be anywhere in the mall? The app will pinpoint the location on the map. And since the app uses Bluetooth, it remembers the last GPS location it “saw” your item, so if it hasn’t moved, the item can be found lickety-split! You can log into your account from any iOS device, meaning that if you misplaced your iPhone and never activated a service like Find My iPhone (silly you) you can use someone else’s phone to find yours.
The Range: Tile’s app isn’t going to know if your wallet just got on a plane to Barbados. But the app can locate your Tile anywhere up to 50 to 150 feet away, “depending on the environment.” (One assumes this means either mountains or steel girders may interrupt the signal.) Interestingly, however, if your Tile is farther away than that BUT another Tile user’s phone/device is within 50 to 150 feet of your Tile, the information will daisy-chain and you’ll get an update with the location of your own Tile, giving you a pin on the map view. The theory is that once zillions of people are using Tile, the eventual range would be practically limitless. Blue sky thinking? Perhaps.
The Cost: Tile is available for pre-order (to-be-delivered Summer 2014) at $19.95 each, or at package pricing of “Buy 3, get one free,” “Buy 6, get two free,” and “Buy 9, get 3 free.” But once Tile is widely available commercially, the price will go up to $25/each. Yikes!
The Basics: The round, discs (“trackers”) are available in six colors (well, five plus “clear”) in case you want a little designer panache with your private-eye tool.
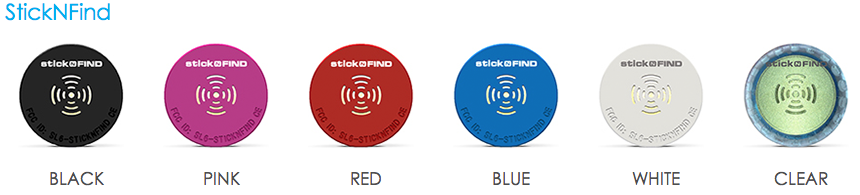 Unlike Tile, the Stick-N-Find trackers use traditional CR2016 coin-style watch batteries, which last about a year. Stick-N-Find discs come with 3M-brand double-sided adhesive stickers. Each pack comes with two Stick-N-Find discs and two key fob mounting plates.
The Works: Pair a Stick-N-Find tracker with your (free) Radar app. Like Tile, Stick-N-Find’s app works via Bluetooth 4.0, but is supported on a broader range of devices, including iPhone 4s, iPhone 5c and 5s, newer iPads, including the Mini, and iPod Touch, as well as Samsung-branded Android devices, including Galaxy S3, Galaxy S4, Galaxy S4 Mini, and Note 2, and any future devices using Bluetooth Low Energy.
The Range: Supporting materials for Stick-N-Find reference ranges of both 100 and 150 feet, and the Radar app should track up to 20 of your Stick-N-Find discs. It doesn’t exactly pin-point your tagged item; instead, the app gives you a visual of how far you are from the item, but doesn’t identify the direction. As they, themselves, note, it’s a bit like playing the old game “You’re getting warmer. You’re getting colder.” Paper Doll would find this annoying, but others might enjoy the adventure.
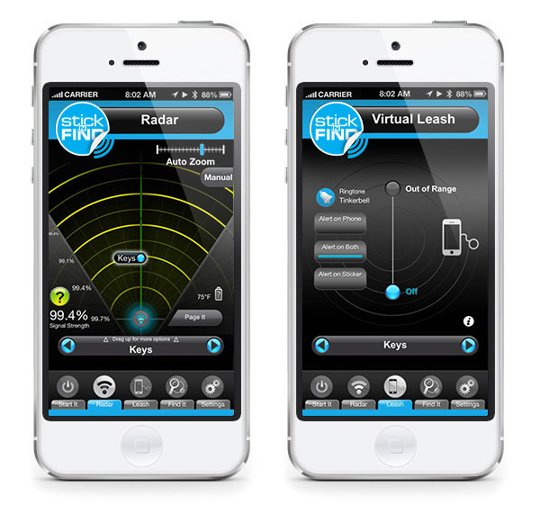
The Virtual Leash lets you set an audio alarm/alert if an item leaves a pre-set radius around you; the disc will also flash lights in case you’ve dropped your wallet at a dark, noisy party. The Find It function lets you know when an item has come in to range, within 300 feet. (You’re getting warmer…)
The Cost: Each 2-tracker pack costs $49.99 (or 4 for $89.99, 6 for $129.99, 10 for $199.99 and 20 for $389.99) from the Stick-N-Find store; Stick-N-Find is also sold under the Smead brand name and can be found at office supply stores and on Amazon.
Trackable Items
Practically anything can be tracked by Bluetooth tracking devices.
- Things you carry: luggage, wallets, backpacks, purses, phones, laptops, tablets, day planners, musical instruments, gym bags, medical devices, passports, travel document portfolios
- Things that wander off by themselves: pets (affix to their collars), tiny humans (attach to children’s shoelaces)
- Things you share, which wander off when someone else moves them: keys, remote controls, garage door openers, cameras, bicycles, skateboards
Would you use Tile or Stick-N-Find, or does the pricing put you off? What are you always losing and seeking? Please share below.
Notions on Notebooks: Organize Your Paper Picks
There’s a stain on my notebook where your coffee cup was…
Notebooks. Use them for recording clues in your current mystery or keeping a diary of the progress of your great romance. Copy down notes for school or draw up ideas for your next big event. A notebook, in the broadest terms, is someplace to keep your thoughts safe from the vagaries and whims of undependable synapses. Your brain is good at thinking things up, but unreliable at preserving your genius.
As Paper Doll, I value the inherent advantages paper has over electronic devices. It’s immediately available — there’s no need to power it up. Unless you’re involved in government or corporate espionage, it’s unlikely anyone will want to steal your notebook (as opposed to your shiny tablet computer). No specialized tools (stylus, cable, charger) are needed. If you don’t have your favorite pen, you can write with a pencil (even one of those stubby ones from miniature golf), a crayon, or if you’re desperate to get that inspiration down on paper, an eyeliner or lipstick.
Sure, there are numerous benefits to keeping your information digitally, too. You can’t back up a paper notebook, except by photocopying (unless you’re a John Adams with son John Quincy around to make copies of everything by hand). You can’t collaborate simultaneously with a writing or work partner. Sure, you can pass a notebook back and forth like a third grade slam book, but simultaneous collaboration requires a cloud service like Google Drive. (Then again, if you share documents across two Google accounts and one person deletes their account, you lose access to all the shared documents created at the other person’s end. And, of course, reduced security of paper notes is only as problematic as your own lack of vigilance, but while the NSA probably can’t see into your breakfast nook, you don’t know when or whether Evernote or Google is granting somebody a peek at your digital accounts.)
These issues and more have come to my mind after reading Janine Adams’ The Virtues of a Nice Lined Notebook and Lifehacker’s Note Taking Styles Compared: Evernote vs. Plain Text vs. Pen and Paper. At some point, we’ll look at how to select the right electronic note-capturing system for your needs. (We’ve already talked about hybrid systems, like the Evernote Smart Notebook by Moleskine.) But today, I’ve been thinking about (what else?) paper notebooks.
Not all notebooks are created equally; neither should you forget that you are unique, and your choices need to reflect your personal needs. Consider the following!
Price and Branding — If capturing information is your only concern, an off-brand, black-and-white speckled composition notebook from the dollar store should suffice.
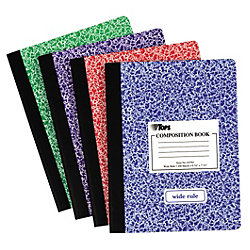
However, if you’re the kind of person who can’t write a grocery list unless it’s bound in leather, then you might want to look at this classic Unclutterer post, 35 Luxury Notebooks To Organize Your Life.
Or, you may be less hung up on price, but it matters to you that your notebook is stamped with a name like Cavallini or Fabriano for cachet or Field Notes or Moleskine for hipster cool. Or maybe Rhodia‘s little trees on a golden backing remind you of your Grandpa. If these things matter to you, buying a notebook that doesn’t fit your need for prestige may mean it’ll just be clutter in the bottom of the drawer a few weeks from now.
Portability — A small spiral-bound notebook, the kind in which school kids used to record homework assignments and (1970’s-era TV drama) reporters used for interviews, will fit nicely in a purse or a man’s front shirt pocket. Many purveyors have lovely (faux-fancy) small notebooks. But if you prefer a larger canvas, with something closer to letter-sized paper, recognize that the trade off is that you’ll have to carry something else, like a backpack or messenger bag, to protect your notebook from the elements. Well, unless you choose waterproof notebooks, like the ones we talked about a few years back.
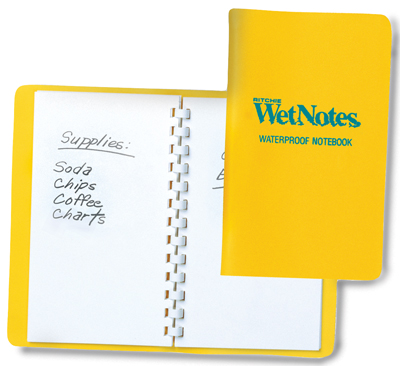
Binding — Spiral can be messy when you tear pages out, unless the paper is also perforated. Fancy sewn bindings with gussets allow upscale notebooks to lay flat when open, making them more like traditionally-bound books. If the difference seems subtle to you, your binding choices won’t matter. If you’re a princess with a pea-green, machine-glued binding, you may never fall asleep and get to use your dream-capturing notebook.
Paper quality — Some people can just as happily write on a paper napkin as parchment, but if you have a fondness for luxe inks, you need to make sure your notebook of choice can stand up to your writing implements of choice without any bleed-through. Tip: The Well-Appointed Desk is a great blog for learning about papers and inks and whether they play nicely with one another.
Lines — Lines on the highway to delineate lanes? Essential. Lines on your face? Misery in the mirror. But lines on your notebook page make a difference. If you’re linear and focused and number your lists, you’ll probably want lines. If you’re all about mind-mapping, the blank page will probably suit you better. Of course, the types of lines may make a difference, in which case, alternatives like the White Lines notebooks we discussed in Green-Eyed But Not-So-Monstrous, might be your preference. Lines, grids, graphs — only you know what you need.
Color — Again, that seventh grader in you might long for the black-and-white speckle, but Paperthinks‘ rainbow of recycled leather notebooks (from pocket-sized to large, slim or regular, ruled or unlined) might fulfill your passion for a colorful lifestyle.
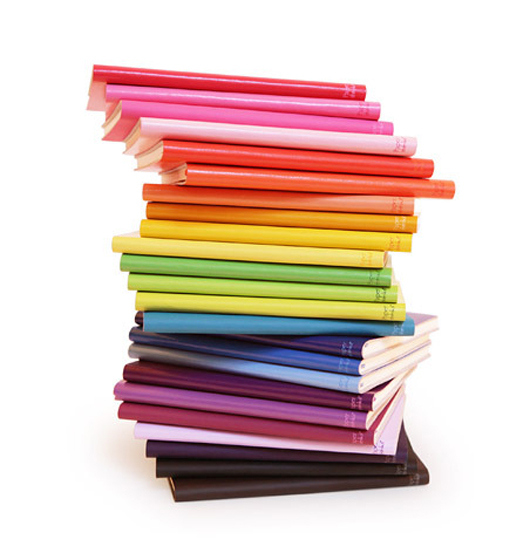
Or, you might eschew color for classic Parisian chic, like the Moleskine Black Line we talked about last year.
CAVEAT: Over the years, I’ve had many clients who loved the sensory delights of fancy-schmancy notebooks: the colors, the materials, the bindings. They haunted bookstores and stationers and gift shops and bought them giddily, as if they were guilty pleasures. But they never used them. Why? For the same reason we save the “good” china for a special occasion and never wear that perfect outfit because the event doesn’t live up to the dream occasion we imagined when we bought it.
Could you dare write “broccoli, Lemon Pledge, dental floss” in a $52 leather-bound, crimson notebook? If not, either stick to manhandling those sexy notebooks in the stores (but skip buying them) or purchase notebooks with fancier covers but replaceable inner workings. Switch out the paper parts of the notebooks when you’ve filled them with brilliance or drivel, but keep your signature-style colors and fabrics on display as you desire.
Tell Paper Doll — what’s your notebook style? What do you think it says about you? Please reply in the comments.
Max Headroom Meets John Hancock: Digital Signatures Series: SignEasy
Your business partner just realized he needs your signature on an important client contract that will impress the venture capitalist he’s meeting in two hours. Unfortunately, you just headed off on a well-deserved vacation to a remote mountain cabin. And let’s imagine everyone involved is the buttoned-up type who needs more than a handshake and a promise. Do you really want to divert yourself through one tiny town after another until you can find a random stranger willing to let you use her printer and fax machine so you can send the document on its way?
Or, closer to home, let’s say you forgot to sign your middle schooler’s permission slip to attend an important field trip, and said kid is pretty miffed at you. What do you do?
Use it as a chance to build up the tough love and teach your kid that “tsk, stuff happens” and get back to what you were doing? Feel guilt-tripped enough to excuse yourself from work, and then drive halfway across town in crazy traffic to sign the permission slip under the gaze of a disapproving school secretary?
What if there were a better way? There is! You can use a digital signature!
Electronic signatures are legally binding in the United States, Canada, the UK, Australia, throughout the European Union and elsewhere, per the Global and National Commerce Act (ESIGN), the Uniform Electronic Transactions Act (UETA) and European Directive (EC/1999/93).
Major players in the digital signature field include Docusign and Echosign. This is just the first in a series of ongoing posts on innovative ways to sign-and-send, without needing an envelope, stamp, fax machine or courier service. Watch this space for more on this topic.

SignEasy just turned three this summer, but this company has some pretty advanced features for a toddler.
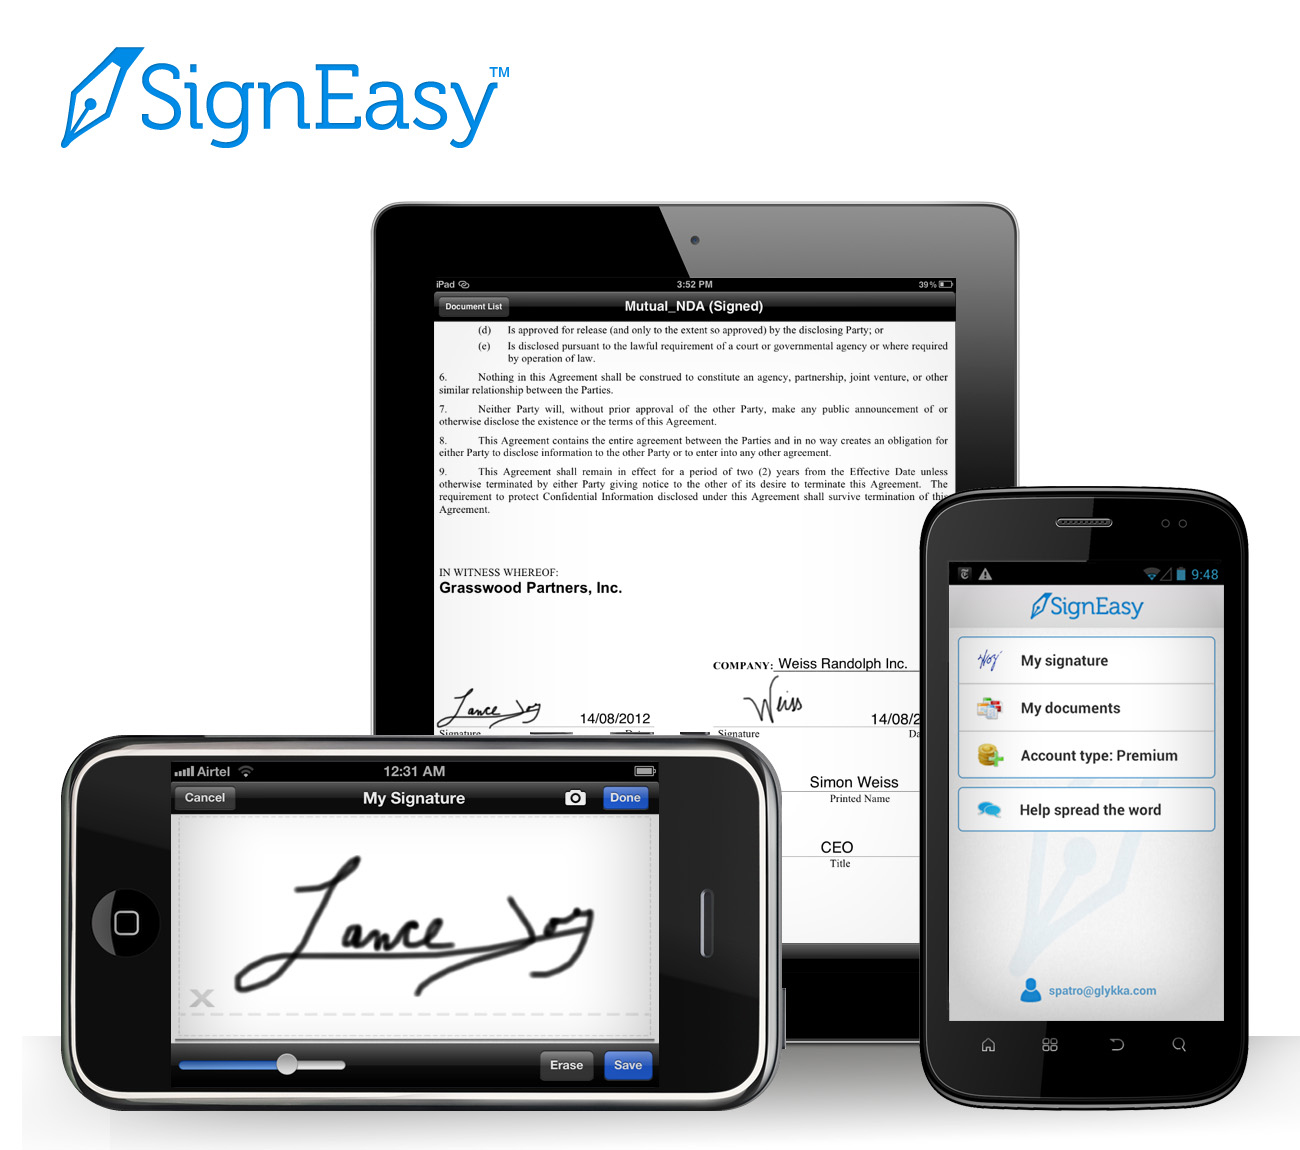
Start by downloading the SignEasy app, and then create an account with a valid email address. Next, you’ll log in to create your signature and save it. From there, it’s just three easy steps: import, sign and send!
IMPORT
No matter where it lives, you just import the document in any of a few easy ways:
If someone emails you a document, just tap on the attachment and select SignEasy as the Open In option. (You know, like “Open in Safari” or “Open in Microsoft Word.”)
You can also forward it to add@getsigneasy.com from the email address set as your SignEasy username.
Or, if you want to import the document from Dropbox, Evernote, Google Drive, Box or some other file storage app/accounts, just open it, select the option of “Send to” or “Export to” and then tap on SignEasy.
No matter how you import it, the document will appear in the “My Documents” section of your SignEasy app.
SignEasy supports PDFs as well as all the Microsoft Office (DOC, DOCX, XLS, XLSX, PPT), Apple Pages and OpenOffice formats, images (JPG, BMP, PNG, TIFF), Text, HTML, RTF, and CSV. With the most recent release, SignEasy can handle importing filenames containing native alphabets or scripts in Spanish, Russian, Chinese, Korean, Japanese, Arabic and Hebrew.
SIGN
Once you’ve got your “paperwork” in front of you on your phone, tablet or other gadget, sign the document using a stylus or your finger. (Don’t turn this into a blonde joke; don’t use a real pen.) I suggest using a narrow-tipped stylus so that your signature will look more “real” and reflect the types of signatures on other documents you’ve signed, just in case there are any legal questions later on.
The app will let you adjust the color and size of your signature to your preferences, either on an ad hoc basis or to create a default. You can also use the security settings to password-protect your signature so nobody can steal your John or Jane Hancock.
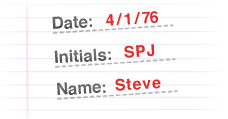
Complete your document, as necessary, with your initials, the date, any additional text, your company logo and more. You can also insert buttons and checkmarks on the iPhone/iPad version (but not on the Android or Blackberry versions, so far).
Any given document can be signed by up to three signers, including the account holder. If you’ve got a whole board or committee needing to sign off, there’s a slightly kludgy work-around where you get the initial three signatures, and then you reimport the finalized document back to SignEasy and repeat the process.
Offline signing is supported, so you can sign multiple documents and save them as drafts until you’re able and/or ready to send them.
Signatures created with SignEasy are only stored on the mobile device where they are created, never on the server. Signatures “pass through” the server, along with all the rest of a document’s contents, only when users generate the final signed document.
SEND
Email the signed document to whomever needs it, CC it to yourself, or tuck it away in your digital filing cabinet (Dropbox, Evernote, yadda yadda).
PRICING
SignEasy is a free app, and is available for iOS, Android and Blackberry platforms. You can sign up to three documents for free each month, too. If you want to sign unlimited documents each month or have cloud storage integration, there’s an annual fee of $29.99 per year for the premium package — about the cost of 65 First Class postage stamps or one or two overnight deliveries. Less frequent users can purchase pay-as-you-go document credits, where $4.99 gets you ten sign-and-sent documents. These plans are designed for individuals/single professionals only, so if you’ve got a whole staff looking to use this, there’s a volume licensing schedule for business and enterprise level usage.
Do you use an electronic signature program or app? Do you have a favorite? Please share your thoughts and concerns in the comments section, below.
Tech Planning on Paper: From Old-Fashioned to Cutting Edge
Are you techie? Or do you have a loved one (a geeky grandkid, a web-designing date, a TechCrunch crush) whom you want to impress with a gift that shows you really get it? Last December, Paper Doll‘s 2012 Holiday Gift List: A Compendium of Practical Delights referenced an item that I thought would be a fun little gift for web-designing pals.
It was a short reference to UI Stencils’ Browser Dry-Erase Board. I didn’t even review the 9″ x 12″ twenty-pixel grid browser template — I’d merely mentioned that it “bridges the gap between brainstorming and web design with a page-organizing tool that can be revised with the swipe of a dry-eraser. It’s $26.95 and no batteries or chargers are necessary!” And I put up a photo.
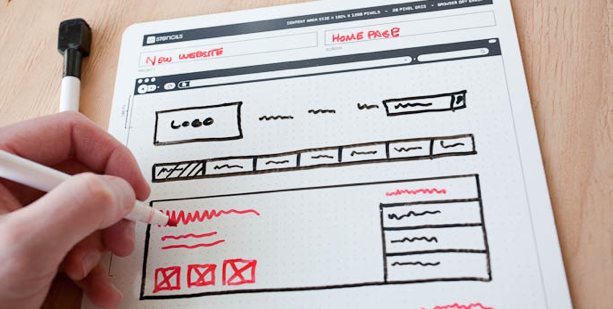
It turns out that I’d stumbled onto an area of paper organizing that I didn’t even know existed. It’s called paper prototyping, and my tech peeps tell me that even in this modern world of apps, the best way to start brainstorming and designing a user-facing digital experience is on paper. Who knew?
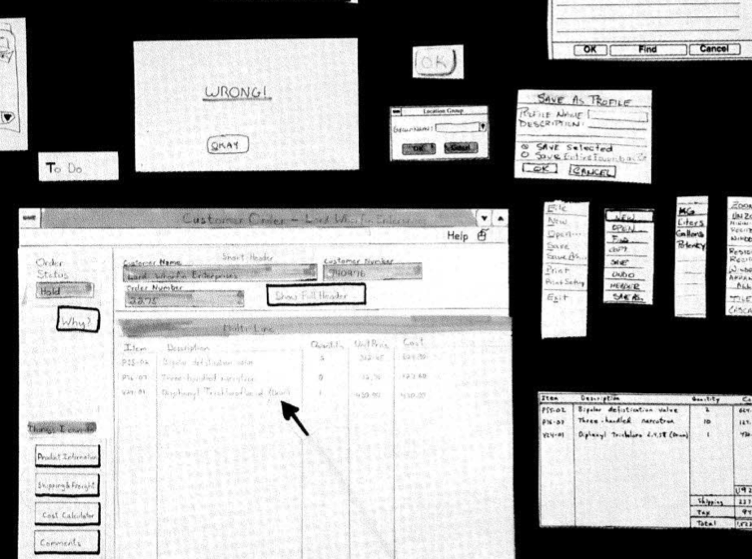
The above photo excerpt is taken from Paper Prototyping for Tiny Fingers, a 1994 article from the Practical Programmer column in Communications of the ACM, a computer and IT industry journal/site. I had no idea how much this concept would appeal to my tech peeps (and their loved ones, who were able to cross the perfect stocking stuffer off their shopping lists) until the mail (and tweets) started pouring in. Since then, two other nifty paper-based tech planning tools have come my way.

Sticky Jots is the brainchild of two grad students from the School of the Visual Arts in New York City, Pam Jue and Rae Milne, who really love and believe in the power of sticky notes. In their own words, “When designers go straight to the computer instead of starting out with pen and paper, they get caught up in the details instead of seeing the bigger picture. Not thinking systemically can lead to miscommunication or, worse, unintended consequences and inappropriate design choices.” (For more, read, “So Why Sticky Jots?”) Of course, by starting with paper, these gals are warming Paper Doll‘s heart.
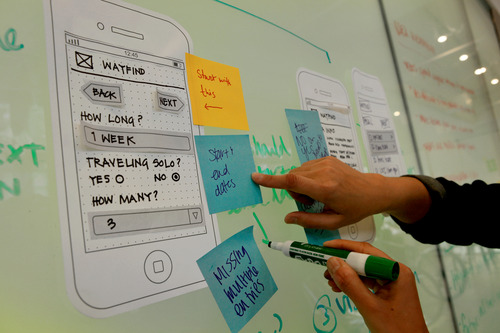
Sticky jots start with two basic elements: a pad of sticky note templates and a clipboard-esque base. Both are designed to scale to reflect the size and shape of a smartphone and/or tablet so the designer (or you, wearing your “Look at me, I’m a designer” hat) can get a sense of the big-picture approach to designing the app interface in a less abstract, more systematic way. Start with your initial image, and then sketch out different approaches, switch elements until you get the look and flow you want, and you never have to erase (or even create) a line of code until it’s all looking the way you envision.
Sticky Jots come in kits and individual elements, including:
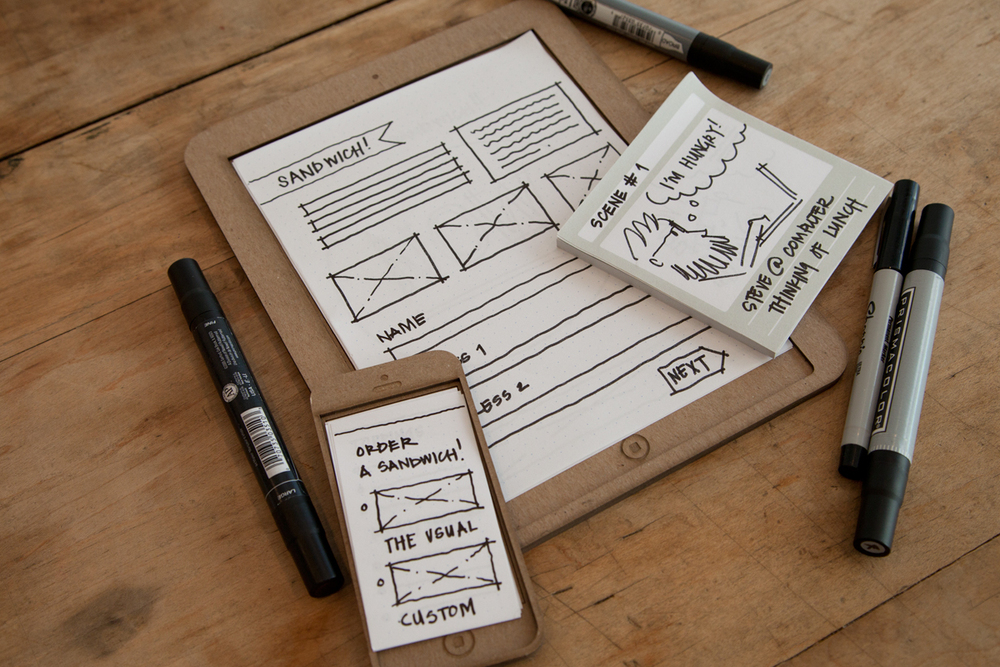
- Everything Kit ($50) — One mobile template base, two mobile template sticky pads, one tablet template base, two tablet template sticky pads, and two storyboard (of which, more later) template sticky pads
- Mobile Kit ($24) — One mobile template base, two mobile template sticky pads and one storyboard sticky pad
- Tablet Kit ($24) — One tablet template base, two tablet template sticky pads and one storyboard sticky pad
- Storyboard template sticky pads, set of six ($12)
- Mobile template sticky pads, set of six ($8)
- Tablet template sticky pads, set of six ($24)
Each sticky pad includes 50 template sheets. The mobile and tablet pads have dot grid patterns to enable easier and more precise sketching. To aid in the design process, Sticky Jots provides a downloadable workflow template.
(Sticky Jots aren’t just for budding tech-heads. Maybe you’re a novelist, filmmaker, or some other narrative wunderkind. If so, you can use Sticky Jots to create and modify storyboards in a visual way. Left-brainers like Paper Doll think of narratives as bulleted or numbered plot points in outline form. But those of you creative types who are at home in your right-brained thinking can move dialogue from the introduction to the denouement or switch the action sequence in Act II for the love scene in Act III with a quick flip of some sticky notes…without that ever-present fear that you’ll accidentally delete something. Lift, move, stick. Done!)
App Seed, which like Sticky Jots, got its start on Kickstarter, reminds me a little of the Evernote Smart Notebook by Moleskine, which we’ve discussed previously, in terms of the interactivity between the paper and the digital. The Canadian team is led by Greg Goralski.
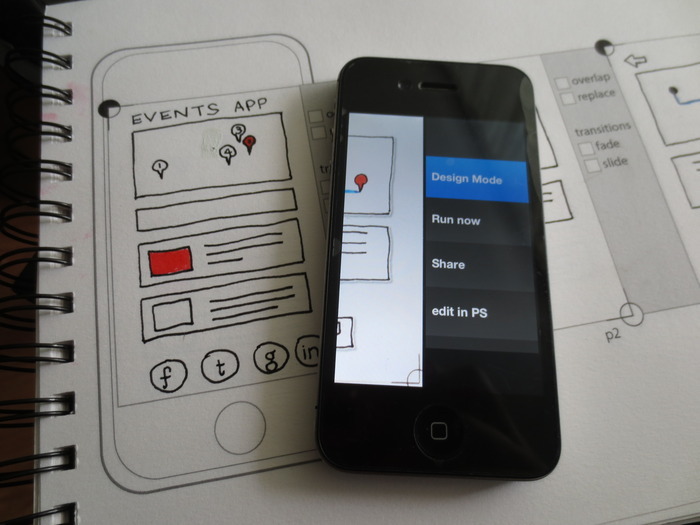
App Seed has two parts: a sketchbook and an app. (There are also whiteboard stickers because, well…because stickers are cool.) Basically, you start with the printed paper template and start drawing the elements of your user-interface design. But then the tech part gets added. As the creative team explains the concept:
AppSeed lets you take your sketches and make them into functioning prototypes, bridging the gap between pen/paper and digital, through computer vision. It allows you to sketch your designs as you normally would and then manipulate your sketches directly on your phone. Unlike similar products, the use of computer vision speeds up the process and understands your sketches. AppSeed can identify an enclosed space in your sketch, allowing you to make it into a button, input text, map, or another UI element. Making your sketch into a functioning prototype running on your phone.
In other words, it’s magic. See how it works:
So, you sketch your designs and then capture them, using your smartphone or tablet’s camera. Then, App Seed uses “computer vision” (which sounds like a superpower to Paper Doll) in order to automatically crop your paper design to the right space. Then it isolates each element that you drew — separately — so that you can manipulate and interact with those elements — for real!
For some perspective, with Sticky Jots, you create the vision of what you’d like to have your technology do, but eventually you have to seek out someone (or some way) to make it happen. With App Seed, once you upload your design into the “computer vision,” you can then actually make the elements work in the user interface you’re designing. It takes the big picture and makes it come alive. (Try to tell me that’s not magic!)
Actually, these magicians are willing to share their secrets, as they explain,
“The secret sauce behind AppSeed is the use of computer vision to search your sketch and isolate individual elements. Specifically, we use the wonderful OpenCV (an open source computer vision code library: opencv.org) to isolate lines and drawn shapes within your sketches. We then use our own algorithms to identify the UI elements.”
The OpenCV takes your elements and creates buttons, maps, street views, form inputs and more, and then lets you run and share an HTML5 prototype with others on your team (or, y’know, someone who actually understands what you’re trying to accomplish).
From this point, you can export and edit the elements “in Photoshop through PS Connection. This creates a Photoshop document that has all your drawn elements on their own layers, giving you the pixel perfect control to move your design into the next stages of production,” per App Seed.
App Seed’s Kickstarter campaign just hit its funding goal this week, so it’s not available quite yet. Per the Kickstarter page, it should be up and running by January 2014.
Whether these paper prototype templates seem nifty because you’d use it for your own tech design, or neato because you have absolutely no idea what any of it means but it sounds like Sci-Fi, they’re nonetheless a fascinating set of examples of the intersection of paper and technology and how the two can be combined to better organize our world.
Follow Me