Archive for ‘General’ Category
Paper Doll Talks Tabs (Part 2) — Sorted, Separated and Stylized!
POST-IT
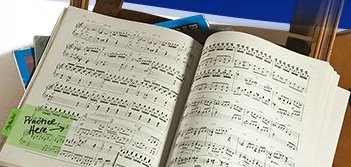
For Post-it, it was a natural progression from squared-off and pinpoint tape flags (the kind that say “Sign Here”) to creating a full line of labeling tabs.
Post-it Durable Flat Filing Tabs are ideal for organizing individual papers within file folders, as well as marking sections in books or loosely collected but unbound documents. The flat filing tabs come in two styles — white but striped at the top to aid in color-coding, and full-color tabs.
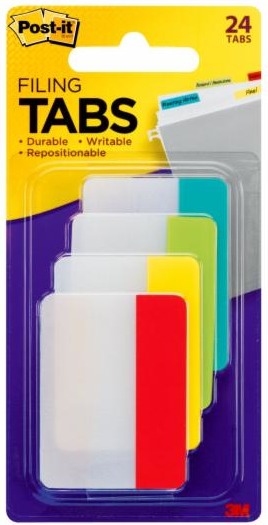
In both styles, the portion below the labeled tab is clear, so that when you’re reviewing paperwork, there’s no need to move the tab to read what’s underneath. The flat tabs come in 1″ solid-color and striped for easy sorting, 2″ solid-color and striped for traditional filing, and 3″ solid-color tabs for more detailed filing and sorting jobs.
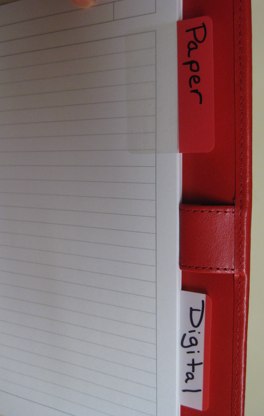
The flat tabs are re-positionable and made of extra-thick, heavy-duty material to stand up to repeated use. Both the solid-color tabs and striped tabs come in Red, Yellow, Light Green and Blue Green assortments.
Post-it Durable Angled Filing Tabs are specifically for vertical filing and come in 2″ solid-color and striped formats, in the same color schemes as the flat tabs.
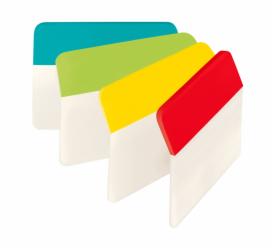
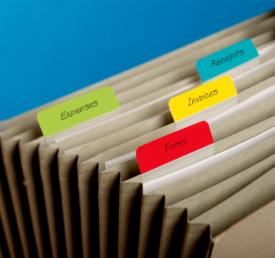
These angled tabs are suitable for use with hanging folders or with individual pieces of paper when you’re not using file folders, such as with accordion files (as illustrated above). These tabs are also re-positionable and sturdy, and lean just slightly back from the user to make them easier to read.
[To speed the filing process, Post-it also makes Pre-Printed Tabs, with solid-color blocks labeled with the months of the year, days of the week, letters and numbers.]
Post-it Note-Taking Tabs combine the “Hey, here’s what you’re looking for!” quick efficiency of tabs with a solution for keeping notes associated with documents. With the flat and angled tabs, both the tab itself and the clear “body” portion are made of a slick writing surface. The Post-it Note-Taking Tabs just go one step further.
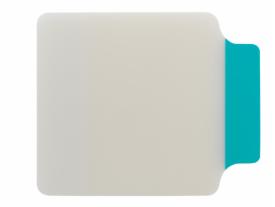
The extra-thick and sturdy Note-Taking tabs measure 3 3/8″ x 2 3/4″, offering up a nice-sized piece of real estate for the user to make notations regarding the page being marked. Make notes of mnemonics in your text book, substitutions for recipes in cookbooks, or specific language for arguing your point in a contract dispute, all the while keeping the original pristine.
You can position tabs anywhere — top, bottom, left or right — just flip the tab and orient yourself before writing. Affix your tab adjacent to the applicable section, and then leave yourself notes about the written material. Students can even use highlighter on the writing surface of the tab’s body, instead of directly on the page, so they’ll be able to sell the books back at the end of the semester.
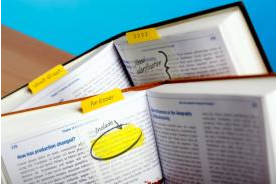
The Note-Taking tabs come ten per pack in a variety of single-color (pink, aqua or yellow) and assorted color packages.
AVERY
Avery sometimes takes a back seat to Post-it in terms of “celebrity sticky” status, but Avery’s innovations really deserves some attention.
The Avery Small NoteTabs are perfect for traditional filing, and are much like the Post-it flat tabs, specifically designed for color-coding files, organizing documents, marking references in books and journals, and creating divided sections in notebooks. The tabs bear up under heavy use, allow you to write or highlight anywhere on the tab (or see-through writing areas), and are re-positionable without removing any ink from the printed page.
However, Avery’s tabs come in a slightly wider array of styles. The basic Small NoteTabs are 2 x 1 1/2″ notes and come in Primary (Red, Yellow, Cool Green and Cool Blue, with clear writing areas), Cool (Cool Blue and Cool Green with matching-color writing areas), Pastels (Blue and Yellow, with clear writing areas), all in packages of 40, and Taupe (white tabs with Taupe writing surfaces, as well as all-Taupe) in packages of 10.
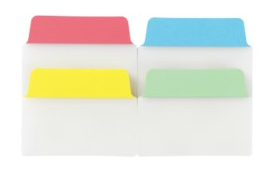
Beyond the traditional form, Avery expands the tab definition with sets of 2″ x 1 1/2″ Rounded NoteTabs in various assorted colors,
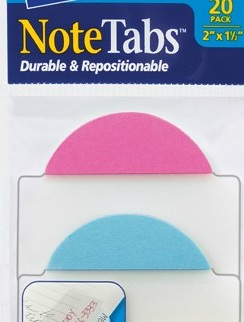
including two sets of Neon (Yellow/Clear and Magenta/Clear or Blue/Clear and Magenta/Clear), and Citrus (Lemon/Clear, Green/Clear) in packs of 10.
For those needing a more expansive writing area, Avery makes 3″ Square NoteTabs (with 1/2″ tab surfaces), which work exactly like the Post-it Note-Taking tabs. However, unlike the slick tab surface of Post-it’s tabs, Avery’s have a paper tabbed surface, although the body is still a slick poly-style.
Some of the combinations seem standard, with a clear writing surface and a colorful tab in pastels or neons. However, the Cool Green and Taupe varieties have colored writing surfaces. Although writing surfaces purport to be see-through, one imagines that it might be hard to read the printed page, depending on the colors of the papers to which the tabs are affixed. Cool green on a dark page might be iffy.

In addition to these standard tabs, Avery has partnered with Martha Stewart, Doyenne of Domesticity, to create a special line of notes available only at Staples. The tabs come in two styles, the straight-top Classic and the curvier Flourish
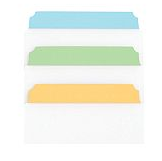
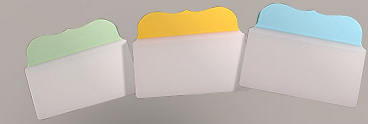
and in three sizes (1″ x 1 1/2″, 2″ x 1 1/2″ and 3″ x 1 1/2″) in assorted packs of 24 or 40. The color assortments include Custom Blue, Custom Green, Dark Yellow, and Pastel Pink tabs, with clear extended writing surfaces.
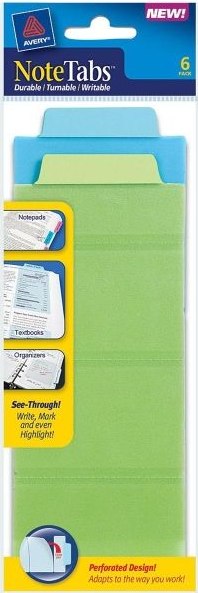
Avery has two other intriguing products. The 3″ x 7 1/2″ Perforated Tabs, are positionable vertically or horizontally on the page, and can be adjusted to the size(s) you prefer (like when you’re reading narrower or shorter books). Much like adjustable-sized paper towels, you can tear off as little or as much as you like, and even reposition the detached, non-tabbed portions to affix notes on other sections of the reading material.
Finally, Avery PocketTabs bring together two disparate needs — the ability to mark your place and the opportunity to hold onto small resources.
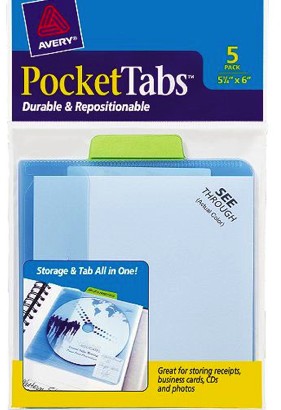
The sturdy adhesive-backed tabs are re-positionable without lifting ink or damaging the underlying paper. The poly translucent pockets hold receipts, business cards, digital media, ID cards, and more, with a secure closure. The PocketTabs come in two sizes, square-ish 5 1/8″ x 6″ and half-page 5 1/8″ x 8 5/16″, in assorted Pastels, Neons and Taupes.
SEE JANE WORK
The big guys, Post-it and Avery, aren’t the only ones who know how to stick around and show off. See Jane Work carries a spiffy line of Sticky Tab Dividers from Semikolon in wide array of truly gorgeous colors. Create tabbed sections in journals, binders, cookbooks, and more, and keep your loose papers fashionably sorted.
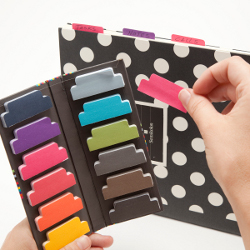
Each set comes with approximately fifty 2″ x 3/4″ tabs in each of twelve colors, for 600 tabs per set. They’re designed for labeling — not note-taking — but what they lack in size, they make up for in dazzling color and the ability to snappily customize and accessorize.
No matter your tabbing style, there’s something to suit your needs, whether you’re a student, a professional, or a family filer. Happy tabbing, and don’t forget to enter the Filertek Contest!
Paper Doll Talks Tabs (Part 1) — and Throws a Filertek Contest
Over the past year, I’ve been teaching Paper Mommy how to use a computer, and in particular, the internet, via long-distance. (If you’re trying coach computer issues over the web, Log Me In is a godsend!) She’s doing a great job, and like her daughter, Paper Mommy prefers the clean, organized lines of Twitter to the clutter of Facebook.

Most of her technological questions deal with the basics of maneuvering through email, social media, search engines and browsers. The terminology can sometimes be a sticking point, though, as I learned when I tried to convey what I thought was a simple concept regarding the purpose of browser tabs. Eventually, Paper Mommy was able to visualize that the tabs in her browser were supposed to be the digital equivalent of file folder tabs. Ah-ha!
Once we had that cleared up, she had just one more question. What did the browser tabs have to do with the tab key on her keyboard? (Some lessons take longer to explain than others.)
All of this got me thinking about the importance of tabs in keeping paper organized. When papers are at their tidiest and most efficient and effective, tabs serve as “Peek-a-Boo” alerts to let you know, “Hey, that thing you want? It’s right here!”
For the most part, the big guns in the filing business have created the kinds of built-in innovations we’ve talked about before, like Smead’s SuperTab oversized tab filing folders and FasTab hanging folders with built-in tab areas, and Pendaflex’s Ready-Tab Reinforced Hanging Folders and Ready-Tab Extra-Capacity Hanging Folders with Lift Tab™ Technology.
But what do you do when the tabs that would make your organizing life so much easier just aren’t built-in or part of the kit? Over the next two posts, we’ll be looking at some special alternatives to help you create tabs wherever you need or want them. Today, the focus is on hanging folders.

Filertek Dry-Erase Hanging File Tabs first showed up on Paper Doll‘s radar after the 2011 NAPO conference. This stand-alone plastic hanging file tab has its own patented, built-in, dry-erase writing surface, so even if you have hanging folders without any built-in tabs (or a bag of those nasty, old-fashioned, plastic filing tabs), you can still have clear, bright, easy-to-read labels.
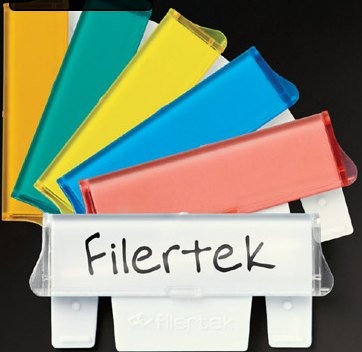
With Filertek, you write directly on the tab with a dry erase pen, flip down the little visor-like cover (available in clear or assorted colors) and click it closed.
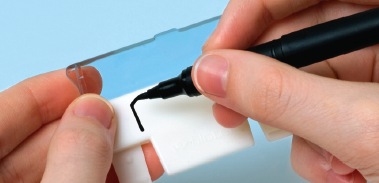
Paper Doll isn’t too proud to admit it: I have chubby, little sausage fingers. Writing on those tiny strips of paper and threading them into those traditional (sharp, annoying) hanging file folder tabs has always been a bane of my paper organizing life. I really like that with Filertek, to reuse and relabel a tab, you simply flip the cover up, wipe the tab clean and write a new label. Lather, rinse, repeat.
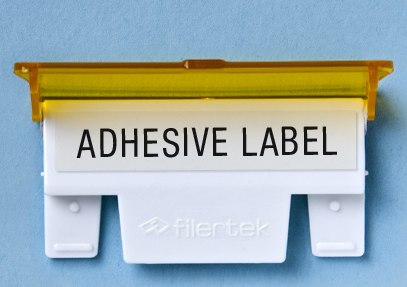
Of course, you can also attach a removable adhesive label (that you’ve printed on your labelmaker) and then close the cover.
And if you really like kicking it Old School, you can insert a pre-created paper label, too, but it slides in from the top after you’ve closed the cover, so there’s no fussing with threading a narrow label horizontally into the old file sleeve.
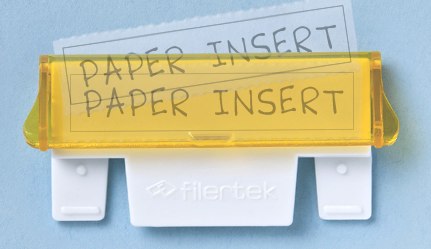
Once your preferred label style is in place, just attach a Filertek tab to a hanging folder by snapping it in place.
Filertek comes in clear or color tabs (blue, yellow, green, pinky-peach and orange). I’d like to see them upgrade to some prettier shades, but aesthetics are certainly in the eye of the beholder. Filertek is available in packs of five or twelve, and in boxes of 25 or 50, in either clear or color. Every package comes with a special odor-free, black Filertek dry erase pen.
Filertek Dry-Erase Hanging File Tabs can be purchased directly from The Pencil Grip, the North American distributor, or through Amazon.
Now, for the Paper Doll/Filertek Contest. The rules are super-easy:
1) Tweet or post a Facebook update about this blog post. You can do it manually, or use the Bookmark & Share links at the bottom of this post.
(On Twitter, make sure your tweets aren’t protected (hidden). On Facebook, set the access for the post to public.)
2) Include a link to this Paper Doll post and the hashtag #PaperDoll-Filertek.
3) Come back and post in the comment section below, with a link to your tweet or Facebook update.*
*UPDATE: The OnlineOrganizing.com system does not allow clickable links in the comments. If you’ve tried to post your comment and have had a problem, please post your link WITHOUT the http:// portion (i.e., just www.Twitter.com/whatever) and it will post without trouble. Sorry about that, folks!
That’s it! But be speedy — the contest closes at Noon in the Paper Doll (Eastern) Time Zone on Friday, June 15, 2012. Two randomly selected winners will each receive both of the following:
- One 25-pack box of CLEAR Filertek Dry-Erase Hanging File Tabs
- One 25-pack box of COLOR Filertek Dry-Erase Hanging File Tabs
You can’t win if you don’t begin, so be sure to enter, and let the world know about the contest.
While you’re at it, visit Filertek at Twitter, Pinterest and on Facebook, and Paper Doll at Twitter, Facebook and Pinterest. To make sure you never miss a post, subscribe to the RSS feed up there to the right, just below my photo.
Of course, when we’re using hanging folders isn’t the only time we need tabs. Surely, there are moments when we’d like a textbook or cookbook to help us quickly delineate categories. Sometimes we just wish we had some pretty tabs to mark our places in notebooks or loose stacks of paper. And once in a while, wouldn’t it be nice to have a tab that also provided a place to take some notes or tuck some items away in a flat pocket?
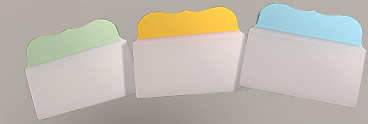
In our next post, we’ll be looking at ways to have the convenience of tabs that do all of the above — even when we’re nowhere near file folders. Here’s a sneak peak of just a few of the items we’ll be reviewing:

See you next time. Until then — good luck in the contest!
Paper Doll Puts Pen To Paper: A Shoplet Sanford Writing Pens Review
Readers will recall that I recently promised an ongoing, if irregular, series of reviews for our friends at cool office supply purveyor Shoplet, operator of the nifty and prolific Shoplet blog.

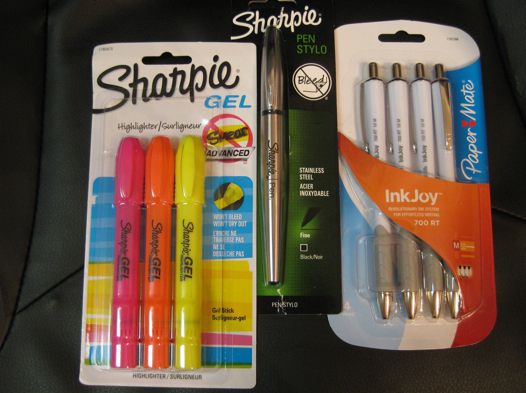
I was particularly pleased and intrigued by the package that recently arrived from Shoplet for my perusal, as it contained three different Sanford Brands writing tools:
- a four-pack of Paper Mate InkJoy 700 RT Ballpoint Pens (two black, one blue, and one red)
- a Sharpie Premium Pen
- a three-pack of Sharpie Gel Highlighters (yellow, orange, pink)
(Think you don’t know Sanford Brands? Sure you do — they’re part of the Newell Rubbermaid family.)
But first, are you familiar with IPS, or Icky Produce Syndrome? How often, after reading an article on the health benefits of some fabulous, if underutilized, fruit or vegetable, do you make a point of heading to the nearest grocery or farmer’s market to try the newest superfood?
You buy it, perhaps search the web for a recipe that will make the odd item seem more palatable, and maybe even try it, despite the dubious or perplexed reactions of your loved ones. (Seriously, have you ever seen a Buddha Hand?

It’s just freaky. And that’s before it spoils!)
The produce eventually hides in your fridge, moving ever farther into the recesses of the chill chest, until it reappears, days or weeks later, when you’ve given yourself over to a hearty clean-out, and find the item is dried up (at best) or moldy.
What does that have to do with writing implements? Everything! Office supplies can be addicting — like the superfoods, new writing tool holds the promise of a magic wand. To the student, it’s the thing standing between mediocrity and genius. To the list-maker, it has the potential for bringing those never-ending tasks to completion.
We buy with a flourish, but we are too often disappointed when the pens and pencils, highlighters and markers fall short of their promises, or of our expectations, and then they languish as clutter in our drawers, or the bottoms of our bags, or our pen mugs, ignored until the ink dries to dust. That’s why an inside look can be so important, and hence my delight at reviewing these office supplies.
When it comes to pens, Paper Doll is very picky. For more than fifteen years, I’ve primarily used one specific rollerball gel pen, with brief forays into the land of fine markers, or felt-tips. However, I love testing out alternative pens, because so many of my clients are on a lifetime search for the “perfect” pen — one with the right heft and balance, the ideal flow of ink, the preferred grip, and so on. Pens are very personal, as even in this digital age, so many of us take our first creative steps on any project with an old-fashioned (if newfangled) pen.
To be honest, I’m not much of a ballpoint pen kind of gal. I usually find them the wrong weight and shape, and most often, I find that the ink flows too weakly, forcing me to exert extra pressure to achieve the desired result, or intermittently, leaving blobs.
The Paper Mate InkJoy 700 RT Ballpoint Pen surprised me.
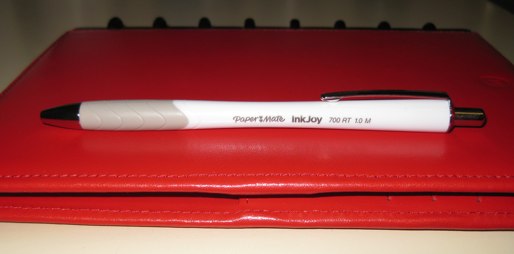
The InkJoy definitely has less heft that I would personally prefer, but that’s its only drawback. The retractable pen’s hourglass design is almost imperceptibly narrowed in the center of the barrel to make it rest more easily between the thumb and forefinger, and the rubber grip is a little shorter than might be expected, but satisfyingly smooth. The color of the ink is indicated, almost covertly, by a tiny, flat, colored disk at the top of the pen, perpendicular to the “clicker.”
The joyful aspect of the InkJoy is that the ink flows very smoothly, as though it were a gel pen, rather than a ballpoint. No extra pressure needs to be exerted, and the ink releases smoothly, gliding across the paper, without effort.
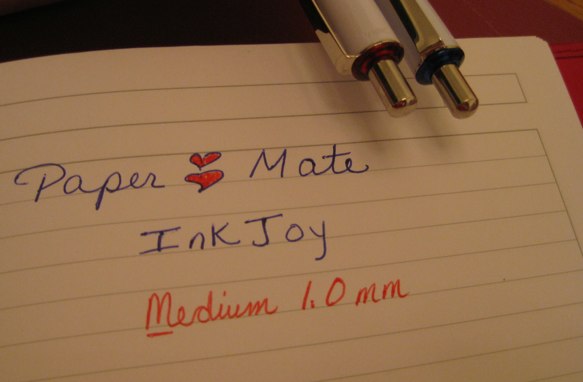
Again, the main advantage of the InkJoy for me is that it behaves more like a rollerball than a ballpoint, requiring less exertion. If you actually like putting your hand (or even shoulder) into it to make the paper “bumpy” on the reverse side, I suppose you can still do so.
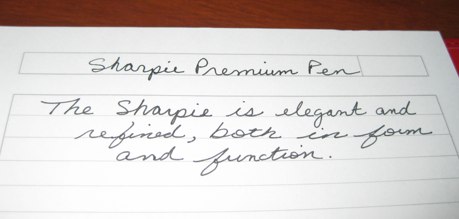
The Sharpie Premium Pen is the newest in a line of nifty Sharpie advances. Although it wasn’t a rollerball, I was a fan of the original fine-point Sharpie pens that came out a few years ago. Functionally, they were dandy, and though the form was nicely streamlined (even skinny), the outer coating had a mild tendency to flake, and I wondered if Sharpie might create an upgrade in form. The Sharpie Premium is that upgrade.
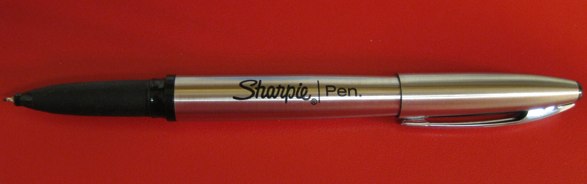
Indeed, the Sharpie Premium Pen seems to take the best of two product worlds. First, it has the smooth dependability of the smear-resistant (when dry) Sharpie Pen; both also have the advantage of not bleeding through paper.
Second, the Premium Pen has a sleek look. When I eyeballed the Shoplet package, I was let down for a tiny second when I saw that the outer casing of the Sharpie Premium Pen was stainless steel. I’d loved the idea of the stainless steel traditional Sharpie marker a few years back, but that barrel, even thicker than those of regular sharpie permanent markers, was just too thick for my hand. Sharpie sidestepped that problem with the Premium Pen.
The refillable stainless steel barrel of the Sharpie Premium Pen is narrower than its marker predecessor, and the rubberized grip is smooth and has just the right amount of, well, grippiness. The one concern you might have is the same as with any fine felt-tip pen, and that is that one might press too hard and bend or damage the tip. I found that applying a natural amount of pressure yielded a smooth flow of ink, so unless you have a particularly heavy hand, this shouldn’t be a problem.
Finally, I got to try out the the Sharpie Gel Highlighter …and it is weird. Weird like the Buddha Hand. Which is to say not to say it’s bad, just that it takes some getting used to, and then you might find yourself singing its praises.
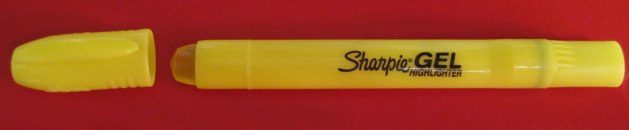
I’ve never used a gel highlighter (indeed, I’m not sure I knew they existed before this Sharpie version), and for want of an apt comparison, the functional aspect seems more like an roll-on anti-perspirant or the slick 1980’s lip gloss Kissing Potion than a highlighter.
It highlights brightly and cleanly, and thus far, seems to live up to its promise to neither bleed through paper nor smear across inkjet inks or anything written in marker or pen. Sharpie notes that it highlights text just as well, no matter the paper type, though I did find that the brightness of the highlighting somewhat decreased when used on glossy magazines.
From the form perspective, it’s atypical. The barrel is somewhat flattened, rather than rounded, and until I read the directions, I didn’t quite realize that the bottom of the highlighter should be twisted to advance the sturdy gel stick. Thus, unlike a traditional short-tipped highlighter that dies too quickly because it has dried out or absorbed the ink from the paper, this gel highlighter should be far longer lasting. Indeed, Sharpie claims that the Gel Highlighter may be left uncapped for days without drying out. (Paper Doll didn’t try that — the potential for drawing on myself or my clothes was too great.)
Don’t let your home or work office suffer from the writing tool version of Icky Produce Syndrome. Research your preferred qualities, and if something you buy turns out not to fit your needs, consider a one-to-one trade with a friend or colleague so you can keep testing, without excessive spending…or finding a dried up Buddha Hand in your pencil case.
Disclosure: I received these products for review purposes only, and was given no monetary compensation. The opinions, as always, are my own. (Who else would claim them?)
Paper Doll Shares How To Print Only What You Want and Need
Certainly, some sites have links to create “print-friendly” pages, but it’s not a common enough occurrence. While various sites and apps allow you to convert a website’s HTML into PDFs, the real trick is eliminating all the detritus you don’t actually need. And, although some PDF conversion services have add-ons for editing HTML before creating printable PDFs, you need to purchase a license to customize, and that’s really overkill when all you want to do is save your ink and paper costs.
BOOKMARKLETS
You remember bookmarklets, those little bits of javascript code that let you put a little link in any browser’s bookmark bar? Instead of taking you to a bookmarked URL, they do little flourishes of magic — pin pictures to Pinterest, shorten your links, or, in this case, eliminate all the icky extras from a website so that if you must print, you can print a nice, clean version.
Generally, to put a bookmarklet in place, you merely drag and drop a linked button icon from a service’s website onto your Bookmarks or Favorites bar and you’re good to go. (Internet Explorer users must right-click the icon and select “Add to Favorites.”)

Readable converts web pages to text-only and re-formats the text according to your specifications. To get started, you select your preferred style from a wide variety of options: font family, font size, background color and whether you’d like the ensuing page’s formatting justified. You can even refine your view more narrowly, selecting how you’d like to see headline fonts, line spacing, link colors and more:
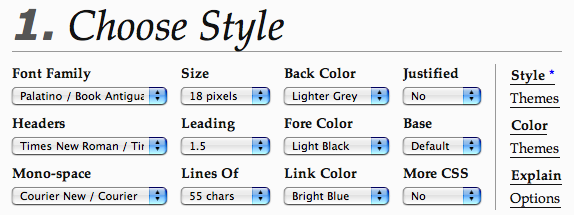
As you make your selections, the preview screen displays the results of your changes, allowing you to tinker until everything fits your ideal. Once you’re set, just click and drag the Readable bookmarklet to your browser’s bookmarks toolbar, and your preferences will be saved.
As originally designed, Readable deals primarily with articles pages, like those on online newspapers and blogs — anything that contains one large block of text; then, it automatically processes those pages. It even works just as well on sites written in languages that read from right to left, like Hebrew.
On other types of sites, Readable operates in manual mode — you select the chunk of text you’d like reformatted, and then click the bookmarklet, and, if you desire, print, saving ink and paper. When done reading, you just double-click the background to dismiss Readable’s overlay.
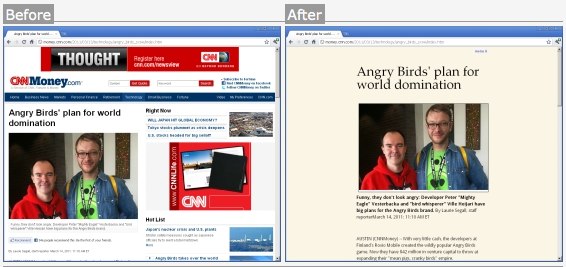
Evernote recently acquired Readable, launching it as Evernote Clearly. It’s already available for Chrome and Firefox, and will soon launch for other browsers. The original Readable remains operational.

Print What You Like works similarly, allowing you to customize any web page so that you can retrieve a printable copy with just the elements you want. Install the bookmarklet, or just enter the URL of the page on the Print What You Like website, and the page is displayed with a sidebar, from which you can choose your setup options:
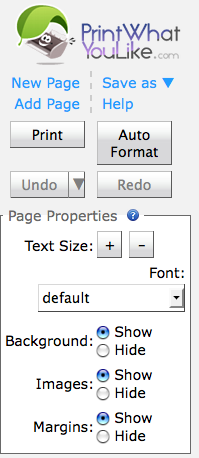
To further modify your view, click on any portion of the text to select it, and then opt to isolate it (and make everything else disappear), remove it (and keep everything else intact), widen the column, or change the font style or size in any select portion of the page (leaving everything else in place). If you wish, hide the background or specific images. Save documents as HTML or PDFs, or just print, whether or not you’ve elected to save. You can also create “clips” to save small elements to later group with other segments and print as one page.
Whereas Readable is designed to pre-set one style for all your reading, the basic version of Print What You Like is meant to allow you to make viewing selections on an ad hoc basis. If you choose to sign up for an account, Print What You Like offers advanced features, like preserving your display preferences and collating multiple website pages into one document or print job.
Joliprint automatically turns any web page into a clean, streamlined PDF for reading later — on your computer, phone or Kindle — and prints easily with a single click. You can install the bookmarklet in your browser, or if you choose to use it rarely, just visit the Joliprint site and enter the URL of the page you wish to “sanitize.” (Be sure to enter the actual article page, not the home page of the website.) Or, as with Pinterest, if you see a Joliprint button on a website, you can also just click that to achieve the same effect.
Once selected, Joliprint will prepare your document, turning the website into a simplified, printable PDF document you can download, open on your computer or digital device, print, or share with others via Twitter, Facebook or email by using the customized link Joliprint provides. For example, I chose a Time Management Ninja post that Print Preview indicated would print as ten ink-intensive pages, and clicked on the bookmarklet. In seconds, I received the following pop-up:
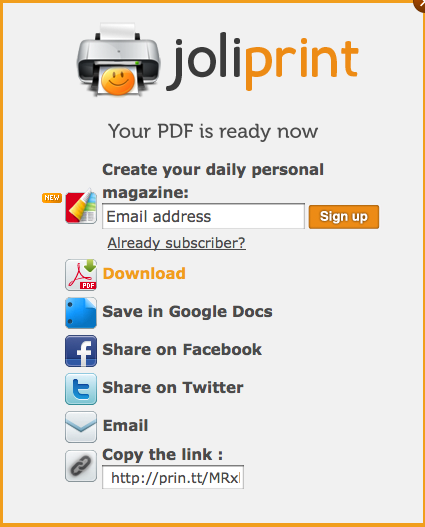
Each of the icons was clickable, granting me options for preserving or sharing the article, including a simple shortened link to a downloadable PDF: http://prin.tt/MRxkUI. That version? Only two pages!
Joliprint also enables several “save for later” reading list options, like InstaPaper, Google Reader, and Read It Later, as well as Twitter and even your own email account, to feed directly to Joliprint. Most recently, Joliprint has added an option to let you create a “magazine” of your content for your iPad or other tablets.
On the plus side, Joliprint is swift and tidy. However, you can’t customize the document, so you have to accept whatever deletions Joliprint uses, and may end up printing more, or less, than you wanted.

PrintFriendly may be the most deft of the page-cleanup-and-print options Paper Doll reviewed. (It definitely has the cutest website, with smiley-face trees to remind you that it’s good for the environment.) Using PrintFriendly is supereasy — install the bookmarklet, type or paste the URL into the PrintFriendly site, or click a (Pin-It/Tweet-It style) button installed on a website.
As with Joliprint, one click of PrintFriendly automatically removes the ads, navigation links, extraneous graphics, etc., but you still have the option to manually remove anything else you don’t want. Just mouse over the area you don’t want — as you hover, PrintFriendly highlights the section. Double-click or click the “Click to Delete” button that pops up. Select specific images to delete, or click the “Remove Images” box to maintain text only. You can also change the font size, increasing it to accommodate tired eyes or decreasing it to reduce the number of pages.
Once your document looks the way you want, print it, save it as a PDF, or email the document, as you like, happy in the knowledge that you’ve streamlined your content, increased your focus, soothed your eyes and reduced your use of ink and paper.

Printliminator works much like the other services mentioned. Install the bookmarklet, and when you’re surfing a page you’d like to print (without all of the extra junk), click the bookmarklet. A small, unobtrusive set of controls pops up in the upper right corner of your window:
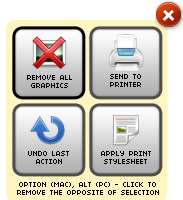
Roll your cursor over any section of the web page and a thick red outline will appear around discrete sections. Click once and the material within the red outline will disappear. (Be careful to click only on white space; if you click on any link or linked graphic, you’ll be taken to a new page, and you’ll have to start over.) Conversely, you can also select an area, use Option-Click, and everything except your selected area will disappear.
Once you’re satisfied that enough material has been deleted, click “Send to Printer” (and once there, print to PDF, if you’re so inclined).
All of the above sites offer easy-to-install bookmarklets to maximize your reading and printing experiences, and all except Readable and Printliminator allow you to enter the URL on the service’s website in lieu of installing a bookmarklet. None require registration. Print What You Like, Joliprint and PrintFriendly can all be installed on your website or blog to enable your readers to more easily print or share your content.
In addition to bookmarklets, there are other options for reducing your ink and printing costs and streamlining your web reading.
EXTENSIONS/ADD-ONS
PrintEdit is a free Firefox add-on that lets you edit any web page content while you’re still in Print Preview mode. Remove unwanted pages, sidebars, blank pages and useless information, and compact the layout so you can print fewer pages.
PrintPlus does the same for Safari and Chrome users.
SOFTWARE

Fineprint is one element in a suite of software options for easily creating intuitive, ink-and-paper-saving PDFs. When you install Fineprint, it creates a virtual printer within your system (just like when Mac users print “to” PDF), only when the website (or other document) appears in the preview section, you then have the ability to delete pages and add headers, footers, or watermarks. Fineprint also allows you to shrink and scale pages to print multiple pages to one sheet and archive print jobs.
There’s a free trial version; to remove the Fineprint banner that appears, you must purchase the full version (for $49.95) to receive the registration key.

GreenPrint, which we discussed a few years ago, has grown by leaps and bounds. Now, the company’s analytics, reporting and advisory products and services, particularly for large businesses, take the center stage, but at $19, GreenPrint Home Premium still provides the ability to customize any print job, eliminating unnecessary images and pages, thereby reducing print costs.
Both Fineprint and GreenPrint are only compatible for Windows 7, XP and Vista. GreenPrint has discontinued its Mac and free online versions.
Paper Doll encourages readers to experiment with all of the free bookmarklet options before plunking down money for paid alternatives. Happy printing!
Paper Doll On Paperless vs. Less Paper: Send To Kindle, iPrint & Paperless Post
Paper is here to stay. The promised paperless office (or paperless life) is a fantasy. But paper efficiency — less paper — is certainly possible. Previously, we’ve talked about paper-reduction and environmentally-friendly options. Today, I’d like to offer a round-up of some new and trending alternatives.
SEND TO KINDLE

Although Kindle e-readers are primarily designed to allow you to download books you’ve purchased or borrowed, owners have pretty much always been able to get other documents onto their Kindles. The problem was that it was a little inconvenient to do so.
Let’s say your team has a work document in Word that’s finally ready for review, but you don’t really want to schlep your laptop on vacation. Maybe you were really hoping to review it in bits and pieces — at lunch, in the waiting room, or while sitting in the carpool lane. Previously, you could have printed the document, which works fine for five pages, but becomes progressively unwieldy at 500 pages, not to mention the impact on the environment, the cost of ink and paper, and the time dealing with loading paper, paper jams and collating the pile once the ceiling fan or the kids or the pets get all the pages out of order.
When Kindle came along, it yielded another option. You could mail any PDF to your personalized Kindle account (or move a PDF from your hard drive to your Kindle via USB cable). All you had to do was turn your document into a PDF.
The problem was that although turning something into a PDF on Mac is ridiculously easy (just click “Print” and select “Save as PDF”), creating PDFs on PCs always involved a few extra steps. To turn a document on your PC into a PDF, you needed to use a third party converter like Cute PDF, PDF Creator, or PDF Printer for Windows 7.)
Once you have a PDF, getting it to your Kindle isn’t that hard:
1) Log into your Amazon account and select Manage Your Kindle. Under Manage Your Devices, you’ll see your Kindle email address at Kindle.com.
2) Add your regular email address to your Kindle “approved” list (just this first time) under Personal Document Settings.
3) From your email account, create a new email. Attach the PDF and put CONVERT in the subject line.
4) Send the email to your Kindle.com address.
5) Turn your Kindle on, and Whispernet should deliver it within a moment.
(Send the PDF to your Kindle via USB by copying the document from your computer to your Kindle, just as you’d do with any attached hard drive, flash drive or device.)
Whew. As you can see, none of this was particularly onerous, but it involved quite a few steps, especially for PC owners.
Amazon’s Send To Kindle makes the process much easier. Amazon released Send to Kindle for PC in January, and just released Send to Kindle for Mac a few weeks ago. The app is free, and lets you easily send any of your documents from your computer to your Kindle devices as well as to any supported Kindle reading applications on your computer or smart phone, and also lets you store the documents in your Kindle Library (giving you some extra backup).
If You’re A PC:
Send to Kindle for PC is compatible with Windows 7, XP, and Vista. It’s also supported on Kindle for Android (version 3.5 or greater) and the Kindle App for iPad, iPhone, and iPod Touch. Once downloaded, you can transfer files by either of two methods:
- From Windows Explorer, right-click on one or more documents and select Send to Kindle.
- From within any Windows application that allows printing, select Print and choose Send to Kindle. (Documents will be delivered in a PDF format.)
If You’re A Mac:
Send to Kindle for Mac is only compatible with Mac OS 10.6 (Snow Leopard) or 10.7 (Lion), so if you’re still running Tiger or Leopard, you’re stuck with the old methods. For Kindle reading applications, it’s supported on Kindle for Android (v. 3.5 or above) and the Kindle App for iPad, iPhone, and iPod Touch.
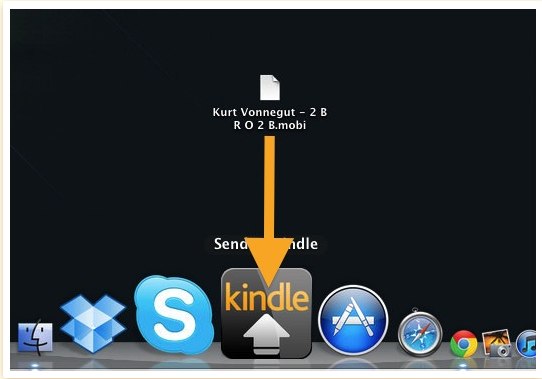
Once downloaded and installed, you’ll be able to move PDFs to your Kindle quickly and easily in any of three ways:
- Drag and Drop one or more documents onto the Send to Kindle icon in your Dock (or launch the application and then drag and drop one or more documents on to it).
- Print — from any Mac application, select Print, then choose Send to Kindle
- From the Finder, select one or more documents, Control-Click, and select Send to Kindle.
Not Just PDFs
You don’t have to convert documents to PDFs first. You can also send Microsoft Word document (in .doc or .docx formats) and various file formats, including .txt, .rtf, .jpeg or .jpg, .gif, .png, and .bmp, which Send to Kindle automatically converts to PDF.
REDUCE PRINTING BY INCREASING PAGES PER SHEET
Most of the time, when you DO want to print a piece of paper, it makes sense to print one page per sheet. But there are instances — say, when you want to print copies of PowerPoint slides, preview the layout of a series of pages in a big document, or create little cheat sheets — when printing multiple pages to one sheet of paper might be nice.
Your printer’s Print function can probably handle this fairly easily. On my Mac, from the Print screen for my HP Deskjet, I select Layout from the drop-down menu and then have a choice of six different page-per-sheet options:
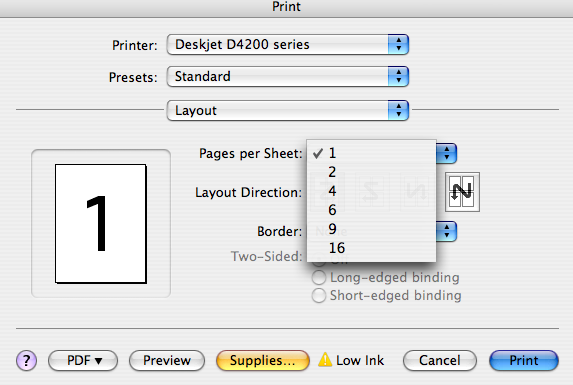
On a PC, the print options are sometimes dictated by the application you’re using. For Word 2007, for example, select Zoom and under the drop-down menu, select Pages Per Sheet and then, if applicable, select Scale to Paper Size.
Windows XP, 7 and Vista users have a new option: iPrint!

iPrint is a free, downloadable printer driver. It works for any (Windows-based) document, in any format, automatically scaling pages to fit the printed sheet and letting you set up multiple pages (to a maximum of four) to be printed on a single sheet of paper.
What? Only four? I know, that may seem like few, but iPrint has the distinct advantage of automatically deleting blank pages and letting you select unwanted pages for deletion from the printout. (And, let’s face it, if we’re combining pages while hoping to maintain readability, four is probably the limit, anyway.)
Even more interestingly, iPrint improves productivity by allowing you to group print jobs from multiple applications into one iPrint session.
And while the general notions of helping the environment and saving ink and paper costs are nice — iPrint estimates a 30-60% annual savings on printing costs — the service goes that one better. iPrint actually measures, tracks and reports your savings!
iPrint also integrates with Click to Convert, its parent company product, to allow you to “print” to PDF or HTML and eliminate paper printing, altogether.
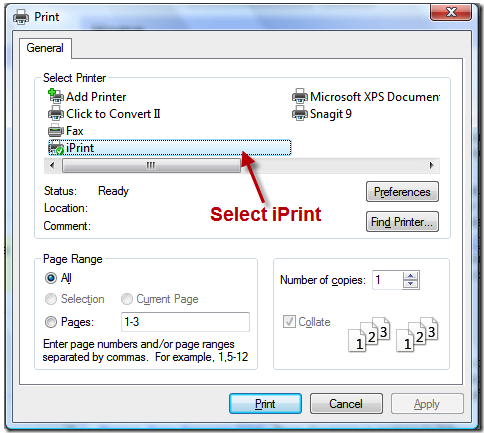
Once you download and install iPrint as a virtual printer, select your print option, and then choose iPrint as your printer. iPrint then automatically displays the print job, the way you’d normally see it when using the Preview function.
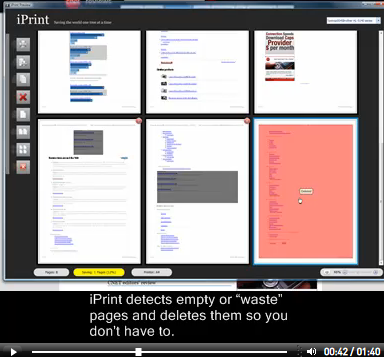
iPrint highlights blank pages in red, and can even detect when a page isn’t totally blank but includes nothing useful, like the final navigation pages if you’re trying to print a web page. (Paper Doll will have an upcoming post on other nifty digital tools to help you save paper when printing from web sites.)
You can opt to un-delete anything iPrint has highlighted simply by double-clicking the page. At the bottom of the screen, iPrint alerts you to how many pages you’ve saved, and in a side-bar, you can then view the document graphically and select how many pages per sheet you’d like to print.
Just the click Print icon, and iPrint prints! Clicking a resulting green button will bring up a report of how many sheets of paper you’ve saved since using iPrint, how many you’ve printed, how much money you’ve saved.
IT’S MY PARTY, AND I’LL GO PAPERLESS IF I WANT TO

There have been digital invitations for a long time now: Evite, Eventbrite, Punchbowl, etc. In most cases, they’ve been straightforward and free. But Paperless Post, founded by siblings James and Alexa Hirschfeld, is different. It’s operated by a seven-person design team creating a vast expanse of templates, from collages to hand-drawn and computer-designed art, and offers something different — pretty online stationery, for a fee.
It’s a simple concept, and yet a little difficult to grasp. Paperless Post’s e-cards purport to look like digital versions of the kinds of formal invitations you’d have printed by a classy stationer. Customers can select from various graphic designers’ collections and customize the card shape, “paper” color, font colors and styles (engraved calligraphy vs. letter-pressed appearance), a card’s “weight”, and even envelope liners (for envelopes you’ll never touch or mail, and which will never be held by your recipients).
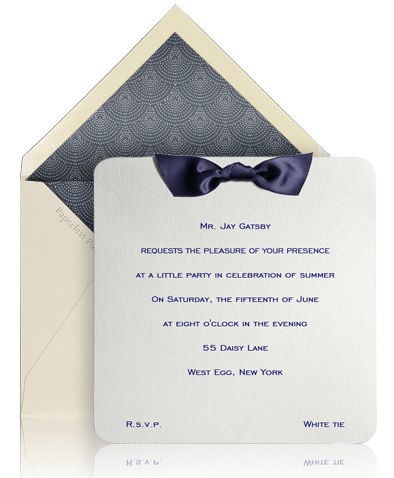
So, you can design your perfect card or invitation, personalize it with your own photo or branded logo, and send it in an interactive envelope via Paperless Post (by uploading your contacts to a Paperless Post address book). Then “promote” the contents via Facebook or Twitter, and even maintain a public link to your creation, which you can send via email or post in a blog or newsletter to reach a larger audience. You can even track RSVPs or registrations, Facebook Likes, opens, clicks and attendance.
Card options include party and event invitations, notes and greetings, change of address and birth announcements, save-the-date cards, and holiday cards.
Paperless Post touts that this is all done at a fraction of the price of traditional paper printing — but Paper Doll can’t get past the idea that no matter how lovely it is, it’s no more real than a picture of a Reese’s Peanut Butter Cup. It conveys all of the visual aesthetic — Paperless Post cards are truly gorgeous — but none of the tactile enjoyment.
For a clam bake, I get it. But as pretty as it is, I’m fairly certain Paper Mommy would share my horror at a digital Bar Mitzvah invitation, and I honestly believe the combination of “formal” and “digital” are as suitable as a tuxedo T-shirt. Cute, amusing, but entirely inappropriate for the real thing.
Paper Doll definitely believes that technology, and particularly the advent of tablet computers like the iPad, will eventually mean a dramatic reduction in paper, and in most cases, this is a good thing. But as I noted way back in the classic post, A Valentine to Paper, there are delights that only paper can bring:
Isn’t there still something romantic about a rainy Sunday afternoon spent wrapped in a fuzzy blanket, noodling through old, dog-eared photos and tear-stained love letters? Will our children’s children feel just as warmhearted if they rifle through digital photos and archived emails?
Efficiency is one thing, but you can have my paper when you pry it from my cold, paper-cut covered hands.
Follow Me