Paper Doll
Paper Doll’s Manual Override – Part 1: Declutter and Organize Owner’s Manuals
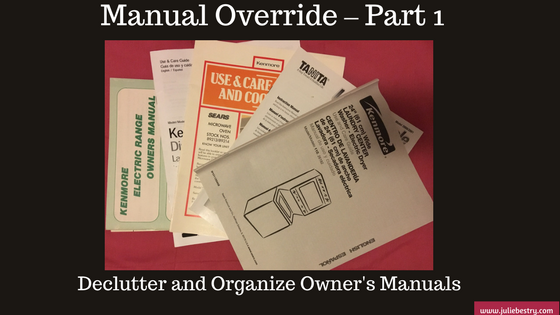
A manual override is a mechanism where control is taken from an automated system and given to the user. Our new three-post Manual Override series takes control from the entropy (which seems like an automated system) that develops from mountains of disorganized owner’s manuals and gives that power back to you in the guise of organized, streamlined systems.
I recently helped a client re-organize her kitchen. She and her husband have a gorgeous, newly renovated kitchen with many modern conveniences, like roll-out shelving, but they also had a lot of excess mugs, plasticware, and far more frying pans than burners. As we moved from cabinet-to-cabinet and drawer-to-drawer, we identified what didn’t belong in the kitchen, reduced the duplicates and triplicates, and relocated most items to be closer to where they are used or to the items with which they are used. But one drawer – one I find in most kitchens (but some dens, offices, bedrooms, and occasionally bathrooms) – was filled to the brim with paper. Not recipes. Not mail. But manuals!
In almost every home, there’s a drawer or cabinet or bin filled with installation instructions, operational manuals, repair manuals, and similar booklets – they pile up but are rarely addressed. Too often, the piles are populated with manuals for items that clients have long-since discarded, donated, lost or sold. But the manuals, they live on, like ghosts of prior purchase decisions.
If you want to reduce the manual clutter, you have three main options: keep and organize the paper manuals you have, use online manuals, or develop your own personalized digital system. Today, we’re going to cover how to organize your traditional paper manuals.
MAINTAINING THE PAPER MANUALS
Gather all of the manuals in your home. Go room-to-room, checking under, behind, and on top of appliances, and in drawers and cabinets. If you’ve previously had a drawer, bag, or filing cabinet where manuals were supposed to go, you still may find that members of your household have borrowed manuals and then left them near where they were used, far from their “homes.”
Identify the manuals for appliances, electronics, and other items you are selling, donating, or no longer own. If the manuals are leaving your home, consider scanning and uploading them to the digital manual archives we’ll be discussing in Part 2 of this series.
Match useful manuals to whatever items you are selling or donating to make things easier for the new owners.
Recycle the manuals for items you no longer own or for anything you already know how to use. If you need written instructions for your toaster or hair dryer, you’re either buying products that are far too fancy for your busy lifestyle or you’ve got bigger problems than organizing.
(And seriously, no mention of PopTarts? Toaster Strudel? Paper Doll does not approve.)
Recycle the manuals in languages you don’t read. If you’ve got a collection of foreign language manuals from items you purchased abroad, consider asking your local middle school or high school language department staff if they’d like the manuals for translation projects.
Sort manuals by category or location. For example:
- major kitchen appliances (refrigerator, oven, stove, dishwasher, microwaves)
- small kitchen appliances and gadgets (food processors, blenders, crockpots)
- laundry room/mud room appliances (washers, dryers, steamers, vacuums)
- major household appliances (furnace, air conditioning, water heater, air cleaner)
- entertainment electronics (TV, home audio system, DVR, streaming devices)
- computer/electronics (computers, peripherals, tablets, phones)
- Internet of Things (IoT)/Smart Home devices
- automotive
Create a physical system. There are multiple methods for filing user’s and owner’s manuals, installation instructions, and similar materials. The key factor is developing a system for quick, easy retrieval of a manual when something has gone kablooie! (Please note, this is the technical term for household malfunctions.)
1) Traditional Files
Most of my clients prefer incorporating their manuals into the “household” section of their Family Filing System. You might want to check out two classic posts, Family Filing – As Easy As Pie and Paper Dolls Live in Paper Households for insight, but in general, this means using traditional left/middle/right-tabbed folders and grouping them together, by category, within hanging folders.
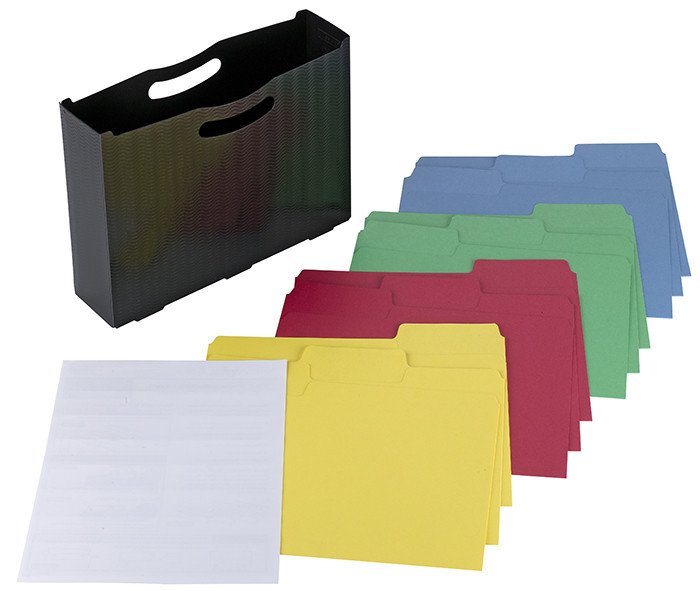
Filing drawers, milk crate-style filing boxes and desktop file boxes, just as you’d use for the rest of your household files, all work well.
The main advantage of the file folder system is that you can flip through a relatively small set of manuals in the narrowed, categorized file folders to find what you need. You can color code categories to add some pizzazz but still maintain your files in a way that matches the rest of your filing system. The main disadvantage is that other household members may tend to grab the entire electronics folder, plop down in the living room to fiddle with the audio system, and leave the whole folder, with piles of papers, splayed across the floor or nearest horizontal surfaces. It’s a tidy system until someone chooses to make it less tidy. Maintenance is key.
2) Three-Ring Binders
Some clients prefer to create (multiple) three-ring binders and insert their manuals in plastic sheet protectors. To use this system, you’ll want:
- multiple 2″ or 3″ three-ring binders, preferably with D-rings, with sturdy (rather than flexible) covers
- 8 1/2″ x 11″ standard top-loading sheet protectors with three-hole punched left margins (Consider heavy-duty or extra-capacity protectors if you’ve got manuals that are particularly hefty.)
- Binder dividers to label sub-sections and/or create a table of contents (This is optional.)
The advantage of the three-ring binder is that you can store all manuals upright on any bookshelf and return the binder to its place with ease. You have to bear in mind that some manuals (such as those for computers) are going to be so thick as to take up most of the space in the binder. It’s also slightly less convenient to remove (and later replace) a manual from a sheet protector vs. a file folder.
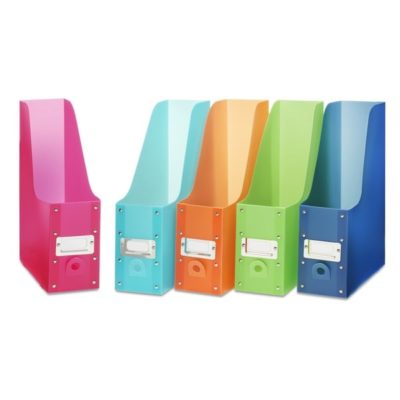
3) Magazine Files
Some households need or want a less structured system for maintaining manuals. For these clients, I recommend some attractive magazine files, locating them close to the items the manuals address rather than in a centralized location. So, one magazine file for the kitchen, perhaps bookending cookbooks or on the kitchen desk or in a cabinet; one magazine file for the laundry room; one for the major HV/AC appliances stored on a basement bookshelf, and so on.
The physical aspect of the system you choose is less important than picking one method and committing to it so everyone in the household knows where to find a manual when the water heater is whistling, the DVR is blinking, or Siri and Alexa join forces to lock you out of your house.
The water heater is whistling! The DVR is blinking! Siri and Alexa joined forces to lock you out of the house. Find the manual! Share on XCreate a behavioral system so that at least once a year, you go through your folders, binders or files and let out-of-date manuals go. (Consider adding it as a task reminder in your phone for the cold, boring days of January.) Alternatively, develop a habit so that every time you acquire a new item, put the manual in place and review the folder/binder/file into which that manual goes.
Having a system for your operational, owner, and repair manuals means that you (and anyone else in your home) can find a manual easily. However, the more manuals you have, the more overburdened you may feel by having so many paper documents. Also, there may be items you’ve owned so long that the manuals have gotten lost, or you might be the second (or third) owner and the manual never made its way to you. If either having too many manuals or lacking the manuals you need sounds a bit familiar, there are some great alternatives.
WHAT ABOUT MISSING MANUALS?
It’s not unusual for manuals to go missing. They might have been accidentally thrown out with the packing materials, tucked away with the board games, or tossed in the trash. If you were re-gifted an item or bought it second-hand, the manual may never have made it to you in the first place. You could just call the manufacturer, get put on hold until you’ve memorized The Girl from Ipanema, and find out that the company has no more tangible manuals. That’s OK. That’s where digital manuals come in.
Digital manuals, accessible online, provide two huge advantages:
- You can decrease or eliminate household storage given over to owner and repair manuals.
- You can access a manual for an item from anywhere. This means that if your grandma calls you to complain that her soap opera is suddenly in Spanish (she probably hit the remote’s SAP button, by the way), you can look up the manual for her on your computer from work, your iPad from vacation, and seriously, your phone from anywhere.
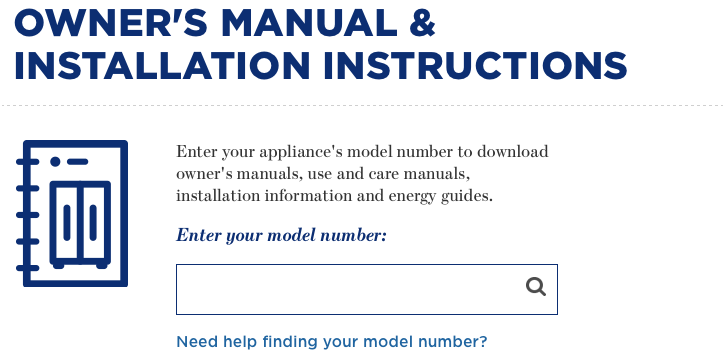
But first, you have to find the manuals you want. You would think that this far into the 21st Century, it would be as easy as finding the manufacturer and entering your product’s name or model number. This is certainly the case with some of the big guys. For example, with GE Appliances, you just type in your model number to get your installation instructions and owner’s manual.
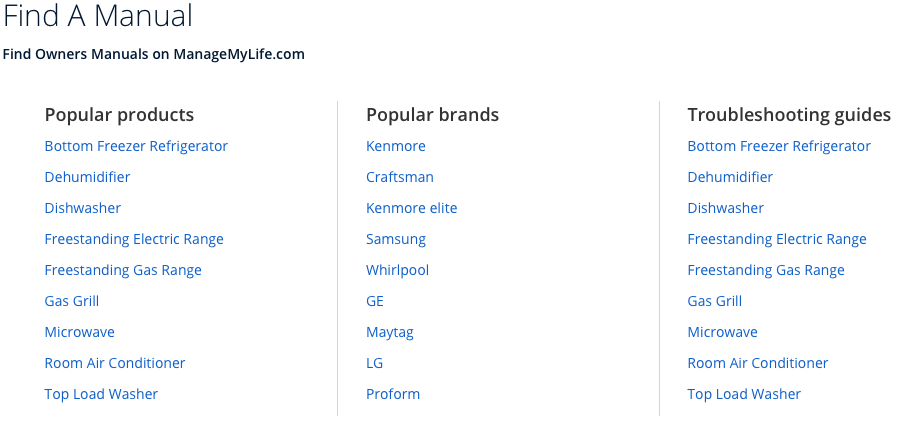
Similarly, Sears has a Find A Manual page where categories of popular products and brands can be searched to find manuals listed at their associated Shop Your Way site, as well as a series of clickable troubleshooting guides linking to Sears Parts Direct.
Sadly, many manufacturers do not make finding their manuals that easy to locate. In a perfect world, upon Googling your product, manufacturer, and model number, you’d be directed to the appropriate place on an official site. And, in many cases, it is that easy. But not always.
To find manuals you are missing, or to access digital versions of manuals so that you can replace the paper versions, there are a variety of online sources. Watch this space for the second part of this series and find a robust offering of online manual resources.
Paper Doll Post:

Back-to-School Organizing News You Can Use: 3 Solutions to Save Time, Money, and Serenity

Wait, it was just Independence Day! Why are we talking about back-to-school organizing? In ye olden days, when I grew up in Buffalo, New York, where kids still don’t go back to school until after Labor Day, talking about back-to-school so soon after the 4th of July would be like stores putting up Christmas decorations right after Halloween. (Oh…right.)
But there’s a method to the madness. In many parts of the country, students go back to school in the middle of the summer. In my county in Tennessee, the public schools start on August 3rd, and mere miles from me in Georgia, students go back on the first of August. But even for kids going back to school in September, that’s only about eight weeks from now. Instead of rushing to get everything done, here’s a roundup of ways to organize your approach to the back-to-school season.
ORGANIZE YOUR ADHD STUDENT – FREE WEBINAR
Paper Doll‘s colleagues (and longtime friends), Michelle Cooper and Michelle Grey of Student Organizers of Atlanta will be presenting a free, live webinar entitled Practical Organization and Time Management Strategies for Middle and High Schoolers with ADHD on July 20, 2017, at 1 p.m. ET.

Presented as part of ADDitude Magazine‘s ongoing webinar series, the webinar will provide strategies for:
- Managing the day-to-day organizational challenges facing students both inside and outside of the classroom
- Understanding your child’s “thinking style” and finding organizing methods and tools that fit his or her style
- Using organizational systems that will improve his or her chances of academic success
- Collaborating with your child and the teachers to support his or her efforts at organization
- Using products, books, and websites to ease the process of organization for your student
Register for the webinar and take it live, or you can use the replay link to watch (or rewatch) the webinar for free, any time up through next January 20, 2018.
Learn more about ADDitude and check out the other webinars in the series. If your child is heading to college, both of you might want to watch the webinar on July 11, 2017, entitled The College Transition Guide for Teens with ADHD.
ORGANIZE YOUR FINANCES – TAX-FREE HOLIDAYS
Over the four weekends from July 21 through August 13, sixteen states will be having tax-free holiday weekends. In general, these states allow retailers to sell clothing and footwear, school supplies, computers, and sometimes backpacks, books, and other “tangible personal property” without charging sales tax. In my state, that’s a savings of 9.25%. Combine that with various 10%-25%-off sales, and that’s a great opportunity to stock up on necessities.
Note: Some states, such as Georgia, have discontinued their tax-free holidays, so be sure to check out states adjacent to yours.
Click on the name of your nearest state to be directed to that state’s official tax-free holiday page.
Alabama (July 21-23, 2017)
Tax-free: Clothing (up to $100), Computers (up to $750), School supplies (up to $50), Books (up to $30)
Arkansas (August 5-6, 2017)
Tax-free: Clothing and footwear (up to $100), Clothing accessories and equipment (up to $50), School and academic art supplies (no dollar limit)
Connecticut (August 20-26, 2017)
Tax-free: Clothing and footwear (up to $100)
Florida (August 4-6, 2017)
Tax-free: Clothing, footwear, wallets, and bags (up to $60), School supplies (up to $15/item), Computers (up to $750)
Iowa (August 4-5, 2017)
Tax-free: Clothing and footwear (up to $100)
Louisiana (August 4-5, 2017)
Tax-free: Tangible Personal Property (3% tax rate up to $2,500; a 2% state sales tax exemption applies, so qualified purchases are subject to only 3% state sales tax)
Maryland (August 13-19, 2017)
Tax-free: Clothing & footwear (up to $100)
Mississippi (July 28-29, 2017)
Tax-free: Clothing & footwear (up to $100)
Missouri (August 4-6, 2017)
Tax-free: Clothing (up to $100), Computers/peripherals (up to $1,500), Software (up to $350), Graphing calculators (up to $150), School supplies (up to $50)
New Mexico (August 4-6, 2017)
Tax-free: Clothing and footwear (up to $100), Computers, tablets, and e-readers (up to $1,000), Computer equipment (up to $500), Book bags and backpacks (up to $100 per item), maps and globes (up to $100 per item), Calculators (up to $200), School supplies (up to $30)
Ohio (August 4-6, 2017)
Tax-free: Clothing (up to $75), School supplies (up to $20)
Oklahoma (August 4-6, 2017)
Tax-free: Clothing and footwear (up to $100)
South Carolina (August 4-6, 2017)
Tax-free: Clothing (no limit) School supplies (no limit), Computers, printers, peripherals, and software (no limit)
Tennessee (July 28-30, 2017)
Tax-free: Clothing (up to $100), School and art supplies (up to $100), Computers (up to $1,500)
Texas (August 11-13, 2017)
Tax-free: Clothing, backpacks and school supplies (up to $100)
Virginia (August 4-6, 2017)
Tax-free: Clothing (up to $100), School supplies (up to $20), Energy Star products (up to $2,500) and a variety of hurricane-preparedness items.
Tax-free holiday tips:
- The price limits generally refer to the price-per-item cost, not your entire purchase. However, if a store is placing limits on entire purchases and you have a large family, you might want to have your older, more responsible children stand in line and pay with cash.
- Make a list of what each child needs before you get to the store. (Check with your school to see if a grade-appropriate list has been posted online.) It’s tempting to buy anything that seems like a bargain, but acquiring what you don’t need just because it’s a “deal” is the fast track to clutter.
- Set a budget for each shopping category.
- Shopping with smaller children will stress you (and your kids) out, so consider trading shopping and babysitting time with a friend or split babysitter costs while you and your friend hunt for bargains together. Let older children participate – use it as an opportunity to practice math skills (“How much is this shirt if it’s marked as 15% off?”) and encourage them in finding good deals on high-quality products. The more responsible they are, consider rewarding them with the amount by which they came in under budget to apply toward something fun.
- Remember to keep your receipts in case you find that you need to return something; note each retailer’s return policy.
ORGANIZE YOUR STUDENT’S SCHEDULE – A NEW KIND OF PLANNER
As mentioned a few weeks back when I was talking about Time Timer, many people, especially students, can have trouble mastering the concept of the passing of time, which makes it difficult to properly plan academic and life tasks. When I was in middle and high school, almost nobody used a planner or a calendar. These were the days when Trapper Keepers were the height of organizational technology and pocket-sized assignment notebooks yielded the best option for academic time management. Somewhere during the <mumble mumble> intervening decades, schools started providing and/or requiring student planners to help keep up with homework assignments, projects, and tests.
These planners give students the opportunity to mark down what they must do. It’s not clear, however, that students get the time management skills and system-training they need to master the intricacies of juggling academics, extracurriculars, part-time jobs, and familial obligations, or learn when to complete it all. That’s where Leslie Josel comes in.
Professional organizer Leslie Josel of Order Out of Chaos, is not just a colleague and friend; she’s also a fellow Cornell University alum, so when I first heard about her product line for students, I paid particular attention.

Paper Doll with Leslie Josel, © 2017 Best Results Organizing
At first, Leslie’s organizing practice concentrated on working with chronically disorganized clients, people with ADHD, students with learning challenges, and clients with hoarding behaviors. Eventually, (like Michelle and Michelle, above), she expanded her offerings to include coaching services for both students and parents. In 2016, Leslie expanded her company’s product division and officially launched Products Designed With Students in Mind.
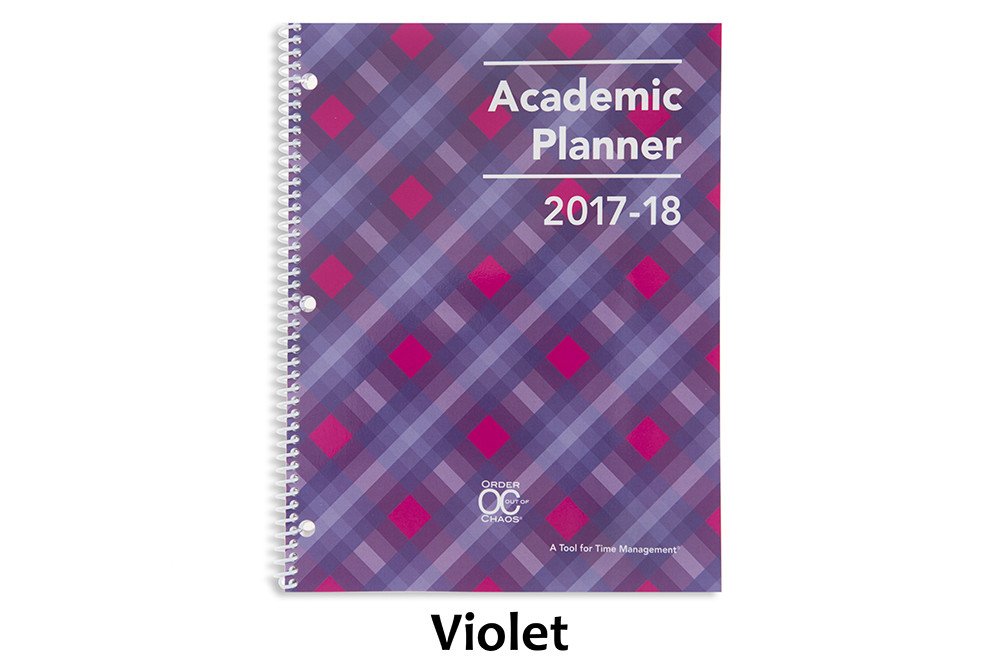
Leslie’s big idea was the Academic Planner: A Tool for Time Management®. The 2017-2018 Academic Planner comes in two sizes: letter-sized (8 1/2″ x 11″) and personal-sized (8 1/4″ x 8 1/2″), both for $18.99. Based on an academic year calendar, the planners run July through June. They’re spiral bound, but also three-hole punched to allow students to pop them right into their binders.
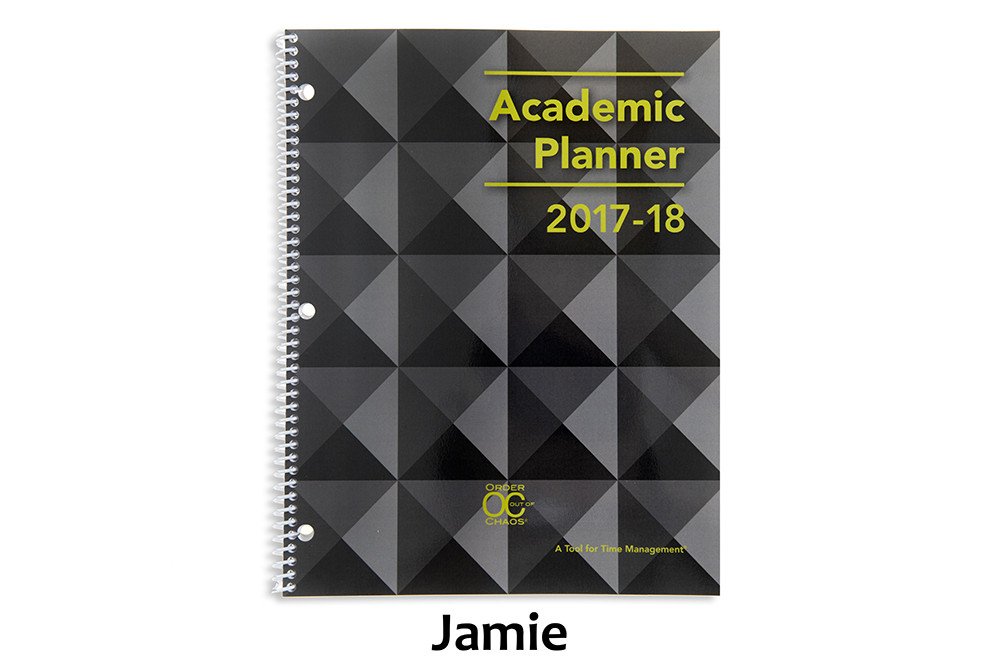

Each size is available in four styles of planners: Jamie (black), Riley (orange/blue), Taylor (white) and Paper Doll‘s personal favorite, Violet (pink/purple). The interior pages measure 7” x 11”, offering up more than the typical space for writing down assignments and activities.

Introductory Pages
The front pages, measuring the same size as the front and rear cover of the planner, include:
- a contact information section so a lost planner can be easily returned
- a class schedule (subject, period, instructor, room #, days) to quickly acclimate students for the new year (and give a fellow student, armed with the contact info, an easy way to find the owner at the right classroom and return a lost planner)
- a Welcome Letter from Leslie to parents
- a detailed set of Planner Pointers, providing excellent guiding tips for making smart use of the planner. (My favorite? Writing “No Homework” if none was assigned so the student never has to wonder if he or she just forgot to write something down.)
- a two-page Planner Use Guide, showing the planner in action — noting assignments, reminders (“Get permission slips signed!”), after-school activities and previews for the next week
- Homework Helpers, tips that could only come from a professional organizer experienced with helping students gain control of their work.
- a sample Project Planning Guide to help plan long-term assignments (Students can download more guides for future projects.)
- a two-page School Year at a Glance
Planner Pages
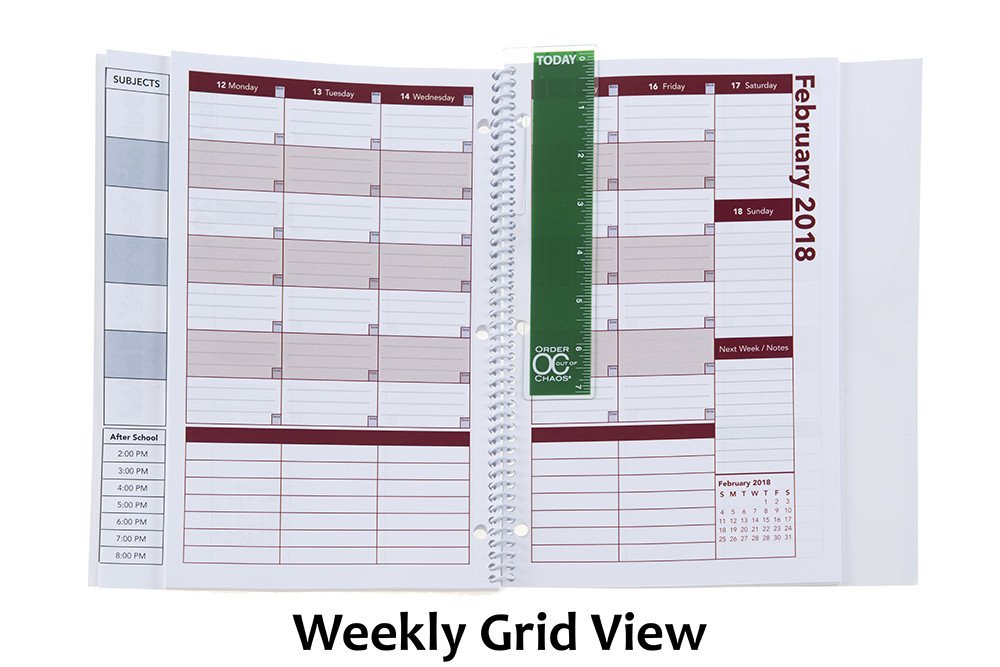
On the last (extra-sturdy) full-sized front page, the Academic Planner has a vertical index page that peeks out from behind (and to the left) of the actual planner pages. This index page means that students record their class subjects (in up to 7 subject boxes) only once. Then everything on the upper calendar sections of the planner pages lines up with the appropriate class subjects, course by course, horizontally (with days of the week arrayed, vertically) across a two-page layout. (You can download a sample planner page.)
The next row (in the personal-sized planner, only) is for To Do items.
Below that, there’s an hour-by-hour schedule from 8 a.m. until 8 p.m. Typical student planners only cover the academic day and don’t take into account post-school activities, like doctor’s appointments, tutoring, clubs, rehearsals, sports, and jobs. This planner provides oodles of space for all of those activities and recognizing conflicts (just like in the best calendar planners for adults). This really helps students see the forest and the trees of weekly time management.
Other Features
- At the start of each month, there’s a left-side full-page monthly calendar with space to note major events, holidays, and vacations, and adequately plan longer-term projects.
- The right-side Notes page facing the calendar offers up ample room for planning, notes, and the kinds of serious thoughts only people between 12 and 18 can understand.
- There’s a clear poly pocket at the rear of the planner for safely keeping notes, permission slips, and other documents too small for a student’s binder.
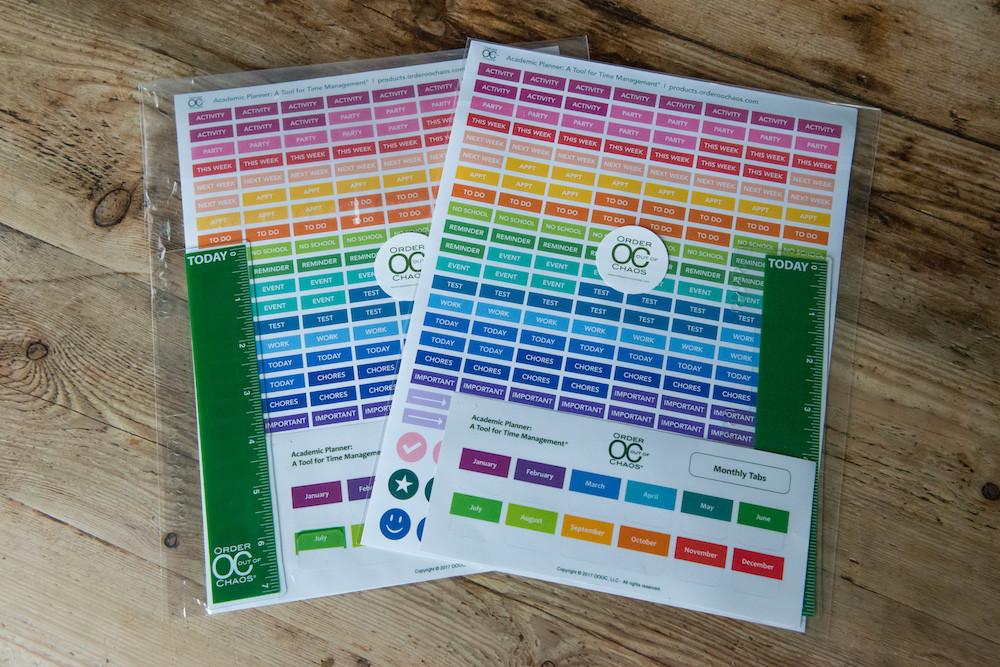
- A bonus Academic Planner Accessories Pack (sold separately, for $8.97) includes a plastic page marker that clips into the spiral binding, so it’s easy to find the current week in the planner, a set of monthly tabs, and a really bright, sunny set of useful stickers.
But of course, measurements, styles, and features don’t give credit to what the 2017-2018 Academic Planner: A Tool for Time Management® can actually do to help students. For that, let’s go to the video!
Enjoy your summer, but remember that a little organizing now can make back-to-school the most wonderful time of the year!
Disclosure: Some of the links above are affiliate links, and I may get a small remuneration (at no additional cost to you) if you make a purchase after clicking through to the resulting pages. The opinions, as always, are my own. (Seriously, who else would claim them?)
Paper Doll Post:

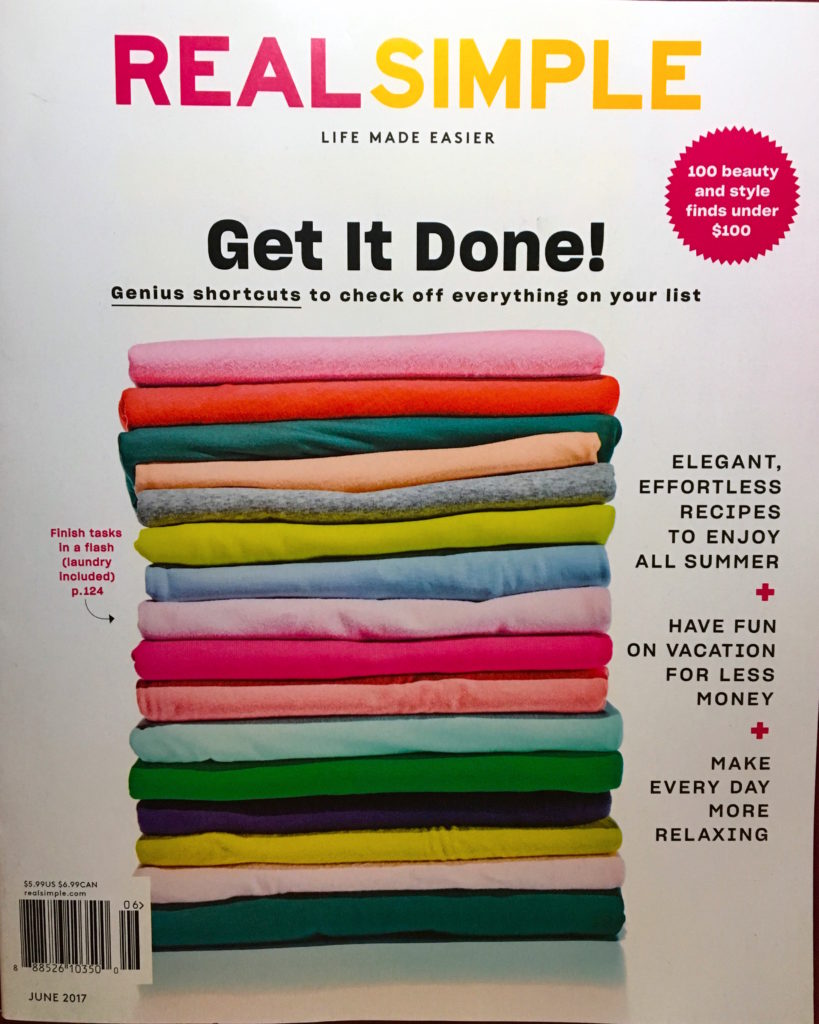
5 “Real Simple” Reasons We Don’t Get the Laundry (or Paperwork) Done
Did you just do a double-take? Laundry? In a Paper Doll post? While we rarely talk about organizing non-paper aspects of domestic life, a recent interview presented an interesting way to use laundry to consider how we procrastinate on other tasks, like paper management.
A writer for Real Simple Magazine contacted my colleague, the fabulous Dr. Melissa Gratias, about the psychology behind why people fail to finish their laundry. Being interviewed by Real Simple is a plumb opportunity, but Melissa – a psychologist by training – focuses on corporate organizing and professional productivity. Melissa honored me by suggesting Real Simple should get my take on the topic.
In the end, in Real Simple‘s June issue about “getting it done,” laundry ended up being just one small section. (See my quotes on page 128!) But you, dear readers, have the opportunity to learn it all!
The reporter asked:
Why [do] we have trouble finishing the laundry (wet clothes left in the machine, clean clothes not folded, folded clothes not put away) – and how we can change our habit to get it done in one swoop so it’s off our plate?
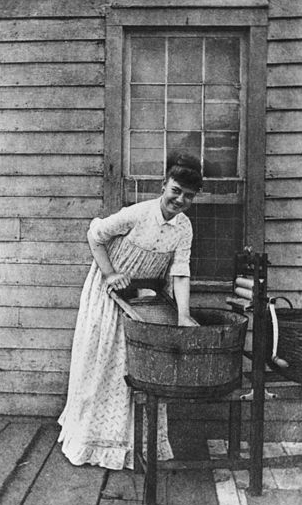
The key word in the inquiry was “finishing” but for many people, even starting laundry is the bigger obstacle. It’s funny to think about why we put off laundry as this huge, scary thing, because our great-grandmothers used finger-peeling washboards and our great-greats had to take the washing down to the river to beat the clothing against the rocks.
Meanwhile, we drop our laundry in metal boxes and push a few buttons! It’s not particularly onerous, so there must be more to it than the labor — and, as you may have suspected, much of it is psychological. However, small tweaks can dramatically improve our ability to get our laundry done and get us on our way — fully clothed, unstained, and possibly in a fashionable mode of dress.
First, laundry is not a task, but a project. Tasks are singular, but the ongoing saga of the laundry project involves multiple sequential tasks:
- collecting our laundry from the various places we (and our children, and our spouses who sometimes act like children) drop or toss them
- remembering what special tasks (pre-treating stains, removing accessories, securing drawstrings) must be performed
- sorting laundry by color and/or temperature
- washing (but the actual labor is done by the machine)
- transferring the laundry to the dryer, making sure to remove any items that must be line-dried or hung over sweater racks or otherwise given extra attention
- drying (again, done by the machine)
- removing laundry from the dryer in a timely manner so that wrinkles don’t set in
- folding laundry (clothing, bedding, towels, etc.) and hanging clothing
- putting it all away
Wow. These discrete tasks should naturally flow from one to the next, just as the various steps in cooking a meal, but we’re much more inclined to wander away, mid-task, with laundry.
Consider the following obstacles and solutions:
1) PROBLEM: We lack timely triggers to start laundry.
At least, we don’t have them in the same way we do as for preparing a meal. (What? Do you starve for fluff & fold?) Other than in college, when students tend to put off laundry until they run out of clean underwear, most adults don’t have a natural trigger to get started on laundry.
SOLUTION: Create your own triggers.
Pick days and times when you’ll do laundry, like during your children’s piano lessons and scouting meetings on Tuesday and Thursday afternoons, or on weekend evenings after dinner, because the bulk of the work can be done quickly before TV time and the folding can be done during commercials. Set alerts on your phone or computer and let them serve as your valet or butler — albeit one unwilling to do laundry, but happy to remind you that it must be done.
This concept works just as well for paper-oriented tasks. Instead of waiting for your bills to be due (or overdue) — the equivalent of running out of clean laundry — schedule a time to work on your tasks. Bill-paying is a kind of correspondence (though you’re sending money, rather than cheery news), so you might schedule other tasks, like writing thank-you notes at the same time. In your professional life, group tasks like responding to emails or drafting your business newsletter at set times on certain days, like after your staff meeting on Wednesday mornings.
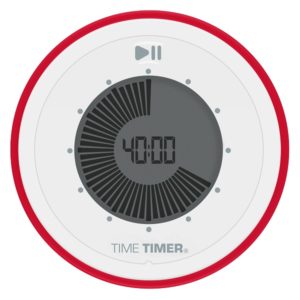
The key is to identify your trigger, set an auditory or visual alert to help you focus on the trigger, and create a time block to complete the task. Maybe the new Time Timer we recently reviewed can help?
2) PROBLEM: We anticipate that laundry will be more of a pain than it actually is.
Although laundry requires multiple steps, most of them are easy and each can be completed in a matter of minutes (except for what the machines do). But many of us recall when laundry was difficult (requiring amassing adequate stashes of quarters, dragging heavy laundry bags from our dorm rooms to basement laundry rooms only to find all the washers were in use), and that sense memory makes us subconsciously rebel against even the idea of doing laundry.
SOLUTION: Find ways to make doing laundry less unpleasant.
- Install better lighting in your laundry room, and clear the space of clutter.
- If your laundry room is also used for other purposes, create a separate laundry zone. Corral your bottles of stain remover, boxes of fabric softener, lint remover, and everything except your heavy detergent bottles, in rubber dishpans or tubs you can easily slide off cabinet shelves.
- Install a valet hook, a rolling clothes rack, and/or a retractable clothes line in your laundry area to make buttoning, zipping, and hanging clothes easy.
- Get rid of (or fix) anything about your laundry area that makes you avoid it.

These tips work for paperwork, too. Do you put off filing, remembering that one time it took you all weekend to deal with six months’ worth of paper backlog? You have almost ten years of Paper Doll advice on how to create a filing system so that everything is logical and easy to find. Join the Clean Desk Club, and learn what papers you need to keep and what you can toss by getting Do I Have To Keep This Piece of Paper? Instead of filing months of papers in drudgery, do short bursts every week, and put on your favorite music to liven the mood.
3) PROBLEM: We lack systems and don’t set aside time to complete the project.
Work isn’t completed until it’s done, and laundry isn’t done until it’s put away. But that injects another problem. Because we procrastinate about doing laundry, we then feel that we have to do ALL THE LAUNDRY all at once, at which we either will fail (making us resentful of that sense of failure) or succeed (making us resentful that we’re expected to ever do it again).
SOLUTION: Create physical and behavioral systems to make the work easy to complete.
- Only start laundry when you’re going to be around to complete a load from start to finish.
- Don’t start a load of laundry late at night – you’ll be tempted to go to bed and leave the items in the washer or dryer.
- Sort laundry sessions by type. Do bedding and towels when it’s more likely you’ll be interrupted. (Nobody minds wrinkled towels).
- Do more smaller loads of clothing. It’ll wash better and dry faster.
- Know how long your washer and dryer cycles take; if they don’t have musical alerts that you can hear from elsewhere in the house, set your kitchen timer or phone alarm to remind you to move the process along.
With papers, conquer your ingrained avoidance by making sure you have systems that make it easy. Create homes for what is to-be-paid and to-be-filed, and a filing system that is aesthetically pleasing (if that’s what gets you going) and ergonomic (with good lighting and a comfortable place to sit so you don’t hurt your back while working).
Behaviorally, you can complete small tasks in whatever time you have available, but if you’re working on a larger project, like developing a family budget, writing your graduate thesis, or putting together your start-up’s marketing plan, you need to see the big picture and make sure you’ve blocked time to take your project from start to completion.
4) PROBLEM: We resent that we’re doing all the work!
While some of us find the folding of laundry to be almost Zen-like, for most people it’s not exactly
Disney World. That doesn’t mean laundry must mean misery.
SOLUTION: Don’t feel obligated to do it all by yourself.
Delegate: If your kids are old enough, teach them how to do laundry, starting with hard-to-destroy items like towels, and help them to understand laundry instruction tags, temperature settings, etc. Start by working together, and once they’re good to go, include the least destructible types of laundry on their chore charts.
Share: Nobody says laundry has to be a solo adventure. Just as with kitchen tasks (I’ll wash, you dry), split up the effort so it seems like less work. If you get the clothes sorted, pre-treated, and into the washer, make it a tag-team event and let your partner get it from the dryer to the bedrooms and linen closets.

Trade tasks: If you really hate doing laundry, even with these tips, see if your spouse has a much-detested task of similar effort and value, and trade-off, even if only for a few weeks at a time, to give you both a respite.
Entertain yourself: If nobody else can or will help, make laundry time delightful. Listen to podcasts or favorite songs while you do the bulk of the work, and let yourself focus on fun rather than work during the washer and dryer cycles.
This advice is applicable in your non-laundry areas, too. Whatever you have to do, if it’s not something at which you’re skilled (or willing to get skilled), find a way to get it off your plate. If you don’t have a committee member, colleague, employee, neighbor kid, or pal to whom you can delegate or with whom you can share, hire someone affordably:
5) PROBLEM: Our closets and drawers are bulging.
Here’s where the Pareto Principle really comes into play. 80% of the time, we wear the same 20% of our wardrobe; we wear, we wash, we dress out of the laundry basket. Our clothes don’t make it back to our closets and drawers because we often know that trying to squish hangers into tightly jammed spaces or folded clothing into overstuffed drawers will be futile. It reminds us that we must purge our excesses, and to avoid that discomfort, we subconsciously avoid even taking clothing back to where it belongs.
SOLUTION: Declutter!
- Pair up with a spouse, teen, or friend, or enlist the aid of a professional organizer so that you can reduce the number of items that no longer fit (your body or your lifestyle) or flatter.
- Arrange by clothing type (to make it easier to know where to return any just-laundered item.
- Move empty hangers to one area, so you’ll be able to grab them for laundry use instead of fighting to untangle them amid the chaos. Move anything that isn’t clothing, shoes, or
accessories elsewhere. - Pare down linen closets to what you actually use; jettison threadbare towels; donate sheets that don’t fit any size beds you currently own.
To get from to-do to halfway-done to finished with paperwork, eliminate the distracting clutter. Get the kids toys off your bill-paying desk and back to the playroom, pull and shred the household bills from 1987, and get the dust-covered knickknacks out of your workspace.
Finish the laundry. Finish the paperwork. Get on with your life!
Paper Doll Post:

Justick by Smead: Vertical Organizing Powered By Balloon Magic
Remember the first time you ever saw someone rub a balloon on his head and then stick the balloon to the wall? You were perhaps four or five years old, and it probably seemed like magic. At some point you learned it was static electricity, but if you’re being honest, doesn’t it still seem like magic?
Well, Smead’s newest answer to solving paper clutter with vertical storage pretty much runs on balloon magic.
JUSTICK BY SMEAD ELECTRO BULLETIN BOARDS
Last year, at the NAPO2016 conference in Atlanta, we got a sneak preview of the Justick by Smead collection, but this year in Pittsburgh, we got our official introduction to their new display boards. We viewed a desktop copyholder, the kind of item you’d usually use for displaying documents to give you easy access while typing at your computer. But look more closely at the Justick — and take a moment to appreciate the adorable tot on the left, the daughter of Smead’s Associate Marketing Manager Leiann Thompson. (Paper Doll is sending a shout-out to Leiann, soon to welcome tot #2 into the world!)
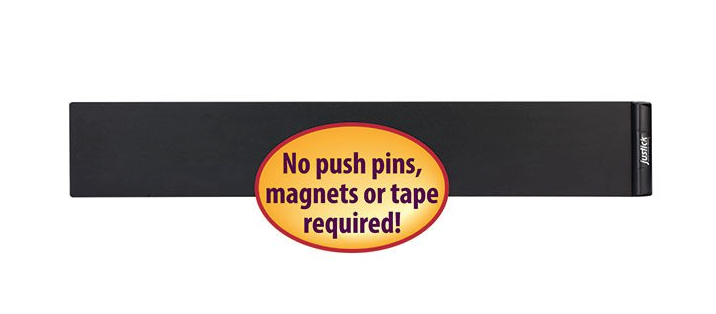
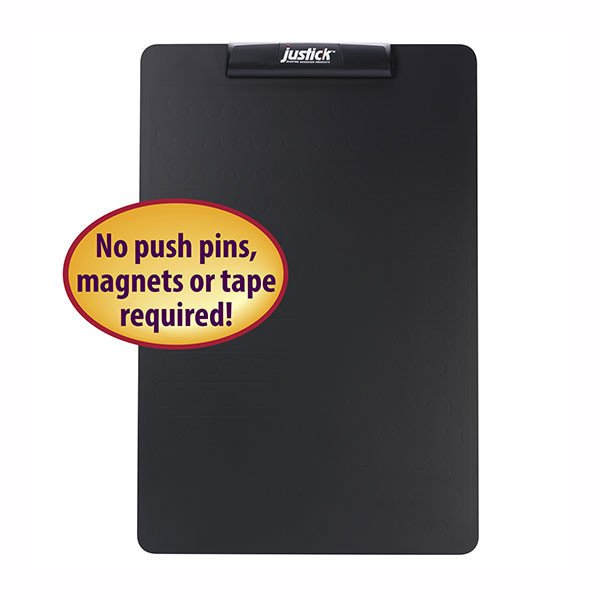
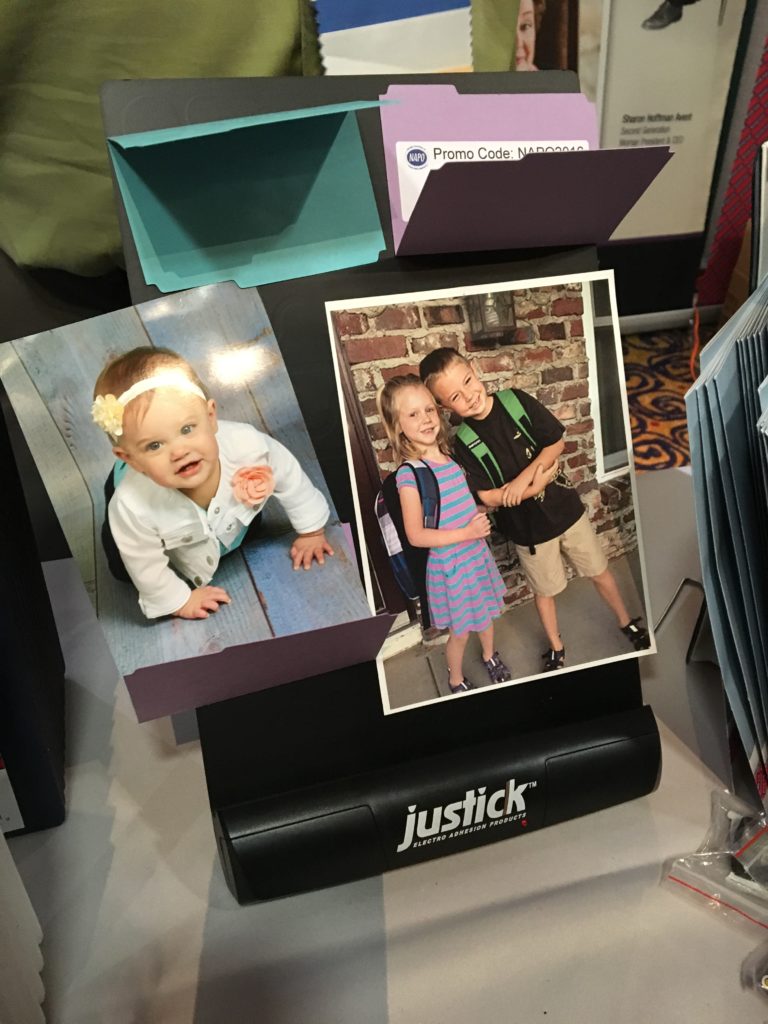 Can you tell that there’s nothing holding the photos to the copyholder? The photos and doodads adhere to the Justick as if by magic. Rather than needing push-pins, glue, magnets, tape, or that sticky roly-poly stuff used to hang posters, Smead has developed an advanced type of bulletin board that allows you to organize things vertically — using nothing but the power of static electricity!
OK, officially, it’s electro-adhesion surface technology.
Justick’s technology keeps in place whatever you put on the board: photos, memorabilia, reminder notices, business cards, phone lists, illustrations, training material, etc., and does so vertically. And no, you don’t have to rub anything on your head to get it to stick.
The electrical energy behind the Justick boards is powered by four AA batteries, or you can use an optional AC adapter if you’d rather keep it plugged in. Justick products have modern aluminum frames and frameless styles, and there are a variety of display solutions within three main categories:
- Electro Bulletin Boards
- Dry-Erase Boards with Clear Overlays
- Commercial Communication Solutions
Justick Frameless Wall Strip Display
Start by hanging this simple, black, unobtrusive, 48″ W x 8″ H strip on your wall.
Next, grab anything you’d like to keep in front of your face, but off of your desk. Your toddler’s newest artwork? Up it goes. The business cards for the people you need to call this week? Display them in columns or rows. Birthday cards? Motivational photos of yoga positions? Whatever you’d like to see on your wall, without having to find studs, poke holes, or make anything sticky.
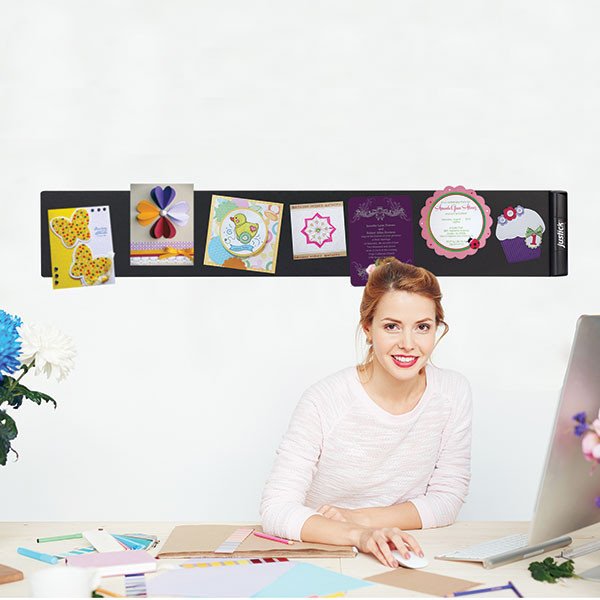
The Justick Frameless Wall Strip Display retails for $79.99 on Amazon, myOrganized.life and Office Depot.
Justick Frameless Desktop Organizer/Copyholder
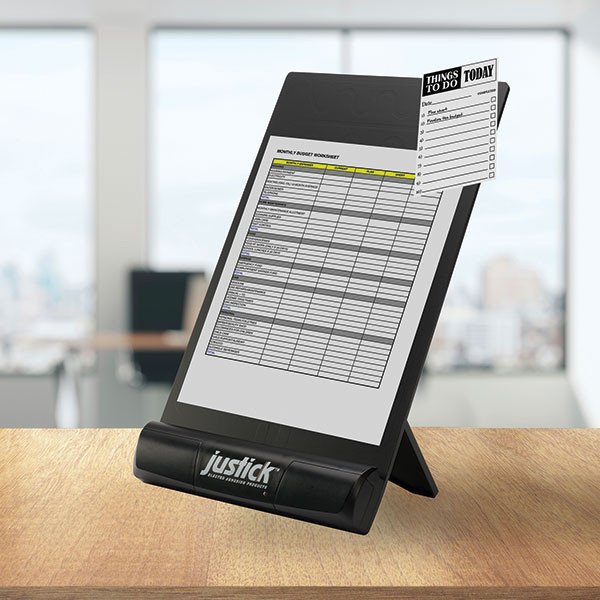
Ever since the days of the typing pool, there has been a need to stand papers vertically while doing your typing. Invariably someone gives you a printout or handwritten document when you’d prefer an email or link to Evernote, and it’s up to you to get the information into digital form. Arraying a document vertically makes it easier to move your eye from the paper to the screen and back again vs. having to keep looking down at your desk.
The neato-keen thing about the Justick version is that you can stick multiple items on at once — so you can keep multiple ad hoc (documents, contracts, to-do lists, etc.) items and more permanent ones (cheat sheets, department codes, etc.) on the same page. Paper Doll tested this out — things really do stick where you put them and, unlike balloon-style static electric power, they do not start sliding down to the floor or desk as time goes on.
The Frameless Desktop Organizer/Copyholder is black, measures 8″ W x 11″ H and is priced at $34.99 at Amazon, myOrganized.life, and Office Depot.
Justick Frameless Mini Electro Bulletin Board
The “mini” bulletin board measures 16″ W x 24″ H, so it isn’t all that small except in comparison to its siblings, but it’s perfect for vertically displaying essential papers in homes and small offices.

The mini runs $69.99 at myOrganized.life and Amazon.
Justick also has three versions of their framed full-sized electro bulletin boards. The boards for all have modern black styling, and both the standard and premium framed versions are three feet wide by two feet high, suitable for larger home offices and small businesses. The larger premium version, four feet wide by three feet high, is more suitable for larger businesses with ample display space.
- Standard Aluminum Frame Electro Bulletin Board, 36″ W x 24″ H ($79.99 at myOrganized.life or Amazon)
- Premium Aluminum Frame Electro Bulletin Board Black, 36″ W x 24″ H ($119.99 at myOrganized.life or Amazon)
- Premium Aluminum Frame Electro Bulletin Board, 48″ W x 36″ H ($189.99 at Amazon or myOrganized.life), more suitable for office displays.

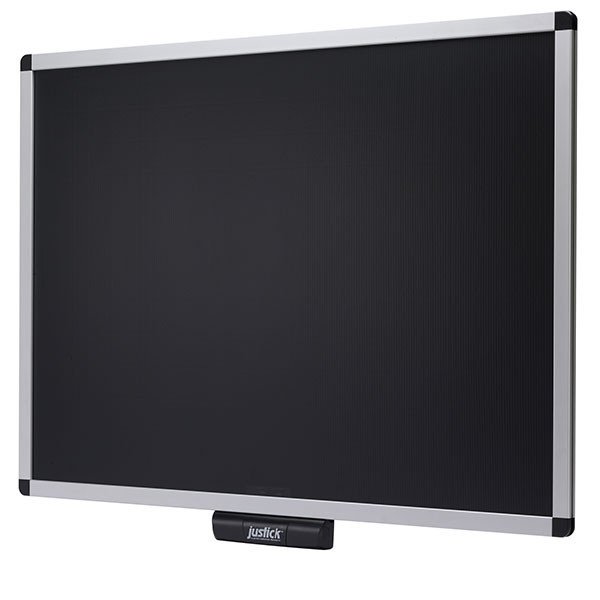
JUSTICK ELECTRO DRY-ERASE BOARDS WITH CLEAR OVERLAY
As discussed above, Justick provides an innovative alternative to a fussy French board in your home or corkboard in your office. But what about when you want a dry-erase board? Do you have wall space enough for both? Happily, you don’t need it, as Justick has also developed a combination electro-board with a clear dry-erase overlay, to serve both purposes.
As with the electro boards above, just install four AA batteries into the board, and the Justick electro surface technology transforms the surface from “zero adhesion” (that is, like any old “dumb wall”) into a powerful force field able to attract photos, papers, business cards, calendars, and memorabilia.
Use either dry-erase or wet-erase markers on your board to “write, display, and interact” with three times the benefit of a traditional board. The durable plastic overlay provides a clear, brilliant surface that Smead says won’t ghost or stain, creating a dynamic whiteboard experience with the utility of a bulletin board. However, as they say on the infomercials…
BUT WAIT, THERE’S MORE!
Smead has also developed Justick overlay board templates. Categories include:
- Education (for teaching addition, alphabet tracing, telling time, cursive writing, and more)
- Sports and Coaching (for teaching basketball, football, and hockey plays)
- Family Activities (daily calendar for activities)
- Home Management (grocery shopping planners, architectural design planning)
- Scheduling and Management (Gantt charts, goal tracking, sales reporting, weekly/monthly/yearly and project planners, and more)
- Medical Industry (hospital and clinic sign in/out, operating room schedules, patient information data for hospital rooms, etc.)
- Restaurant Management Industry (layouts for the day’s specials)
Got papers? Stick them up!
Got something you want to write or draw? Doodle it freehand or use a template! Get thee to it!
Whether you’re doing a presentation for your biggest client or teaching your child that “M” is for “Mommy” by moving a photo of yourself next to where you’re practicing the alphabet together, Justick has an option.
Justick Frameless Mini Dry-Erase Board with Clear Overlay
The Frameless Mini Dry-Erase Board comes in two versions, black or white, with a clear overlay. Both measure 16″ W x 24″ H and sell for $79.99 at Amazon and myOrganized.life.
![]()
Premium Aluminum Frame Dry-Erase Boards with Clear Overlays
If you want something on a grander scale, for your home, school, business, or medical office, Justick has four full-sized dry-erase options, all with the same electro surface adhesion technology and erasable properties, in either black or white in each of two sizes, measuring 36″ W x 24″ H or 48″ W x 36″ H.
- Premium Aluminum Frame Dry-Erase Board, Black with Clear Overlay, 36″ W x 36″ H ($179.99 at myOrganized.life or Amazon)
- Premium Aluminum Frame Dry-Erase Board, White with Clear Overlay, 36″ W x 36″ H ($179.99 at my Organized.life or, right now, $152.39 at Amazon)
- Premium Aluminum Frame Dry-Erase Board, Black with Clear Overlay, 48″ W x 36″ H ($229.99 at myOrganized.life or Amazon)
- Premium Aluminum Frame Dry-Erase Board, White with Clear Overlay, 48″ W x 36″ H ($229.99 at myOrganized.life or Amazon)
JUSTICK ELECTRO COMMERCIAL COMMUNICATION SOLUTIONS
In addition to home and office bulletin board and dry-erase solutions, Justick also has a line of commercial display products suitable for larger businesses, restaurants, hospitals, non-profits, and other locations.
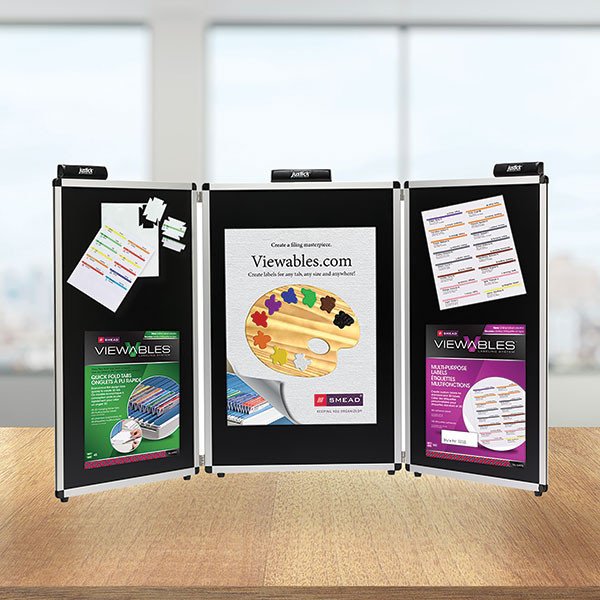
3-Panel Table-Top Expo Display
Picture yourself at the fanciest, most grown-up version of a science fair and you have some sense of how this Justick 3-Panel Table-Top Expo display works. At 72″ W x 36″ H, it allows you to set up your displays for conferences, expos, and whatever corporate version of Show & Tell at which you need to make a big splash, without fear that breezes, un-sticky sticky tape or lost push-pins will cause trouble. It’s priced at $399.99 at myOrganized.life (or $391.67 at Amazon) and can be carried securely in its own 36″ W x 27″ H nylon carrying bag ($99.99).
Lobby and Promotional Stands
Justick also makes a wide variety of lobby and promotional stands. They are all black with aluminum frames and have electro surface technology, but you can choose from standard or dry-erase versions for the lobby stands, and choose among single- and double-sided for the promotional stands, as well as a dry-erase version.
- Lobby Stand with Justick Electro Surface Technology, 24″ W x 36″ H ($249.99 at myOrganized.life or Amazon)
- Dry-Erase Lobby Stand with Clear Overlay, 24″ W x 36″ H, with Justick Electro Surface Technology ($299 at myOrganized.life and Amazon)

- Promo Stand Single Side, 24″ W x 36″ H, with Justick Electro Surface Technology ($350 at myOrganized.life or $350 at Amazon)
- Promo Stand Double Side, 24″ W x 36″ H, with Justick Electro Surface Technology ($375 at myOrganized.life or Amazon)
- Dry-Erase Promo Stand with Clear Overlay, 24″ W x 36″ H, with Justick Electro Surface Technology ($375 at myOrganized.life or Amazon)

Certainly, some of the higher-end Justick products are more than one would need in a home or small office, and I’d like to see some technology for making the wall-affixed products even easier to display. (Hmm, how about a partnership between Smead’s Justick and 3M’s Command brand of hooks and adhesives?) I’d also love to see some colorful options for the smaller items for use in dorm rooms.
So, why are these Justick products so intriguing?
First, it’s the balloon magic. The ability to make your papers and photos adhere to a vertical surface without having to rummage through your desk for thumbtacks or tape is an organizational advantage.
Second, for the dry-erase versions, it’s advantageous to be able to mix (temporary) storage and dynamic writing.
Third, it’s VERTICAL. As this blog has referenced previously, vertical storage is fabulous when your area is small, when your workspace is awkwardly laid out, and when you want to avoid building up clutter.
- Paper Doll Adjusts the Vertical Hold: Space-Saving File Solutions
- New Smead Organized Up Folders Stand At Attention
- Upright Expansion: Pendaflex® Vertical Reinforced Expanding Wallets and Files
- Up Filer: A New Vertical Filing Solution
- NAPO2014: Our Friends at Smead Are on the Up and Up!
Of course, vertical clutter isn’t completely impossible — I’m sure you’ve seen refrigerator doors with long-forgotten appointment card reminders, overdue notices, and invitations to events that have long-since past — all layered over one another until the door is almost double its original thickness. So, it’s still important to cull and purge your papers on an ongoing basis, whether they’re lying down or standing up.
Don’t you just love balloon magic?

Photo of Bella+Balloon, courtesy of Pat David is licensed under Creative Commons 2.0
Paper Doll Post:

Paper Doll’s NAPO 2017 Recap: A Sneak Peak at Smead’s All-in-One® Organizer Kits

Paper Doll doesn’t like to play favorites, but it’s hard not to love a company whose heart and soul is helping you keep your paper organized, so we have more than a few post’s worth of post-NAPO2017 news from our friends at Smead. Today, we’re looking at their direct-to-consumer line, myOrganized.life, designed to help you keep your personal and family documents safe, secure, accessible, and organized. But Smead’s NAPO Expo showing was bountiful, so watch upcoming posts for some nifty innovations.
###
In an emergency, could you find your will? Your Power of Attorney documents? Your life insurance policy? Approaches to general filing systems vary. Some people have very specific, well-labeled, color-coded filing systems that they maintain religiously. Others have one drawer for important documents and one hip-high “stack” earmarked for paid bills, and assuming no strong gust of wind (or a playful puppy or child) gets near, they’re satisfied. Most people, and especially most of my clients, fall somewhere in the middle of the spectrum.
DIY vs. Made-For-You Filing Systems
Often, what holds people back from developing filing systems is perfectionist procrastination. Rather than creating a wrong system, they won’t get started at all. Others, fearful that their system isn’t good enough (measured against some arbitrary benchmark or guideposts), up-end their files and folders and binders, starting from scratch every few months or years, not because their system wasn’t working, but because they’d never committed to it in the first place, and the appeal of a magical solution was more compelling than the reality of having to make decisions and apply rules.
It’s not as though there aren’t multiple ways to contain papers and documents — we have tabbed file folders, hanging folders, ringed binders, accordion-style folders — and they are all fine, depending on your resources, your space, and your willingness to maintain your system. By and large, there is no wrong system — as long as the system works for you!
Longtime readers of this blog know that Paper Doll isn’t going to drink the Koolaid and tell you that you have to buy a pre-existing filing system with pre-made categories, like FreedomFiler. I have many colleagues who love, respect, and recommend that particular pre-made, “self-purging” filing system, with the categories all laid out, and even year/odd year purging and shredding schedules. I see the value, but unless one of my clients asks for something like that during our sessions, it’s my professional experience that people with disorganized (or non-existent) filing systems learn more when, together, we create their entire filing system from scratch. This way, clients learn the why behind the what and the how. I think naming each file something that works for you (Vet: Fluffy vs. Medical: Cat, or Elantra vs. Auto vs. Car vs. Roxanne) helps inspire you to actually file your documents away.
That said, most people don’t have the opportunity (or haven’t taken the opportunity) to work with a professional organizer to get their papers in order, so if people are in a situation where “they don’t know what they don’t know” and don’t have a sense of all the documents they should be creating, collecting, and organizing, a pre-ordained system template can eliminate confusion and stress. For my clients (and readers of this blog), my Family Files approach generally works well as a starting point for getting the whole kit and caboodle in order.
- Family Filing—As easy as (eating) pie
- Financial Filing—Scrapbooking snapshots of your money’s life
- Mom, why is there a receipt stuffed in the turkey?
- I Fought the Law…and the Paperwork Won!
- Patient: “Doctor, it hurts when I do this.” Doctor: “Then don’t do that!”
- Paper Dolls Live In Paper Households
- I Hope Nobody Ever Writes a Nasty Tell-All Called “Paper Doll Dearest”!
It’s one thing to try to finesse an entire system to pay your bills, and track your daughter’s orthodontia plan, and keep your life running, but sometimes, you want to make sure that your super-essential information is available in case of an emergency. Friend-of-the-blog John Hunt, Smead’s Senior Manager of Digital Marketing and host of the Keeping You Organized video podcast, has written previously about the emotional and financial pitfalls of not having essential records available when necessary.
Life Documents Organizer

A few years ago, Smead launched its own self-contained filing system called the Life Documents Organizer to help consumers organize and store what they call “key life documents” — what Paper Doll refers to as VIPs (very important papers). These include wills, trusts, health care directives, investment documents, retirement plans, marital and adoption paperwork, and contact information.
Each Life Documents Organizer kit centers around three elements:
- The container — one black polypropylene file box
- The interior essentials — 6 colored hanging folders, 24 SuperTab® file folders, and 1 sheet of Viewables® Quick-Fold tabs, and 3 label sheets with pre-printed labels
- The philosophy — a detailed instruction sheet, based on The Wheel of Organization
Smead’s philosophy behind The Wheel of Organization, and how it’s put into use, is that the hanging folders represent each of six major, overarching “life-essential” categories, and each tabbed folder is used for a document or types of documents in those categories. The kit spells out what those documents are that you should be seeking to plop in there.
The Wheel of Organization includes categories for:
- Financial — essential account information
- Health — medical records and contacts
- Ownership — essentials documents regarding real estate holdings, valuables, insurance, etc.
- Personal — key VIP documents like birth and marriage certificates
- Communication and Wishes — key directive documents and end-of-life instructions
- Contact Information — names and contact information for key advisors
While Paper Doll‘s own Family File categories (financial, legal, medical, household, and personal) are designed to figure in every personal/family document that might be necessary, the Life Documents Organizer kit focuses on just the key documents, the ones that are most likely to be needed in a particular situation, like a healthcare emergency, catastrophic event, or other life-changing circumstance. Smead notes, “Having your key life documents organized helps to ensure that your wishes and assets are managed, retained and distributed as needed while being less stressful for you and your loved ones.”
The Life Documents Organizer Kit runs $39.95 on Amazon and in office supply stores. For more in-depth information, be sure to check out myOrganized.life’s dedicated Life Documents Organizer page.
All-in-One™ Organizing Kits
Sometimes, you want or need your documents to be quickly accessible, portable, and/or self-contained, separate from your regular files. Certainly, you could use a traditional red rope accordion folder, the type attorneys have been using for generations. However, they’re a bit drab and hard to tell one from the other without using a label maker to help identify the contents. This is where the new myOrganized.life line of kits comes in.
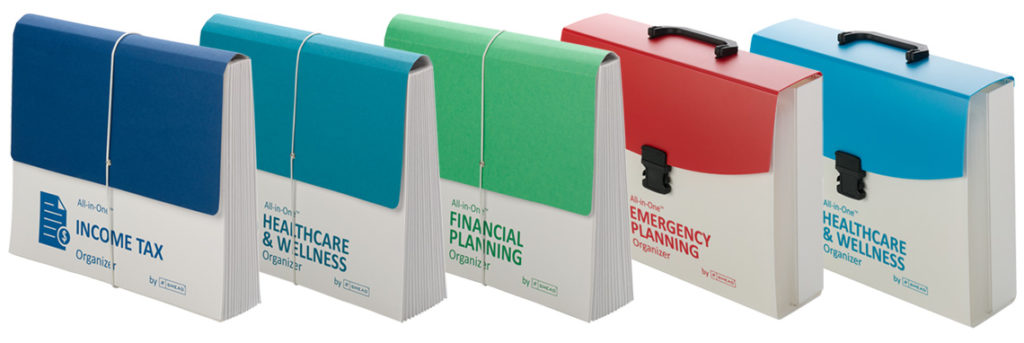
All-in-One™ Emergency Kit
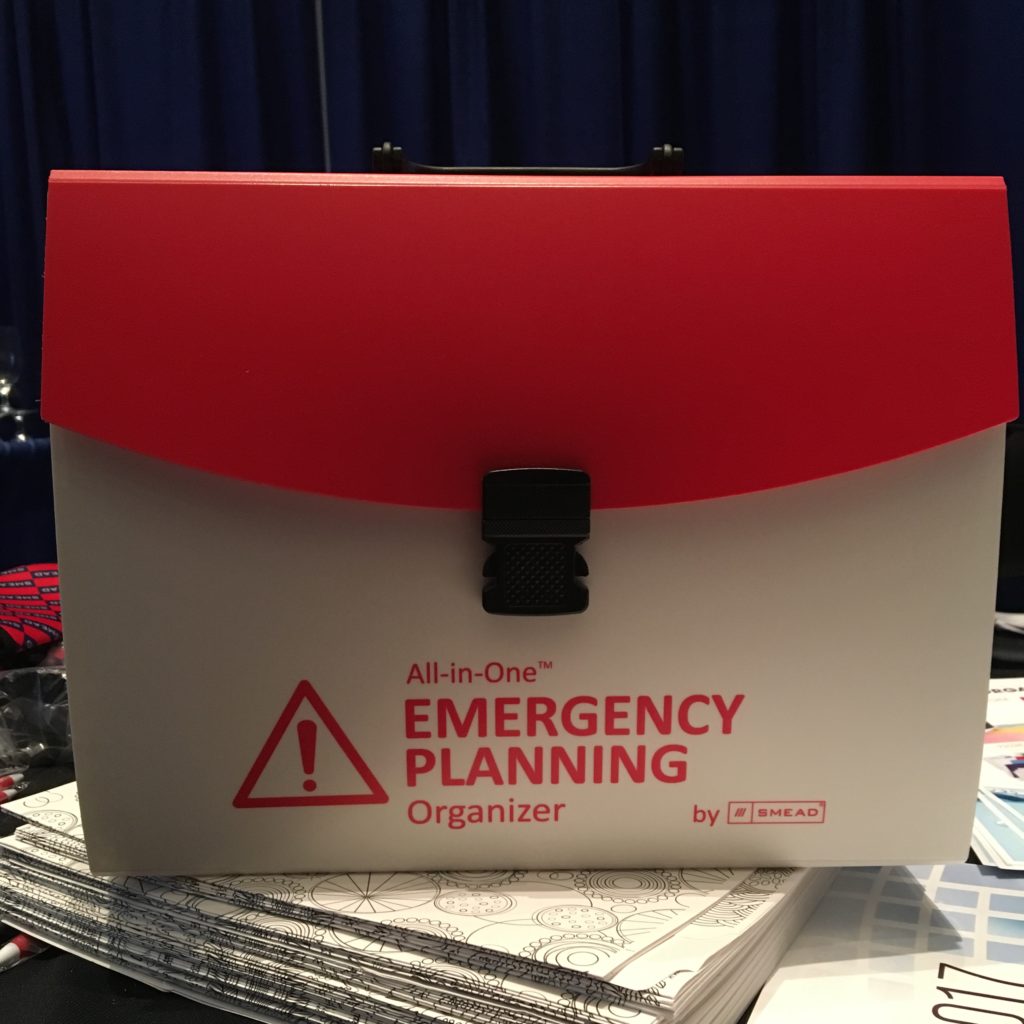
This snappy red-and-white (First Aid-themed) durable poly organizer has 12 interior pockets and includes Viewables® labels. The kit has a plastic handle for portability and a latch closure for security.
All-in-One™ Healthcare & Wellness Organizer
For healthcare, there are two versions of the kit:
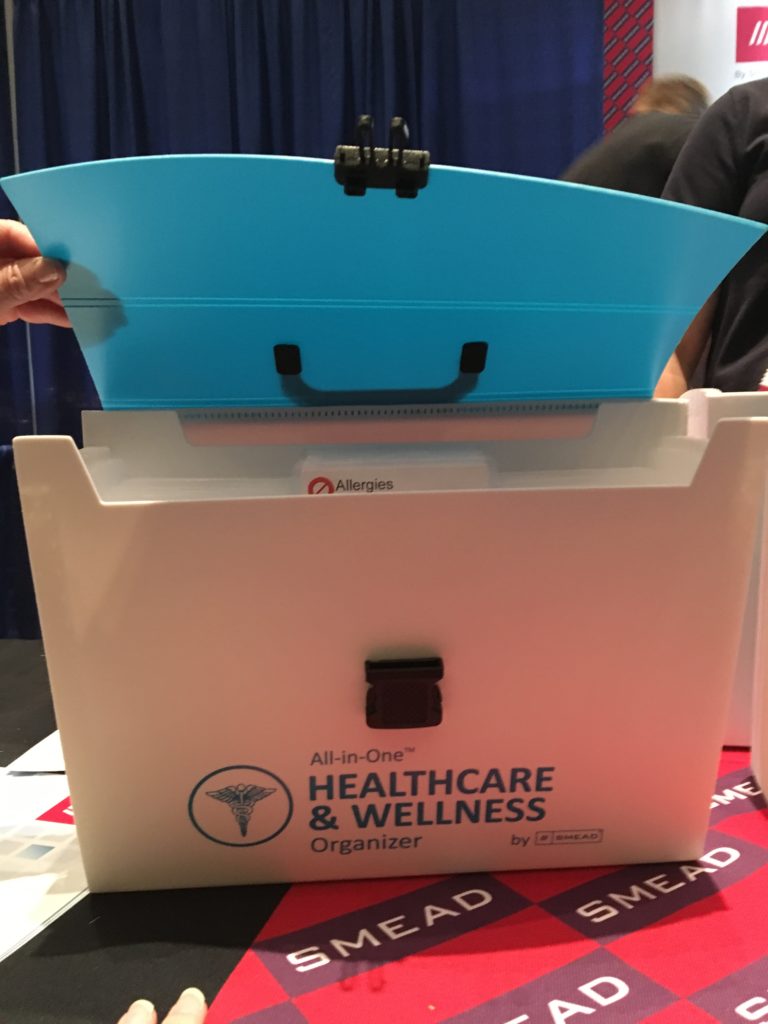
The boxier durable poly organizer is identical in design to the Emergency Organizer Kit, but with a soothing blue and white theme, and has a plastic handle and latch closure, 12 interior accordion-style pockets, and Viewables® labels.
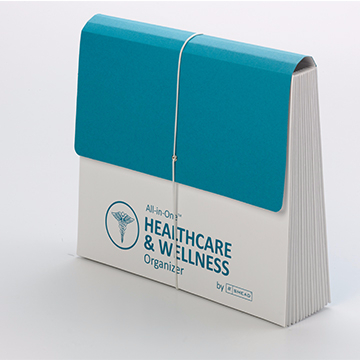
For those who prefer paper to poly, there’s a durable paper Healthcare & Wellness accordion version, with an over-the-top paper flap and elastic band closure. There are 12 expandable pockets with one large pocket in back, and it also includes Viewables® labels.
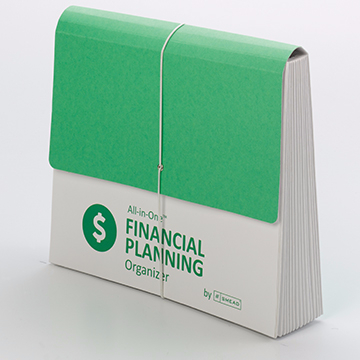
All-in-One™ Financial Planning Organizer
All-in-One™ Income Tax Organizer
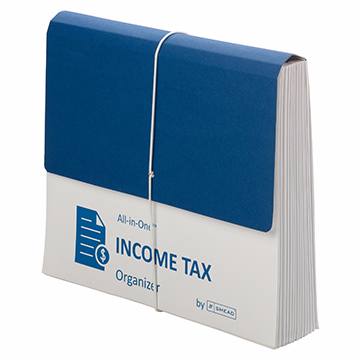
Both the green and white Financial Planning Organizer and the navy blue and white Income Tax Organizer come in the durable paper version, with an over-the-top flap and elastic band closure, 12 expandable pockets with one large pocket in back, and Viewables® labels.
The Financial and Income Tax organizers, as well as the paper Healthcare & Wellness Organizer, contain 10% recycled content and 10% post-consumer material.
The All-in-ONe™ Income Tax Organizer is currently available at Amazon and office supply stores, and runs about $18. The remainder of the All-in-One™ Organizer Kits are branded COMING SOON, so pricing information is not yet available.
Create a DIY Kit With the Smead Poly File Box
Sometimes, you have a clear idea of what you want to create, but you don’t want to have to go in search of putting all the pieces together. I wasn’t surprised to find that myOrganized.life has an option for that, too. You could start with the Smead Poly File Box (suitable for desktop or in-drawer use) and add your own hanging folders and tabbed interior folders, in whatever color schemes you prefer, using whatever labels fit your needs.
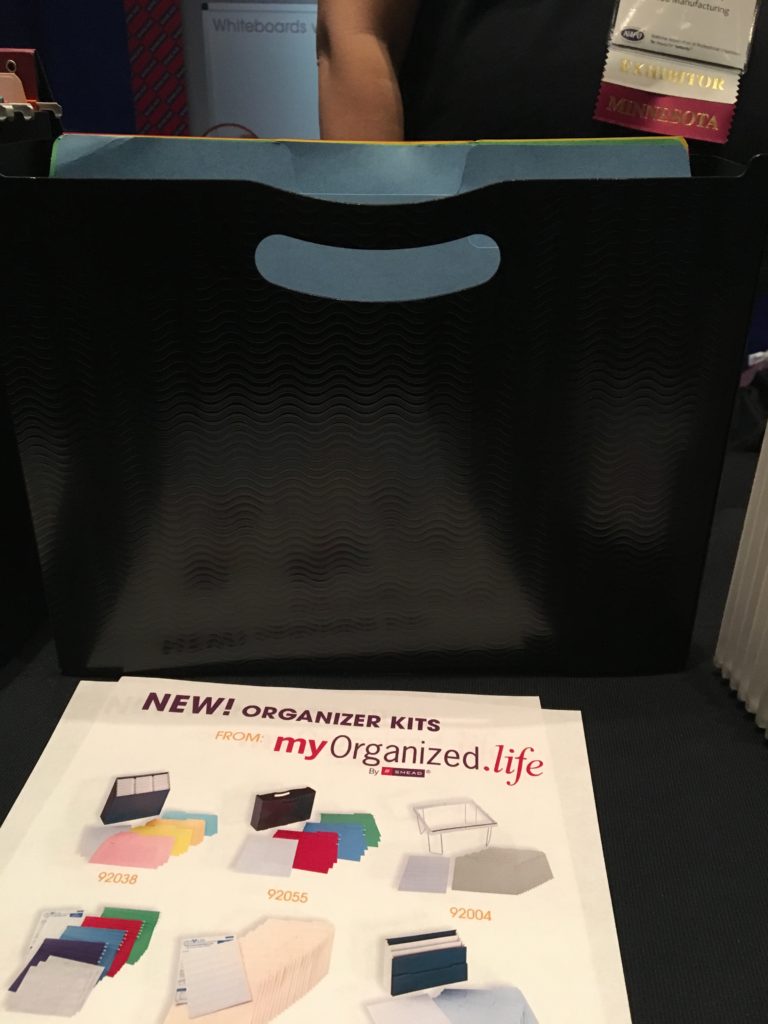
It’s a sturdy poly file box and holds up to 3″ of files, directories, or similar materials, and can be used with hanging files and interior folders, or just folders, depending on your needs and preferences. The Smead Poly File Box is harder to find in brick-and-mortar stores than online, and runs from $8.95-$10.55.
Conversely, you could opt for the Poly File Box with SuperTab® Folder and Viewables® Labels Kit.
The kit comes with one black poly file box, 12 colored one-third cut SuperTab® file folders (three each of yellow, red, green, and blue) and 16 Viewables® labels. The SuperTab® folders have a 90% larger labeling area than standard folders, so you can use larger text or more lines of description. The file box is lidless, so you’ll want to make sure that if you need it to be portable, you’re holding it securely and upright. The Poly File Box with SuperTab® Folder kit runs upwards from $11.95.
And that’s the straight talk on Smead’s organizer kits. No caboodle!


Follow Me