Paper Doll
Is Your Junk Drawer a Drunk Drawer? 3 Steps to An Organized Junk Drawer
[This post originally appeared on January 8, 2019, and has been updated with additional material as of October 4, 2021.]
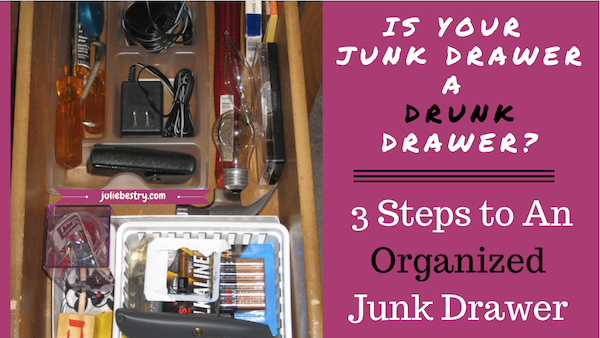
One of my clients refers to her kitchen junk drawer the “Drunk Drawer.”
I don’t drink, so I thought I was missing a pop culture reference. She said that now that we’ve been working together to help her get her life back in order after a few tumultuous years, most of her life is planned out to the nearest detail — organized, categorized, contained. But, on the rare occasion that someone puts a margarita in her hand, especially after a stressful time at work, and she has the opportunity to let her hair down, everything flows freely.
My client notes that with a margarita (or a few) in hand, she says what she wants, she dances to her own drummer, and she gives herself permission to accept that not everything makes sense. Similarly, my client sees that her junk drawer is the one area in her house where she lets the wackiness take over, categories intermingle, and nothing makes sense.
I was reminded of my client’s story when I was approached by Katina Hazimihalis of Dumpsters.com for the Start Fresh: Take the 30-day Decluttering Challenge. (Definitely check it out!) They asked for my advice for Day 7, earmarked as the day of their challenge to “Declutter the Kitchen Junk Drawer.”
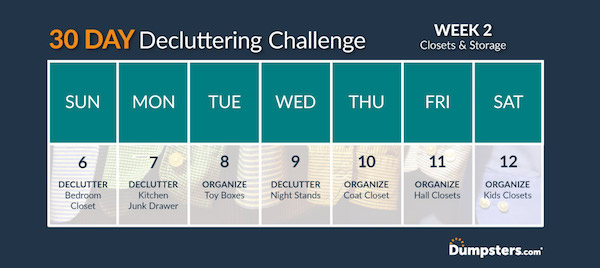 Longtime readers of Paper Doll know that I can never give only a little bit of advice, so there’s a lot that didn’t make it into that post. So, now it’s all here for you!
WHAT’S THE DEAL WITH THE JUNK DRAWER?
Most of the things in a junk drawer aren’t junk. They just tend to be far from their friends in similar categories — the loose change that never makes it to the wallet, the tools that haven’t found their way back to the toolbox, all those random things we want to keep, but we don’t want to take the time to think about where they belong.
Seth Godin says, “The junk drawer is the enemy of understanding.” I have to agree. If you can’t name it, you can’t fathom it.
With paper, “miscellaneous” is the enemy. Is it financial, legal, medical, household, or personal? Is it action paper or reference paper?
With clothing, it’s either underwear, outerwear, or what you wear! You can subdivide into shirts, pants, dresses, etc., and onward to sleeve length or color or season, but there’s still a basic way to start breaking things down.
Categorically, things need to belong somewhere — is it fish or fowl? Animal, vegetable, or mineral? Ginger or Mary Ann? If you can name it, you can put it into place.
Something has to belong somewhere — is it fish or fowl? Animal, vegetable, or mineral? Ginger or Mary Ann? If you can name it, you can put it into place. Share on XBut unlike paper or clothing, not everything has just one home. Some things have a main home and a vacation home — that’s the junk drawer. Yes, you should have a home first aid kit, but it’s helpful to keep a few Band-aids in the kitchen. Yes, most of your office supplies belong in your home office or at your desk, but sometimes you need to grab a highlighter to make sense of the recipe you’re making.
At its best, the household junk drawer can be a miniature subset of categories found around the house. At its worse, however, it’s drunk. It’s sloppy, it makes no sense, and it leads you down a path of regret. Let’s fix that!
WHAT’S THE FIRST STEP TO ORGANIZING A JUNK DRAWER?
Empty that junk drawer. Dump the whole thing out.
It’s rare to hear a professional organizer advise emptying everything out of any space. Usually, we focus on handling one shelf or one category at a time. That’s because the last thing you want to do is get ninety minutes into a closet overhaul and have to pick up your children from school, leaving you with an unusable bedroom and a huge headache.
However, there are two reasons why a complete dump-out makes sense with a drunk junk drawer. First, junk drawers are small. Other than a wallet, purse, or glove compartment, I’d be hard-pressed to find a smaller space that requires concerted attention.
Second, approaching a junk drawer too delicately usually means nothing ever gets completed. People pull out one item at a time and make a few decisions, put a few things back when they decide to keep them, and never quite get around to making decisions about everything. Instead, the best thing to do is to remove everything from the drawer.
Because most junk drawers are in kitchens, what often works is to put a large towel down on the countertop or kitchen table (to prevent scratches). Plop everything down together. Slowly move things to the outer edges of the towel, as if you were searching for a Canadian penny amid all the coins you’ve shaken out of your piggy bank.
Grab the low-hanging fruit first. Remove gum, candy, soy sauce or hot sauce packets, or really anything edible and move to a “snack” box or food storage container on one of the shelves of your kitchen or pantry. Keep sticky, melty, or bug-friendly edibles out of the junk drawer.
Select one item at a time and ask yourself a few questions:
- Is it broken, expired, dried out (like pens or old wipes), or icky? Toss it out!
- Do you ever really use it? If not, you might toss it or donate it.
- Do you find yourself using it often enough that it really needs to be in the kitchen (or whatever room you keep your junk drawer)? If not, move it to a part of the house where it better fits with a category of items already kept elsewhere, like tools or office supplies.
- Do you need this many of whatever it is? Keep your favorite, keep the best, keep the one you’d grab if you needed it. Set the excess free (from the drawer) and either donate or move to a more appropriate place in your home.
Remember, if you don’t use it often, don’t let it take up the valuable prime real estate in your drawer!
NEXT, MAKE SENSE OUT OF THE CATEGORIES
At first glance, it may seem like everything in the junk drawer belongs to the miscellaneous category, but with patience, you’ll start seeing patterns.
Categorize the items into little areas/zones on the counter or table so you get a sense of how many of each thing you have. If you have duplicates, triplicates, or more, you may want to keep one version handy in the drawer, but move the remainder elsewhere, in your own mini-mall of “when I need them” supplies.
Ask yourself, what does the item DO? What is it for? Some category examples:
Batteries — Keep a small supply of the most commonly (and urgently) needed (like AA and AAA). Move the rest, plus whatever other sizes (9 volt, C and D, and smaller batteries for hearing aids, watches, and medical devices) to one divided container (like a tackle box) elsewhere in the house, like in a cabinet or on a shelf in the laundry room, utility room, or basement.
Duplicate keys — Use key cap tags/covers or labels to identify what the keys fit and keep all keys in one container.
Organize Your Life: The Truth About Resolutions, Goals, Habits, and Words of the Year
A new year begins and we give ourselves absolution for everything that has happened previously: our diets, our habits, our clutter. We have this vision that the true version of us isn’t reflected by everything we’ve ever been, but who we could become. Whether that mindset is more a matter of naiveté or positivity doesn’t matter as much as figuring out how we can transform this vision of who we want to be into a reality where we can say, this is who we truly are. So how do we get there?
RESOLUTIONS
New Year’s resolutions tend to come in two flavors. We promise ourselves we will change some behavior or personal trait (quit smoking, swear less, be nicer to our mothers, etc.) or accomplish some personal goal (run a 5K, learn Italian, knit a sweater). Making resolutions dates back ancient times. For example, the Babylonians apparently promised the gods they would return borrowed objects and repay debts. (Perhaps that resolution came from having achieved the prior year’s resolution to declutter, during which they found all the things they’d borrowed?)
In the United States, the ritual of making resolutions has actually increased over time, from about 25% of the population to over 40%. The biggest advantage I see in making resolutions is that it allows us to start the new year in a motivated, positive way – generally, at a time when the weather, our weights, our checking accounts, and our moods are fairly frightful. The disadvantage, however, is that most of us abandon our resolutions somewhere between February and June.
Resolutions tend to fizzle because of a few reasons: the real world (that is, the same things that kept us from maintaining our resolve last year) gets in the way, we haven’t identified working strategies for achieving our resolutions, or we have resolved to do something because we think we should rather than because we really want to do it.
If you’d like some inspiration for developing new or different resolutions, the Daring to Live Fully blog offers 29 New Year’s Resolution Ideas that go beyond the typical, with some motivational notions for volunteering, being more conscientious, and bringing more peace into your life. Lifehack has 50 New Year’s Resolution Ideas and How To Achieve Each of Them to help get you started. From adopting a pet to getting over an ex, there are enough choices to help you make this next year a little more interesting.
GOALS AND HABITS
Goals are the less shiny versions of resolutions. Nobody announces “New Year’s Goals” with a flourish or breathlessly asks celebrities about their “New Year’s Habits.” But goals provide a big-picture framework, and habits develop the muscles to accomplish those goals.
SMART goals are popular because they identify where resolutions and plans have might otherwise fail without precautions. SMART goals are supposed to be:
- Specific (What are you going to do? Use action verbs!)
- Measurable (What metrics will you use to show you’ve done what you said you’d do?)
- Achievable (Is this a practical goal? Is it realistic?)
- Relevant (Does this goal make sense for your life, family, or business?)
- Time-based (When will you start? When will you do the action? When will you repeat it? When will you finish? Remember, “Someday” is not a day on the calendar!)
You may want to lose weight, pay off debt, find a significant other, or grow your business, but the way to get there can’t be vague. Make sure your goals spell out what you’re going to do, how you’re going to do it, and how you’re going to measure your success.
Goals set the rules and create the game plan, but habits are how you get to the finish line. The reason you lose your keys all the time is because you don’t have a habit of always putting your keys in the same place every time you come home. (Or, I guess, you’ve got a hole in your pocket.)
Habits are settled or repeated tendencies. Bad habits become like second nature (which makes them hard to break). Luckily, good habits are hard to break, too! That means that if you can get in the habit, so to speak, repeating positive, healthy tasks, you stand a much better chance of achieving your goals.
Two superior resources for understanding how habits work, and how you can put them to use in your life, are:
Project Management Tools To Get It Done in 2019

With a new year approaching, you’re probably looking at all you want to accomplish, professionally and personally. While there may be a variety of tiny tasks, most things (particularly at work) involve projects, and for better or worse, this means project management.
If you’re anything like Paper Doll, memories of dreaded group projects in middle school make the words “project management” set your teeth on edge. So, to look at some of the tools that make project management less stressful, I’m pleased to share this rare guest post. The 6 Best Project Management Tools for Small Business by Grace Miller originally appeared at MyEmma.com, a company that specializes in productively building customer relationships through email communications.
While Grace focuses on the collaborative approach to project management in companies, most of these tools are appropriate for a wide variety of efforts: a group of friends planning a baby shower, a writer corralling her “street team” to launch a new book, a volunteer group working through the steps to develop outreach, far-flung family members planning a family reunion, and more. The keys are always figuring out who will be doing what, and when, where, and how they’ll accomplish it. Let’s see what Grace has to say.
~~~
If you’re involved in the management of a small business, then you know that project management is a task often shared by staff and company owners alike.
Regardless of job title, many small business employees end up handling some project management tasks as they work through their assigned duties.
That means having tools to streamline and organize project management processes, particularly if they’re shared across departments or staff levels, can be invaluable.
To help you increase productivity and boost revenue, we’ve curated some of the best project management tools for small businesses currently available.
The best project management tools for small businesses to increase productivity right now
Marketing and the strategy behind it are the lifeblood of your business, ensuring that revenue flow is healthy and consistent.
While many aspects of small business management can benefit from better project management tools, your marketing staff will definitely get a boost from tools that make their job easier.
In fact, many of our recommended tools can encourage better internal communication amongst staff and between separate departments to aid in developing targeted campaigns and stay on top of metrics and goals with greater accuracy.
Some of the largest start-ups in the world, like Dribble, Uber, CNET, and Kickstarter rely on these technical helpers to keep their staff on target, so using them puts you in good company.
In researching our list, we made sure our picks were heavy on features that are important to small businesses, such as:
- Functionality and ease of use
- Free or sensible pricing options
- Ability to integrate with other systems
- Ability to be accessed remotely
Without further ado, let’s start our tour with one of the most recognizable names on the list: Evernote.
1. Evernote
Image: Evernote
Evernote is a fantastic app that functions as a clearinghouse for ideas, documents, and workflows.
Not only can you grab and save ideas from online sites in clearly organized folders to prompt creativity and idea generation, but you can also design and store templates within the app to further streamline your process.
Best of all, their premium subscription offers team storage, where any member that has access can save and retrieve all aspects of a particular project.
Anything new that’s added to your team’s space is automatically shown front and center, in what they describe as a “virtual bulletin-board for your team.”
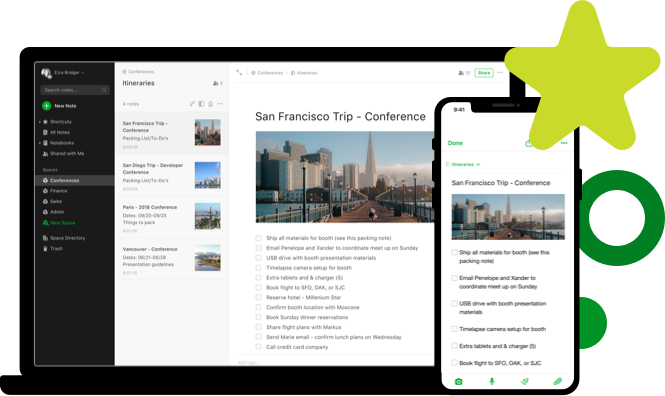
Image: Evernote
And companies like Swiss conglomerate Migros know the value of this simple, but incredibly useful, tool. As the largest supermarket and retailer in Switzerland, Migros needed a team to keep their marketing on trend with the food and restaurant industry.
Using Evernote’s apps that spanned web, desktop, and smartphone, the team was able to easily manage and coordinate interviews and data from German, French, and Italian-speaking sources.
Each team member could keep their own photos, sketches, audio recordings, and diagrams shareable with other members for fast access and accurate real-time data, making it easy for Migros’ marketing to stay fresh.
2. Basecamp
Image: Basecamp
Basecamp works hard to bring everything small businesses need into one neatly-designed package with tons of useful features.
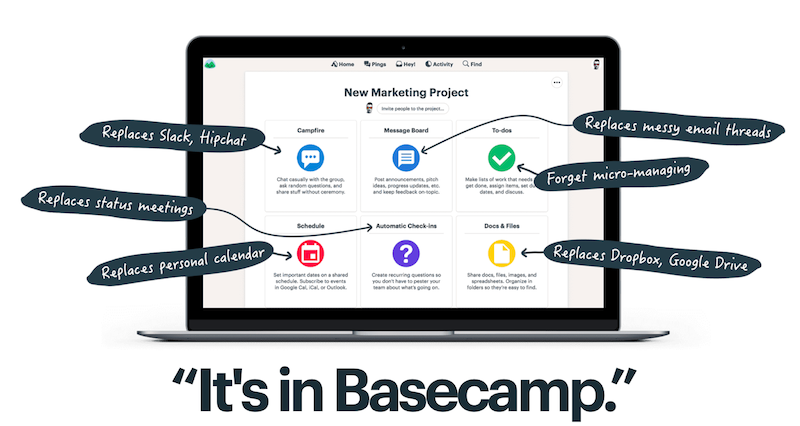
Image: Basecamp
You can store and retrieve documents with a simple drag-and-drop, manage schedules, conduct real-time group chats, and even invite clients to be a part of the process without dealing with learning-curve aggravation.
Plus, with features like check-in that allow you to ask your team members basic questions at a specific time each week, you can pare down meeting times.
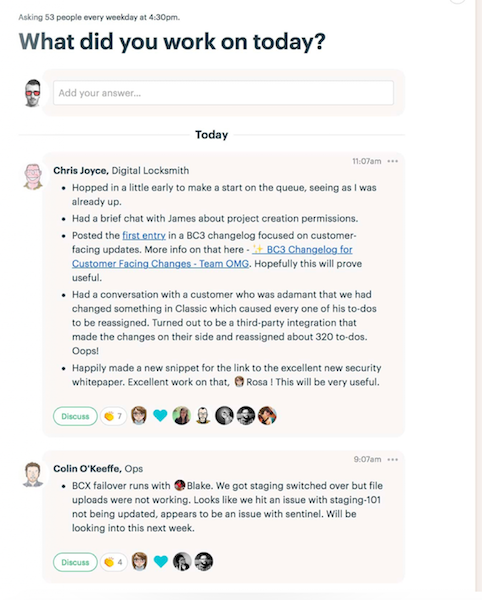
Image: Basecamp
Some businesses that use Basecamp to keep their teams in-the-know include Groupon and Harvest, but the software boasts thousands of devotees.
3. Trello
Image: Trello
Trello is a wonderful tool for marketing teams, as its visually-oriented “card” system lets team members track each part of a project as it flows through to completion.
Boards can be set up with trigger events in any way you need them. Here’s an example of this in action:

Image: Trello
You can see how easy it is for teams to set up individual project flows and for managers to get a quick overview of project statuses from any department.
Cards are moved using drag-and-drop, making keeping things up-to-date supremely easy, while multi-tiered pricing means you don’t pay for what you don’t need.
Best of all, Trello integrates seamlessly with Evernote, Slack, Jira, Google Drive, and other software. Companies that use Trello include National Geographic, Adobe, the British Red Cross, and others.
4. Slack
Image: Slack
Slack has wonderful workflow possibilities for every business, but marketers will love its user-friendly integrations.
Email marketing, in particular, gets a boost from the Slack workspace, as Slack seamlessly allows you to manage email campaigns directly from your Slack command center using minimal keyboard commands.
With integrations for most common marketing apps and tools, Slack can give marketing professionals real control and sharing options with their team, including performance metrics.
Besides fostering collaboration, Slack offers savvy marketing teams a great way to keep on top of changes in direction.
Conversations are automatically archived and indexed, so information is available when you need to reference it. Having a cohesive space for team collaboration and cooperation is a wonderful way to nip problems in the bud or share successes!
Image: Slack
Slack’s clean, easily-integrated format makes it a winner among the best project management tools for small business.
Companies that use Slack include NASA’s Jet Propulsion Labs, Zapier, Emma, Benefit Cosmetics, Autodesk, and more.
5. Flow
Image: Flow
Flow is project management software that offers a simple, beautiful user experience (UX), and powerful tracking and integration.
Kanban boards allow managers to track entire projects, team tasks, manage resources, collaborate with teams, and integrate with other purpose-driven software, like Slack.
Marketing teams will love the way Flow allows them to share project milestones for feedback, as in the example above. In this way, an entire campaign can be vetted, edited, and even changed on-the-fly for faster production.
Here’s an example of a marketing team’s roadmap for several goals as seen through the Flow workflow model:
Image: Flow
Companies that rely on Flow to help them stay on track include Shopify, Bumble, and TED.
6. Asana
Image: Asana
Asana gives project managers several ways to visualize their workflow, from Kanban-style boards to other bright visuals that keep marketers and other teams on track.
Image: Asana
The example, above, shows the status of several projects at-a-glance, showing which are on target, how close to completion each is, and assigning each a priority level.
Having these metrics at your fingertips allows for quick re-assignment when necessary to avoid missed deadlines.
Asana’s pricing is flexible, but at a minimum of $9.99 per user per month, it might be a bit steep for smaller businesses.
They do offer a free trial, however, so you can explore the product for 30 days to see if it’s worth the splurge for your business.
Asana is used by the New York Times, Deloitte, Red Bull, the United Way, among others.
Wrap up
Now that you’ve gotten a taste for what these elegant tools can do for your small business, all that remains is to choose the one that is the best fit for your staff and your business goals.
If you’re on a tight budget, check out the tools that have a free option like Slack, Evernote, and Trello. If you decide they’re on target for your needs, you can always upgrade on down the line if you need more features or if your business expands.
Most of our other recommendations have a free trial period that you can use to determine if the tool will provide all the functionality you require. Remember, you’ll be saving money by using a project management tool that helps organize tasks and streamline processes.
Any way you look at it, these project management powerhouses represent some of the best project management tools for small business on the market today.
Why not take a risk-free trial, capture some of that power, and take your small business to the next level of success?
About the Author
~~~
Paper Doll has some familiarity with all but one of these platforms. For example, I use Trello‘s simple card-and-board approach to plan my blog research and marketing, but also to follow up with prospective professional organizing clients. I also have me-only boards like “Be a Grownup” which reminds me to take care of personal and home-related tasks, as well as collaborative boards I share with clients, volunteer committee members, and friends. (Hey, baby showers don’t plan themselves!) I like that Trello has some great video tutorials as well as a cheat-sheet tutorial board.
Of the six tools Grace mentioned, the one I’m most familiar with is Evernote, and I’ve written about Evernote many times on these pages. As an Evernote Certified Consultant, I often find myself evangelizing for all the ways Evernote can be used for capturing and maintaining information, as well as for collaboration (though much more so at the premium and business levels vs. the free level). Features and pricing change over time (as with all software-as-a-service options), but it’s definitely a standard-bearer.
Although I’ve tried both Basecamp and Asana when I’ve been brought on-board to collaborate on other team’s special projects, I lack the familiarity you get from working day-in and day-out with a software tool. And while I am familiar with Slack as a concept, I have never used it. Flow is completely new to me, but I see it has a very Trello-like visual appeal.
Readers, do you use any of these project management tools, either in business or for your own projects? Do you have other tools you love? Please feel free to share your thoughts in the comments.
Disclaimer: The above post includes some affiliate links for which I may get some small payment if readers make a purchase via a link I’ve provided; this will have no impact on your costs but will help support the ongoing research and development of this blog.
Organize Story Time for 21st-Century Families
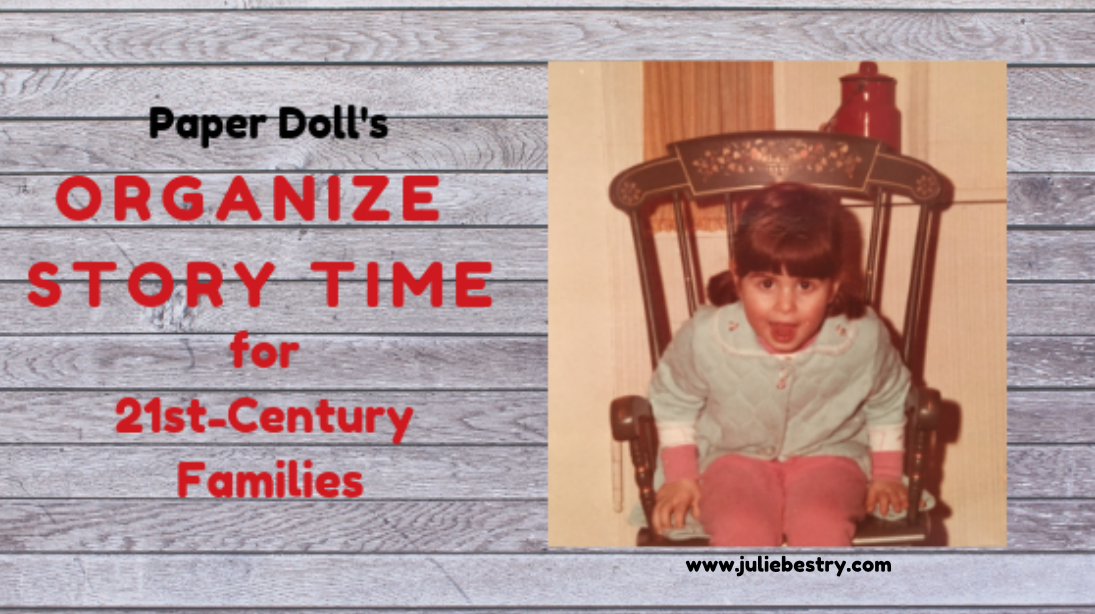
There’s something special about parents or grandparents reading stories aloud, a tiny human nestled warmly in the lap of a loving grownup as they turn the pages together and delight in a new story. Sometimes, the tales are as soft as the voice of the lady who says hush in Goodnight, Moon. Other times, the laughter is as infectious as this viral sensation of the Scottish grandmother reading The Wonky Donkey by Craig Smith. (Seriously, I dare you to not laugh along.)
Reading to and with children is essential for their emotional and cognitive well-being. The bevy of benefits range from imparting a love of learning to developing children’s imaginations to building language skills and empathy, and so much more:
- Reading With Your Child
- The Importance of Reading Aloud
- 10 Benefits That Highlight the Importance of Reading for Young Children
- Why Reading Aloud To Kids Helps Them Thrive
- The Benefits of Reading Aloud To Your Kids
- 10 Reasons To Read With Children
There’s even a podcast devoted to the concept, aptly entitled the Read-Aloud Revival Podcast!
Children love stories, and there’s a comfort in hearing the same stories over and over. Parents bemoan having to read Green Eggs and Ham until their minds are numb, but in a world where so much is beyond their knowledge and understanding, children delight in being able to anticipate what is coming and having their expectations met. Adults may be bored by reruns, but children are soothed by tales twice told.
We’ve talked before about how to reduce book clutter without hampering our love of reading. (It’s hard to believe that Paper Doll‘s 6-part Reducing Book Clutter series, including a post on how to reduce children’s book clutter, was all the way back in 2010. Sadly, many of those children’s book rental options have vanished in our increasingly digital world, so watch for new posts in the coming year on ways to inspire reading without building a library addition onto your house.) However, we’ve never looked at the issue of organizing for reading when the grownup and the tiny human are not in the same place.
In the days before the internet, if tiny humans and their big people were separated at story time, a telephone had to suffice, but it never felt the same. If you’ve ever watched a toddler try to maintain a telephone conversation for more than a few minutes, you understand why.
When parents travel for work or are deployed in the military, when moms or dads no longer live in the same homes as their kids, when grandparents are far away or beloved babysitters go off to college, it's harder to connect over a… Share on XWhen parents travel for work or are deployed in the military, when moms or dads no longer live in the same homes as their kids, when grandparents are far away or beloved babysitters go off to college, it’s harder to connect over a good story.
With the advent of Facetime, Skype, and Facebook video chat, there came all manner of ways to read a story in front of the computer or iPhone camera and show the pages to the little one on the other end. Of course, tinier tots are still less likely to stay engaged, and if you’re not practiced at imitating kindergarten teachers, it’s hard to hold a book so that your mini-audience can see both you and the book clearly, and for you (or Gramps) to see the book and the tot simultaneously. Now, however, there are apps that take this process one step beyond.
READEO

Chicago-based Readeo has created “BookChatting,” which combines a Skype-like video chat with the opportunity to co-read a book. So whether a loved one is deployed in the military or just on a business trip, big people and their tiny humans can see one another’s faces and share a story on the screen. During a BookChat, the pages of the story appear on the computer or device screen. Participants can see, hear, and talk to one another through video chat windows at the bottom of the screen, and either participant in a BookChat can turn the pages of the book, creating an interactive story time experience.
Readeo has a growing library of books, mainly for toddlers and very young readers, selected by a former children’s book reviews editor for Publisher’s Weekly. Personally, I’m intrigued by Does A Camel Cook? and The Ugly Vegetables. (For all Paper Doll knows, camels cook ugly vegetables!) Readeo claims that thanks to this highly interactive experience, its users report that BookChats “last almost 10 minutes longer per session than [on] Skype” and that 9 out of 10 of their users say BookChatting is better at capturing children’s attention than using Skype due to the interactive nature of the storybook combined with video and audio.
Membership is a pricey $9.99/month (or slightly discounted $99.99/year) after a 14-day free trial, but friends and family of Readeo members can use the app as guests at no cost.
CARIBU

Caribu considers itself “Facetime meets Kindle…for kids.” The educational ecosystem provides an “engaging livestream, shared-screen experience – in a carefully designed, curated, and secure platform.”
The in-app library contains hundreds of books, in seven languages, from leading children’s publishers, as well as educational workbooks in which children and adults use together in real time to read and draw. Child profiles in the system allow books to be personalized, and a story guide pointer works in real time to help children follow along in the book. Not only can children (and grownups) read, but they can draw “on” the books (via the screen) in real time as well.
Available for iOS and Android in 148 countries, Caribu offers video calling, but also provides an audio-only fallback for times when a user is in a low-bandwidth location. The app itself is free, but an all-access purchase is $6.99/month. Up to six family members are able to use the app with iOS family sharing enabled. (It’s not clear how many users can be registered for the Android version.
Gift subscriptions are available for 3-, 6-, and 12-month periods (and are currently available at discounted holiday rates. Caribu provides free subscriptions to active duty military personnel.
ROOTZ
For our European readers, there’s Rootz, which combines multiple functions in one app. At its heart, the Dutch-run Rootz is an interactive app designed to connect family and friends so that they can read children’s books “together” while located in different places. There are currently over 100 books in the Rootz app, and the in-app bookstore includes books in English as well as Spanish, French, German, Dutch, Japanese, Chinese, and Russian, geared for children from infants to age 12.
Rootz also offers the ability to play educational games – there are currently about 50 available – or share photos during a video conferencing session, and there’s a calendaring function to schedule the sessions (for those busy, overscheduled grandchildren).
Right now, each linked family/group can include up to nine people, whom you can invite via email directly from inside the app. Currently, the video calling sessions can include up to three people, but Rootz anticipates upgrading to allow up to six users concurrently.
The iOS-only app comes with a limited number of built-in books and games, with in-app purchases possible. (There’s a child-lock to ensure that little ones don’t go wild book-and-game spending sprees.) It’s not available for download in the US, and is only available for iPads; although the site mentions plans to make the app available on other tablets, it’s been a few years since the FAQ has been upgraded. Paper Doll advises trying out the free version to see if your child enjoys the experience before further exploring your Rootz.
Whether you read in-person or from a distance, know that reading with the children in your life will help them lead fuller lives, socially, emotionally, and intellectually. What could be more organized?
Paper Doll’s 5 Essential Lists For Planning an International Vacation

Recently, I returned from Italy. For most of 2018, I knew I was going to be going on a Smithsonian Highlights of Italy tour, and so I had a lot of time to prepare. I imagine you’d expect that as a professional organizer, packing for a two+ week trip to Italy would be no big deal. But I’m also a panicked packer. I may do laundry many days before the trip, only to decide at 1 a.m. before a 10 a.m. flight that I need to take a dress I haven’t worn in two years and may not have shoes to match. As a long-planned trip approaches, I have been known to shop for a new wardrobe of shoes, or socks, or foundation garments, or shirts, making me Kohl’s favorite shopper.
It’s not that I’m not organized; I have no issues with packing electronics or toiletries or meds. I put my mail on hold weeks ahead of a trip, and arrange my ride to have plenty of time to be at the airport, finding myself through security with fully-charged devices and little to do ahead of my sure-to-be-delayed flights.
Nope, it’s just clothing. I suspect it’s a body image thing: a fear that the ubiquitous photos, the only “true” proof that a vacation or conference or any other trip ever happened, will show my physique to a disadvantage. It’s a neurosis. The best I can do is to plan all of the details related to my trip with the precision of a wedding (or an invasion) – and the only way I can do that is with lists. Lots and lots of lists.
Whether you’re heading over the river and through the woods for Thanksgiving or crossing an ocean to visit a famous, giant, naked dude, consider the lists that might make your trip less stressful.

1) LIST OF WHAT TO ACQUIRE
Note, I say acquire and not purchase because many of the things you need for a trip, but only for that trip, need not add to your personal clutter.
Spread the word among your friends (via social media or in person) about your trip, and ask for guidance among those who’ve traveled extensively. I guarantee that you will learn some surprising things.
Friends of the blog Nanette Duffey of Organizing Instincts and her mom, Maxine, are smart travelers and kind people. In addition to travel standbys, they offered me a variety of supplies on loan for the trip, including a few things I may not have realized or remembered I needed:
- electric converter and adaptor with Italy-specific prongs
- opera glasses/small binoculars
- bungee cord laundry line with small plastic clips
- cross-body bag (halfway between a purse and a backpack)
- small Eagle Creek bags and money belts serviceable as purses or mini-packs
- personal, battery-operated fan
- inflatable travel pillow
All of these were great ideas, and I appreciated their help. In the end, I bought a fabulously squishy (non-inflatable) neck pillow on sale at TJMaxx for $6 instead of using the inflatable one, and PaperMommy bought me a Baggallini water-resistant cross-body bag that has replaced my everyday purse, but this largesse made planning the trip so much smoother.

My biggest regret, as you’ll understand as you read on, was eschewing the little fan, thinking it was too much of a luxury given my 44-pound luggage limit. (Trust me, ladies, even if you’re outside of the “power-surge” age group, unless global climate change experiences sudden reversion, a mini-fan is a small miracle.)
2) LISTS OF WHAT TO PACK: CLOTHING AND ACCESSORIES
In the US or Canada, you can pack very lightly because if you find you’re missing something, a quick trip to Walmart, Target, Kohl’s, or the nearest mall can find you what you need. When I visited Disney World in 2005, the airline lost my suitcase for 36 hours, but a zip over to a big box store (and a ridiculous familiarity with store layouts) meant that we lost less than an hour of precious vacation to obtain a few essentials.
However, if your luggage is lost in a foreign country, or you’ve failed to bring shoes that match the outfit you plan to wear to give a speech, accept the Nobel Prize, or make (or receive) a wedding proposal, not having your stuff can cause anxiety. Planning is key.
Start with your schedule. What special events or activities require certain articles of clothing? Will you need a ballgown for meeting the Queen? Hiking boots? I saw people climbing the steps of the Colosseum in sandals, but I know I really needed grippy treads and closed-toe shoes to feel safe.

Check the weather report. The Smithsonian info packet included a list of the average highs and lows in Sorrento, Rome, and Venice for the month of September. However, although it was delightfully sunny for all but one day of the half-month tour, the temperatures were more than ten degrees higher than the average. It was hot. Damned hot. Checking the ten-day forecast online helped me decide to jettison anything with long-sleeves and add a few lighter skirts. And if unexpected inclement weather hits? The Points Guy blog has 13 tips for keeping rainy weather from ruining your trip.
Bear in mind that if you’re traveling internationally, many religious sites require covered shoulders for women and trousers for men. You can often buy inexpensive but beautiful scarves (or inexpensive but ugly rain slickers) outside the Vatican and other religious sites.
Don’t pack what you can’t afford to lose. Certainly, you have insurance (right?), but even the best policy only covers the monetary value of what gets lost or stolen. I made the decision not to bring any jewelry at all. Perhaps excessive (and a fashion DON’T) but losing my favorite pieces would have spoiled the trip for me. Instead, it gave me a shopping goal to find a memorable (but affordable) piece of jewelry while traveling.
3) LISTS OF WHAT TO PACK: EVERYTHING ELSE
If you’ve never made a packing list before, start by playing “Let’s Pretend.” Start at your bed and walk yourself through your day from tooth-brushing, showering, and grooming, and on through the rest of your typical day. Keep your pen or notetaking app near you for a full day, as you’ll remember things you might otherwise have forgotten.
If you consider yourself low-maintenance, or if you’re the sort of person who can crash on a friend’s couch or sleep in a tent, bully for you, but for those of us who rarely leave home without using “product” in our hair or have activity-specific shoes to avoid blisters, there are issues to consider.
For example, I’d been warned that even with converters, American hairdryers won’t work abroad; my fancy and tress-tending dryer would be staying behind, and precious space meant leaving behind the smoothing velveteen-coated curlers that keep me from looking like Art Garfunkel when it’s humid. I felt I had no choice but to accept the hotel hair dryers, but I invested $20 at Amazon for a dual-voltage haircare product. Results were mixed, especially when the temperatures topped 90°F, but at least I didn’t waste my luggage space on devices that would have blown up.
What are your little saviors? Only you know what you need in your daily life, but I can tell you what helped me survive (admittedly) “first world problem” awkwardness on this trip:
- Zip-lock bags in multiple sizes – Yes, you have to put your carry-on liquids in a one-quart baggie, but these little marvels work for much more, from gathering all of your small chargers and earbuds neatly inside a small day pack to safely transporting the only non-enormous container of baby powder sold anywhere in Italy without making your suitcase look like blizzard scene from a Christmas movie.

- Tissue packs – When we got off the “motor coach” in Orvieto, a lovely hilltop town, our wonderful tour director advised us to skip “not the greatest toilets” and wait until we climbed up into the city. We should have listened. There was no toilet paper. (Also, no soap, and as we found all throughout Italy, no toilet seats. But that’s another blog post!)
- Anti-bacterial gel – See prior paragraph. Also, you’ll be touching handrails touched by thousands of people each day. I switched back and forth between environmentally un-sound but comforting Wet Ones and a non-alcohol gel. (This isn’t the blog to argue about the dangers of anti-bacterial products on overall global resistance. I won’t hold my gelato cone with a hand that’s covered in Vesuvius ash and dead Etruscans, and you can’t make me!)
- Insect repellant, sunblock and a hat – I may not have been pinched by any Italian men, but their mosquito cousins did their worst. Our group debated the efficacy of sprays vs. lotions vs. those telephone-style coiled bracelets designed to keep bugs at bay, but came to no conclusions. Enjoy nature without becoming a victim.
- Compression socks/stockings – As someone who once had a deep vein thrombosis, and as one of almost 20 people in a tour group of twenty with swollen ankles and legs blotched with broken blood vessels, I encourage you to wear compression socks or stockings on your longer flights.
For other packing suggestions, consult the experts:
Rick Steves’ Packing List (as a list) or as a printable checklist PDF
Eagle Creek: What to Pack: The Ultimate Travel Packing Checklist
Travels’ Interactive Checklist – This unassuming site is a marvel! Answer a few questions and get personalized lists: travel prep activities; how to handle documents, money, and tickets; packing lists; time, weather, currency, and safety advisories for your destination; flying and packing tips; a map!
Roll It, Bag It, Cube It to Pack Light and Tight — and Save on Travel from The Penny Hoarder
4) LISTS OF WHAT TO DO BEFORE YOU LEAVE
Stop deliveries. What gets delivered to your home or office? Mail? Meal prep kits? Place a hold.
Think like a doctor. Don’t wait until the week of your trip to think about refilling prescriptions, or the timing may leave you without access to essential meds. Talk to your pharmacist (and, if necessary, your physician) to make sure you’ll have what you need. (Of course, you should pack all medical essentials in your carry-on.)
Call your health insurance provider. I was delighted (but surprised) to find that my marketplace-acquired Blue Cross Blue Shield policy had Global Core coverage to ensure that if I needed to be hospitalized or receive medical care (emergency or otherwise) while in Italy, I was safe.
Be a money honey. Review your bank account activity and identify what non-automated tasks you’ll have to address before you depart. Are there bills for which you’ll need to schedule payment even though the actual statements won’t have arrived before you depart?
Call your bank and credit card companies to alert them that you’ll be traveling (so you won’t be flagged as a fraudster or thief) and find out which of your cards charge international transaction fees.
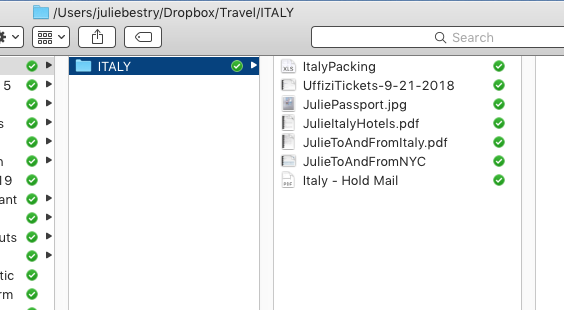
Gather your documents. Take a photo of the interior page of your passport. (Don’t worry – your photo can’t be as bad as mine.) Keep copies in your phone’s camera roll and in Dropbox or Evernote or wherever you collect trip-related documents (like copies of your itinerary, hotel contact information, and emergency numbers). Email or text a copy to people who are always immediately responsive, like your BFF or your mom. Or my mom.
5) LIST OF IMPORTANT PHRASES
This summer, I realized that my paltry Italian vocabulary of ciao, grazie, prego, gelato, and mafia was not going to cut it, no matter how much my frequently-traveling pals assured me that everyone in Europe speaks English. I started using Duolingo, a fun and free program (available for browsers or in-app) to learn languages. While it makes language learning fun, Duolingo builds language skills using some quirky phrases. Thus, I arrived in Italy knowing how to say, “My monkey is hungry” and “My mother’s toothbrush is green and white,” but not yet how to say “Where is the bathroom?” or “How much does this cost?”
If you are traveling to a locale where your primary language is not spoken, download Google Translate (or at least bookmark the less robust web page). It’s a great app, and you can type, handwrite, or just hold it up to a sign or menu and it will magically translate what you’re seeing into English. You can also speak into it and it will translate your phrase, which was hugely helpful when the hotel laundry lost my shirt and the nice lady from housekeeping wanted to foist a lovely (and obviously more expensive) shirt on me rather than giving me my own.
My cell phone carrier promised me I’d have the same texting and data plan as I have at home and would only spend extra on voice minutes, but WiFi was sometimes lackluster and I learned early on that data was racking up major moolah. So, make a list of the essential questions you think you might want to ask while traveling and keep it handy. For example:
- “Hello, pardon me, I’m sorry that my [language] is poor, but could you help me? Thank you.”
- “How much should a taxi cost to get me to [point on the map]?” or “How long would it take me to walk to [point on the map]?” “Is it safe for me to walk to [point on the map]?”
- “How much does this cost?”
- “I’m severely allergic to [X] and I will die if [X] is in my food. Is [X] in this?”
- “My language course only taught me how to say that my monkey is hungry and my mother’s toothbrush is green and white. I’m certain your English is better than my [language]. Please feel free to laugh at me after you tell me where to find the toilets.”
As it turned out, “grazie” proved to be the most valuable vocabulary words I studied. After “gelato.”

Organize your planning, your packing, and your preparation with lists – it will help you avoid being anxious or listless (literally and figuratively) as your departure date approaches. Buon viaggio!




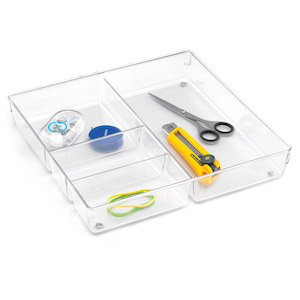 Mesh desk drawer organizers from office supply stores are usually inexpensive, low-key attractive, and work well when you want to buy just one thing. This


Follow Me