Paper Doll’s 10-Minute Tasks to Make Difficult Moments Easier
Lately, I’ve been considering that it’s a bit ironic that February, the shortest month of the year, is National Time Management Month. We collectively assign the month with the fewest days to figure out how to achieve goals that would solve so many frustrations.
Wouldn’t a 31-day month be better for that?
A Necessary Caveat About “Time Management”
Time management, obviously, is a misnomer. We don’t really manage time, which is fixed. Every person gets the same 60 seconds every minute, the same 60 minutes every hour, the same 24 hours every day, and of course, 525,600 minutes in a year.
(With apologies to all of you who’d rather watch the Broadway version, linked above, than Glee‘s, but YouTube is really cracking down on music videos being played anywhere but their own platform.)
Rather, we must try to manage our attention, our energy, and our labor. Though we have the same amount of time, none of us has the exact same quality of our time, nor the same obligations.
The single, healthy, unencumbered twenty-something with a salaried office job has more (financial, as well as temporal) resources than the mom of two working multiple retail jobs, or the person going to school while taking care of an elderly parent, or the individual struggling to make it through these crazy times with a chronic illness, visible or invisible.
Often, when the media has articles on time-saving tasks, they fail to acknowledge the complexities of life. If you are beyond the juggling and are full-on struggling, we professional organizers and productivity consultants see you. And we know that when the you-know-what hits the fan, you’ve got limited energy and time to deal.
So, today’s post has ten-minute tasks (or projects that can be handled as a series of ten-minute tasks) that will make things easier for you and your family when things get “ouchie.”
Check and Update Your Beneficiaries
You don’t even have to do these all at once, though if your paperwork is already organized, it should only take you a couple minutes for each. Though the time investment is small, the ease of mind it will bring (both now, and in the future) is tremendous.
And yes, you can even consider these two separate tasks (the checking and the updating) so you can make two different checkmarks on your task list.
Pull out the file folders or head to your online accounts and check to see who you previously listed as your primary and secondary beneficiaries for any of the following you may have:
- life insurance policies
- annuities
- pension accounts
- Individual Retirement Accounts (IRAs)
- 401(k)s, 403(b)s, and other retirement accounts
- profit-sharing plans
- brokerage/investment accounts
Obviously, a beneficiary is someone who gets a benefit. When we’re looking at financial documents, beneficiaries are the people (or sometimes entities) that the account holder designates as the recipient of any assets in that account when the account holder eventually shuffles off this mortal coil. (I know, nobody likes to use the world “death” or think about it, but that’s why we have life insurance policies, wills, and similar accounts and documents — to make things easier when someone has passed away.)
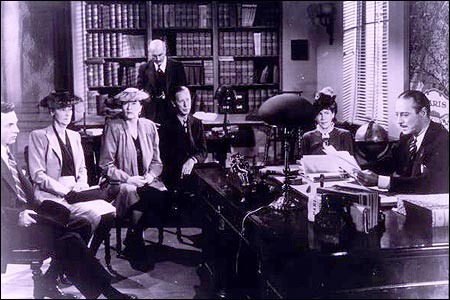
“The Reading of the Will” — central to any good murder mystery
In most cases, setting a beneficiary (and usually both a primary and secondary beneficiary) is part of the required paperwork. Some states (usually “community property states”) require you to list your spouse (if you have one) as your primary beneficiary for retirement and other accounts.
You may be wondering, if you have a will, why do you need to name beneficiaries? That’s a darned good question.
The main reason is that when a person dies, a will goes through “probate,” a legal process where the court in your jurisdiction supervises all the assets in your estate getting distributed hither and yon. Depending on the situation, it can be murky and complicated, and take a long time, which is pretty miserable if your people need those funds.
However, whenever you have a beneficiary set in your insurance policies and various financial accounts, that money can go straight to your intended recipient as soon as the insurance or financial institution gets proof that you are no longer among us. That usually just amounts to a certified copy of the death certificate and some proper ID.
If you set your beneficiaries for any of these accounts several years ago, you may have picked someone no longer appropriate — parents who are no longer living (or not able to manage their own finances), former spouses or significant others, or even friends who are not part of your active life anymore.
I went through the “check the beneficiaries” process with one client who was shocked to realize that she’d never gone back to revise the beneficiary on a small 401(k) plan she’d never bothered to roll over from a job decades earlier. (Note to readers: don’t do that. Roll over your retirement accounts so you don’t have to hope your former employers have stayed solvent and managed your funds properly.)
Imagine my client’s shock when she realized that her [expletive deleted], [expletive deleted]ing [expletive] of a [expletive deleting] ex-[expletive deleted] husband was still her beneficiary! Be assured it did not take her ten full seconds, let alone minutes, to get cracking on changing that beneficiary!
Imagine my client's shock when she realized that her *expletive deleted*, *expletive deleted*ing *expletive* of a *expletive deleted*ing ex-*expletive deleted* husband was still her beneficiary! Share on XIf you never set your beneficiaries before or your want or need to change them, you’ll need a few pieces of information, like their Social Security numbers, birth dates, and contact information (like phone numbers, email addresses, and mailing addresses).
EXTRA CREDIT: Here’s a time-saver so you don’t have to go through this entire process in the future:
- Create a spreadsheet (or even a handwritten note) with the first column listing all of your account names.
- Create a column and list all of the beneficiaries as they stand now.
- Create a column entitled “as of” and list today’s date.
- Any time you acquire a new policy, add a line to this list. Any time you revise a beneficiary, revise the spreadsheet.
This way, whenever you’re not sure whether you’ve updated your beneficiary, you’ll only have to look in one place.
EXTRA, EXTRA CREDIT: Checking your beneficiaries is easy and quick. Changing/updating them should be easy, but how quickly you can accomplish it depends on whether your insurance or financial institution will let you do this all online. But making this list is definitely easy and quick.
However, to take it a step further, fancy-up this spreadsheet with another ten-minute (or so) task.
Add columns for your account number, and the name, email address, and phone number of your insurance agents and financial brokers associated with each policy or account. Create a column to explain what kind of policy or account it is. And then make sure that someone you trust, like the person who has your Power of Attorney, has a copy or can access it when/if necessary.
Put Your Emergency Contacts On Ice
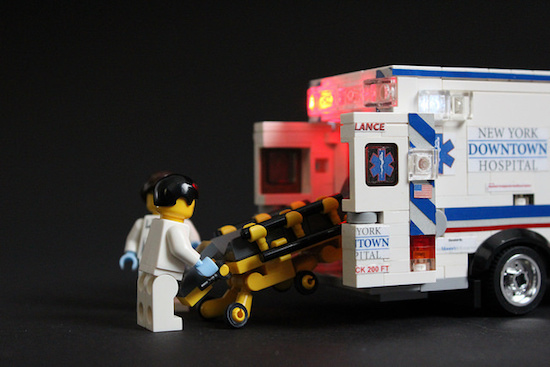
“Downtown Hospital Ambulance” by sponki25 is licensed under CC BY 2.0
In the early 2000s, first responders in the UK started suggesting that people list their “In Case of Emergency” contacts as “ICE” on their cell phones to make those contacts easy to locate. The idea quickly took hold in North America.
While first responders, themselves, generally don’t have the time (or authorization) to contact someone for you, nurses and hospital staff often do need to obtain important medical information when you are not able to provide it. That’s where your contacts come in.
As cell phones got fancier, the lock screens made accessing ICE contacts more difficult, but now, even if you are not able to respond, medical personnel may be able to use your thumb print access or facial recognition to get your emergency contact info.
But there’s something else you can quickly do to make sure your emergency contacts can, um, get contacted. Add your emergency contacts to your cell phone’s lock screen.
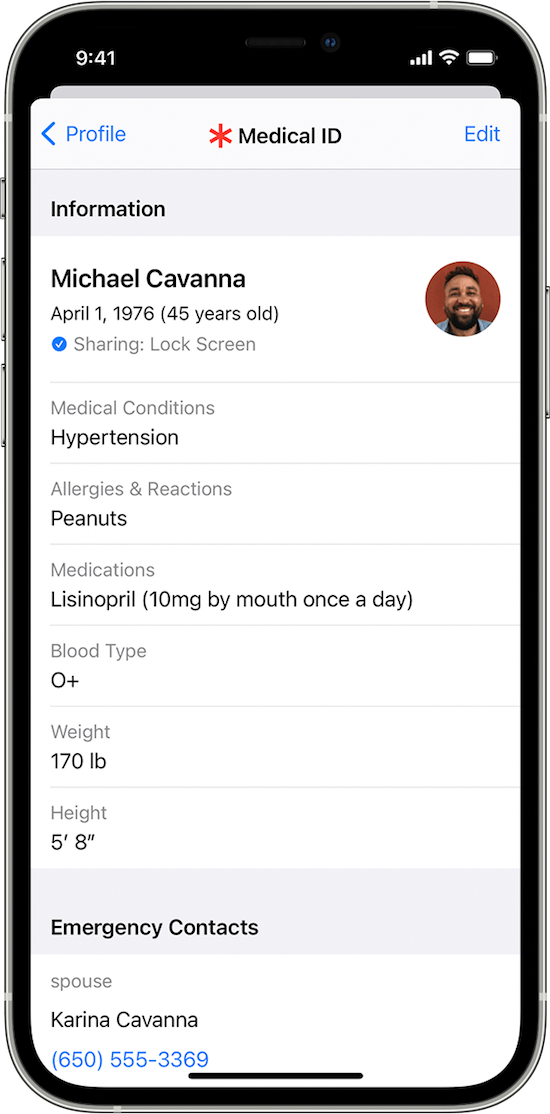
On an iPhone:
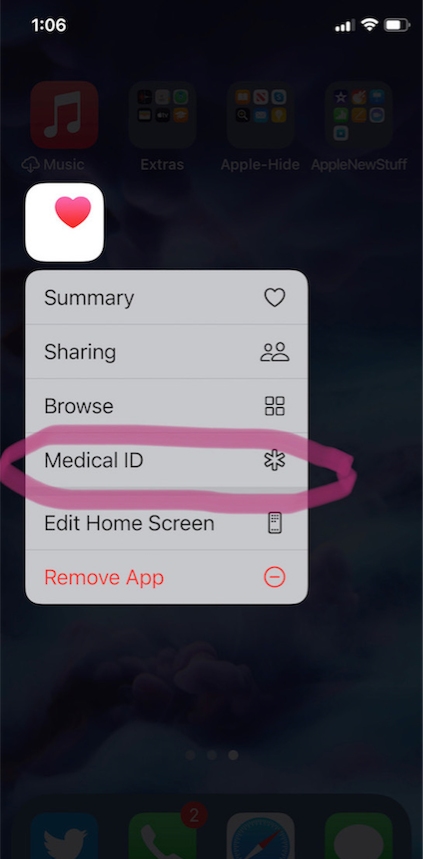
1) Go to the Medical ID screen. You can get there one of three ways:
- Long-press on the Health app icon. That will bring up a screen that looks like this:
- You can also manually open the Health App by tapping on it, then on your profile image, and then selecting Medical ID.
- Or go to Settings, then Health, then Medical ID.
2) Tap Edit.
3) Fill in all the fields that you want, but if there’s nothing significant, it’s better to type “none” than to leave it blank (so that you’re not leaving anything open to interpretation). There are fields for medical conditions, allergies, medications, blood type, weight, height, and emergency contacts. (Bingo!)
At the top, there’s an option to put in your photo. Do that; it ensures that an emergency responder can verify this is your phone.
4) Choose a name and phone number (or two names and numbers) for your Emergency Contact(s). Be sure you select names/numbers that already exist in your contacts list.
5) Scroll down to the section for Emergency Access.
6) Enable “Show When Locked” and “Share During Emergency Call.”
7) Tap “Done” at the top right corner to save your info.
Now, go look at your lock screen. You should see the word “Emergency” in the lower left corner of your iPhone. If your phone is locked and someone taps that, they can see your emergency information but nothing else.
If you don’t see the word “Emergency” there, hold down your power button (or power and volume-down buttons) as if you were going to turn off your phone and you’ll see the Medical ID access. (I guess it all depends on which version of iOS you’re using.)
For more information about the iOS Medical ID, Apple has a detailed page of instructions and explanations.
Assuming you have a photo somewhere on your phone to add in the photo field, this can usually be completed in well under 10 minutes. (The only sticking point is if someone has many medications or allergies they have to list.)
On an Android Phone
Although Android phones do not have one default health-related app, you can easily show your emergency contacts on your lock screen in one of two ways.
Method #1
- Open your Settings app.
- Tap “User & Accounts” and then select “Emergency Information.”
- Tap “Info” and then “Edit information” to enter any medical information you want to store.
- Tap “Add Contact” to add a person from your contacts list. Note, you might have to click on “Contacts” first to be presented with the list
Method #2
Android phones will let owners put any message directly on the lock screen.
- Open your Settings app.
- Tap “Security & Location.”
- Tap “Settings” next to “Screen lock.”
- Tap “Lock screen message.”
- Type your primary emergency contact (and, if applicable, any medical conditions). You could type, “In Emergency, call Lin-Manuel Miranda” and his number. What? Can you think of someone more comforting to have around in an emergency? OK, maybe Stanley Tucci. Or Paper Mommy.
- Tap “Save.”
After you’ve set this up, your ICE information can be found by swiping upward on the lock screen and tapping EMERGENCY and then “Emergency information.”
Do An Inventory of Your Essential Documents
An emergency is the worst time to realize you have no idea where your important documents are. Do you know which of these documents you have and where you can find them?
- Birth Certificate
- Social Security card
- Marriage License and Certificate
- Divorce Degree
- Military Separation Papers
- Death Certificate
- Passport
- Durable Power of Attorney for Finances
- Healthcare Proxy or Durable Power of Attorney for Healthcare
- Living Will or Advanced Medical Directive
- Last Will and Testament
- Digital Will
- Driver’s License
- Voter Registration card
- Vaccination Record
- COVID Vaccinate Card
- Professional license(s)
- Other licenses
As with the beneficiaries section above, a great way to save time is to make a list (think of it as a treasure map) of where each of these documents are located. Use Excel or a Google spreadsheet and take note of what the document is and where it’s located (e.g., your family filing system, fireproof safe, safe deposit box, wallet, etc.).
EXTRA CREDIT: For good measure, for your passport, driver’s license, and any other licenses, take note of the expiration date.
And then for really good measure, put a reminder task in your phone to alert you one month before your any of these items expire to make sure you address renewals. (Give yourself a longer lead-time to renew your passport; also, as you’ve probably not been traveling out of the country in the last two years, you should check to make sure your passport hasn’t already expired.)
If you have a lot of documents, just do a few every day and you’ll be amazed at what a few ten-minute tasks can do to put your mind at ease.
EXTRA, EXTRA CREDIT: The Paper Doll archive has extensive information about what documents you should have and what to do if they’re missing. These posts are a great place to start.
How to Replace and Organize 7 Essential Government Documents
How to Create, Organize, and Safeguard 5 Essential Legal and Estate Documents
The Professor and Mary Ann: 8 Other Essential Documents You Need To Create
Protect and Organize Your COVID Vaccination Card
Paper Doll acknowledges that I write longer-than-typical blog posts. Feel free to consider reading each one to be a 10-minute task. But the knowledge you gain will contribute to your ability to use your time more efficiently. Because, the more you know, the better prepared you are for any eventuality.
Snap Some Photos to Take Key Information With You
Unlike the vital documents listed in the prior section, there are some pieces of information you are more likely to lack at the most inconvenient times.
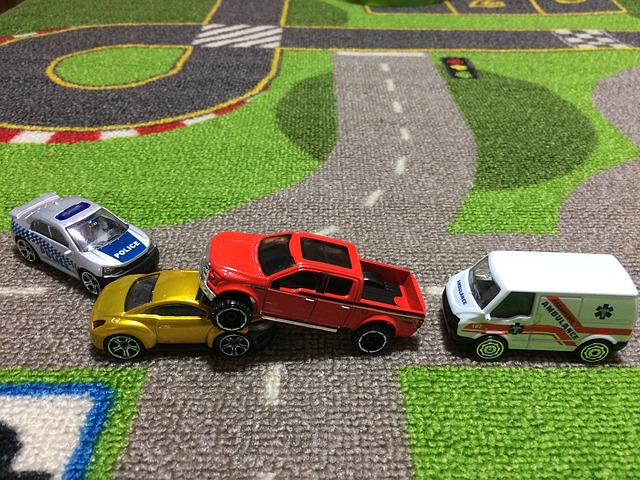
Toy car accident image by Andrea Closier on Pixabay
For example, if you have an auto accident and the police or first responders won’t let you get back into your car for safety reasons, you wouldn’t be able to get your auto registration and car insurance paperwork out of your car. Yes, you’d have it at home, but that would slow everything down.
Or perhaps you need to fill a prescription at a different pharmacy from usual, perhaps when you’re on vacation, and they don’t already have your pharmaceutical company discount card on record.
Or maybe you’re unexpectedly with your spouse or child or senior parent in the emergency room, and the physicians want to know what medications, at what dosages, prescribed by what healthcare providers, the patient is taking. If that information is pinned to the fridge at home, but you came directly to the ER from somewhere else, that’s frustrating.
This is where the magic of modern cell phones (which we usually bemoan for the time they steal from us) comes in handy. Consider any of the following:
- auto registration form
- auto insurance card
- health insurance card
- homeowner’s insurance card
- pharmaceutical company discount cards
- handwritten instructions of how to get to a room or office you visit infrequently
- a list of the size/type of batteries and light bulbs you use for which items in your home so that you never again have to unscrew a light bulb just to know what voltage and whether you want a skinny-base or a fat-base bulb)
- etc., for whatever is important in your life.
You could snap all of these as photographs and store them in a photo album in your phone’s photo section. Name it “Remember” or “Vital” or whatever will catch your eye.
If you want to go to the effort of scanning the document and sending it to your phone, that’s fine, but iOS has created an easy option using the Notes app.
- Open a new or existing note.
- Tap the cute little camera icon.
- Tap “Scan Documents.”
- Focus your document, card, medicine label or whatever within your camera’s viewing area.
- Then you have two options:
- Let the auto-capture work its magic as the item comes into the viewfinder and auto-focuses, or
- Click the shutter button (or one of the volume buttons) to capture the scan
- Drag the corners of the scan to do any necessary adjustments.
- Tap “Keep Scan.”
- Scan more fiddly stuff to keep it handy or tape Save if you’re done.
From here, you can save the scan in your Notes or Files app in your phone itself, or upload it to a synced app, like Dropbox or Evernote:
As an all-Apple user, I don’t have an Android-specific scanning suggestion; if you do, please add your voice in the comments.
The next time a new insurance card or other piece of important information comes your way, take a snapshot or scan to ensure you’ll have whatever you might need when you are out and about.
As I often say, organizing can’t prevent all catastrophes, but it can make many of them less catastrophic. I hope these various ten(ish)-minute tasks will help ease many of the ickier moments in life for you.

Julie- You cracked me up with your comment about Time Management Month being on the shorted month of the year. I never realized that. Maybe the idea is if you are more efficient with your time, you’ll save four days. Who knows?
This post was worth the price of admission, and then some. I LOVE the two tips about how to add emergency contacts and the reminder about scanning capabilities in Notes. Wow! So useful. Guess what I’ll be doing at some 10-minute time in the future. Yep!
Also, your comment about how time management tips don’t always account for the “complexities of life” resonated with me. Any time we help clients create systems, ALL of who they are and what they do gets taken into consideration. Because lives are complicated, full, and a strategy the works for one person might not for another.
Thank you for all this great stuff! You are Oh, So Awesome!
Linda, you are the best cheerleader. I’m so glad you liked the post. And I like the Medical ID method of accessing emergency contacts better than some nurse holding the phone in front of my face to try to achieve facial recognition! (NCIS had a storyline about a guy’s girlfriend committing treason, and it hinged on her using his facial recognition while he was asleep. Mine doesn’t work unless I get the angle juuuuuuust right!)
You are Oh, So Lovely!
It makes perfect sense to me! If you have less time available, you have to be more efficient with it.
I’m now working three full days and two half days a week, instead of five full days, but I seem to be getting just as much done.
Wow! Who knew? Just set up my medical ID. Already had ICE
Great job, Jonda! I hope nobody ever has to use it, but I’m so glad you put it in motion. One fewer thing to ever worry about!
Thank you for reading.
Wonderful advice as always, Julie. I laughed out loud at the quote from your client about her ex-*expletive deleted” husband. She may have come back as a ghost and haunted that ex-*expletive deleted” husband if you hadn’t intervened! Because of you, she can pass along into her afterlife peacefully. Although, it sounds like the ex could have used a good haunting…
LOL, I think the [expletive deleted] husband would have expired at least one moment prior, given her anger! But your way is good, too.
Thank you for reading!
Great stuff! This is so important to review all of these things. Financial documents are so important. It’s essential to visit them once in a while. Thanks for sharing.
We like to think of these things as set-it-and-forget-it because we really want to forget about them, but yeah, a little effort goes a long way toward putting our minds at ease. Thank you for reading!
This information is so darned useful and actionable. I added my medical information to my phone and I’m going to work my way through everything else ten minutes at a time. Thank you for this post, it’s going to help so many people.
I’m so pleased you found it useful, Lucy. There are so many “little” things we can do to make the rough times a little smoother. Thank you for reading!
Julie, thanks for these tips on short tasks to do to be ready in the event of a difficult moments. The details on setting the ICE on cell phones is so helpful. I also like the idea of taking photos of important information. When I was in a a car accident and my car had to be towed away, I actually had a second copy of my insurance card in my wallet, but having a photo of it on my phone would have been just as good.
Isn’t it amazing how one little click of a digital shutter can preserve information? It’s magic!
Thanks for reading!