Archive for ‘Tech’ Category
How to Stay Organized When Travel Goes Off the Rails (or Runway)

Summertime is a high travel season. If you’re ceaselessly online, when you hear “travel,” you’re probably stuck on the non-stop loop of “Nothing Beats a Jet 2 Holiday.” (If you just got the jingle out of your head, I’m sorry.)
Otherwise, you’re either traveling, yourself, or comparing travel horror stories. But as you’ll see, a little organization can make these experiences a little easier to stand.
ORGANIZED TRAVEL IN A DISORGANIZED ERA
Trapped on the Tarmac
A few weeks ago, I did my own little version of Planes (No Trains) and Automobiles. The plan was to fly to Buffalo (by way of Atlanta) for my 40th high school reunion, and after a week with Paper Mommy, rent a car to drive to a friend’s combination vow renewal/housewarming/birthday party in Massachusetts, followed by a short drive to an airport in Connecticut and a flight home (again, by way of Atlanta).
Any trip with that many moving parts leaves a traveler open to a few kerfuffles. There was a one-hour delay on the New York State Thruway near the village of Canajoharie when one 18-wheeler sheared off the back of another 18 wheeler that was carrying giant bags of cat food, littering the highway with both bags and actual loose cat food.
On the return trip from Connecticut to Atlanta, the gate agent seemed particularly surly as she informed us that the airline had oversold the flight, and nobody would be boarding unless three people agreed to give up their seats and fly the next afternoon or evening, and agree to be without their luggage until they did fly! (This came after I circled the airport twice, passing the “Rental Car Returns” sign each time, because my GPS insisted that I should continue further along and return my car to an empty field.)
However, the anecdote that prompted this post was my connecting flight from Atlanta to Buffalo. We boarded on time, but passengers immediately noted how warm the plane was. After everyone had fastened their seat belts, and had their tray tables locked and seat backs in an upright position, we heard the various bing-bongs, but went nowhere. Eventually, a weary voice intoned, “This is your captain speaking…” and we learned that there was a “minor mechanical problem” and we would be delayed fifteen to twenty minutes.
(This wasn’t my flight. But in a way, don’t we all feel like this was our flight?)
The temperature continued to rise. Passengers were polite and resigned, except that after about half an hour, an announcement was made that there would be another delay of about twenty to twenty-five minutes. This continued for about an hour and a half, when we were assured the problem had been fixed and that pending ten minutes of “paperwork,” our flight would take off. But it didn’t.
We were then told that there was a lightning strike on the field and that all ground crew were ordered inside, so we needed to wait until the weather cleared. At this point, our phones’ weather apps told us it was in the 90s outside the plane; you can imagine how high above 100° it reached inside.
After two hours, a small rumble of rebellion fomented. We were hot, thirsty, late, and cranky.
Over the course of time, passengers started air-dropping and sharing Department of Transportation regulations (of which, more later) about traveler rights regarding delays. After more than 2-1/2 hours boiling inside this elongated metal hot box, we were told that we would de-plane and it would be decided whether we would re-board or be assigned a new plane. (This made us wonder whether the weather issue had been valid at all; had our plane truly been fixed as reported, why would we have needed a new one?)
Long-story-short, we deplaned, had our re-boarding scheduled and canceled multiple times in a short period, and then we were assigned a new plane — which would take off a little more than four hours after our originally scheduled flight.
Welcome to airline travel in 2025.
The Chaos of Air Travel
Of course, my experience is one of many, and a relatively insignificant one. A few days after this, Alaska Airlines grounded its entire complement of planes — 200 flights in all — over a Sunday night and Monday computer glitch.
Because travel has become more chaotic (and more controlled by digital systems), it’s increasingly necessary for consumers to organize their resources to prepare and respond to this chaos. In this post, I will highlight some of the essential information you need and actions you can take to guard against travel frustrations.
Pre-Trip Prep: The New Administrative Burden of Travel
Do you recall the days where you’d call a travel agent, explain where you wanted to go and when, and be presented with a nifty little itinerary and all the information you might need until you arrived at the airport (with your non-wheeled suitcase and traveler’s checks in hand)?

Online check-in and e-tickets began in the 1990s, and though it’s shocking to think how recently it actually was, we didn’t have mobile check-in until 2007, and it wasn’t widely adopted for several years after that. (For those interested, CNN’s Final Call for Paper Boarding Passes: A Visual History of the Beloved Memento offers an interesting look back.)
Book Your Travel Arrangements — With Padding
This is not a travel blog, but one focused on organizing and productivity. If you want good advice on booking travel, I direct you to:
- The Points Guy (especially for using credit card, airline, and hotel reward points for booking)
- The Blonde Abroad (focused on solo traveling for women)
- Nomadic Matt (great for coverage of wide-ranging travel tips and news)
- Budget Traveller (particularly for adventurous but cost-cutting travelers)
Travel is messier than ever. It’s not uncommon to hear tales of canceled flights and travelers sleeping in airports, even when weather is not a factor. My advice is to always book your travel with at least one day of padding in case things go awry.
I discourage you from ever scheduling a flight the same day that you need to be anywhere or do anything; that will guarantee more stress than is necessary.
Log all of your travel information
Those 1970s-era travel agents? They provided tickets, itineraries, and nicely organized lists with every date, time, and confirmation number. You are your own travel agent now.
Whether you create a digital, analog, or hybrid record of all of this information is up to you. However, whatever you do to log your essential travel information, provide a copy to loved one or trusted assistant. If technology fails and/or you and your documents are divided, having someone able to see your travel arrangements (and possibly help you alter them from afar) can be the real golden ticket.
Confirm everything a week in advance
During our junior year in college, my boyfriend was seeking a placement for a summer and semester in engineering co-op (basically, a fancy science-y internship). He painstakingly wrote down the details arranged by the company’s office, and arrived on-time at the airport — a day late.
It’s easy to mis-remember details, or to misread what you’ve logged or see in an app. Check your dates and times, even if you’re 100% absolutely, positively sure.
Check in when prompted
Nowadays, check-in has become a part-time job for travelers. I traveled extensively up through 2019, but must admit that I hadn’t traveled (by air or stayed in a hotel) since the start of the pandemic, and was by turns surprised, annoyed, and flummoxed by all the different types of checking in to be done. You will be asked to check in a day prior for:
- Flights — You’ll generally get a prompt to check in 24 hours in advance of the first flight in whatever sequence of flights you have. If you haven’t booked via an airline co-branded credit card, you will likely have to pay a fee for your baggage; do it at this time and it will be one fewer thing to worry about when you get to the airport.
- Hotels — I’ll be honest, I wasn’t expecting to have to do this and was surprised when my hotel sent me a text and email to prompt my check-in.
This is where another travel kerfuffle took place. I clicked on the link in the text, which took me to the hotel website, but the page was insistent that my booking did not exist and suggested I call. (I was just delighted that I wasn’t routed to an AI bot.) The phone system immediately recognized my cell phone number and the automated attendant asked if I was calling about my hotel reservation for the next day — at least the robot lady knew that I had a reservation, even if the web site did not.
It took twenty minutes with a lovely gentleman to accomplish the digital check-in; eventually, I had to download the app, log in (twice) and (I think) spin around three times and bow toward the ocean, but eventually it worked.
For this reason, having your confirmation number and reservation information logged and handy will help ease whatever pain the process requires of you.
- Rental cars — Yup, I wasn’t expecting this, either. Admittedly, every time I’ve had to rent a car in the past 5 years it has been (sigh) because someone has hit (or stolen) my car, so the reservations have been handled by insurance companies, and the car rental companies have called me to confirm, so I have never had to check in.
- Tours, transfers, etc. — Basically, any arrangements you have related to travel, whether it’s a car service, a tour, a transfer (like from plane to bus for a group booking), etc., will likely have a booking. Anticipate your check-ins so that your busy day-before-travel workload is not interrupted unnecessarily.
What happens if you don’t check in?
Wondering what happens if you just don’t bother to do a digital check-in as prompted? Consequences vary.
On a flight, your seat may be given to someone on the stand-by list, particularly if you arrive late to the airport. You might miss important information or changes to your reservation, causing you to be late or miss the trip altogether. Your hotel room could be given away, or your priority level could be reduced.
ORGANIZING YOUR TRAVEL INFORMATION
 The New Tech Landscape of Travel: Apps You Can’t Escape
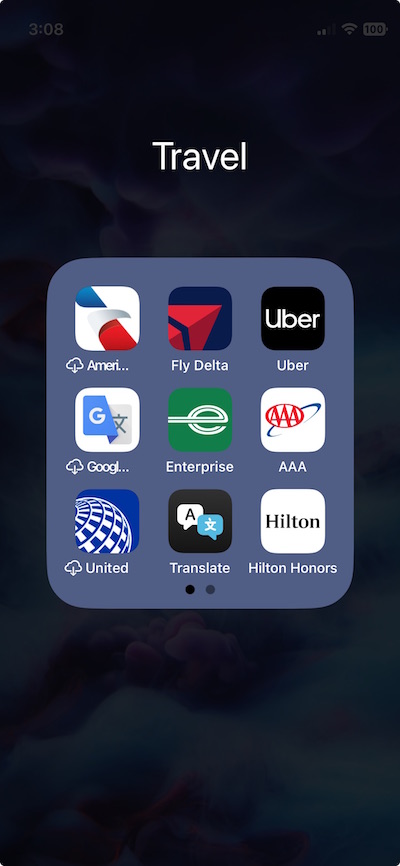
I’m not going to tell you that you have to have all of these apps, but I can tell you from recent experience that downloading travel apps and having the passwords accessible in a digital password manager will save you headaches on a rough travel day. So, at least consider downloading the following apps and saving them all in one travel folder, moved to your phone’s first page on travel days:
- Airline apps – Although you can check in to a flight in your computer, phone, or tablet browser, airline apps are pretty much de rigueur for managing check-ins, downloading boarding passes (or sharing them to your digital wallet), keeping abreast of gate changes, arranging re-bookings, etc. The app makes everything smoother.
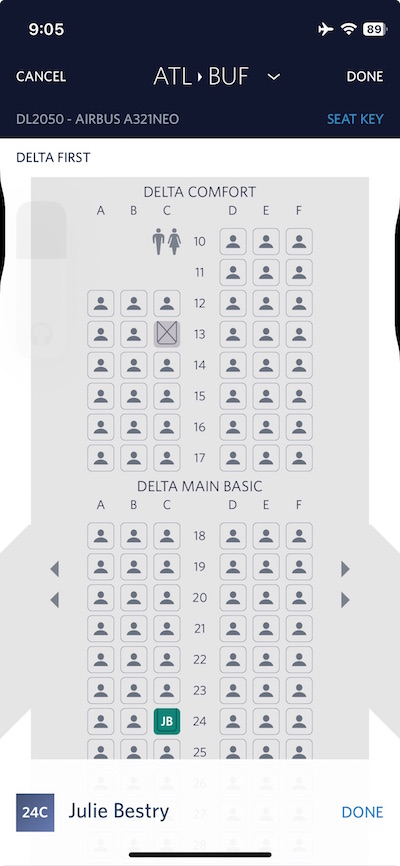
Across the four flights on my trip, but particularly that hot-box delayed-flight experience, the app alerted me to each change (and even to the location of my suitcase each time it was relocated) long before the pilot or gate agent informed us of anything. Because the new plane was larger and had a different layout, my boarding pass and seat assignment changed, seamlessly. I just had to consult the app.
- Hotel apps – You may be wondering why you need an app to basically rent a tiny piece of real estate for a day. (You may also be wondering why you book a hotel “by the day” but can only check in at 3 p.m. and must check out at 11 a.m., getting only 20 hours of any “day.” Sorry, no clue.)
Hotel apps now not only have digital check-in and check-out, but keyless entry and the ability to control the TV, thermostat, and lights, order room service, request amenities (like more towels or toilet paper) or to chat with front desk. If you are an introvert, hotel apps must be a saving grace!
Note, however, that like most of modern travel, boo-boos occur. My Hampton by Hilton digital key on the app should have allowed me to hold my phone against a plastic square above my doorknob to unlock the door. However, after several attempts on my own and multiple re-settings by the front desk dude, my digital key never worked to enter my room. (Strangely, it operated as expected if I wanted to use the fitness center, pool, business center, and laundry room. Apparently, the app felt strongly that I should be a fit, productive, and clean traveler; it just didn’t want me to sleep or be well-dressed.)
I was given a plastic key card, like the kind we’ve been using at hotels for thirty years; however, instead of inserting it anywhere, it required waving it in front of the aforementioned doorknob plastic square thingy at just the right angle or speed.
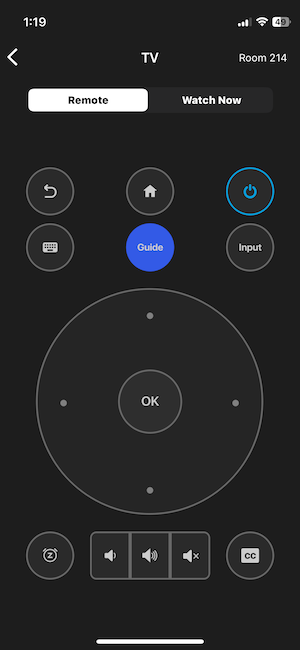
(For germaphobes like me, being able to control the TV from my phone instead of having to touch the hotel’s remote was a nice feature.)
- Car rental apps — Whether you opt for the old standbys like Hertz or Enterprise, or have embraced peer-to-peer car rentals like Turo (basically an AirB&B model for car rentals) – an app may be necessary for everything from rental check-ins and returns to unlocking the vehicle.
- Ride share apps — If you spend more time in Ubers or Lyfts than in your own car, you’ve probably got the apps already, but if you only use them to get to/from airports once every few years, you might want to re-install and make sure your saved credit card info is right.
- Master itinerary managers — If you prefer a formal platform to DIY-ing your trip, an app like TripIt allows you to gather all your hard-won trip-planning successes in one place. You forward all of your travel confirmations to the app, and it automagically arranges everything into a comprehensive itinerary. TripIt also includes seat trackers (in case a better place for your tush becomes available, fare trackers, point trackers, and document storage. Wanderlog is similar, but includes functions for creating checklists, tracking and splitting expenses, collaborating with fellow travelers, and adding travel guides.
- Note-taking and cloud apps — You don’t have to use fancy apps to track your itineraries if you prefer DIY. Just print your travel itinerary info to PDF and save in a trip-specific note in Evernote, Notion, AppleNotes, or OneNote, or upload your confirmation documents to iCloud or GoogleDrive.
- Your photo and camera app — These other apps are convenient, but if you really want a failsafe digital backup, screen-shot or make a PDF of mission-critical travel details, like confirmation numbers, boarding passes, airport maps and hotel/resort directions, and important contact info that’s too lengthy to type into your contacts app.
- Flight tracking sites/apps — Some people are comfortable trusting the airlines to keep them informed. The rest of us obsess and need to know if our connecting flight is leaving late or if there’s weather that’s going to make our plans go kablooie or if our travel companions coming from other locations meet us on time! Two great site app options for knowing about flight and airport disruptions are FlightAware and FlightRadar24.
Organize in Case Your Tech Fails
Apps and the internet are modern and cool and essential for many things. Except, and I’ll hold your hand when I say this, tech can suck. For example:
- Some apps only work when you’re online. This is bad news if you’re in a cell tower dead zone or, as happened on my hot-hot-hot delayed flight, the promised Wi-Fi melted down.
- You phone may poop out, because the more travel kerfuffles you experience, the more time you’ll be spending on the phone.
- Yes, you should probably travel with a hand-held charger, but if you’ve had to re-charge your digital devices many times, your charger may be weary, too.
- Yes, there are chargers on planes, but if your charging cable is the modern USB-C format and you’re not traveling with an adapter, you may be out of luck, as the weird little charging ports down below the seats and the ones (on larger planes) in the seat-back “entertainment system” are all USB-A.
- Digital keys often fail — that front desk clerk is still your best chance at getting into your room. (When you get to the hotel, request key cards. You don’t want to schlep up to your room with all your luggage, only to find the digital key doesn’t work.)
- Notifications overload is real — Sometimes, it’s worse if all your technology works than if it fails. There’s too high a chance of important messages getting lost in a sea of “Rate Your Experience!” notifications pinging your phone.
So, as Old School as it sounds, and with apologies to the trees, print your master itinerary with all of the dates, times, and confirmation numbers.
I printed every confirmation email and arranged them in the order in which I would need to use them over the course of ten days. I popped them, along with a pen and one of my beloved purple legal pads, in a zippered Container Store document pouch. It kept my notes dry when I needed to dash a few places in the rain, and the cardboard backing of my legal pad kept the papers from getting wrinkled or squished.
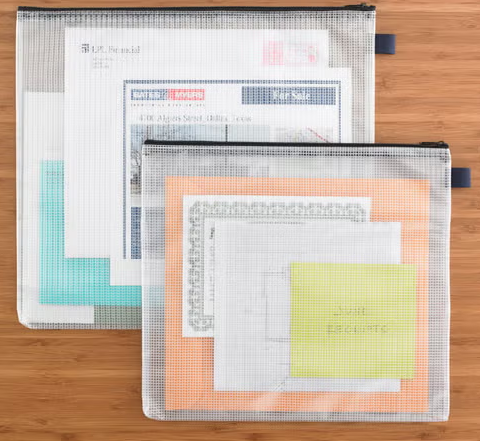
A printed boarding pass works when your phone is freaking out. If the airline or car rental place is having a computer meltdown, your printout will verify your booking and the rates and service levels you were promised.
And Don’t Forget the Telephone
Save yourself the headache of having to Google or look on the back of your frequent flier card — program important numbers for your airlines, hotels, rental car agencies, etc., into your phone.
WHEN TRAVEL GOES SIDEWAYS: KNOW YOUR RIGHTS
The United States Department of Transportation has developed a variety of passenger rights, but many people misunderstand or get them wrong. Some highlights:
- There’s a maximum 3-hour domestic tarmac delay at which point airlines are required to “de-plane” you (unless the pilot feels that passenger safety would be compromised).
- Airlines must provide food, water, working lavatories, and climate control after 2 hours. During our first two hours on the tarmac, we had only working bathrooms. Just before the 2-hour mark, we were each offered a tiny puddle of lukewarm water, and it took almost half an hour to disseminate those.
- Passengers must be notified about the situation every 30 minutes.
- The airlines must provide flight refunds if the airline cancels or significantly delays your flight, but only if you decline whatever alternative they offer!
So, if they delay you by four hours but put you on a plane (or get you onto a competing airline’s flight), you aren’t due a refund; but if you had a “non-refundable ticket” and the airline’s delays ruin your trip such that you reject their offer to get you where you’re going a day late and many (airport snack) dollars short, you can be refunded for your non-refundable ticket.

Airplane Photo by Gerrie van der Walt on Unsplash
However, if you have a bad experience, I encourage you to contact your airlines rewards center; they have a chart for depositing extra miles for delays and bad experiences.
You have other rights, too. For example, airlines must refund baggage fees if your bags are lost or extensively delayed. There are also rights regarding compensation for voluntary and involuntary “bumping” due to overbooking. For further reading and resources:
Department of Transportation Dashboard for Airline Commitments
DOT Fly Rights: A Consumer Guide to Air Travel
Keep a PDF copy of these rules on your phone.
During a bad experience, log problems as they happen so you can request compensation later. As we never took off during that hot-as-h-e-double-hockey-sticks flight, my phone wasn’t yet in Airplane Mode, so I was live-texting Paper Mommy, yielding contemporaneous time-stamps for every frustrating occurrence. This made it easier to have my upgrade fee refunded and to secure rewards points.
Experts and seasoned travelers with whom I’ve spoken advise being polite but firm in quoting regulations if you believe your rights regarding tarmac delays (or, y’know, anything else) have been denied.
If the airlines fail to satisfy your complaints, read section 13 of the DOT Fly Rights document (above) to know how file a complaint with the DOT if needed.
Finally, always have a backup plan. Know what other options you have for flights, rental agencies, or hotels are nearby.
For more on organized travel:
- Paper Doll’s 5 Essential Lists For Planning an International Vacation
- Paper Doll on the Smead Podcast: Essential Lists For Organized Travel
- Paper Doll Organizes Your Space, Money, and Well-Being While Traveling
- Ultimate Guide to Organizing the Passport Process: In Person, By Mail, & Now: Online!
We can’t control the skies, but we can control our systems. Organized travel isn’t about being perfect, but about considering what we will need and having appropriate plans and backups. Feel free to share your trips (and travel horror stories) in the comments.
Digital Disaster Prep: How to Organize Your Tech Info Before You Need It

Do your digital devices ever frustrate you?
You probably use your computer much of the day. Even if you don’t, you likely grab your phone or your tablet with some frequency. You’re on the internet, and you want to connect to Wi-Fi. Perhaps someone in the house plays online multi-player video games or likes to stream movies or TV shows.
And when something goes wrong with any of it and you can’t figure out why, you may find that you want to exhibit less than delicate language and less than genteel behavior.
I feel your pain.
MONGO AND A TALE OF TWO PRINTERS
Decades ago, I needed to install more memory in my Ruby iMac G3 (may it rest in peace) and had been assured that it was a simple process. I just had to turn the computer upside down, remove some teeny screws holding a panel in place, and insert the memory card thingy. Except, it didn’t work. I mean, it would go in, but it didn’t seem to be going in properly. I gingerly pressed it as far as it would go, but it did not give that satisfying “click” you expect, like with a seatbelt. (Oh, how I wish I’d thought of “seatbelt” as a metaphor at the time!)
After more than a few frustrating minutes, I called my grad school friend Phil, one of my BFFs and the person who knew my level of tech capabilities. After multiple go-rounds, Phil could not understand what I meant by “The memory thingy is going in, but it’s not clicking like a compact.” Frustrated, he passed the phone to Mongo.
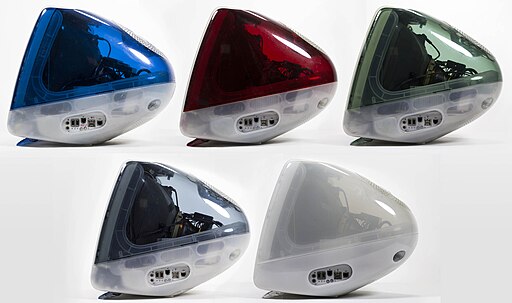
iMac G3 series courtesy of Stephen Hackett, CC BY-SA 4.0, via Wikimedia Commons
Mongo listened to my woes, figured out what I meant by “clicking like a compact” (which, at the time, seemed perfectly comprehensible to me) and eventually the problem was solved. I realized that day that if we were going to survive the internet revolution and live in a digital world, we would all need a Mongo (and a Phil), as well as a better sense of how to detail and explain our tech situations.
I was recently reminded of this by two experiences. First, I had a problem with printer/scanner. It would not scan. Or print. Although it had worked perfectly two days prior, my computer couldn’t see it, and vice versa. I suspected the printer/scanner had lost connection to my Wi-Fi network.
I set about manually inputting the network passcode into the printer, which is like old-timey texting, because you only have an Up and a Down arrow and a Select button. To get to a capital M, you have to scroll through 1-9, then lowercase a-z, then A-M uppercase before saying “select” and then move on to the next letter.
Still, nada.
I eventually asked ChatGPT, which walked me step-by-step through each possible activity, brimming with (sometimes misplaced) confidence. Over the course of an hour, I deleted my printer, re-installed it, then installed the printer and scanner drivers. I’d done everything right and it was STILL not working. The scanner driver troubleshooting mechanism alerted me that it couldn’t see the Wi-Fi and encouraged me to make sure the computer and scanner were on the same network. Doh!
Would you believe that although my printer/scanner was on the right network, my desktop computer (which I use everyday, and which I never manually change to any other network) had somehow been reset to the Xfinity public hotspot network rather than my own, private network?
Weird. However, had I not had all of the various network information written down and handy, from the beginning, the process would have taken much longer.
In a second case, I was working with a beloved elderly client whose family had just bought her a new printer to replace her formerly reliable but lately exhausted one. We’d even used it to make copies at the prior session. However, on deadline to print some documents and to take to a notary, the new printer wouldn’t print.
My client abandoned ship to make a cup of coffee and play Sudoku.
With a series of questions to Google and many false starts, I was able to install the correct drivers (because contrary to what the client’s family had told her, printers are not plug-and-play) and get the printer on the correct network. However, had I not previously secured the client’s home internet and computer information all in one place, I’d probably still be struggling.
Whether you have a Mongo and Phil, or a well-intentioned if bewildered Paper Doll, the key to a happy and well-connected digital life is organizing your tech information. You definitely don’t want to act out the printer-beating scene from Office Space.
Please don’t wait until the next time you need your tech information to start amassing it. Instead, develop a cheat sheet/folder and keep it someplace safe and accessible, whether on paper or digitally.
NETWORK AND DEVICE INFORMATION
Your home (or office) network is the lynchpin to getting anything done. Without a network, you wouldn’t be able to surf the internet (sigh, maybe sometimes access to the internet is keeping you from getting things done, but let’s circle back to that), scan documents to your computer, print from your various devices, or do much of anything.
There are four basic “chunks” of information you’ll need to have and/or know to keep your network running smoothly: your IP address, your router and modem information, your Wi-Fi network essentials, and your ISP details.
IP Address
IP stands for Internet Protocol. Think of your IP address as a unique identifier or label assigned to every single device connected to a computer network that uses the Internet Protocol for communication. You’re probably thinking about computers, tablets, and cell phones, but lots of other things have IP addresses that you might not expect, such as:
- Boring tech, like printers, scanners, and peripherals
- Internet of Things devices, like smart fridges, smart thermostats, or smart lighting use IP addresses to allow you to monitor or remotely control them
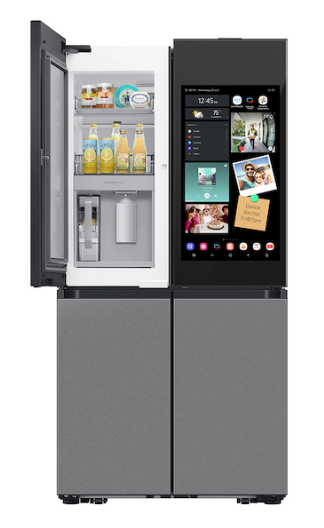
- Security devices like doorbell cameras similarly use IP addresses for remote control and remote access monitoring.
- Gaming consoles like PlayStations and Xboxes need IP addresses to connect to online gaming services and other players
Think about how you might use your label maker or a chalk outline on a pegboard to show where a coffee mug or your favorite wrench lives. The IP address is a digital version of that, a digital address, making it possible for your devices to send (and receive) information — data, instructions, etc. — over the internet as a whole or, across a local network in your workspace. The IP address is how your devices are able to identify and locate each other online.
Why and when do I need my IP address?
All the devices on your Wi-Fi network get assigned an IP address, ensuring the system will avoid conflicts and be able to smoothly communication. Your network administrator at work may need your IP address to optimize system performance or manage bandwidth. Security firewalls use IP addresses to filter unauthorized devices for incoming and outgoing traffic.
But what about you? You might need to access or provide your IP address in the following circumstances:
- Setting up a new modem or router when your internet provider sends you email saying “Hey, dude, your hardware is out-of-date! Trade it in for something that’s faster and shinier and won’t freeze during Zoom or your favorite MMORPG (Massively Multiplayer Online Role-Playing Game).”
- Troubleshooting connection problems. Maybe you want to access a streaming service but are being blocked because they’re not supposed to let people in your country (or wherever you are) access their good stuff. (In which case, you might want to look into a VPN.)
- Tech support, whether you’re getting assistance from your internet service provider or your grad school BFF.
- Beef up your network security so you don’t get hacked.
- Increase or modify your privacy so that advertisers (and their delicious cookies), your ISP, or your government can’t peek at what you’re doing (or, in the case of your smart fridge.
Where can I find my IP address?
You can find your IP address in two general ways.
- Use a website that shows your IP address. If you click on the link for https://whatismyipaddress.com or https://www.whatismyip.com/, it will automagically detect and your IP address and show you two different flavors of your IP address assigned by your internet provider.
- IPv4 addresses are a string or set of four numbers separated by dots. It’ll look something like 172.16.0.1. (Sometimes, when you’re trying to set up a router or deal with a tech kerfuffle, you’ll be advised to use the IP address 10.0.0.1 to access the admin panel.)
- IPv6 addresses use eight hexadecimal groups separated by colons. They’re freakier looking, like 2001:0db8:85a3:0000:0000:8a2e:0370:7334.
- Let your fingers do the walking to find your IP address.
If using the internet feels like cheating and you want to pretend you’re a programmer, you can:
-
- Use the Windows Command prompt — click the Start button, type “cmd”, and press Enter. Type ipconfig /all and press Enter: This will display detailed network configuration information. Find your IP: Look for the “IPv4 Address” under the appropriate adapter (Ethernet or Wireless LAN).
- On a MacOS or Linux machine, run “ipconfig” or “ip a” in Terminal.
- On mobile devices, like iPhones and Androids or tablets, go to your Wi-Fi settings.
- iPhone/iPad — Navigate to the Settings app and tap on “Wi-Fi”. Then tap the “i” icon next to the network to which you’re currently connected and you’ll see your IP address.
- Android — Go to the Settings app and pick “Wi-Fi.” Then tap on the to which you’re network you’re connected and you’ll see your IP address displayed under “network details.”
You can find a tutorial on the ins-and-outs of IP addresses at Computer Networking Notes.
Router and Modem Information
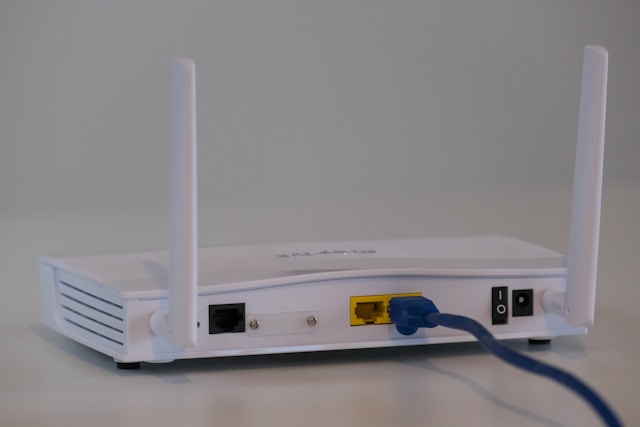
Router by Compare Fibre on Unsplash
Maybe you’re thinking, what’s the difference between a modem and a router?
In the simplest terms, a modem connects your house to your internet service provider (ISP). Your router then creates a network — a local area network (LAN) within your home, enabling all sorts of devices to connect to your internet simultaneously, generally via Wi-Fi. These days, your modem and your router are usually housed in one “box” that your ISP gives you.
Why and when do I need my router and modem information?
- To troubleshoot your network
- To update the firmware for your equipment
- To set parental controls
Document the following router and modem information
- The manufacturer, model number, and serial number of your router or modem. It’s generally written right on the housing. If the typeface is too small for you to read, use the magnifying tool on your cell phone.
- The default administrator login and password (plus any changes you’ve made) — Save the information in your digital password manager, or write it on a piece of paper and put it in an easily-grabbed folder called “Home Tech Stuff.” If you haven’t made any changes, the default might be as simple as “admin”/”admin” or “admin”/”password,” so check the sticker on your router’s manual or a sticker on the device.
- The Configuration URL for your router. It’s usually something like 192.168.0.1 or 192.168.1.1. You just copy it into the URL bar in any browser, the same way you’d type https://www.juliebestry.com to get to Paper Doll HQ.
- Current firmware version and instructions for updating it. It’s shocking how much we own requires “firmware” updates.
To find your current firmware version, go to your Configuration URL, log in, and yo’ll find a section with a label that says something like “System,” “Device Info,” “Firmware,” or “About” and it will show you something that looks like Firmware Version: v3.1.0.4.384_45678.
Alternatively, if your router has an app, check the app’s dashboard.
Wi-Fi Network Information
Why and when do I need my Wi-Fi network information?
You’re going to need to know (or access) this information when you:
- Set up a new router or connect devices to your existing router.
- Reconnect devices — I needed this when I had to get my scanner and computer to talk to one another again.
- Help guests or service workers access your WI-FI — If you don’t want them to know your Wi-Fi password, you have a few alternatives:
- Set up a guest network — If you log into your network’s administrator page as described above, there will be an option for setting up a new network name (SSID) for guests. For example, my home network is Pride & Prejudice; I could make a guest network and call it Longbourne or Pemberley.
- Some routers let you generate a QR code your guests can scan to connect to the network without knowing the password.
- Mobile devices have specific sharing options. On iOS or MacOS, you’ll see a pop-up prompt for sharing; on Android, look for the Quick Share option.
Document the following network information
- Your network’s name (SSID)
- The WI-FI password
- The encryption type (WPA2/WPA3)
- Guest network information, if you’ve created a guest network
Again, collect this information and keep it in an easily accessible digital or analog document. If you maintain it in the cloud, you can access it while traveling if you need to help someone at home, like your teens or a pet sitter.
Internet Service Provider (ISP) Information
Internet service providers are often frustrating, but the more information we have, the better prepared we can be.
Why and when do I need my ISP information?
This section is probably going to be the easiest for you, and you may be tempted not to document this information because you already know it. But what if your spouse or adult child or someone with your Power of Attorney had to help solve a problem?
You’ll may need this information if you want to upgrade (or downgrade) your service, report outages, solve billing questions or problems, or return equipment.
Document the following ISP information
- Your internet service provider’s name — Unless you live in Mayberry, the name isn’t going to be Floyd or MarySue. It might be Comcast/Xfinity, Spectrum, AT&T, Verizon Fios, T-Mobile, Google Fiber, or even a municipal or regional utilities provider.
- The customer support phone number — Note, you may need two different numbers, one for tech support and one for customer support, though they’re usually part of the same phone tree selection of options.
- Your account number — This is printed on your billing statement; if you don’t get printed bills (whether you are on auto-pay or just log in to pay each month), find your account number in your online account portal.
- Your login credentials for your account portal
COMPUTERS, PHONES, TABLETS, AND PERIPHERALS
While network information may be the most confusing — and thus most essential to write down, there are other essentials to capture on a technological cheat sheet.
Device Identifiers
For each device or peripheral, document the following:
- Serial number — You may find this imprinted on a peripheral, but on computers, phones, tablets and other digital devices, log into your Settings app. For example, on an iPhone, navigate Settings>General>About and you will find your serial number.
- MAC address — A MAC address has nothing to do with Apple Mac; it stands for Media Access Control, and it’s a unique hardware identifier that’s assigned to any network-enabled device. It’s a permanent characteristic, like a fingerprint, as opposed to an IP address, which can change. A MAC address looks like 00:1A:2B:3C:4D:5E
You may find a MAC address imprinted on the bottom or back of a physical device, labeled as MAC Address, MAC, LAN MAC, WAN MAC, or Wi-Fi MAC, in the router’s admin dashboard, or in the router’s app.
Alternatively, use a MAC address lookup site like MacAddress.io or MacLookup.app.
- Model name/number — Like the serial number, it may be imprinted in the bottom/back of the device but can also be found in the settings section.
- Operating System — e.g., Windows 11 or macOS 15 Sequoia. Don’t worry about noting the periodic version numbers (like 15.5.1) as that will update too often to make it worth logging.
- Device Name — This is whatever you call your devices so you’ll recognize them when you look at the network. For example, “Julie’s Purple iPhone.”
- On a Windows device, look at Settings>System>About
- On a Mac, it’s in System Settings>General>Sharing
- On iOS, navigate to Settings>General>About>Name
- On Android, it varies by manufacturer, but try Settings>About Phone>Device Name
Why might I need device identifiers?
Try to log your device identifiers as soon as possible after acquiring them in case you need to:
- locate a device on your network
- get warranty support
- get help with tech support or repair
- file insurance claims
- submit a filing for a class action lawsuit — Recent, I filed a claim in the Lopez Voice Assistant Settlement. Although I only had proofs of purchase for three of the four devices, I was able to complete the claim for the fourth by submitting the serial number for my 2015 iPhone6!
Operating System License Keys or Activation Codes
If you ever have to re-install your operating system because something implodes or if you need to transfer the operating system to a new device, you’ll need the license keys or activation codes, which are generally long alphanumeric strings.
In the olden days, we had stickers on the envelopes for installation disks and on older computers, stickers with the packaging. These days, look in your digital accounts, like Microsoft or Apple, to find your keys and codes, and save them locally, just in case.
Installed Software and Product Keys
Whenever you buy, download, and install software or other digital “products,” you may get keys to prove you haven’t “borrowed” someone else’s software. This includes anti-virus software, productivity suites like Microsoft 365 apps, or Adobe products.
Log everything you already own and then make a point of cataloguing new software purchases with:
- a list of all of essential apps and software licenses with the:
- product name
- license number
- date you installed or acquired it
- installation files (or locations) and download links from which you got the software
- activation codes
If you ever have to re-install software after a crash, or if your computer is lost or stolen and you have to move to a new device, you’ll need this data.
Peripheral Setup Information
When you fight the Devil — I mean, reconnect or troubleshoot your printer, scanners, Wi-Fi label makers — you need this information.
For the same technological, financial, insurance, or legal reasons you may need to track your digital devices, you need to record essential information about your peripherals. For each printer, scanner, copier or other peripheral, write down the:
- make
- model
- driver download page URL
- IP address (if it’s networked)
- current driver version
Smart Home Device Information
Do you have a futuristic home? Document the following for each of your smart home devices in case you have to reset your network and everything “smart” gets stupid.
- smart device app logins
- setup instructions
- device warranties and supporting info, including:
- purchase date
- warranty terms
- tech support contact numbers and websites
WHAT OTHER TECH INFORMATION DO YOU NEED TO TRACK?
If you manage to collect and safeguard all of the above information, you’ll be ahead of the game. Still, there are myriad other things to track.
Passwords
You already know that having a strong password is essential. Still, to stay on the cutting edge, read The 2025 Hive Systems comprehensive Are Your Passwords in the Green.
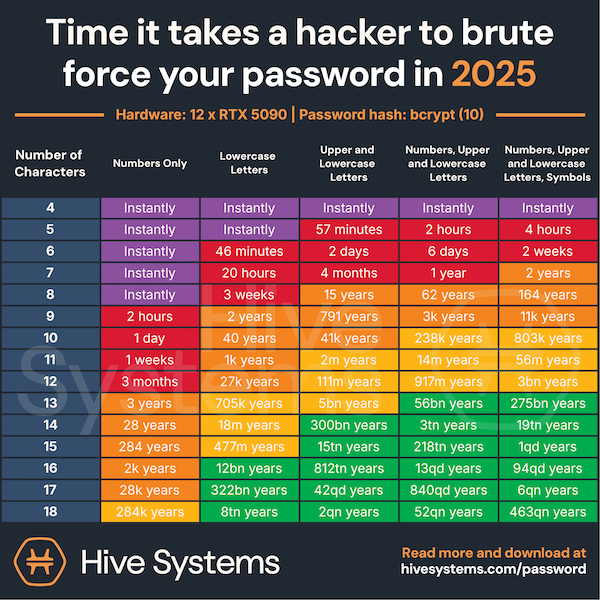
Infographic courtesy of Hive Systems at www.hivesystems.com/password
If you ever need to recover files, sync devices, or re-set your accounts after something goes awry, make doubly sure you’ve captured:
- logins for all of your cloud accounts, like iCloud, Dropbox, OneDrive, Google Drive, Evernote
- recovery email and backup options
- password manager login — If one password or passphrase is the key to your digital kingdom, keep it safe! You may think you’ll remember it forever, but if you get bonked on the head by an Acme anvil or a piano dropped from a high window, you (or your family) will be glad that you recorded it.
2-Factor Identification Backup Codes and Recovery options
Text-based 2-factor identification is quickly being replaced by 2FA backup codes. Take note of your:
- backup codes for services with two-factor authentication
- authenticator app information like which app you’re using, and which phone or tablet it’s installed on
in case you ever lose your phone or switch devices and can no longer have ad hoc codes automatically sent to your phone.
Backup Configurations
I can’t tell you how many times I’ve asked a client, “Do you back your phone up to the cloud?” or “How do you back up your computer?” and received a blank, panicked stare. First, be sure you are backing things up and then document:
- which devices are being backed up?
- how often?
- to where — the cloud? an external hard drive? network-attached storage (NAS)?
- instructions for restoring from backup
If you’ve never had a crash or data loss, you’re lucky. Preserve your luck and back up!
Digital Legacy Information
Think about who should have access to your accounts if you’re incapacitated or unavailable. Then make a plan to provide instructions and logins for your personal accounts. You can put much of this information in your digital password manager and arrange for an emergency or legacy contact. Beyond that, review:
How to Create Your Apple & Google Legacy Contacts
Paper Doll Explains Digital Social Legacy Account Management
Is your tech information captured and organized?
How to Use Timers for Improved Productivity — Part 5: Hybrid Timers and Bonus Material
Depending on how you feel about timers, you’re either relieved or disappointed that we’ve come to the end the series, where thus far we’ve had:
- How to Use Timers for Improved Productivity and Focus — Part 1
- How to Use Timers for Improved Productivity and Focus — Part 2: Picking a Good Timer
- How to Use Timers for Improved Productivity and Focus — Part 3: Tangible Timers
- How to Use Timers for Improved Productivity and Focus — Part 4: Digital Timers
In the past four posts, I’ve offered up the why and how of using and selecting timers to meet your needs, aesthetically and psychologically, and to ensure your greater productivity. Today’s post wraps up with a combo platter.
First, literally, we’ll look at combination timers, those hybrid devices that offer both an analog and digital approach to letting you concentrate on your work without fear that you’ll forget to rest your eyes, roll your shoulders, or pick the kids up from school.
Second, because there are still so many more timers than we had a chance to explore, I’m piling up bonus resources of the tangible and digital sort.
Third, thanks to the generosity of the creator of one of the timers I already referenced, I can offer a little real-world review.
HYBRID TIMERS
We looked at tangible, physical timers which usually (but not always, in the case of the Focus Timer®) express time in an analog-only format. We also examined digital timers timers that were, themselves, digital (in a browser, website, software platform, or app) and which also displayed time digitally in numerals rather than in clock-like, analog time.
However, there are hybrid timers which combine features — they are tangible but with digital (or both digital and analog) display, and digital timers with some measure of an analog display.
Time Timer Watch
The Time Timer Watch takes everything appealing in traditional Time Timers (the Originals, Plus, Mods, Retro ECO, and more) we discussed in the third post in this series and incorporate it all into a wristwatch.
The Time Timer Watch displays time visually with a digital (that is, electronic) version of the red time disk, but also includes a digital (numerical) readout for the clock and countdown settings.
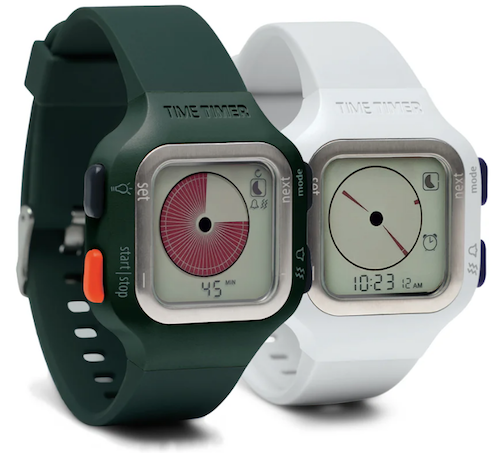
Whether for you or your child, the Time Timer Watch is a discreet and portable timer that helps keep daily routines on track. It supports efforts to maintain and increase focus, and improve independence and self-regulation. As Time Timer notes,
“Whether you depend on Time Timer products to overcome ADHD, Autism, or other cognitive variances, or you just want the look of a fun sporty watch that increases productivity, the Time Timer Watch is your solution. The sporty design makes this wrist-watch a great accessory for students, adults, athletes, teachers, and professionals, of any age or ability.”
The watch band is made of soft silicone in two circumference sizes matched to their color: white (5″ to 7.5″ for small) and dark green (5.5″ to 8.25″ for large), while the watch face is 1.5 inches. Mix and match different silicone band colors (Caribbean Blue, Sedona Orange, and Baltic Blue) to reflect your style.
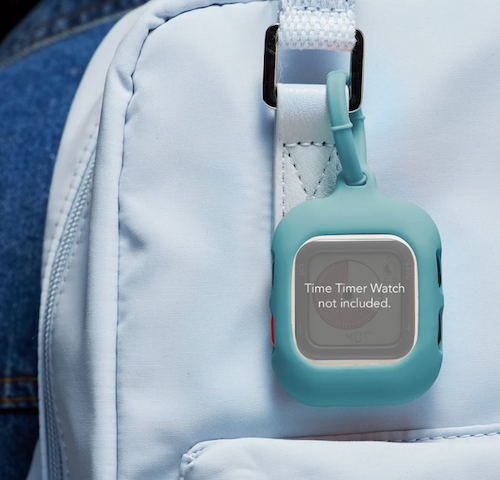
Alternatively, you can carry the watch face in a silicon watch fob accessory; wear it like an 1890s robber baron on a watch chain, on a cord around your neck like an ID badge, or attach it to your backpack.
The Timer Timer watch uses a CR2032 (coin-style) battery and works in three different modes:
- Time Timer — Set an original 60-minute timer or a custom timer for up to 99 hours. (Think you’d never need a timer that long? Imagine counting down how many hours are left having to be nice to a visiting relative who sets your teeth on edge!) You can set an optional repeating alert for circumstances requiring a regular reminders, like to take medication, use the restroom, bring likely-to-wander attention back to the task, or soothe your way into a transition between tasks or modes.
- Clock — The watch has both analog and digital displays in 12- or 24-hour format. (Paper Doll readers know I always prefer an analog clock to a) help children reinforce an understanding of analog time and b) makes time visible and proportional in ways that digital time does not.
- Alarm — While timers give us backup for paying attention to the ebb and flow of our day, an alarm allows us to stop paying attention altogether. Leave it to Jeeves! So, rather than setting a duration of five minutes or 3 hours from now, you can set a time-of-day alarm. The optional alarm has multiple settings such that the alarm can be off, beep, vibrate silently, or beep and vibrate. Pick what works based on sound or tactile sensitivities or variances in hearing abilities.
The Timer Timer Watch is particularly ideal for school and testing situations because it’s not a smart device, isn’t connected to the internet, and can be used in silent mode. Set the visual timer to the duration of a testing session and don’t worry about knowing how much time is left or calculating the time difference.
Time Timer Twist
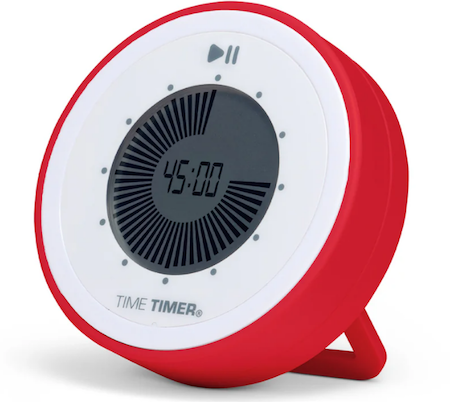
For years, I used to visit the Time Timer booth at NAPO conferences, praising the different devices but wishing for a small magnetic version. I recall being a little giddy when the Time Timer Twist finally made it’s debut, and it ties with the MOD for being my favorite (and the most stylish) Time Timer.
To set the timer on the Twist, turn the outer ring until you reach your desired time, all the way up to 90 minutes, and then push the play button. (Push again to pause.) The digital display shows as a black, self-diminishing, digital version of the traditional red analog disk, while the digital version of the time remaining counts down in the center.
Then just attach it any metal surface, like the kitchen fridge, a filing cabinet in your office, or a magnetic classroom whiteboard, per Time Timer:
At home, use the TWIST® for everything from helping kids’ morning and bedtime routines, timing homework and study sessions, or baking the perfect batch of cookies.
In the classroom, it’s great for timing tests and turn-taking exercises, timing group activities, and helping kids with special needs transition between activities.
In the office, use it to keep track of presentations, team-building activities, and more.
There’s a volume control switch so depending on your environment, you can opt for a silent, low, or high volume alert when your time is up.
Timer Timer Twist runs on one AAA battery and comes in four color schemes: Dreamsicle Orange, Lake Day Blue, Pale Shale Gray, and Original Red. If you love this version and don’t mind sticking with the Original Red, there’s even a Time Timer Twist with Kickstand that’s not only magnetic, but can stand at attention, giving the MOD some competition!
Four-Channel Professional Kitchen Timers
We’ve talked about the convenience of using your cell phone timer when making a complex meal. While it’s pretty far afield from the kinds of timers we’ve been looking at, four-channel commercial kitchen timers are ideal for restaurant kitchens — wanna film your own version of FX’s The Bear? — or in Brady Bunch-style households with big families or lots of housemates.
Digital 4-Channel Kitchen Timers are tangible but digital, and made of sturdy stainless steel with LED lights. Set each of four timers independently. The time mode lets you set in hours and minutes or minutes and seconds, ranging from zero (0000) to 99.59 hours or 0-99.59 minutes. Designed for a busy commercial (or home) kitchen, there’s a loud, high-decibel buzzer.

It’s electric and requires no programming, so it’s plug and play. Find a variety of four-channel digital timers on Amazon or at restaurant supply stores.
BONUS TIMER RESOURCES
I could write another 5-post series and still never hit all of the variety of tangible timers and apps available. Still, there are many that deserve consideration for one or more unique attributes.
Bonus Analog Timers
In the second post of this series, I wrote two potentially conflicting pieces of advice. You want a timer both does something different and is aesthetically appealing. Well, I’ve recently discovered two products that intrigue me by putting more weight on the latter than the former.
Singles Timer
First, I discovered Zone Denmark, a sort of Danish-designer version of IKEA. Reader, I covet them. Their Singles Timer, made of powder coated steel, doesn’t do anything different, but its compact design caught my eye.
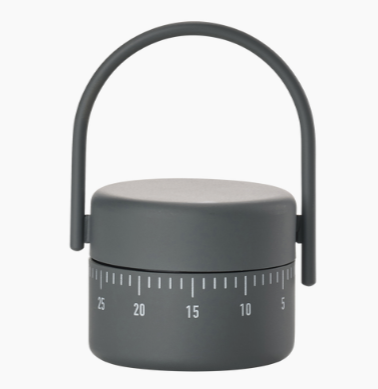
The Singles Timer is a squat cylinder measuring 3.5″ (8.9 cm) high and 2.13″ (5.4 cm) in diameter, and weighs 5.64 ounces. It comes in five colors: Black, Warm (light) Grey, Cool (darker) Grey, Lupine (a sort of violet) and Mud (beige). Turn the basket-like handle on top to set the timer, do your cooking (or whatever), and then carry your timer with you wherever you go.
The Singles Timer costs 25 Euros (about $28.47 US), plus shipping, and while it lacks the attributes necessary for someone needing a visual gauge of time, it’s just darned pretty, making it suitable as a simple household timer.
the dot
the dot wooden timer cube is a mix of ancient and modern, wood and metal and microchips, analog and digital. The base is a rounded block of wood measuring 3.54″D x 3.54″W x 0.98″H with a hole in the center (much like a toad-in-the-hole, egg-and-toast breakfast); affixed to the interior bottom is a metal bowl and suspended from the interior top is the string-and-ball mechanism that strikes the bowl to make it chime. However, the timer is set digitally on the outer top of the dot.
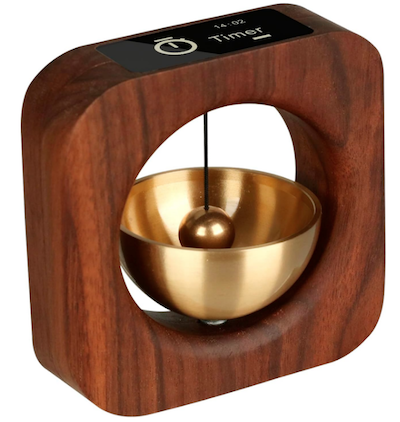
Thus, you have a digital LCD display for easy setting of the timer for meditation or deep work, but a mechanical chiming when the set time is up.
the dot uses one lithium polymer battery, which can be recharged with a USB-C charging cable. It’s a pricey at $80, but it’s an intriguing stylistic mix: yoga retreat-meets-corporate focus.
Bonus Digital Timers
Browser Timers
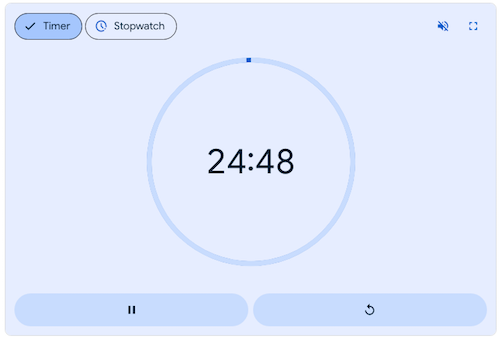
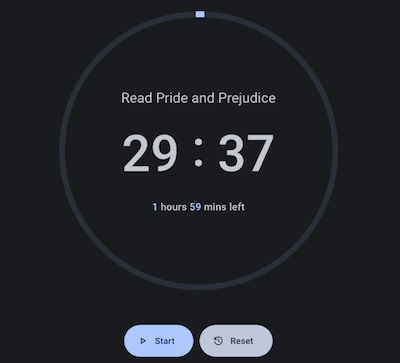
- Google Timer (browser-based) — Did you know that there’s a digital timer built into Google? The default is set for five minutes but you can customize for whatever time you need. Type your exact hour, minute, and second preference or use the pre-set buttons to bump up the time by :30, 1:00, or 5:00 increments. Opt to make the soothing blue background full-screen, mute or unmute the dingle-dingle alert chime, and start the timer. Pause and restart as you like. It’s right on Google, so it’s free.
- Focus Hours (browser-based) — This similar browser-based solution is a step up from Google. Click the timer to slide out a settings panel to name your activity, identity daily start times for habits you want to promote, set (one of only two possible) alerts to ring when your focus time is up. Opt for night mode if you prefer, and when you’re ready, click start. Do ad hoc tasks or set up a roster of personal and business high-focus tasks. This free browser app has extensive statistics to let you track your focus by day, week, month, or year.
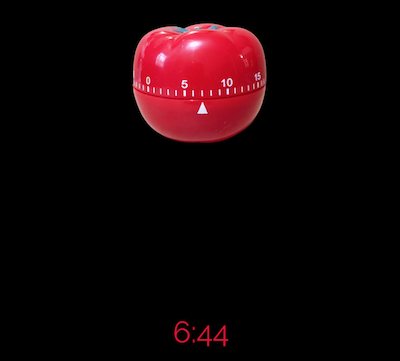
- Juicy Timer (browser-based) — Scroll down to set the time, hit start, and watch as a traditional kitchen tomato timer turns slowly, ticking down to zero, with a digital countdown below. The mid-range (not high or piercing) alert brings you out of focus and prompts a 5-minute break.
- Zorro Timer (browser-based web app) — This timer is both simple and pretty. Select an ambiance (forest ocean, rain, or café sounds, or “peace” with classical music), select your focus and break times, and just start working.
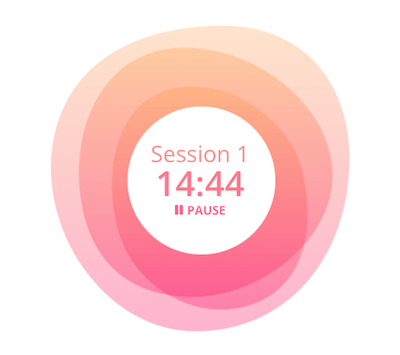
- Tomodoro (browser-based web app) — This customizable, open-source web app has beautiful background colors from which to choose. Set the times for focus and breaks, pick how many rounds/cycles you want to work; choose themes, accent colors, whether you want white noise and whether notifications should be silent or enabled. It supports Always-on-Top, or Picture-In-Picture (PIP) mode without having to install any other app, so you can focus on the work in your browser window without losing sight of the timer.
- Amazing Timer (web browser) — If you’re running an online workshop, interspersing chat with co-working, this is an alternative to a built-in timer in Zoom. Share your screen as Amazing Timer offers a simple countdown with a variety of beautiful, calming, customized backgrounds.

You may also want to take a peek at a few more appealing browser-based timers:
- Big Timer — This full-screen timer is in-your-face with large, white block-face numbers on a solid black screen. Adjust whether you want a sound when time’s up or at each of the final ten seconds (or no sound at all). The timer can also count up after the end (in case you want to know how much more time you took to finish your task). Make the timer full-screen, and have it auto-repeat (in case you want to violate the precepts of Pomodoro and not take breaks).
- Pomotastic — This customizable Pomodoro timer lets you choose literally any RBG colors, with themed colors for focus, short breaks, and long breaks
- Timer.OneClock.Net — Try scary red numbers on a black background, in case you want to feel like you’re deactivating a bomb. (Hey, some people prefer the stick to the carrot!)
- Timesets — Customizable Pomodoro timer has 5 color schemes and drag-and-drop focus and break options.
General Timer Apps
- Time Timer App — This free app is available for iOS through the App Store and for Android on the Google Play Store. It’s fully customizable: select colors, notifications, and multi-timer lists exactly as you like.
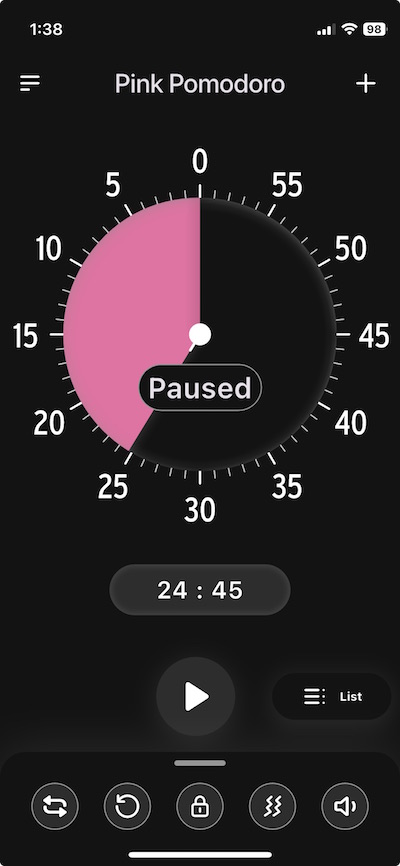
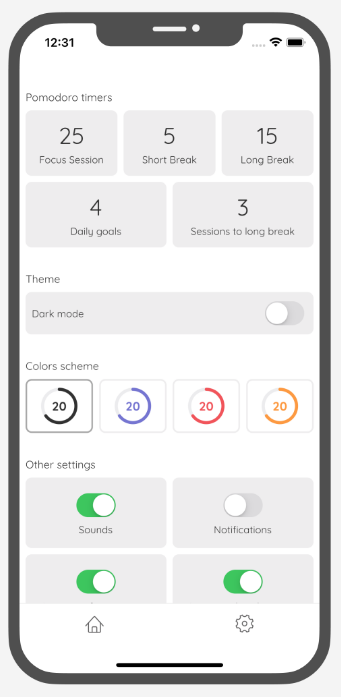
- Minidoro (iOS) — This super-customizable timer app is no-nonsense. Set sessions, breaks, goals, and cycles, color schemes and dark or light themes, sounds and notifications. It cycles through analog time rather than providing a full “slice” of time as with Time Timer. Unlike Time Timer’s app, Minidoro isn’t free; it’s $2.99.
Digital Timer Apps for Wellness Experiences
- Tide (iPhone, iPad, Apple Watch, Android, Chrome) — Unrelated to the detergent of the same name (though it cleans the stress out of your brain), Tide is a mobile and browser app with an immersive timer and features to help you sleep, rest/relax, or meditate. Select a soundscape (like a Hawaiian beach, restaurant, rainforest, a mahjong parlor (!), dishwasher, typewriter, and hundreds more), meditations, or sleep stories. Whether you want to focus and do deep work or empty your mind, relax, and bliss out, Tide has a mode for what you need.
- Marshmallows (iOS) — This is more of a gamified timer, rewarding you with breaks of random lengths after each 25-minute Pomodoro focus session. The breaks range from 5-30 minutes, adding na element of excitement, anticipation, and pleasant uncertainty. (However, it’s not the best option if you’re on a tight turn-around schedule.) This intermittent reinforcement to keep you engaged and motivated is supposed to excite a level of curiosity and encourages focus so you’ll finish your session. The varied break times should reduce stress and burnout. (There’s also a social option to connect with and compete with friends.)
Work Productivity Timers Built Into Productivity Suites
- Focus To Do (Windows, Mac, Chrome extension, iOS, Android, Apple Watch) — This app blends Pomodoro timers with task management features. Create to-do lists, break down tasks into ever-smaller sub-tasks, and set progress reminders and due dates. Generate detailed statistics regarding your time use and the number of tasks completed so you can analyze and improve your productivity patterns. Focus To Do syncs across devices so you can access your timers, tasks, and stats from anywhere. It’s free; the Lifetime Premium level is $11.99.
- TogglTrack (Chrome extension, iOS, Android, Apple Watch) — The Pomodoro timer is just one part of a powerful time tracking and productivity suite for knowledge workers ranging from solopreneurs to small teams to enterprise-levels. It’s designed to track time spent on various projects and tasks, and it generates reports on how individuals and teams use their time, prompting deeper analysis.
- Traqq Pomodoro Timer (Mac, Windows, and Linux, and browser-based) — Traqq is a comprehensive time-tracking suite for solopreneurs, small businesses, teams, and large companies, monitoring how employees spend time on tasks, projects, and breaks. The Pomodoro Timer can be used independently in the browser; it defaults to 25 minutes with 5 minute breaks.
Combination Timers and Task Apps
There’s a proliferation of apps that combine a task function with timers to encourage focus, including:
- Blitzit (iOS, Android ) — There’s a free browser-based Pomodoro timer where you can customize the audio and ambiance, but the full app combines task lists and timers to help you track your focus through your pre-planned work schedule.
- FocusList (iPhone, AppleWatch, Mac) — This app combines a daily planner & Pomodoro focus timer app.
- Podor (Android) — This task app includes a timer, but is also designed to help you organize tasks with tags, access detailed statistical reports of your time use, and customize your experience to fit how you work.
- Pomotodo (iOS, Android, Mac, Windows, Chrome extension) — Designed as a time management app for creatives types, combining tasks and timers and making it easy to generate time sheets for billing after the work is completed.
Whew!
FOCUS TIMER® MINI REVIEW
You may recall that I wrote about the hourglass-shaped Focus Timer® in the third week of this series. Soon after I published, I heard from Dave Zuverink, the creator of the Focus Timer® (and before that, the creator of the SlimFold Wallet).
I’m always happy to hear from anyone mentioned in Paper Doll posts, but I was delighted when Dave asked if I would like to try the Focus Timer® in person and chat with him about it. I would, I did, and we did!

For details about the Focus Timer®, it’s worth going back to that prior post, but I wanted to tell you about my experience and what I learned from Dave.
First, it’s weird to say, but the Focus Timer®’s feels as soft and smooth as a chubby baby’s arm.
Second, it makes no rattling noises, unlike most tangible timers. Dave detailed the various iterations of this super-smooth hourglass timer. It turns out that it’s got a microchip inside; it’s like a little computer processor, always identifying in what direction you turn the timer.
I’d commented to Dave about the chime sound being so satisfying, and it turns out that’s because there’s an actual speaker/amplifier thingie inside, playing a recording of a real chime! (I nodded along as he explained how other timers — and devices like smoke detectors — have a “fisio” that makes a mechanical sound, which is certainly less calming at the end of a Pomodoro!)
Third, between using the Focus Timer® and talking to Dave, I realized that what I’d originally considered somewhat of a drawback was advantageous. It’s tangible, it’s visual, but it’s not analog. There’s no clock face, and there are no numbers. I’d seen that as missing something, but Dave noted that it was intentional so as not to take the user out of focus and to instead shut down the analytical part of the brain — in other words, enjoy the color rings and trust the eventual notification to do their thing.
Dave and I talked about his professional background in interaction design and the psychology of product design, and I shared my perspective as a professional organizer and productivity specialist. Now that I understand how much technology goes into the Focus Timer® and have used it several times (and can’t stop fiddling with it because it feels so nice), I see even better how this novel product brings something new and different to the time management realm.
In the original post, I shared the video for the recent launch of the Focus Timer® V2, but it’s worth watching the original Kickstarter video.
I’m still experimenting with the Focus Timer®, but have already fallen a little in love. It took me a little while (with the well-written and well-drawn directions) but now I can easily rotate the timer (as if it’s doing a fashion show): each turn yield a new time ring. I finally got a feel for how the individual rings (blue for minutes, yellow for ten minutes) work, so the timer counts up by 5 after 20 minutes and up by 10 after 60 minutes. Neato.
Over the past weeks, I’ve read comments and had conversations with readers who have a favorite timer and those who never use them, some who hyper-focus and others who are still seeking to overcome time blindness to focus.
Only you can know whether you need a visual timer or one that merely alerts you to end of a work session; only you can decide whether you need “feel” time by manipulating something tangible or whether a simple (or customized) browser or app timer is right for your needs.
Context matters. My iPhone suffices when I’m cooking, but I want a tangible timer when working with clients, particularly if “seeing” time is difficult for them. When I’m doing deep work, I want a visual timer, but my stress level determines how much I want to bother customizing an app or browser solution.
What doesn’t change is that no matter how precise our internal clock may (or may not) be, there are times when we want to outsource that ticking so that we can focus.
How to Use Timers for Improved Productivity and Focus — Part 4: Digital Timers
In the past three weeks, we’ve explored using timers to enhance focus, reduce hyper-focus, and get stuff done.
- How to Use Timers for Improved Productivity and Focus — Part 1
- How to Use Timers for Improved Productivity and Focus — Part 2: Picking a Good Timer
- How to Use Timers for Improved Productivity and Focus — Part 3: Tangible Timers
After establishing why (and in what situations) timers can boost productivity, we identified the general characteristics of a good timer and the customizable aspects supporting individuals in their unique tasks and projects.
Last week, we examined a wide variety of tangible timers, particularly those (like Time Timer and the Focus Timer® Visual Timer) that allow users to both see the passage of time (particularly with the benefit of showing analog time), and feel like they have some tactile control over manipulating time.
While children, people with ADHD and executive function disorders, and anyone who has difficulty identifying and recognizing time as it passes can benefit from those tangible timers, not everyone needs a physical timer, and while we can all benefit from seeing analog time, it’s not always essential for all.
If what you most need is to have a trusted alert so that you do not overrun your allotted time, digital timers will suffice, but they range from ultra-basic to fancy-schmancy.
DIGITAL TIMERS YOU ALREADY OWN
In the second post in this series, we looked at a long sequence of features that make a good timer, both for the project and the user. You may wish to review those concepts, but in general, you want a timer that is:
- simple to use
- does more than what you’re already able to do with your resources
- integrates, if applicable, with the tools you already have
- process-agnostic, so that you don’t have to use only fixed-durations that aren’t useful for your needs (in case you prefer the 52/17 technique to a standard 25/5 Pomodoro and break, for example)
- aesthetically pleasing, visually (if that matters to you)
- customizable for features such as volume and type of audio alert
- frictionless, because every obstacle to using a timer is an obstacle to your focus
Kitchens stoves have built-in timers, but if you’re in your back yard doing some weeding, at the coffee shop finishing up a presentation, conducting a meeting at the office (or online), taking a nap in your dorm room (or the comfy chairs at the library), or doing anything anyplace that is not your kitchen, you’ll need to possess some kind of timer more sophisticated than asking a patient friend to count one-Mississippi, two-Mississippi for minutes or hours on end and then shouting your name!
Your Built-In Device Timer
The fastest and simplest timer method is to use the one built into your phone. However, I’ve been surprised by how many people don’t know how to use their phone timers or at least all of the features available.
On iOS devices like iPhones or iPads, just open the Clock app on your home screen.
- Tap Timers, generally on the bottom of the Clock app interface.
- Hit the + sign to add a new timer.
- Set the duration by turning the number dials: a 25-minute Pomodoro to get work done, 14 minutes to cook your salmon, 38 minutes until you should check your laundry. Adjust the hours, minutes, and seconds as needed.
- Add a label if you tend to forget what the timer was for. This is helpful if you’re setting multiple timers to get all of the items you’re cooking for Thanksgiving dinner on the table simultaneously; one timer tells you when to baste the turkey, another to reheat the potatoes, and so on. If you’re apt to hyper-focus, labeling the timer PICK UP CHILDREN!!! may give you the boost you need not to snooze or ignore your timer.
- Add a song or sound to play when your time is up if pre-set alerts are too jangly for you. You might want a lilting tone to lift you gently out of hyper-focus or an energetic song to help you transition from your break to the next task.
- Tap Start. The timer will begin counting down. You can now look away and ignore it.
- If you need to pause the timer, because of an interruption, hit the pause icon (universally known among seniors as “the eleven”) and resume (by hitting the “play” triangle) when you’re ready.
When your time is up, the phone will send you a notification, even if you’re in another app.
You may notice that you have other timers in a “Recent” list. If you tend to use an official 25-minute Pomodoro and 5-minute break often, go ahead and create labels for them and keep them in your list; add and label any other frequently-used timers to save you time and effort the next time you want to quickly assign yourself a stop time.
If you want to quickly set a timer on your iPhone and you don’t mind setting it for multiples of 5-minute increments, head to the Control Center:
Alternatively, you can shout, “Hey, Siri, set a timer for 25 minutes” across the office to set a Pomodoro without the temptations inherent in holding a phone in your hand.
Your digital assistant is particularly useful in the kitchen if your hands are wet or you want to avoid touching your phone while cooking. If what’s in the oven isn’t quite ready, asking Siri to set the timer means I don’t have to hover or worry that if I turn to wash some dishes, I could completely forget that three minutes have passed.
Android devices operate much the same way, via the Clock app and using the Timer option. Android users generally set timer durations from a number pad (akin to making a call or using the calculator) rather than a dial, but set customized labels and adjust sounds as with iOS.
Android has the same pause/resume/cancel functions and you can keep multiple timers running concurrently.
You can use your Google Assistant by saying, “Hey Google, set a timer for 15 minutes.” Just be sure to enunciate a little better than than this internet sensation.
The main advantage of using your built-in device timer is that it’s easy-peasy lemon squeezy. Take ten seconds to set a timer by tapping or talking and you’re ready to get started. The obstacles are few and the countdown is simple.
The drawback of using your phone or device as a timer is that it presents an opportunity for distraction when you are setting the timers and again when you reach for the phone to stop the timer alert. If you experience phone addiction, you may wish to read:
- Global Day of Unplugging 2025: Phones and Apps to Reduce Phone Use and Improve Your Life
- Celebrate the Global Day of Unplugging (2024)
DEDICATED DIGITAL TIMERS FOR FOCUS AND PRODUCTIVITY
The next step up from your kitchen or built-in phone timer is a mobile app, desktop app, or browser-based app, and there are numerous options available. Few have any great functional advantages over the others, so it’s often a matter of picking which aesthetic or bonus features you prefer. Most will be marketed as Pomodoro timers, but that doesn’t mean you’ll be limited to 25 minute increments; it’s just branding.
Browser Based Timers
If you’ve got a phone, tablet, or computer, you’ve got an internet browser. Using a web-based timer in your browser means you don’t have to download anything. It’s best for when you are having trouble focusing, want a timer, but know that searching for an app to download will keep you from getting started. Wherever you are, even on a borrowed computer or in the public library, there’s a browser timer for you.
Pomodor
Pomodor is web-based. Just bring up the website and it’s already ready for you tap the play button to start your first (of up to four) Pomodoro timers. While the default is set for 25 minutes Pomodoros with 5-minute breaks, you can can adjust multiple aspects, including:
-
-
- work duration from 5-60 minutes
- short break duration for 1-5 minutes
- long break duration of 1-45 minutes (after four Pomodoro/short break cycles)
- how many rounds (or cycles) you want to do, from 1 to 15
- which of eight alert noises you prefer (all sounding very “iPhone circa 2009”)
-
There’s also a dark mode option, which I’ve employed, below.
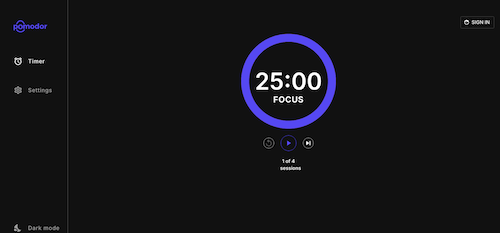
Pomodor is free. While you can create an account to preserve your settings or access your stats overview with charts to visualize which days of the week you were the most productive, it’s not required.
Pomodor’s few customizations means you won’t spend a lot of time futzing with the settings and can (or at least should) get right to work.
Focus Keeper
Focus Keeper is another free and easy-to-intuit web-based timer. Create an account with your email and a password, or Google or Apple ID, and when you log in you can create pre-set timers with labels for various types of activities (reading? meditation? blog writing?) and even have a daily schedule for time-blocked work.
When you’re logged in, just select or create a timer you wish to start, click “play” and start working; you can track your focus by the day, by times of the day, and by focused task-type.
If you don’t want to log in, just start with the default settings: a 25 minute focus setting, a 5 minute break setting, a 30-minute long break between cycles of four sessions and breaks. Turn the ticking (so much ticking!) on or off, and pause if necessary, but otherwise, as you get to work, the soothing “waves” at the bottom of the screen gets higher.
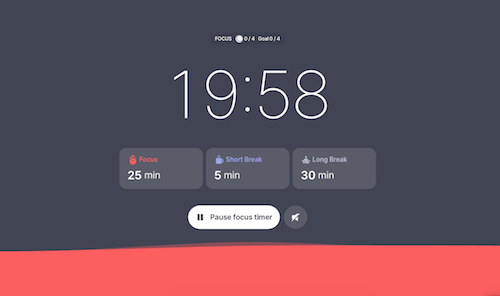
Focus Keeper is available on the web, as well as in iOS and Android versions.
Pomofocus
Pomofocus is another web-based timer that lets you access basic aspects for free. Without signing in, you can set the focus, short break, and long break timers, name the focus task, and select the number of Pomodoros and breaks — which need not be strict 25-minute Pomodoros — I set this up for a 52/17 round; you can also set the number of cycles before a long break.
You can also adjust the volume of the alert and the type of alert sound.
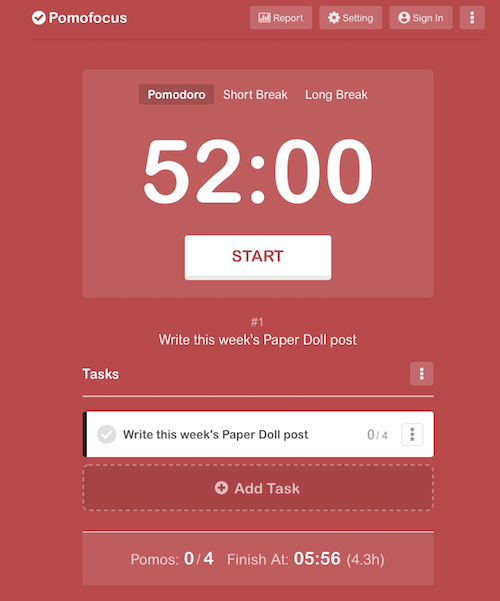
If you create an account and log in, you can use templates, access a summary detailing the number of hours you spent focused, the number of days you used Pomofocus, and how many days of a streak you amassed. (If you’re competitive, you can see how you rank against other Pomofocus users.)
Pomofocus is free, but the ad-free Premium plan gives you lets you add more projects and templates, view a yearly report, download reports, import tasks from Todoist, and connect to other apps. The Premium plan is $3/month, $18/year, or $54 for a lifetime plan.
Deep Work Depot — Want to focus on your deep work in the most bare bones way? Based on Cal Newport’s concept described in his book Deep Work, this timer emphasizes focusing without distraction on tasks that are cognitively demanding.

There are no bells, no whistles, and hardly any color or design. Set your focus and rest timer durations; turn the “Lo-Fi” music on or off.
(Lo-Fi, my aging GenX self has learned, refers to low-fidelity, a musical style that intentionally incorporates imperfections and a relaxed aesthetic. Now that I’ve experienced it with three different timers, I must admit it sounds like elevator music to me.)
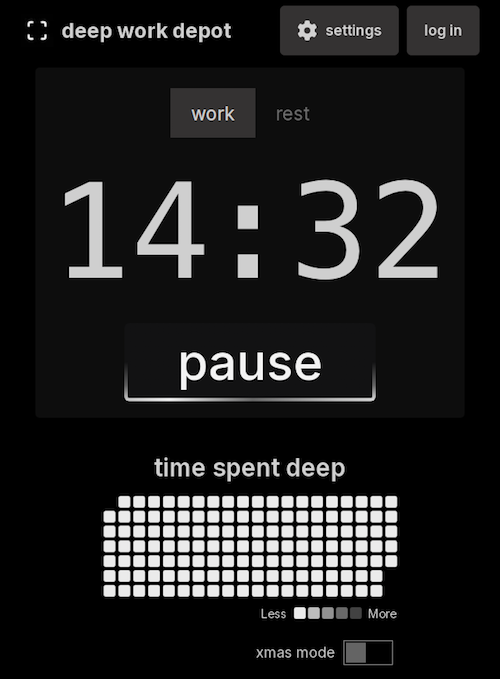
(Note: I’ve yet to figure out what Xmas mode does. The toggle turns green, but otherwise? Nada)
Similar to web-based timer apps, you may also want to explore browser-extension options, like:
- Marinara: Pomodoro® Assistant is a Chrome extension — Marinara creates a toolbar icon for the countdown timer. You can configure preferred work session times, and it offers both short breaks for between sessions and (configurable) longer intervals between cycles. There are 20+ audio alerts, and you can add ticking sounds if that’s your jam. Track your stats and history to gauge when you have been the most productive. You can also set automatic timers. It’s free.
- Momentum Dash is another Chrome extension — It combines a beautiful nature photo and motivational quote with a countdown timer, all on your browser’s “new tab” page. Set up your tasks, create different timer modes, add mantras, customize sounds, and show the number of days counting down to a deadline. The Plus version is $3.33/month and includes Spotify and YouTube sound integration, task app integrations, site blockers and more.

- Otto is yet another Chrome extension. — The free “core” features include unlimited Pomodoros, the ability to block an unlimited number of distracting websites, and the option to create 3 tasks, each up to 15 minutes in length. For real power, the Pro level (at $24/year for $59 for lifetime use) offers an unlimited number of tasks up to 60 minutes in length and other up-leveled features.
Integrated Timer Apps
Some timer apps and programs can integrate with software you’re already using. Note, timers at this level are less intuitive but do more heavy lifting than basic timers. If you are already using the software platforms with which these timers integrate, that goes in the win column, but if you aren’t already dependent on the multi-featured software programs, it’s oversell.
- FocusMode by Geekbot integrates with Slack, so whether you’re doing the corporate thing or are living the start-up dream inside your Slack channels, FocusMode can help you stay the course. Tell FocusMode what you’ll be working on and for how long; as the timer (silently) ticks down, all your notifications will be automatically switched off and Do Not Disturb will be activated. FocusMode is free.
- Pomodoro Tracker is similar to FocusMode and is designed to help you track your Pomodoro efforts while integrating with Slack. (But I think they missed an opportunity to call it Pomodoro Slacker.)
- Pomello is for followers of both Pomodoro and Kanban, as it integrates with Trello. The basic version is free, while the Pro version is $20/year and offers custom sounds, the ability to export your data, and lets you view Trello checklist items as focus tasks.
Timer Apps and Programs
Session
Session for MacOS and iOS for iPhone, iPad, and AppleWatch — For an Apple lover like myself, I’m intrigued that Session boasts so many features, even if it’s kind of kooky to spend real money on a digital timer. True, it’s not just a timer (but remember what I’ve said about not acquiring features you don’t already need!)
Session syncs across Apple devices, integrates with your calendar, lets you customize work and break timer lengths, offers a Mac menu bar app (so it floats atop other windows), and has nifty keyboard shortcuts and a notes section so you don’t have to go searching for information.
You can also see detailed analytics of your focused work efforts — and to boost that focus, the Mac version will block apps and websites. And if co-workers are the reason you can’t get work done? It integrates with Slack! Set a custom status when you start focusing so they’ll leave you alone. You can also have a visual as well as digital timer.
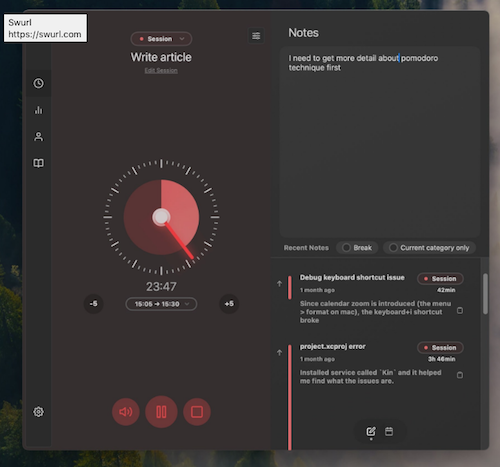
The free plan offers a unlimited basic Pomodoro timers, analytic data from your past two days working, and the ability to view your calendar from inside Session, but the paid versions (Pro Monthly at $4.99/month or or Pro Yearly at $39.99/year) offer all the fancy features, customizations, app and website blocking, automations, and other goodies.
After you set your focus intention and timer, Sessions gives you a meditative breathing exercise to prepare you for work. Ommmmm.
Flow
Flow is a clean, basic Mac and iOS timer. — At the free level, you get an interval-based timer with multiple duration options for your work and breaks, as well as statistics and graphs (synced to your iCloud account) to give you insight into your focus and work habits.
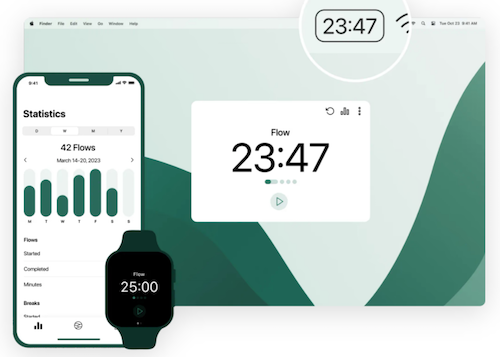
If you upgrade to the Pro level, Flow additionally offers a timer sync, more customizable duration and session cycle settings, the ability to customize your session title, advanced session controls, app and web blocking, Apple Calendar sync, and the ability to export your timer data, all for $1.49/month.
Forest is a fun timer for iOS and Android users, and has a Chrome extension for those seeking an in-browser option — Forest uses playful gamification, knowing your seems-like-a-pipe-dream hope of not getting distracted may need more than a buzzer to achieve success. The iOS version is $3.99; currently the Andoird version is ad-supported.
When you’re ready to focus, you “plant” a cartoon tree. As you continue working, the timer counts down and the tree on your screen grows in front of you (to the sound of calming forest audio, if you like).
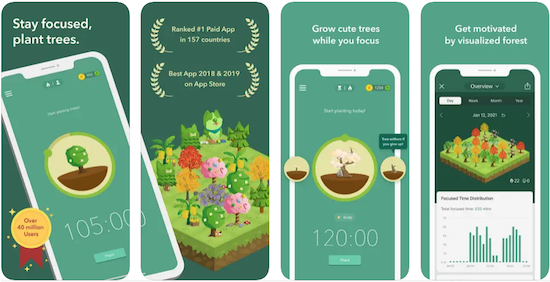
If you put yourself in Deep Focus Mode but then leave the app to do something else on your phone, your tree dies. (For Millennial readers who have just been reminded of your dearly departed Tamagotchis, I’m so sorry.)
With each focus session, you “complete” trees, and over the weeks and months using the app, you grow a forest. Yes, it’s cutesie, but Forest is not without serious analytics. Tag your focus sessions by categories, note trends, and can track when you’re most productive.
While Forest has charm, I imagine that if you’re tempted to watch your forest grow while you’re working rather than waiting until your rest break, your focus will suffer from distraction. But if you’ve got patience, you will be rewarded.
Bear Focus Timer
The Bear Focus Timer is silly. But sometimes we need something silly to keep us motivated, especially when we need longer breaks that we can take and more snacks than we have on hand. From the creator:
Tom is a friendly bear, except when you cannot concentrate. He will do his best to help you focus on something!
Just place your screen face down and focus on what you do.
A variety of white noise will help you focus more.
If you concentrate well, Tom will praise you.
You can change the session time in the settings.
You can reset the timer by pressing Tom’s belly button.
Please keep in mind that Tom can also enjoy fishing when you are focused.
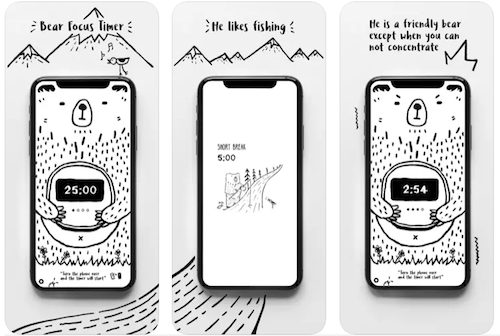
Customize your focus time, short and long breaks, the number of sessions, and the audio accompaniment…and hang out with Tom, the bear.
This iOS-only app is $1.99 in the App Store.
Moosti
Moosti is a gorgeous and deceptively simple timer; it’s fully compatible with iOS, macOS, watchOS, and visionOS. In addition to the traditional timer options, it sets a whole atmosphere with beautiful visual environments and Lo-Fi soundscapes.
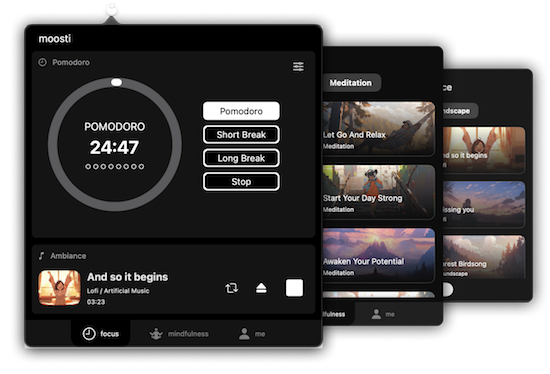
Moosti also offers breathing exercises and guided meditations to support focused work. Moosti is free, with in-app purchases.
The app stores are full of timer apps. If there’s an app that appeals to you (and costs nothing), experiment with it for at least a week; if it doesn’t float your boat, delete it before seeking a new timer.
Online Timers
LifeAt
My colleague Stephanie Denton has recommended LifeAt, a Pomodoro timer within an immersive experience for artificial accountability.
LifeAt blends a timer with virtual spaces, combining visual environments, ambiance, sounds, and musical integration.
The free 7-day trial includes 1,000+ focus video and image spaces, unlimited focus sounds & ambiance, online co-working communities, widgets (including task lists, a calendar, the Pomodoro timer, breathwork exercise, and more). The Pro version provides unlimited tasks and projects, a multi-calendar and task-to-calendar integration, and a daily planner. LifeAt Pro is $16/month, though when I signed up for the free account, it offered Pro at half off.
There are beautiful video landscapes, cozy fires, animated neighborhoods and more, so you have myriad options for finding your LifeAt “space” to set up your timer and features. My personal favorite is this window because, while I like looking at nature, I don’t even want to pretend to get too close.
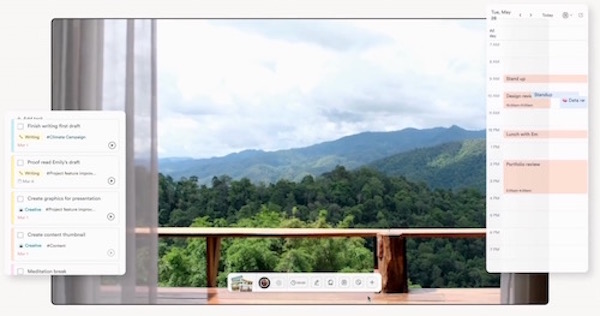 If creating a new environment is part of your focus routine, you might want to check out Flow and Faux (Accountability): Productivity, Focus, and Alex Trebek to see how you can incorporate timers and faux environments.
YouTube Channels with Timers
YouTube is awash with timer videos requiring no downloads or expense. (Most are designed for Pomodoros, so know that the time will not be customizable for your specific needs.)
Just use YouTube’s search bar for “focus timers” and “pomodoro” timers and you’ll get a variety of options like these, which will let you just jump in to a series of timed sessions. And yes, they all seem to be backed by Lo-Fi music. (Forewarned is forearmed, and wow, wouldn’t we be more productive if we had four arms!)
Believe it or not, this only touches on a small percentage of the more popular digital timers at your disposal. Next time, in the final installment of this series, we’ll finish up with hybrid timers that combine tangible, analog options with digital ones for special purposes. There will also be some special bonus material! Whoohoo!
Until then, which of these might you use or recommend to students, colleagues, or anyone else who faces focus obstacles? Would you grow a forest or press a bear’s belly button?
How to Use Timers for Improved Productivity and Focus — Part 3: Tangible Timers
So far in this series on using timers, we’ve focused on the “thinky” aspects.
- In How to Use Timers for Improved Productivity and Focus — Part 1, we looked at the the why of using timers and all of the situations in which they can boost productivity.
- Then, in How to Use Timers for Improved Productivity and Focus — Part 2: Picking a Good Timer we identified the general characteristics of a good timer and the specific, customizable aspects supporting individuals in their unique tasks and projects.
That was wordy stuff. Today, we get to start looking at the actual timers that can work their magic in helping you maintain focus, remember to take breaks, and avoid hyper-focusing. Today’s post is what I consider a “feast your eyes” post; read it in its entirety or just scroll through until you see a timer that appeals, and then explore all the salient details.
As we discussed previously, the timers you select should feel like they’re on your team, not like they’re monitoring you for a productivity parole board. They need to support all your functional, as well as aesthetic and emotional, needs. You don’t want — at least under most circumstances — to feel like you accidentally launched a countdown to self-destruction instead of a 25-minute Pomodoro focus session. Embrace a platform that works for you.
A timer should support your functional, as well as your aesthetic and emotional, needs. You don't want to feel like you accidentally launched a countdown to self-destruction instead of a 25-minute Pomodoro focus session. Embrace what… Share on XToday, we’ll focus on physical (primarily analog) timers; next week, we’ll examine digital and hybrid timers. But to begin, we’ll delve into the product line that has done the most to improve the understanding of the passage of time in schools, within the ADHD community, and among anyone seeking productivity support.
DISK-Y BEHAVIOR: TIME TIMER, THE BIG KAHUNA OF PRODUCTIVITY TIMERS
If you read Paper Doll or any productivity or organizing blogs, you probably already know quite a bit about Time Timer. The basics of this beloved product invented by Jan Rogers in 1994 are told in this video.
The key is that Time Timer was the first solution to the problem of time blindness, an undeveloped sense of the passage of time. As explained in ADHD Minds Are Trapped in Now (& Other Time Management Truths) in ADDitude Magazine, those experiencing time blindness are so ensconced in the present moment, in the “now” of things, that recall of the past and anticipation (and planning for) the future are difficult. Understandably, time blindness creates trouble in estimating how long a task will take.
My professional organizing business started in 2002, when Time Timer was still getting to be well known, so I feel as though we’ve “grown up” together. While almost every professional organizer has familiarity with Time Timer, I knew they’d made the “Big Time” when I walked into a Diabetes Sisters support group meeting. The moderator was almost giddy as she showed off the “cool timer” for making sure we’d hit all the planned activities on time.
Seeing Time
Over the years, I’ve been impressed with how this simple innovation has helped children and adults “see” the passage of time in ways they’d never been able to before.
In part, it’s because younger millennials and Gen Z have experienced digital clocks almost entirely to the exclusion of analog clocks. It’s no wonder that young people don’t know what “half past” or “a quarter ’til” mean!
Digital clocks are on their devices and computers, in their classrooms, and on electronic signs as they drive down the street. If you blink, you miss the minutes changing on a digital clock, and there’s no second hand “sweeping away” the seconds, as my kindergarten teacher explained it.
For many others, whether because of ADHD, executive function disorders, or just the complexities of living in the 21st century, they’ve never quite gotten the hang of how time “feels,” so they underestimate or overestimate how long a minute (or twenty) might take. If you don’t know how long a minute is, how can you envision how many you need for any given task?
The basic element of all of the physical Time Timers is two-fold:
- they display time in an analog manner
- a colored disk is set to the starting point of the timed period, and the visible area of the colored disk disappears (behind the face of the timer — it’s mechanical, not actually magic!) as time is “used up.”
It seems almost too simple, but users soon see that making time visible in this way calms the nerves and soothes the senses. Whether you’re doing a timed practice test or trying to finish a presentation for your client, you need only flick your eyes to the Time Timer to know how much time you have left.
There’s no need to calculate the math in your head as with a digital clock, and even from a distance (and even if you’re extremely nearsighted!), the flash of color slowly moving in a clockwise pattern is enough to signal if you have a lot or a little time left.
In this way, Time Timer delivers on its mission: it “fosters focus and provides clarity to individuals who struggle with visualizing time.”
Original Time Timers
The Original 8″ and Original 12″ versions with the crisp white background, black type, and red disk are for purists (and anyone who wants a variation on the old joke, “What’s black and white and re(a)d all over?”).
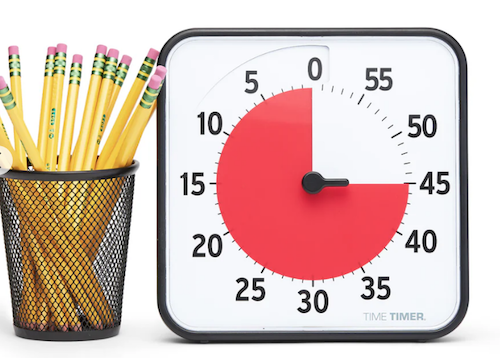
Both sizes are 60-minute timers, good for keeping a typical work or community meeting running without unraveling. Its operations are silent; with no ticking, the Originals are ideal for classrooms, open-plan offices, and for sound-sensitive users or spaces. The alert ding at the end of the set time is optional.
The no-nonsense style makes it appropriate for classrooms or office work, and it has both a magnetic backing and foldable feet, so you can choose the optimum display style for your needs. You’ll need two AA batteries to keep your Original Time Timers in lock-step with you, but it comes with a dry erase activity card to keep you on-task.
Teachers and homeschooling parents may want to opt for the Time Timer® Original 8” Learning Center Classroom Sets, with sets of three Original 8″ timers in either primary or secondary colors.
With all the same features as the other Originals, they add a pop of color, so if the minimalistic look and magnetic backing or table-top options appeal to you for your workplace, but you need to make your stylistic mark, this might be a good alternative.
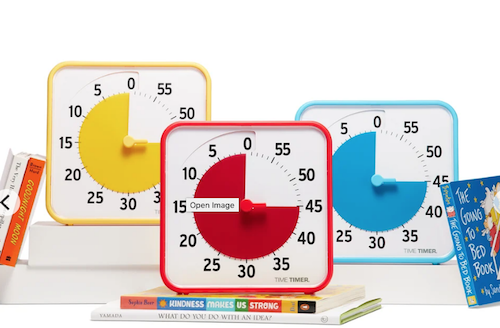
The colored Learning Center versions also prevent you from feeling like you’ve fallen into a creepy, crooked-clock episode of Severance.
You can also amplify the Original 8″ with a Time Timer® Original 8” Visual Scheduler. Encircling the timer is a dry-erase board where you can add calendar/daypart information or time progress details.
Actual minutes are hidden. In addition to the drawn-on markings you can add, there are clips that mark where you have reached in the time allotted.
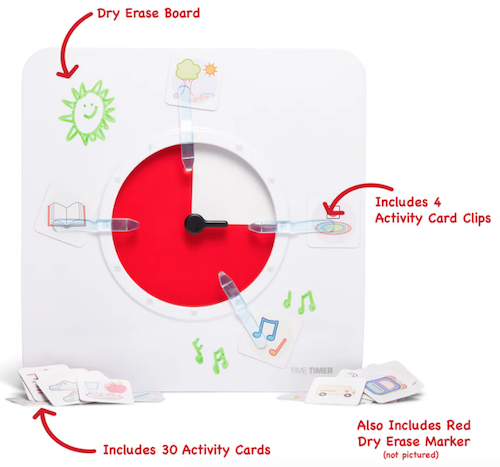
In the reverse portion, there are pockets for holding the clips, dry erase markers and other timer accessories.
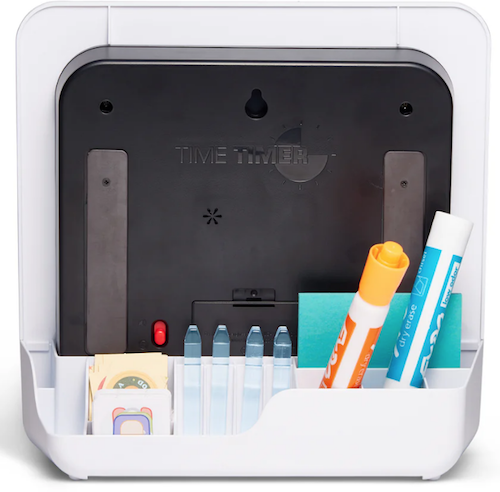
The Original Time Timers include access to the Time Timer apps, which we’ll review next time.
Time Timer Plus
In 2013, the line expanded to include Time Timer Plus, all of which stand upon their own and have handles to make them portable — as more than one client’s child has noticed, somewhat like a purse, or as my GenX clients have said, like a little boombox.
There are two versions of the 7.09″ x 1.7″ x 5.51″ Time Timer Plus 60-minute timers, with relatively serious faces (white backing/black type/red disk) like the Originals; the bodies come in either white or charcoal.
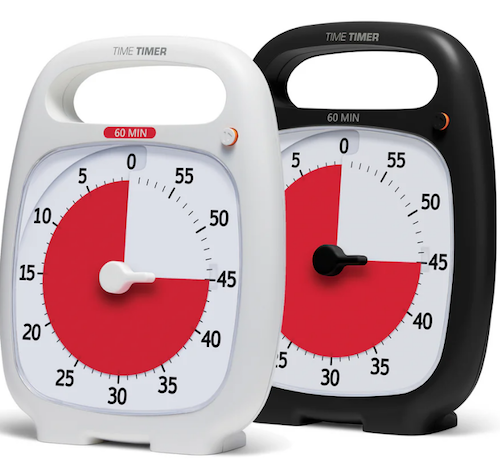
As with the originals, there’s no distracting ticking to interfere with focus, and there’s volume control for the alert, to assure that those who hyper-focus aren’t jarred into anxiety.
These were the first Time Timers I ever owned and used with clients. In addition to the features of the Original version, the timers in the Plus line are the only analog visual timer with a pause button (in the upper right).
The official rules of the Pomodoro Technique say that if your 25-minute Pomodoro is interrupted, you have to start counting from the beginning, but you’re a grownup and can make rules for yourself! If the interruption is worthy — your boss has a question, the school has a fire drill, etc. — hit that pause button, but do get back to what you were doing when you are able.
Over time, the company realized that different users might need different iterations. An hour is fairly long; five or ten minutes barely makes a dent. Thus, the colored part of the disk measuring just a handful of minutes would be hard to discern, especially for children or even someone learning to appreciate smaller increments of time, like while meditating or holding yoga positions. For them, 5-minute and 20-minute versions were created.
Conversely, sometimes an hour isn’t enough; if you’re taking timed practice tests or holding a multi-hour group workshop, a longer visual display of time is needed, so the Plus line added a 120-minute timer. All three additions to the Time Timer Plus family have more colorful disks.
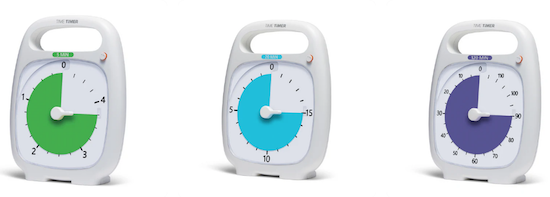
Time Timer Mod
The Original and Plus editions always served their purposes, but (especially early on) had a decidedly academic/industrial look about them. Some people felt that it gave off either a juvenile or sterile vibe; some of my adult clients said they feared it branded them as someone who needed help with time. (But c’mon, we all need help with time.)
As I noted last week, aesthetics can matter, and while most people wouldn’t consider timers as bearing a stigma, both the Original and the Plus line are rather “in your face” about their purpose. The Time Timer Mod line was the perfect response.
These 3.47″ square timers are just two inches deep, so you can use them anywhere: at home, in an office, working from a coffee house or library, even at the beach. They are small enough to throw into a backpack or purse, and to the uninitiated, they just look like little clocks. And a Time Timer Mod only requires one AA battery.
The standard Time Timer Mod – Home Edition Timers can measure up to 60 minutes and come in six designer colors accent colors coordinating with the timer disks: Lakeday Blue, Fern Green, Dreamsicle Orange, Pale Shale Gray, Peony Pink, and Cottonball White (with a burgundy disk). (Value packs of coordinating silicone “skins” are optional.)
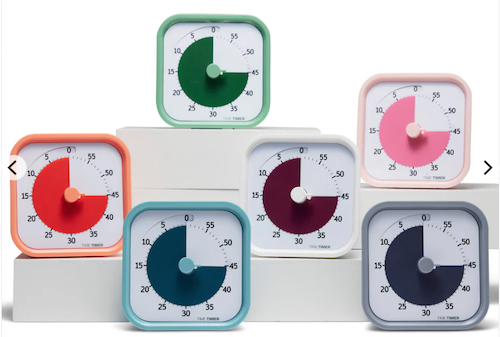
As some people (teenagers? college dudes? macho men in the workplace?) may want or need a timer with a harder-edged aesthetic to stay committed, Time Timer has a new Mod Home Metallic Edition in four different colors/styles that remind me of the eye shadow palettes popular in the 1980s:
- Metallic Midnight (midnight blue timer with gold disks)
- Metallic Indigo (dark purple-blue timer with a light purple disk)
- Metallic Forest (dark green timer with a metallic brown disk)
- Metallic Storm (dark blue timer with a pink frosted disk, the color of an eye shadow I suspect I currently own!)
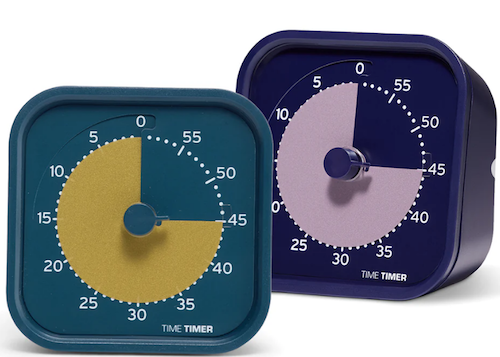
(These are more sparkly in person than they appear on screen.)
And for parents of kids needing something a little more generous with time measurement, the cheery Time Timer® MOD Home Edition Rainbow Wheel colorfully communicates time segmentation to children in five minute increments.
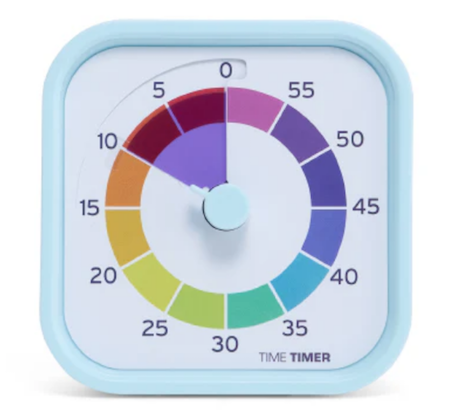
While the Home Editions are equally useful at home or work, the 60-minute Time Timer Mod Education Editions has more specific uses. They come in charcoal with the classic, highly visible red disks and optional silicone skins. However, when Time Timer spoke with educators and therapists, they learned of needs for shorter-duration and longer-timed options, so they created 10-minute (white with a yellow disk), 30-minute (white with an orange disk), and 120-minute (white with a purple disk) versions.
Time Timer RETRO Eco Edition
For those seeking a combination of productivity and sustainability, Timer Timer developed the RETRO Eco Edition. These 7.5″ square timers are smaller than the Original line and come in two styles, Green Land and Blue Water. They take one AA battery, like the MOD line, and come only in 60-minute versions. Their key appeal is how they are manufactured.
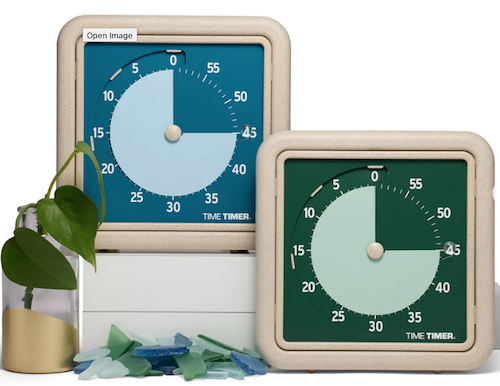
By combining a rice husk byproduct with their plastic, they’ve eliminated any unnecessary plastic pieces, reducing the overall plastic usage these timers by nearly half compared to similar timers. Additionally, 1% of the Time Timer RETRO Eco Edition sales go to their Time Timer® Making Time for Trees Initiative, a program committed to planting more trees and offsetting Time Timer’s carbon footprint. This version also eliminates the plastic lens, making it easier to repair a disk and yield a longer product life cycle.
Time Timer BRAILLE 8”
Closing out the physical Time Timers is the newest and most intriguing, the Time Timer Braille 8″, the first tactile, high-contrast, visual timer!
This innovative, empowering design allows both users with vision impairment and fully sighted users to use the same device simultaneously to monitor time use, stay productive, and support focus without hyper-focus. It’s suitable for classroom use, students taking tests or working on their own or in groups, and adult work or household projects. Like the MOD and RETRO lines, this 8-inch square timer takes one AA battery.
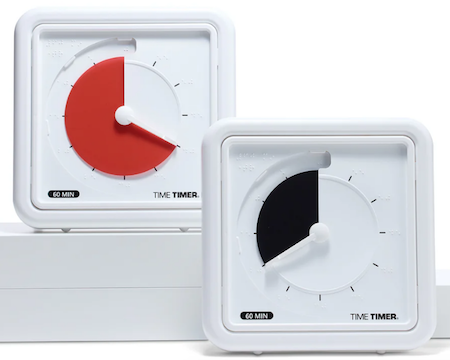
This timer combines their traditional disappearing disk with a tactile-set bar and Braille writing, so that vision-impaired users can set and track time themselves, by touch. The audible alert is optional.
While this is not the only Braille timer I’ve seen, Time Timer’s version offers the advantage of the high-contrast color differences (of the disk against the white background) for low-vision and fully-sighted users with Braille for vision-impaired users, something I’ve not found in other options.
[For current prices of Time Timer, please see the individual product pages linked.]
Time Timer has other products, ones which I would identify as hybrid, offering both an analog and digital approach to timers, and we’ll examine them in the next post.
Again, Time Timer is not the only timer manufacturere, but their wide variety of options make them the first line of productivity support for children and adults, at home, work, and play.
If, based on what I explained in the first two parts of this series, you to believe that you, your child, or someone with whom you work might benefit from a timer that unites the features of a tangible, visual, and analog timer with an optional, gentle (but non-customizable) alert, Time Timer should be your first stop.
OTHER PHYSICAL TIMERS
Lest this post feel like a commercial for Time Timer, there are a variety of other tangible timers worth considering, especially for those individuals most needing both:
- a timer with aesthetic appeal
- a physical timer, something that approximates a fidget toy
but not necessarily one with a visual approach to the passage of time.
Focus Timer® Visual Timer
You may recall that last week, I noted a primary problem with using an hourglass timer: it requires the user to “gauge what those collective grains of sand mean.” With a real hourglass, you must judge the ratio of sand above to what already passed down. A modernized version eliminates that problem.
The Focus Timer® Visual Timer has an adjustable hourglass design allowing you to set customized time measurements from one to 100 minutes.

Made of what the manufacturers call a “magic touch material,” this 3.75″ x 2″ timer has some appealing features:
- a “soothing” chime alert with three volume settings and a mute option (I put “soothing” in quotation marks because, as the video below shows, it’s a little high-pitched for my timer tastes.)
- ability to recharge via an included USB-C charging cable
- 10 hours of use before requiring charging
- 100 days of standby time
- a visual display such that horizontal blue rings are one minute each and yellow rings are 10 minutes each
It works by turning and “twisting” your fingers along the surface, much as you can operate your phone with drags, drops, taps, and pinches. Watch this video to appreciate how it works:
For the right user, this might be ideal for timing quiet reading and working stints, meditating, exercising, or other “gentle” activities, but not for large group meetings.
The Focus Timer® Visual Timer comes recommended by Gretchen Rubin, Cal Newport, Dan Ariely, and others in the productivity realm. It provides a beautiful visual display, making it (fairly) easy to judge the passage of time before the alert.
Note, compared to other timers, it’s a hefty $99 at Amazon or $89 at Focus Timer.
Moaas Timers
I’ve explored a number timers, and for those who don’t need a visual display of time passing but love that tactile, fidgety goodness of a timer they can hold and manipulate, Moaas has a variety of options.
The most basic are the Moaas Cube Timers, requiring two AA batteries. For about $15 at Amazon, these 2.6″ cubes come in violet, coral, mint green, white, and yellow.
Facets of the violet, white, and yellow cubes can be set for 5, 15, 30, and 60 minutes; the mint green version may be set for 1, 3, 5, and 10 minutes, while the coral’s settings are for 10, 30, 50, and 60 minutes.
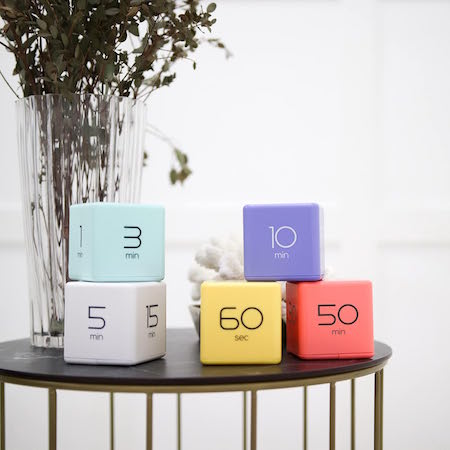
To operate, just turn the timer so that the side with the number faces up and the timer starts counting immediately.
A red light blinks while the timer is in use, which can either be comforting or annoying, depending on how blinking lights impact your focus. Adjust the alarm volume between low and high with a switch; another flicked switch turns off the timer completely.
These very basic timers will suffice for timing exercising, studying, cooking or taking a nap, but I suspect they may be a little “low-rent.” While I don’t have a Mooas cube timer, I do own a fairly ancient, battery-operated, 2.25″ Datexx Time Cube that appears to be much the same. The interior weight that identifies which timer specification has been turned upright (and similar to what Mooas uses) rattles and the whole mechanism lacks the “fun” I expected from a fiddly version.
That said, Mooas has a variety of timer upgrades that may appeal to those who want a timer that looks cute and is fun to handle. The Multi-Cube Timer Clock combines a digital clock readout with pre-set timed facets on the cube. These 2.56″ square cubes come in two versions:
- 5, 15, 30, and 60 minutes in white for $18.90 at Amazon
- 1, 3, 5, and 10 minutes in mint green for about $17 at Amazon

While the Mooas shows them as also coming in yellow, coral, and grey, those do not seem to be sold currently.
Mooas’ Multi-Hexagon Clock Timers are cool to look at and offer similar fidget-worthy features in a hexagonal style, but Amazon has marked as a “frequently returned item,” which is somewhat concerning. As always, function should be a higher priority than aesthetics, even when aesthetic appeal is needed to encourage commitment to timer use.
Happily, there’s no such warning on the 2.24″D x 1.84″W x 2.24″H Mooas Dodecagon Time Ball Rechargeable Mini Timers, which come with eleven different pre-sets: 1, 3, 5, 10, 15, 20, 25, 30, 45, 60, and 90-minute timers and three colors: sand peach, blue, and white. Charge the timers with an included USB-C charger.

There are three alarm modes: sound, vibration, and silent, and it sells for about $25 on Amazon.
I suspect that this small, fiddly timer may appeal best to teenagers and gamers.
Similarly styled cube, hexagonal, and multi-sided timers can be found all over Amazon and in Big Box stores and dollar stores. This $38 TickTime Pomorodo Cube, which is not a cube at all but a hexagon, comes in blue, black, or white; has pause and resume modes, and the adjustable sound can be silenced or replaced with only vibration.
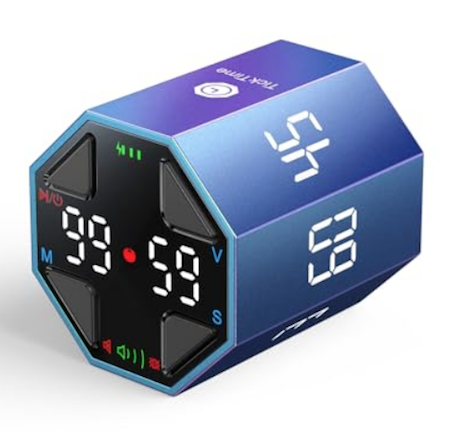
Mechanical Timers
Finally, remember that the simpler your physical timer is — if it requires no fiddling, no batteries, and no instruction manuals — the more likely you will be to use it.
If you don’t struggle with time blindness and don’t need to see the passage of time, and if you can accept (and won’t be startled by) a ding, a mechanical timer may be your best, first, and least expensive option.
If that’s a traditional pomodoro tomato timer, so be it.

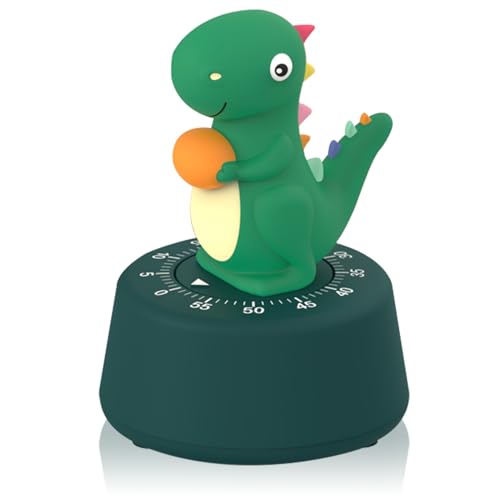
As always, the best solution for any productivity strategy is the one you’ll actually use.
Until then, do you have a tangible timer you love? Did one in this post tickle your fancy? Please let me know in the comments.
Affiliate Disclosure: Some of the links above are affiliate links, and I may get a small remuneration (at no additional cost to you) if you make a purchase after clicking through to the resulting pages. The opinions, as always, are my own. (Seriously, who else would claim them?)




Follow Me