Archive for ‘Children’ Category
Organize Your College-Bound Student for Grownup Life: Part 2

From living with strangers to not having parents and teachers overseeing study habits and self-care, college is a melange of delightful freedom and terrifying responsibility.
Last week, in Organize Your College-Bound Student for Grown-Up Life: Part 1, we reviewed the serious side of what to make sure your kids have and know before heading off to college. We covered making sure they know their Social Security number by heart, having a a handle on important contacts and key medical information, and getting registered to vote and knowing how to exercise their rights to vote.
We looked at legal documents, like Power of Attorney for Healthcare (AKA: healthcare proxy) documents, FERPA waivers, and HIPAA releases, which in combination ensure that a college student has someone they trust looped into their medical situations and able to make medical decisions if they are unable to.
We also started developing punch lists of adulting information and skills, starting with the essentials related to financials and insurance.
And, because people pay more attention to serious things when they can take a moment to breathe, I included a few Chip Leighton “texts from college students” videos from The Leighton Show. More are peppered in this post. (As with last week, click near the lower left portion of the video to un-mute.)
@the_leighton_show Posting one more for all the parents dropping kids off at college #teenagers #college #freshmanyear #text #funny ♬ original sound – The Leighton Show
HOW TO COMMUNICATE BEYOND TEXTS AND EMOJIS
Recently, I was surprised to find that most younger people don’t ring doorbells or knock; they text when they pull up outside. (Honestly, to keep from waking babies or making dogs go nuts, this is pretty smart!)
Gen Z students have often managed to get through life without learning some adulting skills with regard to communication and interaction. Before dropping them off on campus, make sure your kids have these skills.
- How to write, address, and mail a letter. Somewhere around fourth grade, they taught us how to write a “friendly” letter and a business letter, including the entire format of date, “inside address,” salutation, body, and appropriate closing. They also taught us how to address an envelope, where to put the return address, and where to place the stamp. Apparently, this is not taught anymore, as evidence by various Reddit threads, including the one below.
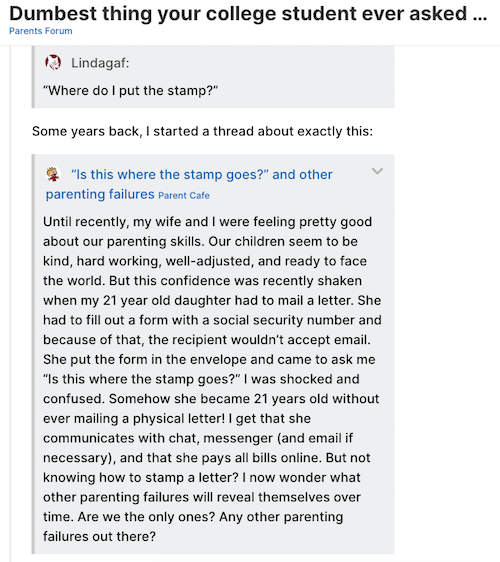
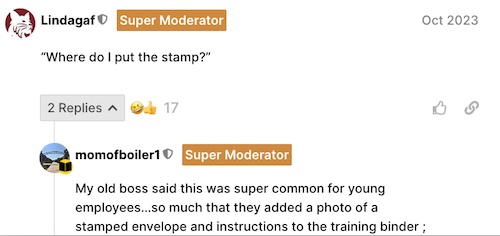
- How to sign their name in cursive. Some elementary schools stopped teaching cursive in 2010, though there now seems to be a backlash against the removal. Whether or not your student knows how to write (even remotely legibly) in cursive, make sure they understand how to sign their legal name.
- How to write a grown-up, professional email. Use a clear subject line that indicates the purpose of the message. Write in full, grammatically-correct sentences. Spell check. Don’t use emoji or slang. (Seriously, no cap.) Except in a rare case when asked to do so, don’t address female professors as “Mrs.” That’s a social honorific, and this isn’t kindergarten. They’re either Professor or Doctor or (if TAs or adjuncts) Ms. (unless they ask you to use their first name). Don’t address professors of any gender as “Bro” or “Dude.” (This goes for verbal communication, too!)
- How to schedule an appointment (and how to reschedule or cancel one) — Your kid knows how to log into a web site and pick a time slot, but Gen Z is particularly phone-averse. Role play with them how to make a call to request an appointment with a doctor or dentist, to get their hair cut, to have their car evaluated or repaired, etc. Teach them how to summarize why they’re calling (whether to a gatekeeper or for voicemail).
- How to leave voicemail — Guide them not to say, “Um, so this is Joe. I need you to call me back” without any hint of why. Young people are often nervous about calling strangers, so they should plan the message, mentally or even in writing. Encourage them to think about why they’re calling — and what result (information? permission? assistance?) they need.
This is good advice for grownups, too, especially those suffer from social anxiety. Practice eases the process. State your name, phone number, and reason for calling so the recipient can do their legwork and get back to you at their convenience without wasting their time (or yours on a cycle of call tag).
- How to write a thank you note — In case it’s been a while since you impressed upon your child the importance (and power) of this habit, share a classic Paper Doll post, Gratitude, Mr. Rogers, and How To Organize a Thank You Note and remind them, once again, that grandparents are more likely to send gifts (money? Apple gift cards? freshly baked cookies?) when thanked for their actions.
- How to apologize authentically and effectively — Whether your student eats her roommate’s last yogurt or commits a more unpardonable act, don’t let kids go off to college without this essential life skill. Make sure they understand that “I’m sorry you got mad” is not an apology.
There’s an easy formula:
-
- Use the words, “I’m sorry” or “I apologize.”
- Take responsibility and state what you actually did wrong.
- Illustrate that you understood the impact of your actions on the other individual.
- Explain how you’ll ensure it won’t happen again, or show how you’ll make reparations.
STAY SAFE, ON CAMPUS AND OFF
There will likely be a safety workshop during orientation week. Encourage your student to attend and to understand what kind of built-in infrastructure the campus has for safety.
Be Safe When Walking Around
When I attended college, we had a Blue Light service, poles throughout campus with blue lights at the top and telephones connected to Campus Safety. You could make a direct call (without a coin) or just hit the handsets as you ran from a horror movie monster (let’s ignore the more serious alternative) and campus safety peer volunteers and personnel would come out in force. There were also free “blue light buses” on campus to ferry people home safely at night. I was delighted to find out that this system is still in place, with some modern tech additions.
Nowadays, most campuses have high-end safety systems and apps. Still, encourage students to program the campus security number into their phones and know how to request an official campus peer escort. Other advice to impart:
- Don’t walk alone, especially at night. Take heavily-trafficked routes with good lighting.
- Let your roommate or BFF know where you are headed, and program your phone to share your real-time location (one time or ongoing) and ETA:

- You’re probably not going to convince your college kid to never ride with strangers, but you can fund an Uber or Lyft account to make it easier to get home if they’ve gone to a concert or club off campus. You may also want to discuss GrownandFlown.com’s The 7 Ride Share Safety Tips Every Teen Needs to Know.
Be Safe in Your Dorm and When Out and About
- Lock your room when not in it (so you don’t walk in to any surprises), or when you are, but lots of others aren’t around.
- Close and lock your windows when you are sleeping or not in your dorm, especially if you’re on the ground floor.
- Program campus housing numbers into phones.You might be locked out of the dorm without keys or key cards or wallet, but nobody goes anywhere without their phones anymore.
Hopefully, you’ve had lots of conversations with your teen about how to have situational awareness when walking around (or studying, especially alone), how to be safe at parties, and how to figure out whom to trust. These kinds of skills can take many years to develop, but open conversations are the beginning.
This is an organizing blog, not a parenting blog, but I fervently hope that just as many parents will teach their sons the importance of not victimizing as they teach their daughters how not to be victims.
For more in-depth advice, You may also want to share:
- How to Stay Safe on a College Campus (US News & World Report)
- 9 Ways to Stay Safe on Your College Campus (Safewise)
- 10 Campus Safety Strategies for College Students (RAINN)
- Campus Safety Guide (Best Colleges)
Be Safe During Emergencies
Personal safety doesn’t just include watching out for bad guys. Your kids had fire drills in school, but they’re used to following an grownups instructions. Now that they’re the grownups, make sure they know:
- How and when to call 911 vs. the police non-emergency line vs. the campus health center vs. the resident hall director).
- When to go to the ER vs. urgent care, or the health center, or a family doctor (or to call the health insurance Ask-A-Nurse line…or Dr. Mom)
- How to use a fire extinguisher. When I visited my old campus for my reunion in June, I saw that fire extinguishers had changed; they were neither the massively heavy ones I recalled from my youth nor the can-of-whipped-cream style I have at home. Have them read the instructions.
- Pay attention to the exits when entering classroom or building, and know the safe exit path for the dorm.
While it’s designed primarily for families, your student might find Paper Doll Organizes You To Prepare for an Emergency to be a useful starting point.
Be Safe When Interacting with the Police
If you or anyone in your family or close circle is Black (or you’ve ever watched a Shonda Rhimes show), you almost certainly know about The Talk and have had it, and multiple iterations of it, before sending a child to college.
However, if you are not a member of a visible minority, your have probably been privileged to not have to think about this. Role-model and practice so your college-bound student knows what to do if they are stopped while driving, riding, or walking — or if the police come to their dorms to make inquiries — or if they participate in a campus protest.
If you watch police procedurals, you’re probably familiar with the concept of swatting, the practice of making a prank call to emergency services in order to get armed police officers dispatched to someone’s address. It happens to congressional representatives and judges, but it also happens to random people, including college students. It apparently started with online gamers being targeted by others playing the game.
Almost nobody gets through life without interacting with police officers, and whether it’s municipal police or campus security, student needs a skill set for handling potentially scary interactions.
Again, this post is about organizing adulting skill sets. Beyond, “stay calm and don’t escalate,” I won’t advise you regarding what you should tell your children, but encourage you to talk to them about how to do it safely and with some starting points:
- ACLU’s Know Your Rights: Stopped By Police (ACLU)
- Dealing With Campus Police: Top 3 Legal FAQs For College Students (FindLaw)
- Black Parents Describe “The Talk” They Give to Their Children About Police (Vox)
HOW TO STAY HEALTHY AT COLLEGE
Nobody gets to college without having had a booboo or a cold or a stomach bug, but a lot of parents find that their newly independent children experience a sense of amnesia once any of these things happen at college. Use the following as prompts to make sure your kids are ready for dealing with the owies of adult life.
Be Prepared for Medical Ickiness
Everyone eventually gets the crud, and being away from home makes it worse. However, knowing how to handle the experience makes having the yuckies marginally better. Make sure students know:
- How to treat a sore throat, toothache, upset stomach (and related intestinal distresses) and minor viruses.
- How to recognize symptoms (like a high fever) requiring professional medical intervention.
- How the dosage on OTC and prescription medicine works. There’s a reason why it says “take no more than X in 24 hours” — because people thought X “in one day” meant they could have X at 11:45 p.m. and again at 12:15 a.m. Medication doesn’t follow a calendar.
- How to fill and refill a prescription — If you’ve always done it for them, your student may not know about prescription numbers or number of refills available.
- How to take maintenance medication or perform health activities without you having to remind them — You won’t be able to ask, “Did you take your ADHD meds today?” or “How many times did you check your blood glucose today?” Your student knows how to set an alarm on the phone, but walking them through how to label the alarms to make it clear which meds are for that specific alarm could help. Even “experienced” adults with established schedules forget to take meds when on vacation; college schedules are stress-inducing and can lead to forgetting, so help them help themselves.
- Where the nearest 24-hour pharmacy is, before they need it — At some point, your student will need Pepto or condoms or feminine sanitary products or a COVID test at 3 a.m. Being prepared is half the battle.
- How to do First Aid — Not everybody was a scout. I’m often shocked by people (OK, men. It’s always men) who don’t know how to properly clean a small wound, remove a splinter, or put on a bandage. You can’t anticipate everything — minor and major — need to know, so share the National Safety Council’s First Aid Video Library link. It’s impressive.
- How to fill out health insurance forms at the doctor’s office. — Seriously, your kid should know their blood type without having to call and ask you. (That’s why I told you last week to give them copies of their medical history information.)
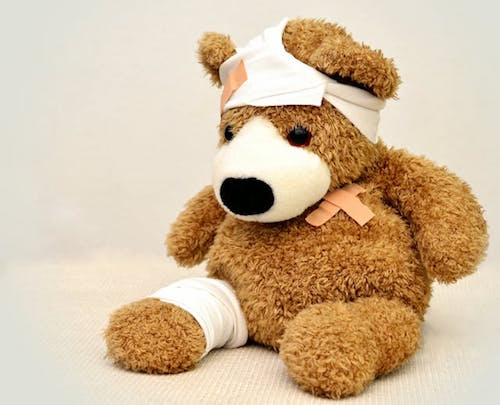
Booboo Bear Photo by Pixabay
How to Deal with College Life Ickiness
- How to safely drink/consume things you’d prefer they didn’t partake of at all.
- How to help a friend who has unwisely or unsafely imbibed or consumed something. This might range from treating hangovers to knowing how to use NARCAN to the calling 911!
- How basic hygiene works. Wash hands! — Feel like you shouldn’t have to explain this to an adult? Reread Organize Your Health: Parental Wisdom, Innovation, and the New Time Timer® Wash. Yes, it’s from the first year of COVID, but the unfathomable reminder that people forget to wash their hands is timeless.
- Wash water bottles. — We didn’t even have bottled water when I was in college. Now, Stanley cups (not the hockey kind) are everywhere. And no, just because there’s only water in it doesn’t mean it’s clean. Microbes are icky. (Secret cleaning trick? Denture tablets!)
How to Deal with Grown-Up Issues
I hope you and your student have the kind of relationship where you can discuss “adult” things without (too much) awkwardness. I was lucky that Paper Mommy always made a safe space to talk about difficult issues, but not everyone has that ability (or that parent).
You may have had that other version of “The Talk” with your student in adolescence, but whether you’re dealing with reproductive care or mental health or anything sensitive, at the very least encourage your college-bound student to talk. Say that you hope they’ll talk to you, but even if not, that there are many safe places (starting with the campus health center) to find accurate information and supportive care. Some of the issues they may need to contend with include:
- Safe sex
- How to use contraception properly
- How to say no, at any point in the process, and maintain healthy boundaries
- How to be secure consent and step back if there is no consent
- Mental health
- How to recognize the signs of depression or anxiety (or other mental health concerns) in themselves and their friends, including social isolation or an increase in risky behaviors, or changes in academic performance, mood, sleep or eating habits, or personal hygiene.
- Where to seek mental health help, on campus or virtually
- Self-care — Remind your beloved child of their options for caring for their mental health, including:
- taking breaks
- exercising
- getting out in nature
- talking to friends
- journaling
- calling home
- speaking with a therapist
- understanding that everyone has problems, they are manageable, and there is support available
For your purposes, peruse Empowering Wellness: Supporting Freshman Health and Well-Being from College Parents of America, and perhaps get your kid a copy of something like The Greatest College Health Guide You Never Knew You Needed: How to Manage Food, Booze, Stress, Sex, Sleep, and Exercise on Campus before they leave for campus.
Find New Life for Unfinished Needlework Projects and Pre-Loved Stuffed Animals

It’s rare that Paper Doll wanders away from the productivity topics of organizing paper, information, and time management, but a few intriguing services were shared with me recently and may be just what some readers need to put a smile on their faces.
When I work with organizing clients to help them downsize or declutter, some things are always easier to let go off than others. Whether we have ample time or are restricted due to an impending move or change in life circumstances, I always try to begin with the areas of a home that have lesser sentimental attachments. It’s just easier to declutter a bathroom cabinet, linen closet, or kitchen than it is to reduce personal memorabilia, photos, or keepsakes.
Today, we’re going to look at some novel ideas for letting go of things you no longer need or can’t use as-is, but are having difficulty parting with because you feel an obligation to the item in question or the person who owned it.
LOOSE ENDS
Some people just have the knack for knitting, crocheting, and needlework projects.
For example, my grandmother (Paper Mommy‘s mother) supplied the family with an inordinate number of multicolored knit afghans (and, admittedly one set of toddler mittens with square, too-short compartments for thumb and fingers). Her sister, my great-aunt, created a sumptuous brocade coat, sewed an inspired wedding gown, and crocheted the loveliest butter-yellow sundress — all for my sister’s Barbies.
The skills, however, did not pass down to later generations. Finding Paper Mommy sewing on a loosened button, my sister squinted and inquired, “Who are you and what have you done with my real mother?!” I, myself, have never stooped to, but have considered, fixing a ripped seam with a stapler.
Of course, my family is not your family, and your mileage may vary. (In which case, could you help me with this hem?)

Public Domain, Library of Congress, circa 1944
When You Are At Loose Ends with Unfinished Knitting/Needlework Projects
Have you ever gone through the closets or drawers of a loved one who has passed away to find that they’ve left behind a number of unfinished needlework projects? So many of my clients have found that their spouses or parents or grandparents have left half-finished sweaters or blankets. These left-behind pieces of handiwork reside in a no-man’s land, neither finished projects nor purely raw materials.
Or, have you known people who have derived great satisfaction from their needlework projects but are no longer able to complete them due to serious illness or disability? I have clients, for example, who suffer from conditions ranging from macular degeneration to debilitating arthritis to Parkinson’s, and they have had to relinquish their needlework hobbies.
It can be demoralizing for them to have these unfinished projects mocking them, so they may stuff them away in cabinets or closets. Meanwhile, it’s heartbreaking to give up on the idea of them being transformed into enjoyable pieces.
If you’re an accomplished knitter, and the yarn selection appeals to you, and you have the time and energy, you might take up the project yourself and finish it. But if one or more of those circumstances doesn’t apply?
Yes, you could donate the unfinished piece, as is, and leave it for the universe to match the project to the right person, but what if you could help the universe along?

Enter Loose Ends, a free service for getting your loved one’s needlework projects completed.
The founders, Jen Simonic and Masey Kaplan are avid knitters who found that they both had the experience of friends asking them to complete needlework projects originally begun by loved ones who had passed away. They were enthusiastic to do so, but recognizing the joy of wearing or using something a loved one created, they realized that there was an opportunity to create and share more joy.
In doing so, they built an organization that turns the clutter of unfinished projects into beautiful collaborations involving those who started the projects, the loved ones who see a chance for completing them, and volunteers who bring the projects to fruition.
Loose Ends turns the clutter of unfinished projects into beautiful collaborations involving those who started the projects, the loved ones who see a chance for completing them, and volunteers who bring the projects to fruition. Share on XSimonic and Kaplan see themselves and Loose Ends, now a 501(c)3 nonprofit (as of May 2023), as matchmakers. Their website notes that, “In knitting patterns, this is noted as K2Tog (knitting two together).” Not being a knitter, I’ll take their word for it.
How Loose Ends Works
Imagine you’ve gone through Grandma’s craft room, identifying all the unfinished sweaters or doilies or baby blankets. You can submit these unfinished projects to Loose Ends and Simonic and Kaplan’s team will survey the Loose Ends database of “finishers” to find a likely match based on geography, skill level, and the ineffable “druthers,” of what volunteers’ profiles show as their interests.
Loose Ends then contacts the finishers to see if the project is a good match, and if so they introduce the finisher and project owner by email.
Then, like any good yenta (matchmaker), Loose Ends leaves the project owner and finisher to develop the project-completion relationship in their own time and manner. (Of course, if it’s necessary, the Loose Ends team is available for troubleshooting problems, offering advice, or reassigning the project to a different finisher, if circumstances proves necessary.)
It usually takes up to a few weeks to find a finisher for a project, and then more time for the finishers to receive the project from the sender. As I discussed in Paper Doll On Understanding and Conquering Procrastination, it takes activation energy to get the ball rolling.
I imagine how much activation energy it must take just for someone to reach out for help; it might take quite a bit for the project owner to move to the next step of communicating with a finisher and even more to finally ship the project.
Finishers, whether they are knitters, crocheters, quilters, or other types of textile crafters, sign up online; similarly, project owners submit their projects online.
What Projects Will Loose Ends Accept?
Loose Ends has a detailed FAQ section, but you may be wondering who actually qualifies to have their projects finished by Loose Ends volunteers. The criteria related to who started the project and the material and projects involved:
- The original crafter must be deceased or unable to do handwork due to illness or disability. (In other words, this isn’t a service for people just looking to get free needlework done! These volunteers are lovingly completing projects started by those who are unable to do so.)
- The project must be partially begun. (So, no sending in Grandma’s unopened needlepoint kits.)
- The project and its materials must be free of moths and moth eggs. Similarly, they will not accept any contaminated yarn or rotting materials. (You would think that this would go without saying, but during my time as a professional organizer, I’ve seen people try to “donate” things that are dirty or otherwise, for want of a better term, yucky. You wouldn’t want someone sending something yucky to your home; right?)
- The project must be clean and not smell of mothballs or mold. If the project has been in a home with cigarette smoke, Loose Ends will try to match the project to a volunteer finisher whois not bothered by the scent of cigarettes.
- The project owner must want the project back — to keep! (I don’t imagine this means you can’t give the blanket to your kids.)
Submitted projects don’t have to involve knitting. Loose Ends notes that the projects can involve “any textile handwork… knit, crochet, sewing, quilting, mending, rug-making, Tunisian crochet, embroidery, cross-stitch, needlepoint, weaving, etc.”
I didn’t even know what Tunisian crochet was, but apparently it’s not quite as exotic as you might think, and involves the stitching used to make afghans.
Logistics and Costs
Understandably, the more specialized the craft, the more time it may take to match the project to the finisher, and if the project and its finisher are far apart geographically, shipping in both directions will increase the time.
Speaking of geography, finishers and project owners need not be in the United States. Work can come from or be finished anywhere in the world! As of six months ago, Loose Ends had 19,000 finishers in 64 countries!
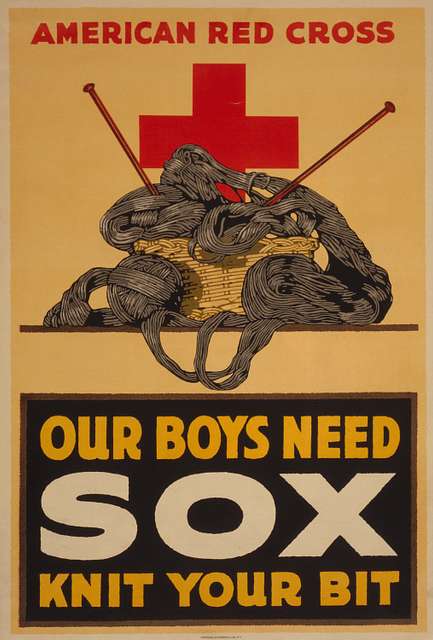
Public Domain Photo Circa 1914-1918
Library of Congress CALL NUMBER: POS – WWI – US, no. 118 (C size) [P&P]
Finishers complete projects at no cost, but (understandably) any shipping costs in both directions get covered by the project owner. Loose Ends works to minimize costs by matching individuals in nearby geographic areas whenever possible.
Impressively, the site notes that if a project requires acquisition of extra materials, JOANN Fabric and Craft Stores (Loose Ends’ partner) will supply anything available at their stores at no cost. (Editor’s Note: JOANN has recently filed for chapter 11 bankruptcy, so it’s not clear if this will have an impact on their future support.) However, if a project requires the purchase of supplies elsewhere, that’s the project owner’s responsibility.
Sundries, Notions, and Benefits
What if you (or your loved one) had no projects to finish, but oodles of fabrics, yarn, or craft supplies? Loose Ends can’t accept those materials, but they’ve amassed a huge state-by-state and country-by-country list of organizations that can give new life to these supplies. Go to their donations page and scroll down.
Speaking of donations, if you’d like to donate financially to Loose Ends’s efforts, you can do so through Zeffy, a Canadian donation processing company for nonprofits that does not charge fees.
Paper Doll may not be into crafting, but I find Loose Ends to be a lovely project with benefits for all.
Are you an inveterate knitter whose family and friends just don’t want or need one more sweater, lap blanket or tea cozy? If you just can’t give up the clickety-clacking of your needles, this gives you a fun project to work on without fear of adding fuzzy clutter to your space or the spaces of those you love. (I’m sorry, but some of us just don’t need any more yarn things!)
Meanwhile, those who’ve lost someone one can get one final gift of connection, completed lovingly by a crafter who shares their loved one’s passion for handiwork.
The finished project becomes a legacy instead of a piece of clutter.
For a more in-depth discussion of Loose Ends, co-founder Jen Simonic just appeared on the most recent episode of the video podcast Fiberchats, hosted by Irina Shaar.
LOVED BEFORE
My fabulous colleague Janice Simon, better known as The Clutter Princess, knows I’m a sucker for nifty projects like Loose Ends and recently sent me a TikTok about another sweet service, this one saving the environment while reducing household stuffed animal clutter.
If you’ve got stuffies that your children have outgrown (or which were given to you by boyfriends later found to be poopyheads) then you know how difficult it can be to move them onward.
We professional organizers usually consider donation first whenever helping clients let go of excess possessions. Stuffed animals and other such toys can be donated to standard charities like Goodwill, hospitals, shelters for unhoused individuals and families, domestic violence shelters, daycare centers, social services agencies, and organizations like Stuffed Animals for Emergencies (SAFE), which give them to the police departments to share with children who’ve experienced a trauma.
The problem? These donations generally need to be brand-new, or at least very gently used, toys. Typically, well-loved stuffed toys generally can’t be donated for hygiene reasons.
The alternative to donation, especially for once-loved but beaten-up fuzzy friends, is the landfill, and nobody wants that.
And, of course, if you believe that your stuffed friends won’t find loving owners through donation, and you can’t bear the thought of them ending up on the junk heap, how will you ever bear letting them go at all? It’s no wonder that so many people have houses filled with ignored, dust-gathering stuffed animals!

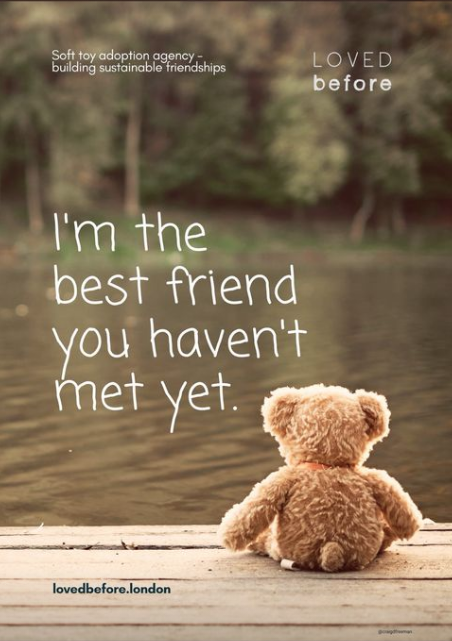
Loved Before, a London, UK-based organization, has found an alternative for giving new life to old “soft toys” (what we call stuffed animals). Their mission is to:
make a difference by recycling pre-loved toys into “eco toys” that are not only adorable but also sustainable. We believe through the medium of soft toys we can teach the importance of preserving our planet to future generations.
Loved Before sees itself as the first eco-friendly, fully sustainable soft toy adoption agency.
Donate Your Stuffies — And Their Stories
Loved Before accepts donations of soft toys in “all shapes, sizes, species and conditions,” no matter whether they are store-bought Steiff, Gund, Beanie Babies, or Build-a-Bear friends or multi-generational, wonky, and handmade with love. (However, they can’t accept plastic toys or those with electronic or mechanical parts.)
People are invited to pack the soft toys/stuffed animals to donate securely in a cardboard box, along with a return address (in case the process goes awry and the package must be returned to the sender). You can even include a little note with contact information so Loved Before can assure you that your little friend has arrived at its destination safely.
Along with your donation, you’re encouraged to write up the life story of your sweet little stuffed friend. Attach it with a string or ribbon tied around the neck or waist. It’s helpful to “add a clear descriptions or even photos” so Loved Before can be sure they’re matching the right life story to the right stuffie, especially if you’re sending more than one.
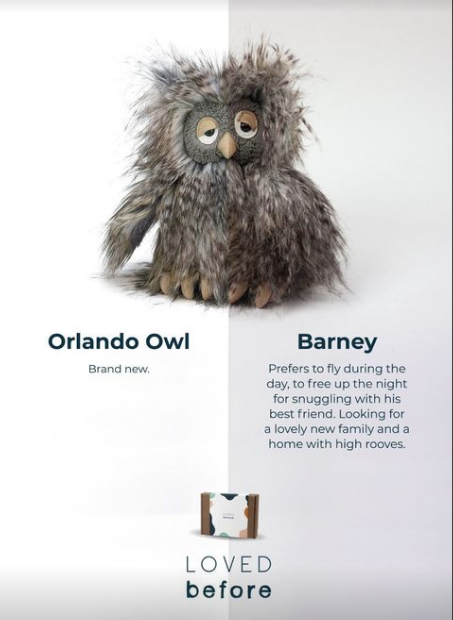
Including your soft toy’s life story is optional, but contributes to the delight of how they will be matched to future families. Loved Before provides prompts to help you become your toy’s biographer, like:
- What are the likes and dislikes of your teddy?
- What is your teddy looking for in a new home?
- Do you have any memories or funny stories with your teddy?
- How has your teddy helped or been special to you?
- Is there anything you’d like to say about yourself?
Package up your soft toy and biography and either book a drop-off appointment at, or ship it to, Loved Before’s HQ:
202 Heath Road
LU73AT
Leighton Buzzard
Bedfordshire, UK
or register to donate it at one of their UK roadshow donations.
UK? Yes, unfortunately for all of us on on this side of the pond, Loved Before currently operates only in the UK. However, they’re looking to expand their efforts globally, and are even seeking volunteers worldwide to reduce the landfill and spread joy.
The Loved Before Spa Experience & Photo Shoot
But wait. Why can these used, possibly shmutzy soft ties be donated? That’s the nifty part!
Loved Before states that although it’s overarching mission is to “change perspectives through the medium of eco-friendly soft toys, our biggest commitment is to ensure all of our pre loved soft toys are safe and clean.”

To ensure safety, every toy gets a “health check.” Then, to make sure that every little stuffed friend is sparklingly clean, Loved Before sends them for a full-on spa experience to clean and re-fluff these “pre-loved” toys.
The actual spa process varies by individual stuffie, and depends on the age, condition, and materials of the soft toy in question. All are “thoroughly cleaned, repaired, and disinfected to ensure cleanliness and safety.”
Want to see what’s going on during this process? Loved Before documents the entire experience on their Instagram page (and you can see many of the new adoptees and friends on their TikTok).
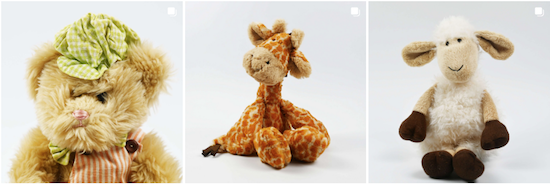
Eventually, your soft friends make their way through the spa for a full shampoo-and-set (plus any necessary refreshing) and then have their own personal photoshoot before being added to the Loved Before adoption center.
The Path to Happily Ever After
Once stuffed friends are spa-pretty and have their photo shoot, they are ready to be adopted, and their photos and stories of their adventures go up on the Loved Before store site in anticipation of them being re-homed to find new their new families!
“Meet” the adoptees newly-ready for adventures by going to the Loved Before website each Monday at 8 pm GMT (3 pm EST). Want a reminder to make sure you get to see each new, delightful adoptee? Subscribe to be sent reminders via a link in the banner!
You can peruse potential adoptees by:
- brand (Aurora World, Beanie Babies, Build-a-Bear, Charlie Bears, Gund, Jelly Cat, Keel, Merrythought, Steiff, Wild Republic, etc.),
- species (bears, giraffes, dinosaurs, etc.), or
- collection (teenies, mythical creatures, woodland or sea creatures, farm animals, famous “celebrity” characters, etc.)
It’s also possible to see who has been recently adopted.
Once you select a new friend to adopt, click to purchase — I mean, process your adoption fees.
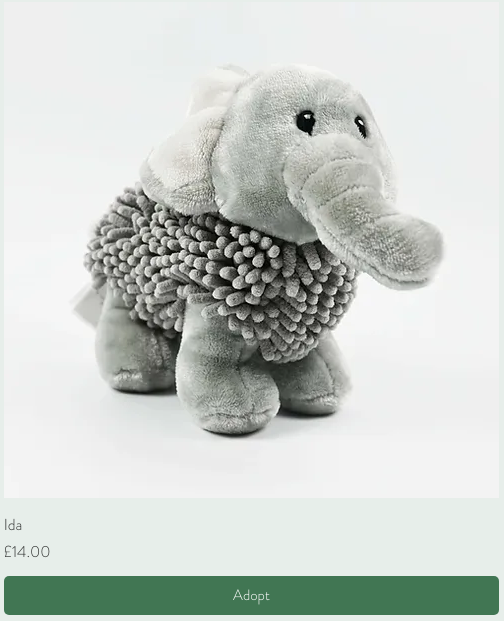
“Meet Ida, the soft toy with a passion for folklore! This little cutie loves listening to stories about mythical creatures and magical adventures. One time, I caught Duha trying to cast a spell with a wand made of popsicle sticks! Always keeping me entertained with their whimsical imagination.”
Loved Before uses fully recyclable, biodegradable, and sustainably sourced materials for all packaging.
The Benefits of Loved Before
Original families who no longer have the space for, or the tiny humans to give attention to, the soft toys can lovingly find them refreshed bodies and new families.
Children (and adults) have the delight of finding new eco-friendly chums with whom to share adventures.
The landfill stays clear of stuffies.
At least half of the profit from each sustainable soft-toy adoptee goes to Make-A-Wish UK. (Read more about Loved Before’s charity model.)
Final Thoughts
Yes, Loved Before is in the UK, so it’s much farther away than the 100 Acre Woods to send your stuffies or adopt from there. Still, it’s heartwarming to read about the little friends who’ve found new lives with their new families in an environmentally sound way, and we can be hopeful that their efforts will go global sooner rather than later. Here’s the latest update on that very thing!
(P.S. If anyone knows how to center a YouTube short on WordPress, please let me know in the comments!)
From Glitter to Macaroni (Part 2): Storing and Displaying Children’s Art

(DRAWING) THE CART BEFORE THE HORSE
Last week, in From Glitter to Macaroni (Part 1): Downsizing and Organizing Children’s Art, we looked at the key elements of digging out from under so that you’re house doesn’t have three-inch thick wallpaper layers of kiddie art.
To recap the key concepts:
- Children live in the moment, enjoying the process of creating art for its own sake. They enjoy applause and appreciation, but by the next day, they’re usually ready to move on, so you should be, too.
- Ask questions to show you’re curious about junior’s artistic choices and thinking.
- Have a plan for collecting the art and host at least a weekly review where you figure out what to purge and what to maintain, at least for the near-term.
- To help you cull the excess, focus on keeping masterpieces (original artwork) and let go of reproductions (coloring book pages, paint-by-numbers, etc.).
- Record the name of the little artist and the date.
If you regularly purge, you’ll feel more confident that whatever you store or semi-permanently display is the best of the best!
HOW TO STORE CHILDREN’S ART
As last week’s post explained, kids create so much art, and so quickly, that thinking you’ll put it all on the fridge or kitchen counter is a recipe for clutter. You need a plan for storage of any art projects that you hope to maintain (both short-term and long-term) without displaying. There’s just no room to show it all off!
Unfortunately, this is the one category of paper that doesn’t lend itself to the filing solutions we usually discuss, like vertical filing folders and three-ring binders with sheet protectors, such as we’d illustrated in Reference Files Master Class (Part 1) — The Essentials of Paper Filing. Those solutions work for pieces that are 8 1/2″ x 11″ emblazoned with only crayon or pencil, but thick paints, glitter, and glue often prevents paper from maintaining structural integrity and laying flat.
Flat Files
In the professional art world, instead of vertical filing cabinets, art pieces and blueprints may be rolled for shipping or travel, but are generally stored in flat files, cabinets with short but deep metal drawers. The problem? Flat files tend to be expensive and ill-suited for children’s art created by anyone but Richie Rich.
For example, this small, 5-drawer Safco Products 4969LG flat file is $710!
At 32″ deep x 46.25″ wide x 16.25″ high, (after a proper culling of lumpy finger-paintings and nature studies made from small sticks and cotton ball clouds) you could probably store all of the elementary school art. But for $710 you could buy a Disney World four-park, four-day ticket and still have $300 left over for concessions, T-shirts, sun-block, and decades of memories!

While yes, the above flat file it will let you store pieces of up to 40-inches in depth, your child’s Kraft-paper, full-sized self-portrait could also just be rolled up to fit in the tube of a used-up roll of wrapping paper!
There are more affordable flat files with more storage space (covering less horizontal real estate), like this pretty Bisley 10 Drawer Steel Under-Desk Multidrawer Storage Cabinet, available in ten colors, including black, charcoal, light grey, a truly sickly green, navy, orange, red, steel blue, white, and as seen here, fuchsia.

At 15″ deep x 11″ wide x 24″ high, it’s a smaller profile solution that works if your prolific artists create relatively narrow (dimensionally-speaking) works. It’s “only” $260, and can be used for storing art and school supplies, too. But eleven inches of width and 15 inches of depth is decidedly small for the often-expansive creativity of a Mini Mary Cassatt or Tiny (tinier?) Toulouse Lautrec.
Given that, I encourage you to seek less expensive, more portable art storage solutions.
Clean Pizza Boxes
As I mentioned last week, a (clean, new) pizza box is the right size to handle the weekly collection of art creation. As your kids get older and you do seasonal and end-of-school reviews, these can be repurposed for winnowed longer-held collections.
Sure, you can tip your favorite pizzeria cashier to save you a few extra boxes when you pick your next pie, but do you want to be beholden to maintaining a friendly relationship with Mario to keep you in pizza boxes until your kids hit middle school (and stop creating art)? And when he goes off to college, are you prepared to start fresh with his replacement?
Assuming not, consider buying a stack of white, Kraft, or themed pizza boxes directly from Amazon or a restaurant supply store like Webstaurant Store. (I recommend white or Kraft boxes so that you can label accurately (“Jamie’s Artworks—1st Grade” or “Chris’ Creativity — 2024”) without cartoonish distractions.

These boxes often come in packs of 50 for about $30-$45, so split a batch with the other parents in your carpool or PTA.
Just be sure to get boxes that are at least 12″ square, as most children’s art won’t fit in the 10″ x 10″ boxes. You can also select options that come in 14″ or 16″ (or even larger) sizes, so explore box style you want to see the different sizes available.
Try one box for each child for gathering a week’s worth of art for curation meetings, storing it on a shelf in the kitchen pantry or mudroom, and another more permanent box for each child into which you put the weekly “best-of” selections.
Art Portfolios Bags
Hard-sided art portfolios cases are a popular resource for professional artists to store work or carry their best pieces. However, children’s art tends to be larger and “lumpier,” so portfolio cases aren’t the best option. Instead, opt for large format portfolios and portfolio bags.
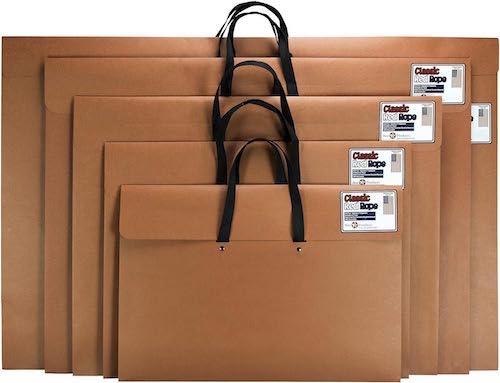
The standard is something like the Classic Red Rope, Paper Artist Portfolio with Soft Woven Handle. All versions come with a 2-inch expandable gusset, and comes in multiple sizes (14″ x 20″, 17″ x 22″, 20″ x 26″, 23″ x 31″, and 24″ x 36″), with prices ranging from $16-$24.
These are lightweight and constructed with heavy-duty recycled paper, ideal for inexpensive paper art storage. Find them on Amazon at the link above or in your local art supply stores. Stand these up along the back wall of a child’s closet or slide them behind a child’s bookcase or dresser to keep art tucked out of the way. You might also consider using using these in combination with pizza boxes, with the pizza boxes for weekly collection and the portfolios for longer-term storage.
For more visually stimulating storage options, you’ll find lots of zippered plastic/nylon portfolio bags, like this SUNEE 19″ x 25″ Art Portfolio Bag. The nylon strap and edging are sewn into the mesh cloth for extra durability, and it’s semi-transparent so you can immediately realize, “Ah, it’s Katie’s art collection.”
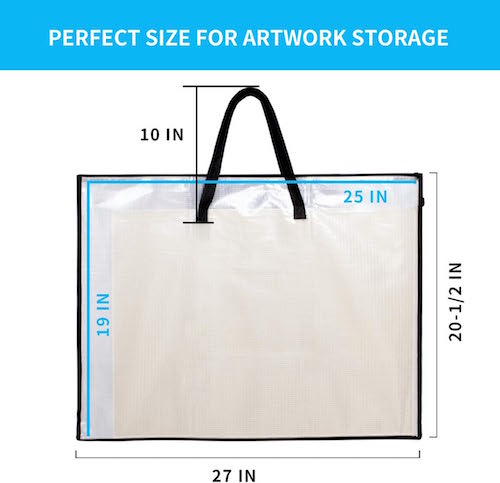
Use one portfolio for each child, labeled with the name on the outside. Don’t try to combine different children’s art in the same storage, especially when they are small.
Aim to keep relatively equivalent numbers of art pieces (per week, per semester, etc.) for each child. If your kid makes it to middle school or high school and is still creating massive numbers of pieces — prolific creation is a rarity after 6th grade — then you have an actual artist on your hands and have my permission to treat this as an interest/hobby (much like sports or musical performance). But when your kids look back in adolescence to what you’ve retained from their tiny tot years, spare yourself family strife and aim for balance.
Capturing Memories
The location doesn’t matter as long as you have adequate space to keep these collections accessible (and file them away regularly). Remember, legal-sized filing cabinets will give you more length, but chance are good that what you need most is more width. If you fold children’s art to make it fit, the paint and glue will crack and flake; glitter will come loose.
You can also choose clear plastic bins to store the art that you decide to keep, memory box-style.
Whatever storage method you use, clearly label each box, bin, portfolio, or folder with the child’s name and the date range. As I noted last week, you may think that you’ll never forget when your Tiny Titian or Mini Matisse created each piece of art, but I guarantee you that 30 years from now, you won’t be able to tell which kid did which.
WHERE TO DISPLAY CHILDREN’S ART
Minimize the backlog, then consider which tangible pieces on display.
Identify a location for a rotating display.
Rotate the art regularly to keep it fresh. Display this week’s award winners and replace them frequently. (Remember, kids live in the moment, so don’t make VIP displays about a moment six months ago!)
Art galleries have both permanent exhibits and rotating ones that allow fresh, inspiring work to grab the attention of visitors. Permanent exhibits (like the collection of family photos on the wall next to the staircase) are lovely, but it’s the rotating exhibits that will catch the eye. The question becomes, where shall it all go?
The American standard is to display art on the fridge. This worked well when everyone had a big white (or avocado green) refrigerator that happily accepted a plethora of magnets. Nowadays, more and more of our boxy chill chests have non-magnetic fronts and are designed to be pieces of art themselves.
Before you run to the 1960s-Classic-Fridges-Are-Us Emporium for your next art wall installation, recognize that there are alternatives to hanging art where your lunch lives.
Invest in a large cork bulletin board.
Pick a bulletin board like you might see in a typical classroom, such as this one from Quartet.
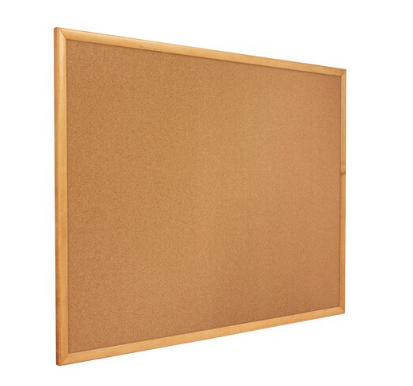
Find full-sized, framed cork boards on Amazon or at office or school supply stores. Alternatively, buy individual cork tiles — array them in a uniform grouping or artistically around a child’s room or playroom — to affix to your walls.
Display the art as-is, right on the cork, or cover the entire board with dollar-store wrapping paper or kraft or butcher paper. Your kids can even draw on or decorate the paper, first, creating a meta-message of art-on-art, or add drawings and designs around the posted art.
Perhaps, use just one cork tile in a high traffic area of the home to showcase the Masterpiece of the Week!
The board does not have to be cork, per se. Customizable felt boards and panels, like these from Felt Right, can make a child’s bedroom or playroom wall bold and exciting as a background display option.
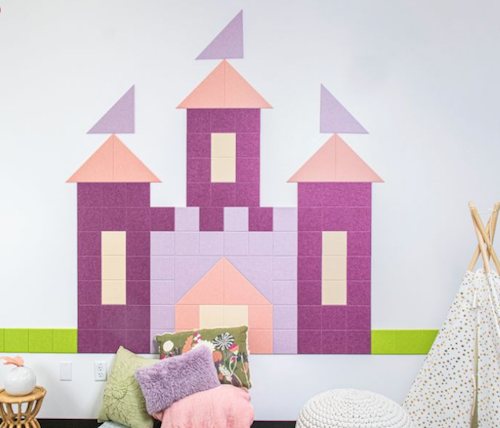
Princess Castle from Felt Right
Wallpaper an unfinished space, like a basement or work area.
Art can be a fun way to decorate your child’s room as well as any other casual area, like a guest room, mud/utility room, playroom or basement, whether you use a cork board or not.
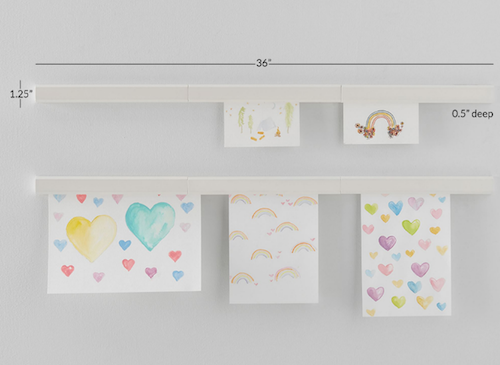
The walls of a basement laundry room are likely to be gunmetal grey and depressing. Charming and colorful children’s art can brighten the area (and the mood of laundry day) immensely. Easily and safely attach artwork to walls with removable 3M’s Command-brand traditional or re-positionable Poster Strips.
Match your child’s magnetic personality!
Chalkboard paint allows children to create masterpieces directly on the wall, but magnetic paint is actually a storage solution for existing art.
Try a brush-on paint like Rustoleum’s Magnetic Primer or Magnetize It! Magnetic Paint & Primer so your wall surface will hold magnets for displaying artwork, schoolwork, and more. Alternatively, use a sprayable magnetic paint primer, like Krylon’s. Find them at Amazon or home supply stores, and then paint your wood, metal, masonry, drywall, or plaster walls.
From Glitter to Macaroni (Part 1): Downsizing and Organizing Children’s Art

I suspect that in the past (almost) 18 years, Paper Doll has covered the entire span of paper organizing topics. Just in the past few years, we’ve reiterated the essentials for all the documents that keep your financial, legal, medical, household, and personal life running:
- Paper Doll Shares 12 Kinds of Paper To Declutter Now
- Reference Files Master Class (Part 1) — The Essentials of Paper Filing
- Reference Files Master Class (Part 2) — Financial and Legal Papers
- Reference Files Master Class (Part 3) — Medical Papers
- Reference Files Master Class (Part 4) — Household and Personal Papers
We’ve also delved into specialty topics, like paperwork hoops to jump through for handling insurance, changing your name, helping a loved one with Medicare, or organizing recipes, and we’ve repeatedly looked at organizing solutions for storing and organizing papers:
- Organize for an Accident: Don’t Crash Your Car Insurance Paperwork [UPDATED]
- Paper Doll’s Ultimate Guide to Legally Changing Your Name
- A New VIP: A Form You Didn’t Know You Needed
- Calm Cooking Chaos (Part 1): Organize Your Paper Recipes
- Paper Doll Refreshes Your Paper Organizing Solutions
- Paper Doll’s Guide to Picking the Right Paper Planner
However, after delving deeply into the Paper Doll archives, I found that it has been 13 years since I’ve visited the topic of one of the most unwieldy types of paper: children’s art!
With the school year ending and all those lockers, cubbies, and book bags getting cleaned out, this is the perfect time to refresh our look at children’s art.
ARE YOU STRUGGLING TO RUN AN ART GALLERY FOR TINY HUMANS?
Parents (and grandparents) sometimes find themselves with secondary careers as curators of pop-up museums catering to a very narrow category of visual media. Do you often imagine yourself the director of something along the lines of the Family History Museum of Kindergarten Arts and Crafts (FHMKAC) or the Modern Museum of Macaroni (MMM)?
With most types of paperwork, we can determine what to keep and for how long based on document destruction and records retention schedules, such as those I provide in Do I Have To Keep This Piece of Paper?

For items without legal or financial rules, we can analyze the situation to see what makes the most sense. If we opt for paper instead of digital users manuals, a series of simple file folders and binders will suffice, and the documents can be discarded when we no longer own the gadget. Our clippings for a dream wedding or trip to Spain generally go away one the event or trip has passed and the photographic of the experience supplants the files.
But children’s art? Figuring out how and when to let that go may be a toughie for several reasons. For example:
- You’re a sentimental softie and it’s hard for you to let go of anything related to your kids. (You’re my client who kept the purple mimeographed instructions on how to get to the right school administrative office to register your child for first grade…in 1978.)
- You haven’t got a clue what most of the art is supposed to be. Your toddler hasn’t quite managed enunciating, so you’re taking the stance that a picture is worth a thousand words.
- You’re a fairly new parent and haven’t previously experienced the inundation of art that comes from tiny humans creating new projects every single day.
- You are certain that your child is a prodigy. You assume everything is stellar and that museums someday be falling over themselves to acquire Little Dude or Dudette’s Early Period work.
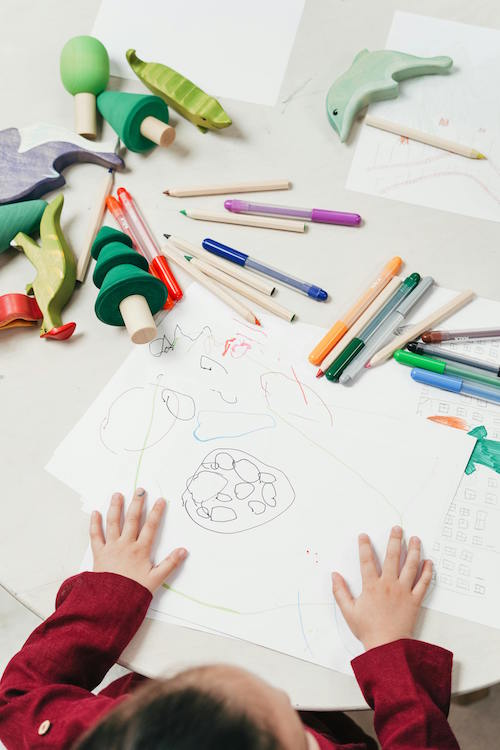
Children’s Art Photo by cottonbro studio at Pexels
- Your family of origin never organized art. Either your parents saved everything you created or it all went in the bin. If it’s the latter, you weren’t taught the tricks of separating wheat from chaff in the tiny tot art world. If it’s the latter, you may resent not being able to trace your MiniMe artistic path and resentment fuels your unwillingness to make judgements about your kid’s artwork.
- You’re digital in almost every other area of your life. You receive and pay bills online, and rarely even receive mail. Your child’s school sends every message through a digital portal. You and your spouse keep everything in Dropbox or OneNote or Evernote. You may not even have experience managing paperwork of any kind, but paper without labels, dates, or clear categories makes your eyes glaze over.
- You’ve tried to declutter, but the art has taken over. You’d wave a white flag, but every white piece of paper and white t-shirt in your home has already been turned over to your picayune Picasso. At this point, you no longer recall what color your refrigerator is because the doors and sides are covered with all of the major artistic methods: watercolor, oil(y Play-doh or sticky jam-hands), and mixed media (painted, sparkly macaroni)!
Never fear. Whatever your situation, there’s a path to making sense of all those artistic endeavors.
HOW TO CULL CHILDREN’S ART
When children are very young, every artistic effort may seem like a masterpiece, but soon enough, parents can become overwhelmed by the embarrassment of finger-painted riches. At some point, you realize you’re either going to have to start buying Frigidaires in bulk, or you’re going to run out of display space in the kiddie art gallery you used to call your home.
There are no records retention schedules for crayoned drawings of your family, each with out-of- proportion body parts in front of a boxy house with a yellow sun in the upper left corner of the page. Culling children’s art is neither an art nor a science, but a labor of love wrapped in papier maché and held in place with colored pipe cleaners.
Culling children's art is neither an art nor a science, but a labor of love wrapped in papier maché and held in place with colored pipe cleaners. Share on XWe’ll start with looking at the basics for winnowing the collection, and next week, we’ll move on to both standard and creative ways to display the artwork. Remember these general concepts:
Kids live in the moment
For children, the charm of creating of art is the experience making it. Unlike adults, they rarely create art to get adulation or social media likes. Whatever they’re doing right now is what matters to them.
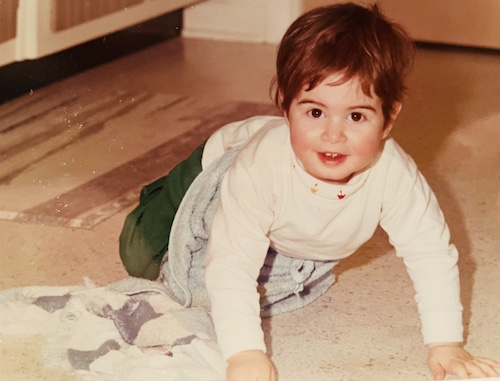
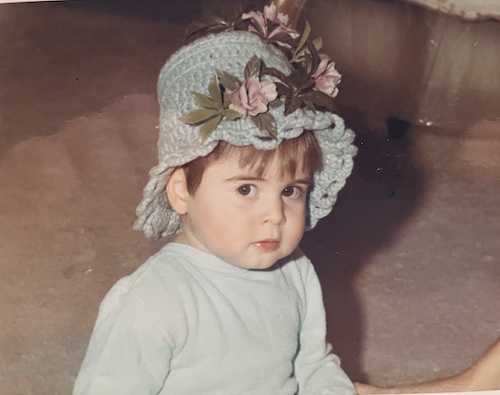
Tiny Paper Doll in Deep Work Mode, Circa 1968
A toddler is enjoying the experience of goopy blue and yellow making green under his fingers.
A first grader delights in the representational aspect of getting the whole family, plus Bluey and Elsa, onto the front yard; the fact that Frozen’s princess towers over Dad is entirely beside the point.
New art is good art
Because kids are little art factories, the stuff arrives fast and furiously, and their favorite pieces are whatever they’ve made most recently. Praise it! Stick to age-appropriate questions and comments (“Is that blue?” “Wow, look how tall Daddy is! Oh, that’s actually a spider? What a cool spider!”)
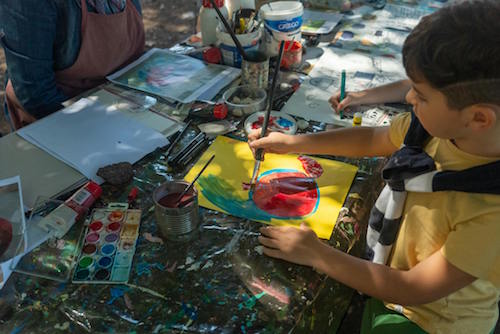
Little Boy Creating Art Photo by Oleksandr P on Pexels
But know that they’ll move on from their blue periods with nary a glance backward, unless you make them think they’re supposed to care about the past efforts.
Be an art collector — for the short term
Don’t feel like you have to display all art, either immediately or at all. Your tiny human is new to the planet and doesn’t know there’s a cultural expectation of putting every piece of art on the fridge or on display in general.
Your tiny human is new to the planet and doesn't know there's a cultural expectation of putting every piece of art on the fridge or on display in general. Share on XMaybe your child will angle to have art displayed (or at least shown off) each night when parents have returned home from work. If the tidiest and easiest way to do that is to display today’s illustrations on the fridge, that’s cool, but if possible, from an early age, consider this like a Today’s Specials board at a café. But tomorrow or next week, they can come down to make way for the next collection.
Perhaps your child is such a little art factory that morning crafts have been forgotten by the time the lunchtime juice box has been abandoned. Try to follow your little one’s cues instead of making too big a deal of the retention aspect. Again, they live in the moment, and so should you!
Separate the masterpieces from the reproductions
We’ve all seen the coloring-book outline of a human hand turned masterfully into a Thanksgiving Tom Turkey with the application of crayons.

Thanksgiving! Happy Thanksgiving Turkey Hand Print Magnet designed and sold by aarniviita on Teepublic
It’s the pre-school version of paint-by-numbers and is a mere reproduction. As you start thinking about what to keep vs. save, yield household space for the masterpieces, the originals that only your child could have made.
Schedule a Weekly Curation Meeting
You are the head curator of this museum; the tots are your assistants. Give yourself permission to collect the week’s art and evaluate it all at once. A good option is a large (clean) pizza box, one for each child. It’ll corral the art until you’re ready for the weekly Curation Meeting.
- Communicate — Once you develop a process, discuss it with your child on an age-appropriate basis. Your two-year-old doesn’t need to know why every finger paint and scribble seems to have a short-term showing; your first grader, however, needs to understand (and eventually participate) in the decision process.
- Create limits and set boundaries — Explain that you have limited space and that by letting go of some art, you are making room to highlight new creations. This can be part of a larger, ongoing discussion with your children regarding how the world is filled with options but your home is for the most useful and beautiful things, and how making decisions about what to keep and what to send on its way is all part of life.
- Choose the best — Involve junior in selecting a few special pieces from that week to keep. You may ask, “What’s your super-duper favorite?” but recognize that your child may have very different evaluative criteria, picking a piece because it was fun to make or because she got to share the best crayon with her BFF. You’re teaching decision-making and value assessment, but remember that perspective, especially with regard to art, is personal!
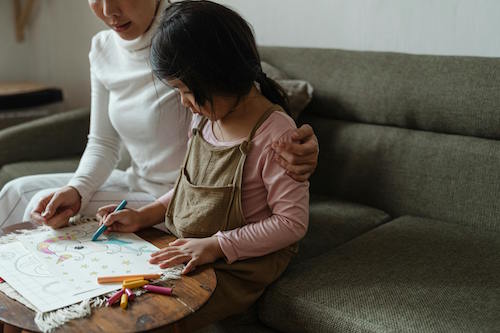
Mom and Child Discussing Art Photo by Ketut Subiyanto at Pexels
- Allow for sentiment — For new new parents, the process may be difficult, especially when your child is too young to weigh in, and every piece feels like proof of a milestone achieved. At this weekly stage, it’s OK to keep items that have special significance to you, such as the first drawing that actually looks like something, particular holiday-themed art, or pieces that reflect significant moments in your child’s development.
- Document the legacy — You may doubt me, but twenty years from now, you will be hard-pressed to figure out which of your formerly-tiny geniuses created that giant lizard-fish-horse-princess-robot. During your weekly curation meeting, pencil in the name of your little artist and the date on the reverse of the artwork.
Establish Regular Decluttering Rituals
Purging weekly is a great start to keep yourself from drowning in sparkly construction paper and 473 identical drawings of a tree. However, you’re going to want to establish periodic curation meetings to go back over the things you’ve kept during those weekly curation meetings.
When kids are younger, that might be monthly. Once they are in school, opt for a seasonal review. Go through the collected art at the end of each season or semester to decide what to keep and what to let go. If you fall behind throughout the year, at least be sure to wrap up the school year to collect what was most representative of the just-ended grade level.
Make this decluttering ritual one that fits your family’s style, whether formal or casual. No matter the tone, establish a routine purging session, a special event where you and your child review and reminisce before making decisions.
WHAT TO DO WITH ART YOU AREN’T KEEPING
Let’s face it. Not everything your child creates is going to go up on the wall of a museum. Most really need not go up on your fridge. (Yes, I’m sure grownup Angolo di Cosimo didn’t imagine his little drawing of a rich patron’s kid would be famous some day, but your two-year-old’s scribble using three different brown crayons just isn’t in contention for the Louvre or Uffizi.)

Portrait of Giovanni de’ Medici as a Child Holding a Goldfinch, circa 1545 by Agnolo di Cosimo. (I shot this at the Galleria degli Uffizi in Florence in September 2018.)
Toss
If it’s goopy, sticky, or critter-attracting, let it go (but do it after the kids go to sleep, as nobody needs to see their creations head to their ultimate resting places). If it’s got macaroni (or any other foodstuffs) stuck to it, let it go. Organic materials attract insects and creepy-crawlies, and while Mrs. Frisby and the Rats of NIHM might have literary merit, you don’t want the main characters coming by to sniff and taste the art at your house.
Recycle
If the artwork is on recyclable paper and not very sentimental, consider recycling it. For example, as long as it’s clean (and clear of organic materials), construction paper is recyclable. Make a point of knowing what types of paper are recyclable and which are not. For example, Kraft paper is recyclable, but tissue paper is not.
Gift
While you don’t want to inundate grandparents, older siblings off at college, or lonely neighbors with absolute mountains of art, it might help (when one or two pieces just barely fail to make the weekly cut) to share with loved ones.
Kids who are just mastering writing can “sign” their masterpieces, and you can add a note to Grandpa to explain what the piece actually is, if it’s not quite representational art (assuming you have a good guess at the content).
Donate
Some organizations or nursing homes appreciate receiving children’s artwork to brighten their spaces. There are also organizations like Fresh Artists which will enlarge, print, and display art in public spaces supported by corporate sponsors. Explore your local and regional options.
Repurpose
For for giving older art new life for a shorter duration, try it as:
- Gift Wrap: Use large-format art (such as the kind drawn on big rolls for Kraft paper) as unique wrapping paper for gifts.
- Craft Projects: Turn artwork into calendars, bookmarks, greeting cards, or other craft projects.
- Collages: Group smaller pieces into a collage to preserve memories in a compact form.
Next time, we’ll look at how to store favorite pieces of children’s art (but seriously, just what makes the cut!) and how to display the special pieces. Until then, start thinking about the places in your home where you might brighten things with whimsical displays of really modern art.







Follow Me