Archive for ‘Paper Organizing’ Category
Whimsical Tools to Improve Your Productivity: Mochi Focus, Mom Clock, and Kiki

THE NASTY TRUTH ABOUT PRODUCTIVITY
Would you like to know a nasty little secret from the world of productivity? Sometimes, getting things done — or more often, not getting them done — is a drag.
Last month, in Paper Doll’s Cheat Sheet for Celebrating Time Management Month, we looked at all the steps for making progress on the tasks we wish to (or must) complete. We talked about memento mori and knowing what we want to achieve in the precious amount of time we have on Earth, and revisited blocking time so that we can be both effective and efficient.
We also reviewed ways to prioritize the tasks we strive to complete and then dove deeply into the strategies for getting ourselves to start, from body doubling and accountability partners to using timers to make use of activation energy. (Speaking of energy, the post also reminded everyone to manage their physical energy through sleep, rest, and rejuvenation through breaks.)
We explored methods for blocking interruptions and obstacles (whether created by others or ourselves), and tracking our time to reflect on our entire systems to figure out where to make tweaks.
Whew. If that sounds like it would be a lot of work, well, that’s part of the problem. Being productive requires work. That’s why we say we’re going to work rather than we’re going to fun.
In a perfect world, if we followed all of these steps, failure would be impossible. We would know what we had to do, figure out what steps were the most important, schedule the work, settle ourselves in, and get it done. Huzzah!
But this is not a perfect world. We told the clocks to spring ahead over the weekend, so many of us are tired and cranky. (A little of that can be eased along with the advice in Organize Your Sleep When the Clocks Change and Beyond.) Depending on where you are today, it may be cold and grey outside.
And mostly, the inability to accomplish one’s goals — even when applying all of these strategies — comes down to a single, solitary truth: I don’t wanna!
Yes, people want the end result. They want their taxes done, their closets organized, and their dreams fulfilled. But they do not want to be bored, annoyed, wearied, or tasked with labor.
Sometimes we all, even professional organizers, just don’t wanna.
When this happens, it’s usually a matter of more than managing one’s physical energy. There are seasons of life when we need serious mental health care and tenderness, such as when we are grieving, experiencing anxiety, or suffering from depression, before we can think about make headway.
When our internal obstacles are less severe, activation energy, or getting ourselves to start, sometimes needs a rousing kick in the pants. Other times, we need the 21st century to stop kicking us when we’re down. Sometimes, we just need to give ourselves a break and find a way to add a little joy to the process.
At the end last year, in 2025 Wrapped: Do An Annual Review To Design Your Best Life, I wrote that my word for 2026 was WHIMSY. What is whimsy, exactly? It’s defined as:
“a playful, quaint, or fanciful attitude and behavior that is often unpredictable, spontaneous, and charmingly eccentric. It represents a shift away from rigid, serious, or conventional thinking, favoring instead a lighthearted, imaginative approach to life.”
Today’s post looks at some tools that offer a few charmingly eccentric, lighthearted, imaginative tools to tip self-management part of time management in your favor.
MOCHI FOCUS
Do you find that you’re better getting things done when you’re modeling good time management for others?
Mochi Focus combines a playful take on a Pomodoro timer with both a gamification element and a site blocker-turned-gentle-taskmaster.
Rather than an app, Mochi Focus is a browser extension for Chrome. (Why are all the good extensions only built for Chrome? Surely Safari deserves as much love!)
When you begin, Mochi Focus starts you off with a little blob of a pet, which they call it a “mascot.” You set to work, and the longer you stay on task, the bigger the little blob grows. Basically, instead of feeding your app food, you are nourishing it with your focused attention.
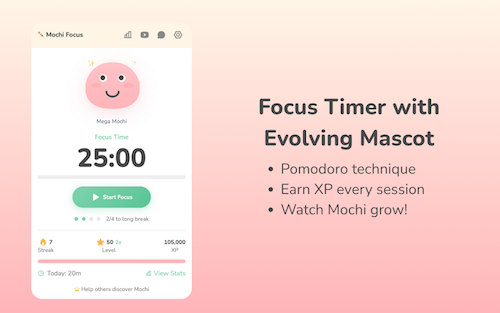
Mochi Focus Timer
A traditional “official” Pomodoro requires 25 minutes of work with a 5 minute break, and no more than four sessions without a longer break. In the abstract, the Pomodoro Technique works well to get our butts in our seats and complete many kinds of tasks.
However, not all tasks are created equal. Crafting an employee review isn’t the same as paying monthly bills, and neither one is the same as editing a chapter of your novel or cleaning out your closet.
Mochi Focus recognizes that some tasks require focus for shorter or longer periods of time. Thus, you get to customize your focus session lengths, anywhere from 1 minute (perhaps to do a plank or sun salutation) to 120 minutes (to rehearse for a presentation or make the mud room look less muddy).
You set the timer, and then Mochi Focus automatically switches between periods of intense focus and the break periods that keep your mental and physical energy from getting stale or expiring altogether. As with an “official” Pomodoro, Mochi Focus enforces a longer break after four sessions for use, but after set-up, you get to keep your hands off the timer for the duration.
The Mochi Focus Timer Mascot
Mochi incorporates gamification, because if we would do the work we have to do just because we have to do it, we wouldn’t need apps to make it fun.
Competing against ourselves is low-stakes, unlike competition with strangers. We win the “game” of getting things done to give our little pal Mochi a boost. You earn 1 XP (in the parlance of gamers, that’s experience points) for each minute you spend on focused work.

As you work, your Mochi mascot grows from baby-sized to Mega form. Depending on your level of experience (from 1 to 50), there are four stages of evolution. As you go along, you build daily streaks for bonus XP, and there are 14 achievement badges to give you positive reinforcement as you attend to your tasks.
In addition to tracking your progress through Mochi’s growth, there are also some adorable (might we say “whimsical?”) interactive features, including five interactive expressions in reaction to completed activity. The little guy expresses pride in your efforts with eye tracking, blinking, and click reactions.
Mochi Focus Website Blocker
Focus is not achieved by one’s competitive nature alone. Let’s face it, we all sometimes need a little help with boundary-setting.
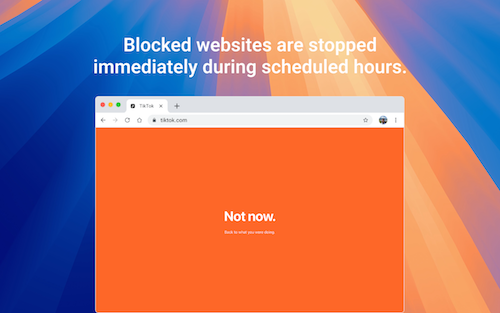
The Mochi Focus website blocker feature is similar to Rescue Time, Cold Turkey, and Freedom, and allows you block yourself from accessing distracting sites during your focused work time. To get you started, Mochi Focus suggests more than 50 sites to block, and you can add your own time-wasters.
If you try to access those sites when you’re supposed to be working, you get a cheery page both reminding you that your access is blocked and encouraging you to go back to what you’ve assigned yourself to do. It’s like having the most gentle of accountability companions with a hint of Jeeves the butler.
On the up-side, when you’ve finished your pre-set focus session, Mochi Focus automatically unblocks those tempting sites so you can play during your breaks.
Pros and Cons of Mochi Focus
On the plus side, Mochi Focus has great features. It’s:
- is a simple, distraction-free interface that doesn’t require a steep learning curve.
- installs right in your browser.
- works offline, so you aren’t web-dependent.
- doesn’t require an account.
- tracks your progress through the main screen and a stats dashboard.
- stores all data locally on your device.
- is 100% free, with all of the various features unlocked. There aren’t even pesky ads or attempts to up-sell you to higher tiers.
But, more importantly, especially when it’s the mental weight that’s detracting from your motivation, Mochi Focus:
- doesn’t nag you to work, but encourages you to get back to your planned area of focus
- digitally prevents you from goofing off while also giving you a reason to care for yourself and your goals by nurturing a little blobby dude.
- offers a whimsical approach, with a blobby cartoon companion who shares your focus journey, joins in celebrating your achievements, and keeps you motivated!
Mochi Focus isn’t for everyone, though. Consider if the following might make it a bad fit for your practice focus.
- It only works with Chrome, so it’s not for you if you swear by Safari or are fixated on Firefox.
- Because it only works in the browser, if you use multiple devices (computers, tablets, phones, etc.), your stats aren’t going to reflect your entire progress. (Update: Mochi Focus was created by Boyd Guang, a solo developer from Thailand. He reports that cloud sync is coming, along with focus-oriented audio and more themes.)
- If you get anxious when competing against yourself, or this brings up memories of the Tamagatchi digital pet you let die 30 years ago, this might not be your thing.
- It’s simple, gentle, and visually sweet. If you prefer the stick to the stick (vs. carrot) approach, this may not be your jam.
To get a sense of the Mochi Focus vibe, check the Focus with Mochi YouTube channel with a variety of videos (with four+ Pomodoro sessions) backed by focus-inducing, lo-fi music.
Whether you’re a remote office worker or a student or just someone looking for more sticktoitiveness, if you’re looking for something to pep up your Pomodoro-style focus sessions, this might be fun to try. And again, it’s free, so there’s no downside to trying.
Mochi Focus works on a few different levels. It has your back by blocking your distractions and giving you a competitive approach with points and stats, but also covers your softer side by pairing you with a teammate for whom your success is their success. It’s animated accountability.
Whatever works, right?
But hey, if the gentle companion approach doesn’t work, perhaps you need something a little bossier.
Mom Clock
Sometimes, neither the gentle, companionable approach nor the competitive angle works. If that’s the case, you may have to consider seeking support from the one person who can strike fear in you by using your full name — first, middle, and last — in a tone that brooks no debate.
Sometimes, you just have to call in a mother.

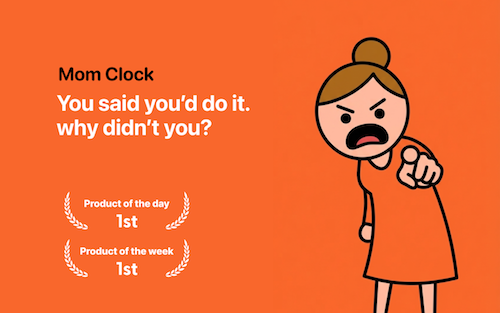
The Mom Clock is an iOS app and Chrome extension that adopts a strict disciplinarian approach to stop procrastination.
This is no gentle parenting. Instead, Mom Clock uses alarms and app-blocking to force you to do what you said you intended to do.
The way Mom Clock’s creators explain it:
Mom Clock is not a productivity tool.
It doesn’t motivate you. It doesn’t encourage you. It doesn’t ask how you’re feeling.
You already know what you’re supposed to do. Mom Clock simply enforces it.
Once you set up Mom Clock with your plan for when you’re going to work, you go to work. Full stop.
You’ve got (relatively) little choice, because Mom Clock understands time blocking (as in, when you’re supposed to work) and uses the power of blocking (as in, it will block all of those distracting websites during the hours you tell it you’re supposed to be focused).
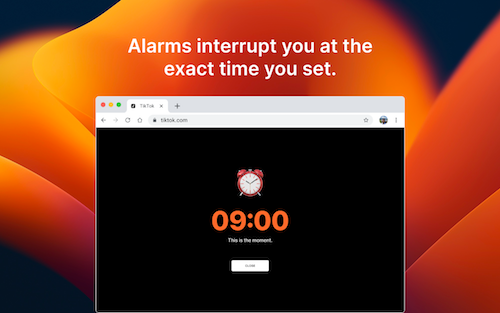
When you’re supposed to be working, you can’t do anything else with your device. When your time is up, Mom Clock starts firing alarms that tell you to stop whatever you’re doing. (Just as “she” enforces your work time, she’s serious about those breaks, too! After all, your mom always knew when you needed a nap, right?)
In between your start and stop, Mom Clock is working quietly in the background, just like she was when you were a kid, doing your homework. Unlike Mochi Focus’ companion style, Mom Clock calls to mind the phrase, “I’m not your friend, I’m your mother!”
Pros and Cons of Mom Clock
Depending on your style, pros and cons may be interchangeable, so you have to know your own preferences. Mom Clock is:
- Designed to be as simple as possible to reduce friction and make the activation energy easy to obtain.
- You don’t need to register for an account.
- There’s no cloud sync.
- There’s no data collection.
- Mom Clock runs in the app or locally in your browser.
- Uses no gamification — Because there are no stats, there’s nothing to keep track of and there’s no attention to what you’ve done in the past or where you’re headed in the future. Mom Clock is about what you’re doing RIGHT NOW.
- Brooks no backtalk — There’s no negotiation for snoozing “just five more minutes!” You just do what mom says! There’s not even an “or else!”
It it just me, or does she remind anyone else of the Angry Mama microwave cleaner?

Just set the rules once for when you want to work, and Mom Clock makes sure you follow them.
Your “Mom” knows your routine, only instead of innately knowing which days you have soccer practice and when you have to stay late for drama club, “she” knows (because you set) your different schedules for work, study, fitness, or sleep. Mom Clock doesn’t ask whether you “feel” like working. She’s just going to stare you down.
Your “Mom” takes away your phone privileges by blocking the tempting apps and websites that prevent you from doing what you should be doing.
As Mom Clock says:
She doesn’t remind. She insists.
No soft nudges. No ‘maybe later.’ Just action.
You don’t need more motivation
Start doing what you said you would. She shouldn’t have to ask twice.
Beyond the main features, Mom Clock has several additional elements, including:
- an online clock — Showing the exact hour, minute, and second; it is constantly updating; it also reports the date (to remind you of time ticking down on those work or school deadlines)
- a time conversion page — Whether you want to convert seconds to minutes or minutes to seconds, minutes to hours or hours to minutes, hours to days or days to hours, or even days to weeks or weeks to years, it’s all available at a click. This way, if you want to remember how many minutes are in a year, and don’t want to start singing Seasons of Love from Rent (though why wouldn’t you?), there’s an accessible feature.
- countdown timers — whether you need to count down to holidays, events, work deadlines, or personally-important dates, just set your timezone, track the countdown in real time, and share links to the countdown when and if necessary. There are a variety of pre-created countdowns for international holidays, so you’ll never forget Mother’s day or Diwali or Hanukkah. You can also select options to count down to when you have to pay your rent, will get paid, can move to your dream home, or may finally retire.
- planner tools — for doing a Pomodoro session (or several) or using time blocks. The Pomodoro timer comes with pre-sets for a traditional 25:5, a 50:10 for deep work, and 90:20 extended session. The time blocking planner has pre-sets to help you with a workday, a study day, and a balanced day for blending focused work, meetings, and recovery time.
- days since counter — whether you’re counting down from the first day you started exercising or the last day you engaged in a bad habit, Mom Clock is keeping track of your landmark dates.
But mostly, the key to Mom Clock is that it eliminates all of the discussion you have with yourself where you let yourself off the hook. There are no more promises to yourself to start “later” or “tomorrow” that you never fulfill.
Mom Clock states its mission as: To make the things you promised yourself actually happen.
Mom Clock knows that willpower is often too challenging and that you can’t always wait to get psyched up into that activation energy.
Sometimes you just need the power of your “Mom” telling you to just do it. NOW!
If Focus Mochi is for workers who embrace gentle parenting, Mom Clock is for those who are seeking an Old School parenting approach because more than motivation, they need someone to hold their feet to the fire.
It’s worth checking out the Mom Clock blog, with wise “motherly” wisdom in posts like:
KIKI
Maybe you need something not as cute as Mochi, but not as bossy as your Mom.
KiKi, created by Isaac Blankensmith, is a MacOS program that calls itself “the accountability monster for people who are easily distracted.” It’s not a very monstrous monster, to be sure.
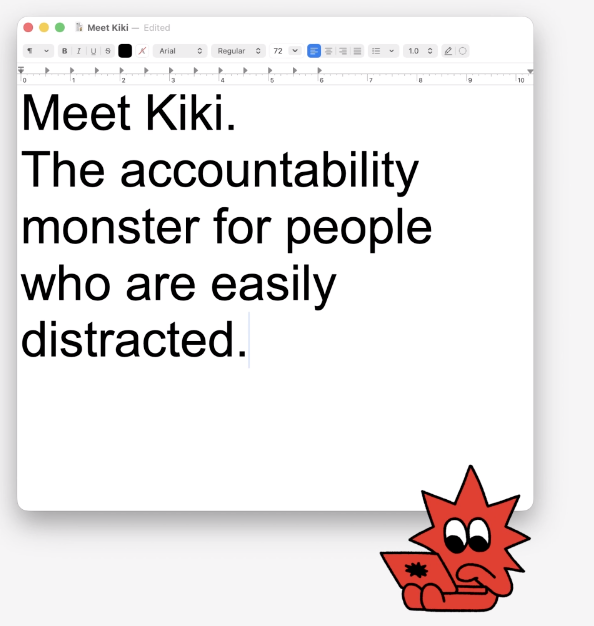
The makers of Kiki envision the program as similar in function to a Pomodoro timer, but better.
First, you identify for Kiki what you’re supposed to be working on in the most specific ways. You write down one concrete task, like:
Next, instead of eliminating all the apps and websites you aren’t allowed to use, you select just what sites you will need to complete your task.
For example, if I’m writing a blog, I need WordPress and Canva, and maybe Pexels or Unsplash. (Yes, I’ll need YouTube later for pop culture videos, but to get the writing and graphics selection stage down, just these sites would be essential.) Kiki will block everything else.
Once your intention, resources, and time are set, just focus on your work. Kiki creates a distraction-free, multitask-free realm until your time is up. If you try to do something outside of the plan, Kiki throws flames onto your screen and pipes up with verbal admonishments!
Mono-focus for the productivity win!
Kiki’s Bonus Features
Kiki tracks your progress, showing how focused you were in each session and over time. For those who analyze data points (or need it to keep them honest), Kiki’s tracking feature may help you stay on course.
Kiki is the escape room you cannot escape. There’s no “safe word” and, allegedly, Kiki cannot be tricked. Once Kiki is activated, there’s literally no way to sneak off to entertain yourself while you’re on that device. (I mean, yes, you can go use your phone, but that’ll likely just guilt you out, and if it’s guilt you want, wouldn’t that be better from your (Clock) Mom than from a monster?)
Or, as Kiki says on the website, “Sometimes good work happens after you run out of ways to avoid it.”
Be forewarned about Kiki’s more “monstrous” alerts. One reviewer noted that it shouted “Get back to work!” while she was in a meeting and attempting tasks that we’re part of her scheduled activity. Eek!
Kiki has a free trial, after which it’s $4.99/month paid monthly or $2.49/month paid annually ($29.88year). While it’s designed for Mac, it only plays nicely with Chrome and Safari browsers.
So, if you want to be nagged (by my a monster rather than a Momster) but also want statistics, Kiki may be worth a look.
These are just a few of the delightful productivity-related apps and extensions I’ve found recently. There are others, with sheep and llamas, quirky gamification and silly stats, and there will be follow-up posts with other tools for this year of whimsy.
Is there an app or tool that you use to organize your time or tasks and that you’d describe as whimsical?
How to Send Large Files the Organized Way — Simple, Stress-Free Solutions

In the olden days, if you wanted to send an important message, you could send it in the mail, and it might go by steamboat, stagecoach, or train to get to your recipient. Hopefully, your Pony Express rider wouldn’t lose it in a saloon. Perhaps if you were from a family of means (the Bridgertons, for example?), you might entrust your very urgent message to your ladies maid, who would give it to the hall boy, who would run through the streets to deliver your a note.
The telegraph was invented in 1837 and by the second half of the 19th century, it was widely used for messaging. But priced by the word, it was essential to limit what you wanted to say to the fewest number of words. As a classic Borsht Belt joke ran, “Start worrying. Details to follow.”
And for those of us of a certain age who recall pay phones, you could place a collect call for “Mom, I need you to pick me up at the mall” or “I arrived safely” and the operator looked the other way. Or, there’s this classic:
HOW TO SHARE SMALL AND MEDIUM FILES
At this point in the 21st century, things are much the same. The truth is that when you have a (relatively) small piece of information, it’s “no big whoop” to transfer that kernel of knowledge inexpensively and easily. The bigger the slab of data (what we’ll generally call “a file,”) the more expensive and complicated things are, and the more strategy you need to keep the cost and effort down.
Methods for Sending Small and Medium Files
For small files, like photos, PDFs, a resume, or a quick video, you can relay information by:
- Text — Whether you use iMessage, SMS, Whatsapp, or Slack, you can quickly relay information or and attach to those texts.
- Email attachments — As long as when you say “attached, please find,” you actually attach the file you intend to share, you’re good to go.
- AirDrop — This works as long as you’e in the same room or area as your recipient and are using an iOS device (or, as of late 2025, are able to duplicate the process on Android using QuickShare).
- Physical media — While tangible media method isn’t as convenient or as quick as a digital transfer, if you have lots of files, it can be helpful to download your files to a USB drive, external hard drive, or SD card, and then carry it to someone in a different location or even ship it to them.
The advantages of these non-tangible methods are that they are generally fast, and there’s little to no set-up needed. You just find the file, click a few buttons or drag-and-drop the file, and you don’t need to be particularly tech savvy as a sender or recipient. If you’re using tangible media, no internet is required, you have total control over the physical file, and it will work anywhere you’ve got the hardware into which to plug it.
The main disadvantage of the first three of these methods are that you’re limited as to the size of whatever file you wish to use, particular to share via text or email.
For example, last week, I had a funny experience when a client had a pregnant pig at her house. The pig had lived at her barn, with horses and chickens, but during a recent cold snap a few weeks prior, the client made a safe, cozy space in her home for the mommy-to-be.

With my client’s permission, I shared a photo in a group text thread with colleagues, and someone said they wanted to see a video! My client provided an adorable video of the pig’s first day in her new space; we were both using iOS, and there was no problem texting it. However, when I went to send the same video to our group thread, I got the message that because it was a mixed iOS/Android group thread, the video was too long to share. Harrumph.
In addition to size limits for file text/email/AirDrop filing sharing, you (or the post office) could lose a thumb drive, hard drive, or SD card in transit, or your recipient could lose it between plucking it from the mailbox and the moment they intend to use it. And none of these methods are particularly useful if you want to ensure that a file is backed up or easy to collaborate upon.
And what you if do you have a BIG file? Certainly text and email are out, as is AirDrop.
For bigger files, the two main methods to get important information from one location (yours) to another (theirs) will be through cloud storage or file transfer platforms.
SHARE FILES IN THE CLOUD
You probably upload files to the cloud (or create them in the cloud in the first place) all the time. This method works best for families and friends sharing documents and photos, professionals sharing client work, ongoing personal and work projects, and providing long-term access to content. As long as you don’t remove the file from the cloud, recipient(s) can re-access it as many times as they like.
How File-Sharing in the Cloud Works
This method involves the following steps:
- Upload a file to your cloud account.
- Set the permissions for the file. Sometimes, you just want the recipient to be able to view a file; other times, the permissions might allow them to edit and even share it with others.
- Share the link with the people or teams who need access. This could be photos of the baby so Great-Grandpa can see how much junior’s smile is like his, or the latest TPS report your staff needs before the next Monday meeting.
- Your recipient then views and/or downloads the file.
The advantages of sharing files in the clouds are:
- Large file support — Cloud storage means that you can upload multi-gigabyte files. Sharing videos, folders of files, and project archives is easy-peasy lemon squeezy.
- Easy sharing — File attachments can be a sticky wicket. If you attach five files to an email, and someone downloads them but then can’t figure out whether the files have ended up in their attachment folder, their desktop, or the most recent folder to which they moved something, it’s a headache. But if you’re just sending someone a link, it’s just a matter of one click to get what they need.
- Ongoing security — With cloud sharing, you can change the permissions at any time. So, if you don’t want your now-insignificant other to access that photo, or your mother-in-law can’t be trusted to not post photos of your little angel to social media per your stated boundaries, or your former employee is “former” for a reason, one quick click denies access to files you no longer what them to have.
- Backup as a perk — When you upload files to the cloud to enable sharing, those files stay conveniently stored until you decide that you don’t want them there anymore. You never have to worry about a crashed hard drive or an accidental local deletion.
- Collaboration made easy — When you upload a file, multiple people can access it (if you wish) and you can keep track of version history, which is great at work or if you’re collaborating with others on a screenplay or story.
Of course, there are drawbacks to the cloud method of sharing files.
- Storage limits — The free tiers for storage sites can fill up fast, so if you do a lot of file sharing and never purge your account, you’ll hit your free limit quickly and need to upgrade to a paid plan. Free tiers with enough storage space will let you upload content, but watch to see if there’s an upload limit on individual files.
- Account registration requirements — Yes, I heard you groan. Nowadays, almost everyone has too many accounts and too many passwords. It may not be a big deal to you (because if you’re uploading, you probably already have a cloud or two that belongs to you), but if your recipients don’t have cloud accounts, they’ll usually have to register to gain access. Note: some accounts will allow recipients to view files without accounts, but not edit or share.
- Learning curves for setup — Unfortunately, the less tech-savvy recipients might be frustrated if they aren’t accustomed to navigating a cloud space. Additionally, some users are inexperienced at setting up permissions, so it’s important to pay attention to the difference in permissions between view, edit, and share.
- Privacy depends on settings — With some cloud accounts, you can create public links for file sharing. That’s great if you want everyone in your neighborhood to have access to a file, but if you meant for only the members of “I hate the dude who leaves his Christmas lights up all year” club to view the link but it’s available for public consumption, it’ll make the next block party a bit awkward.
The Main Players in Cloud Sharing of Files
You’re likely already familiar with the big names in the cloud arena for sharing files, even if you’ve never used them for file sharing.
Google Drive — Every Google user has 15GB of free storage; beyond that, there are different file upload limits at different paid tiers. Just upload your file to your Google Drive, get a link to share, and provide the link to your recipient.
However, there’s also a nice mix of the “attach” method I mentioned for small files and the cloud method.
As a Gmail user, if you start a new message with an attached file that’s over the 25MB limit for an individual file, Google automatically creates a link to that file in your Google Drive. When you go to send the email (the one you mean to attach), Gmail will ask you to grant your email recipient access to that file and prompt you to set the permission (view or edit). The default setting, wisely, is just to allow them to view your file. However, your recipient will need to have a Google/Gmail account.
iCloud — You automatically get 5 GB of iCloud storage for free, but an upgrade of just $0.99/month yields 50GB; $2.99/month provides 200GB; and for $9.99/month, you get a whopping 2TB! Store your files, share the link, and you’re all set.
However, as with Google Drive and Gmail, if you use Apple’s Mail, try the Mail Drop feature to send large files up to 5 GB via iCloud Mail on Mac, iPhone, or iCloud.com, without it counting against your storage quota. Read more about Mail Drop.
It will generate a secure download link that lasts for 30 days. Just attach a large file in Mail, and it will automatically offer to send it via Mail Drop if the file exceeds standard email limits.
Dropbox — You probably know Dropbox for its cloud storage with file syncing and collaboration tools. Their plans range from a free 2GB storage option up through premium business plans 15-freaking-terrabytes of storage. But that 2GB lower end storage limit for free accounts (with a 2GB file upload limit, isn’t going to win any beauty pageants. However, in addition to the storage
(In addition to the basic cloud storage method, Dropbox also has it’s own File Transfer protocol for large files.)
Microsoft OneDrive — Upload your file to your OneDrive cloud account; granting access to others is straightforward. OneDrive allows individual file uploads and downloads of up to 250 GB for both personal and business accounts, and while there isn’t a strict total data transfer limit, syncing oodles (like 300,000+ files can cause performance issues). They recommend using the OneDrive desktop app to accomplish large transfers rather than using browser uploads.
Note, Microsoft does something similar to Google and Apple, in that if you use Outlook 365 and try to send a too-large file as an attachment, you’ll be prompted to upload the file to your OneDrive and share a link to it in your Outlook email (rather than attaching the file, itself). You’ll just use the “Upload and Share as a OneDrive Personal Link” option. Recipients can click to open the file and view it from your OneDrive.
SHARE FILES USING FILE TRANSFER SERVICES
I like to think of this approach as a “send it and forget it” method. It’s great for when you want to send videos to family members or the tour group friends you made on your last cruise vacation, submit creative files to a client or virtual assistant, send one-time deliveries of a massive file — or if you know the person getting your file is a bit of a grumpus about dealing with tech.
Fewer people will be familiar with file transfer service method than the methods I described above, but it’s really efficient for the one-and-done file transfers, plus it’s surprisingly easy for the sender and the recipient.
Upload a file, then enter the email address of the person or people you want to receive it (or, alternatively, you can get a link to put in your own email, text, newsletter, blog, etc.). That’s it.
From there, it’s up to the recipient to click on the link, which takes them to the file transfer site. They click a link, and the file downloads to their computer, where it waits for them to open and use it. The best part is that the file auto-expires after a set period (like a week), so you don’t have to clean up after yourself or purge files or worry that someone you later part ways with could still have access.
I have a friend from high school who was always the most in-the-know person about music. Four decades later and he’s a professional in the music industry, but he still makes mix tapes, or at least the high-tech version. For years, he’s been sending his own little funnily-named, curated “albums” of music for his personal email list to enjoy. Only instead of a fiddly cassette requiring us to have a pencil at the ready to fix it when everything unspools (hello, 1983!), he sends a big MP3 file every month or so.
My music industry friend was my introduction to the file transfer service option, but certainly not my only experience. A few years ago, when I had to create a video presentation an online summit, my colleague had me submit my video via a file transfer service, and I was delighted with how easily it worked.
The advantages of file transfer services are:
- No account (generally) is necessary — Just like you don’t need a UPS account to have UPS deliver a package to your door, file transfer services deliver the sender’s file to anyone.
- Low-friction transfer — Remember how I said that some people can be overwhelmed by having to navigate cloud accounts to find a file? That doesn’t happen with file transfer services. My musical friend sends me to a big, splashy webpage with a big, obvious button to click to start the file download.
- Big-file friendly — These services were designed to tackle large transfers. Did you write the Great American Novel? Produce your own album? Make a movie? Share it easily.
- Automated file cleanup — Because the file auto-expires, once you tell the file transfer service to send to your recipients (or you’ve sent them the link or published access to it), you’re done.
There are a few potential drawbacks to file transfer services, though:
- This is temporary storage — For those who prefer cloud storage to warehouse their files, it’s important to recognize that what’s a boon to some (the automated expiration of the files) means file transfer services do not store your files indefinitely.
- You have limited control of your file — Because there are few (if any) options for permissions with a file transfer service, once you send that file, it’s out in the wild. Someone has it and can copy it, share it, change it and then share it, wear it as a hat, etc. Don’t provide access to your file to someone you don’t trust to have that access. Duh.
- It’s not ideal for super-sensitive data — File transfer services are secure-ish. They use varying methods of encryptions, so if you need ultra-encryption or password-protection, don’t send your super-secret spycraft through a platform that doesn’t offer that. OK? OK!
- Consider the money, honey! — As with everything in the era of late-stage capitalism, you get what you pay for. Free platform tiers work, but if you want bells and whistles, like password protection, longer-termed storage, and higher size limits, you’ll have to shell out the money.
The Big Names in File Transfer Services
There are a variety of file transfer platforms. As a professional organizer, I am not an expert in the technology, and none of these should be considered recommendations. Rather, they are a starting point for your own research into the right file sharing solution for you.
We Transfer — This is the platform my musical friend uses, and it’s the one that seems to be the best known.
Share and receive up to 3 GB/month (10 transfers/month) for free, with transfers expiring after three days. With a paid subscription ($25/month), you get unlimited transfers, unlimited file sizes, no expiration of (uploaded) files, custom branding, and automatic malware scanning.
FileMail — Send large files, up to 5GB, for free, to up to three recipients, with up to ten downloads per transfer. Just drag-and-drop the file from your desktop onto the website. Of note, they impose no restrictions on commercial usage. There are multiple FileMail tiers: Beyond the free Basic plan, there are paid personal ($6/month), professional ($14/month), and business ($24/month) account levels, with each level offering increased file size, storage capacity, and customization.
Smash — The free tier lets you send an unlimited-sized file, has no upload limits (vs. 2 per 24 hours for FileMail), offers password protection, and files are stored for seven days. At the paid tiers, $4.90/month for Pro and $12/month for ten users, 1TB and 2TB of storage, respectively, for 30 days of file storage. (I also think the platform has a more user-friendly experience than FileMail, but your mileage may vary.)
Drop Send — At the free level, send files up to 2GB, up to two files per week, and get 250 GB online storage. At the paid levels ($5/month for basic, $9/month for standard, and $19/month for professional) you get faster transfer speeds, can send 50GB files, increasing numbers of sent files per month and increased amounts of online storage.
Other popular options include:
My Air Bridge — This European platform is best for professionals and teams. Their service is free for individual transfers up to 20 GB in size, with multiple paid plans.
Wormhole — Right now, this is a free services. They note: “For files up to 5 GB, Wormhole stores files on their servers for 24 hours. For files larger than 5 GB, Wormhole uses peer-to-peer transfer to send your files directly from your browser to the recipient. So you’ll need to keep the page open until the recipient downloads the files.”
Send Anywhere — At the free level, send a file up to 50GB; the Lite tier is $5.99/month and the Standard tier is $9.99/month, with additional perks related to downloading, speed, and link management.
BEST PRACTICES FOR ORGANIZING YOUR LARGE FILES FOR SHARING
Before you send your files, consider some tactics for keeping the whole experience organized.
Name your files clearly — If you’re sending a photo, change it from IMG15678 to “Baby’s First Ice Cream.” If it’s a file for work, consider the nomenclature rules and best practices/guidelines your company generally uses for documents. If you’re a solopreneur, this is a great time to develop rules for how to organize and label files so that you know WHAT they are and WHEN they were created. “2026 1Q Earnings Report” tells your recipients at a glance what they’re getting.
Use folders when sending multiple files — Don’t send 3 (or 33) files all higgledy-piggledy. Group them in a folder with a clear name.
Check to make sure you’ve removed duplicates or changed the names — If your recipients are poking around in a cloud folder you’ve created and to which you’ve linked them, and you’ve got 16 iterations of ClientProposal.Final.Final.Final, that’s going to cause confusion.
Add a README file — If your recipients need to know more details about what they’re getting in files or folder, tell them what it’s all about.
Consider file compression — If your files are too big to send as-is for free, consider zipping those large files (or folders) so in order to reduce the size before you send it. Save money by putting your files on a diet, but only if your recipients are tech-savvy enough to know to double-click on a file to unzip them.
What do you do when you have a massive file and need to get it to someone quickly, efficiently, and safely? Have I omitted your favorite method? Please share your thoughts in the comments.
How to Organize Yourself for a Stress-Free Tax Season
Nobody likes paying taxes, but if you’re organized, the discomfort can be limited to the money leaving your bank account and not all the work leading up to it. Preparing your tax returns (or getting the information to your tax preparer) doesn’t have to be annoying. To that end, every few years, I try to provide a Paper Doll primer on what you need to know and understand to make tax time bearable. This year, it has bonus pop culture to keep you entertained!
SET THE STAGE FOR PAYING THE TAX MAN

Photo by The New York Public Library on Unsplash
Tax prep is the homework of the adult world, but that doesn’t mean it can’t be easier (or more fun) than finding the area under a curve or remembering what cosin and tangent are.
Start by creating a comfortable work environment. Clear your desk of clutter and distractions. If that’s not possible (in the amount of time you have), consider moving to a new workspace just for doing your taxes. That might be the dining room table, the guest bedroom, or the conference room at work on a Saturday afternoon.
The key elements are ample workspace, a place to put (and if necessary, plug in) your computer, functional Wi-Fi, a pad of paper for taking notes, access to good lighting and a comfortable chair, and your tax prep documents (of which, more later).
More importantly, do what you can to eliminate interruptions, whether that means working when others are out of the house (or getting out of the house to do your work).
Create the right ambiance for your style. Some people need a window facing sunlight, while I prefer to have my chair face a blank wall to eliminate distractions. Some people need silence, while others prefer white noise. If you used to do your 9th grade math homework with your stereo blasting, try making a tax prep playlist using Hubpages’s 50 Best Songs for Tax Day.
Don’t feel like you have to get your taxes done all in one sitting. If your return is simple (one W-2 and few 1099s) and you’re filing online, you might wrap it all up in an hour. But if there’s a lot of complexity in your finances, plan multiple shorter stints. Find chunks of time to:
- gather (and if necessary, download and print) official documents
- isolate and review all types of income
- isolate and review deductible expenses reflected on forms
- locate deductible expenses reflected on receipts (tangible and digital)
- fill in online tax preparation software like TurboTax or TaxCut, but then walk away and come back later to check your work; or
- make an appointment to sit with a professional tax preparer
Take frequent breaks to keep your mind fresh. Stay hydrated and have light, healthy snacks. When you finally finish, celebrate with a small ritual to reward yourself for all that adulting.
While I’m not always happy with the way my tax dollars are spent, I often find that the filing (if not the paying) of them goes down better with a listen to Irving Berlin’s WWII-era I Paid My Income Taxes Today. (The only version I found with Berlin singing it himself was a bit too jingoistic, so I present singing cowboy Gene Autry.)
GATHER YOUR RESOURCES
One of the most common frustrations my clients have is that they don’t know where to start. The fear of mysterious forms and documents starts the buzz of anxiety. I encourage a few simple steps for making the experience easier to bear.
Time Travel to Last Year
The easiest way to estimate what forms you’ll need this year is to start by looking at what you dealt with to prepare your taxes last year. You should have a folder with everything you (or your tax preparer) used to support last year’s tax returns. Scanning through last year’s taxes and supporting documents will help you create a checklist of what you’ll need for your treasure hunt.

Photo courtesy of Chris Potter/CCPix at www.ccPixs.com under CC 2.0
First, there’s the income side of things. Did you have a job? You’ll be looking for a W-2. Were you freelancing? Find those 1099s! Did you get paid interest or dividends? There will be 1099s for those, too.
Then, on the flip side, there are your expenses. You’ll have some fancy forms, like 1098s for interest paid on mortgages or tuition costs, but you’ll also need to gather receipts.
But that’s generally it, just what did you earn and what did you spend? (Obviously, not everything you spend is tax-deductible. The cheeseburger and fries you eat on your way home from the gym? That receipt can go. The one from when you took your best client to lunch to propose extending a contract? Hold on to that receipt!)
Answer Mail Call
In general, employers and financial institutions are supposed to mail tax documents like most 1099s and 1098s by January 31st, so you should have them in hand already. (Got a pile of unopened mail on top of the fridge? Now’s the time to open it!) Other forms, like 1099-B, 1099-S, and 1099-MISC don’t have to go out until February, so watch your mail. And, annoyingly, Schedule K-1 forms (related to partnerships, LLCs, and S-corps) generally don’t get mailed until early-to-mid March!
Don’t just think in terms of U.S. postal mail. Be sure to check your email, too!
I have quite a few clients, particularly those over 80, who don’t dependably check their email, and don’t necessarily realize that institutions have stopped sending paper copies of essential forms. Instead, they send emails alerting you to the existence of your forms in online portals.
If your inbox is full of hundreds or thousands of unread emails, try using the search bar for terms like “tax forms,” “1099,” or the word “tax” and the name of some of the institutions that should be sending you tax documents.
Let Your Fingers Do the Walking
Waiting for the official mail can be frustrating, especially if you are hoping to get a tax refund and want to get your taxes prepared and your return filed as soon as possible. In many cases, you don’t have to wait — just head to your keyboard, log in, download, and print.
For example, a client was recently frustrated with herself because she suspected that, in a fit of tidying the paperwork from last fall for enrolling in a 2026 health insurance plan, she’d accidentally shredded her 1095-A, her Health Insurance Marketplace Statement. Frustration turned to delight, however, when we logged into her Healthcare.gov account and quickly downloaded another copy.
Starting with your list of all of the institutions that have sent you tax documents in the past, and then adding any that know about your income/outgo, log in and search for a menu title like “tax forms” or “documents.” For example, log in to your:
- Bank accounts for 1099s
- Brokerage/investment accounts for 1099s
- Lender sites for 1098s
- Social Security for SSA-1099
- Health Insurance Company for annual summaries of medical and pharmaceutical expenses
- Paypal, CashApp, Venmo, Square, and similar platforms (for 1099-K and other records of income and expenses)
Remember that you may also have receipts that came to you by email. (If you haven’t gotten into the habit creating a “receipt” folder in your email or printing receipts for potentially deductible expenses, this is this is the time to start.)
Further, if you need to access information that’s on your prior tax returns and you don’t have them accessible — for example, if you’ve been the victim of a natural disaster, or you and an ex haven’t been able to amicably share data — you can get tax records and transcripts directly from the IRS.
Once you file your taxes, make a list of all the forms you received this year (and how/where you acquired them), and tuck that list into your tickler file for next January. Check off each form as it arrives, and you’ll have a better sense of when you’ll be ready to start working on your 2026 taxes in 2027.
KNOW YOUR FORMS
Much of the fear associated with tax time comes from the fact that the language referring to the different types of forms seems like gibberish.
Here’s a reminder of what each of the most common forms related to income and deductible expenses represent.
Let’s start with income.
W-2 (Wage and Tax Statement)
Were you an employee in 2025? If so, your employer should have provided one W-2 to you and one to the IRS, reporting how much you were paid (in wages, salaries, and/or tips). If applicable, the W-2 should should also indicate how much money was withheld (from you) and paid to another entity.
Federal, state, and local taxes, FICA (Social Security and Medicare), unemployment insurance, and a few other withholdings are considered statutory payroll tax deductions, because they are governed by statues (AKA: laws).
Sometimes, courts rule that an employee’s wages can be garnished (which sadly has nothing to do with caviar or sprigs of parsley). In these cases, individuals who owe money from lawsuits or are behind on child support may have money removed directly from their earnings, before it ever gets to their paychecks, to ensure it goes directly to whomever is owed. A W-2 will reflect this.
A W-2 may also report voluntary payroll deductions, amounts withheld from paychecks with your permission. Examples include your portion of health and life insurance premiums, contributions to a 401(k) or other retirement fund, employee stock purchasing plans, one-time or ongoing donations to the United Way, union dues, etc.
In theory, a W-2 should be mailed to the address listed on your W-4. (The W-4, is the form that tells your boss how much to withhold based on your number of dependents you have.)
Smaller companies may just hand you your W-2 instead of mailing or emailing it, but if your W2 is missing, consider:
- Did you change employers last year? You should have received W-2s from each employer. (If you changed jobs at the same company, you’ll receive one W-2 from each employer, not one per position. If you changed companies within a larger corporation, though, you may get one for each.)
- Did you change addresses since you filled out your W-4? There’s only so much a former employer will do to track you down to give you your W-2. Keep the Madge in HR updated!
Don’t assume that if you don’t have your W-2, then nobody knows what you made. Remember, your employer sends the IRS a copy of your W-2. Since the IRS knows what you made, be sure you do, too! (If your former company went out of business or is otherwise not returning your calls, the IRS has a procedure to help you file your taxes in the absence of a W-2.)
Examine your W-2 it carefully. Do the numbers seem right? Compare them to the final pay stub you got for last year. Calendar years may end mid-week (or even mid-pay period), so the numbers won’t correspond perfectly, but they’ll be close enough for you to spot if something is seriously wrong. The sooner you call your employer’s attention to an error, the sooner you can prepare your return.
W-2G (Certain Gambling Winnings)

Gambling Photo by Pavel Danilyuk on Pexels
The W-2G is the wild-and-wooly cousin of the W-2. While a W-2 is for money you make while working, the W-2G is what you get while playing. If you win more than $600 in any gambling session at a casino, the “house” should request your Tax ID (generally your Social Security number) and either prepare a W-2G on the spot or send it to you in January.
Casinos aren’t interested in keeping up with your losses, just your winnings, so they only tell the IRS about what they paid you. If you want to deduct losses to offset winnings, the IRS requires receipts, tickets, statements, or other records to support both your winnings and losses.
1099s
A 1099 is a form that basically says, “Hey, you weren’t an employee but we paid you money this year.” You get a copy; the IRS gets a copy. (Cue Oprah: “You get a copy! You get a copy! Everybody gets a copy!”)
There’s not just one type of 1099; actually, there are 22 different kinds of 1099s as of 2026! Don’t worry, you won’t be tested on this. But it helps to be familiar with some of the more common versions, like:
You may not have interest in 1099s, but 1099-INT reports the interest you receive — from interest-bearing savings and checking accounts, money market bank accounts, certificates of deposit, and other interest-paying. It also reports whether (U.S. or foreign) taxes were withheld and if there were any penalties assigned for early withdrawal from an interest-bearing account.
If you received less than $10 in interest, your bank may not send a 1099-INT.
Whether you’re TikTok’s viral man in finance, 6’5″, with blue eyes, and a trust fund or your grandma bought you one share of stock in Disney for your 10th birthday, you’ll get a 1099-DIV to indicate the dividends or capital gains you received as an investor. (Note: if you have a DRIP — a dividend re-investment plan — you many never see these dividends as checks sent to you. They’re literally re-invested in your portfolio.)
Again, if you didn’t earn at least $10 in dividends, you are unlikely to receive a 1099-DIV.
1099-G (Certain Government Payments)
This random-sounding form can cover everything from state unemployment compensation to tax refunds, credits, and offsets at the state and local level. It can also be used to report payment of taxable grants, agricultural payments, and other nifty things where a state or local government gives you money.
The 1099-K reflects payments to you from third-party settlement organizations (TPSO) like PayPal, Apple Pay, Venmo, or Zelle and platforms like Etsy or TikTok. This form was supposed to go into effect several years ago, but due to the pandemic, its use was delayed, and for several years, the threshold was $600, but has now been raised to $20,000 (and 200 transactions).
If you’re self-employed (a freelancer, an independent contractor, etc.), clients should send a 1099-NEC. However, although 1099-NEC came into use in 2021, some offices still send 1099-MISC by mistake. Just remember, whatever form you get, the IRS knows about it, so don’t try to hide that money.
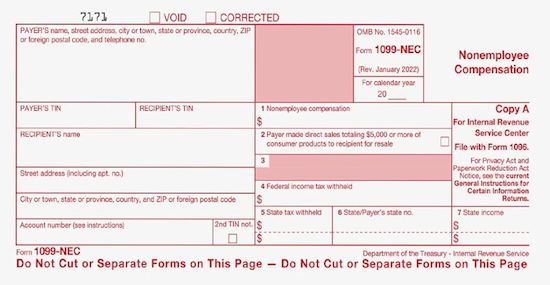
Also remember that even if someone paid you for doing work as an independent contractor, they may not know they should be sending you a 1099-NEC or any form at all.
So, if you are self-employed or irregularly employed, it’s essential to keep track of your own incoming revenue. (Otherwise, if the person who paid you ever gets audited, it could trigger some messy situations for you, too.)
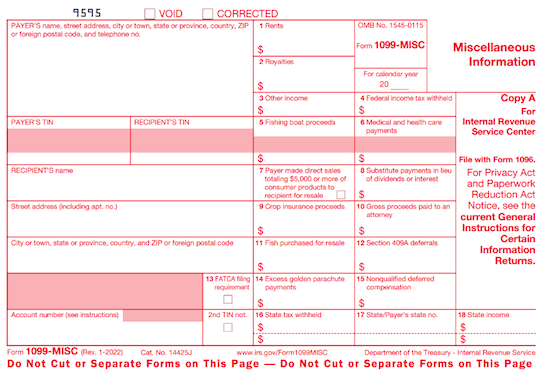
Now that the 1099-NEC covers income for freelances and independent contractors, this one is much more “miscellaneous.” As I’ve said before, it’s the junk drawer of tax forms!
1099-MISC is used to report payment of royalties, broker payments, certain rents, prizes and awards, fishing boat proceeds (yes, really!), crop insurance proceeds, and some payments to attorneys that wouldn’t be reported on a 1099-NEC, like if you received a settlement that required an attorney to get paid a portion contingent upon your winning.
If you get Social Security benefits, you should receive an SSA-1099. (Non-citizens living outside the US, like widows/widowers receiving spousal Social Security benefits, may get a SSA-1042.) The 1099-SSA tends to come on a weirdly long form, folded and sealed such that it makes its own envelope. Unfortunately, it looks like junk mail, so watch out for it and replace it, if necessary!
You Never Give Me Your Money, or Why Income Isn’t Always “Real” Money
A 1099 doesn’t always indicate that you were literally paid money. For example, remember how I said that you may get a 1099-DIV, even if you never actually got the dividend payment because it was re-invested?
Similarly, a 1099-C indicates that someone forgave a debt, like a student loan or a credit card balance. That forgiveness is a relief, but you may owe tax on forgiven debts, and the 1099-C alerts the IRS that since you didn’t pay money owed (and got to keep it), it’s as if you received money.
1099s May Be Hidden in Plain Sight
Sometimes, instead of sending a 1099 in a separate envelope, a bank or brokerage house may include a 1099 form in the same envelope — sometimes perforated at the bottom of a quarterly or end-of-year financial statement, or on the reverse side of a related form. Brokerage houses often send multiple forms as a “combined 1099,” scrolling across multiple pages.
Check all that boring-looking official mail!
Of course, income is only half of the equation. On the other side, you get to use forms and receipts to determine how much you can deduct or write off.
So, let’s look at expense documentation.
1098 (Mortgage Interest)
A 1098 is not a 1099 that’s been taking Ozempic. A vanilla, no-frills 1098 reflects the interest paid on a mortgage, which is generally deductible on federal taxes. Renters don’t pay interest, so they don’t get 1098s; neither do homeowners with paid-off mortgages.
Sub-types of 1098s reflect money you’ve paid for things other than interest on property loans:
- 1098-T shows tuition you paid; you’ll get this from a college or training school.
- 1098-E reflects you’ve paid interest on a student loan; it will come from your lender.
- 1098-C indicates the value of a donated car, boat or airplane. So, if you’re a fancy-pants, monocle-wearing Thurston Howell III or his wife, Lovey, you’ll get this from the agency or organization receiving the donation.
1095-A (Health Insurance Marketplace Statement), 1095-B, and 1095-C
You’ll get a 1095-A if you enrolled in health insurance coverage through a state or federal exchange.
1095-B (supplied by companies with fewer than 50 employees), details the the type of coverage you had through work, the period of coverage, and your number of dependents, so you can prove you had the Minimum Essential Coverage (MEC) required by law.
A 1095-C is similar, but for employers with more than 50 employees.
Schedule 1-A (Additional Deductions)
The Schedule 1-A, to be used with the 1040 return, the 1040-SR return (for seniors) and the 1040-NR (for non-resident aliens) is a new form for calculating some of the new deductions related tips, overtime, new purchases of cars manufactured in America and the enhanced deductions for seniors (see below).
Got all that?
IMPORTANT NEWS FOR THE 2026 TAX SEASON
Know Your 2026 Tax Deadlines
The federal tax deadline is Wednesday, April 15, 2026.
If you file a (valid) extension request, you have until October 15, 2026 to file your tax return. However, you still have to PAY what you (estimate that you) owe by April 15th to avoid a fine.
It’s true that if you won’t owe anything, there’s no penalty for filing late (without an extension), but then you’ll be delaying receiving a refund.
Age Has Its Advantages
Did you know that adults aged 65 and older may qualify for a new $6,000 deduction this year, in addition to existing standard deductions?
The deduction starts phasing out for single filers with incomes above $75,000 and for joint filers above $150,000. Once you hit the threshold, the deduction gets reduced by six cents on each dollar above the applicable threshold. Once your adjusted gross income hits $175,000 (for single filers) or $250,000 (for joint filers), the deduction is effectively reduced to zero.
This $6,000 deduction applies regardless of whether you take the standard deduction or choose to itemize. Also, it’s not permanent, applying only from this year through the 2028 tax year.)
Direct File Is No Longer An Option
A few years ago, I shared information about a government program that allowed people with simple returns (income solely from from employment, unemployment compensation, or Social Security, and only taking a standard deduction) to file directly with the government at no cost. The current administration has cancelled this program.
If you’re seeking a no-cost or low-cost way to file your taxes without working with a professional or filing through paid commercial software or online platforms, consider the following options for filing your 2025 returns:
- file out a paper form (often available in public libraries) or use IRS Free Fillable Forms
- see if you are eligible (depending on your adjusted gross income) to use IRS Free File and file through one of the eight online programs
- seek volunteer tax preparation programs like the Volunteer Income Tax Assistance VITA and Tax Counseling for the Elderly (TCE)
Don’t Procrastinate If You Plan to Mail Your Return
Filing tax returns at the last minute is a time-honored tradition. I’ve seen postal workers outside in the late hours, clad in reflective gear, taking possession of people’s returns.
Unfortunately, if you prefer to mail your tax return, filing on the last possible day may not be workable anymore.
At the end of last year, the US Postal Service announced that it was changing the methods for postmarking mail. They will still stamp the current day’s date on your tax return envelope, birthday card to your grandma, or care package to summer camp when they get to a USPS processing facility. The problem? It might take longer for your mail to get from where you give it to them to an actual facility.
Apparently the USPS is looking at ways to save money. One of those strategies includes reducing the frequency with which it picks up mail from local post offices. This means fewer trips from your drop-off point to a processing center, and THAT means it’s less likely that you’ll get a same-day postmark.
So, if you put your mail in your outside mailbox with the flag up, it could take a few days to get where it’s going. If you drop it in a blue maiilbox in front of a post office that isn’t a processing facility, it could take at least another day. Grandma may not care when an envelope is postmarked, but the IRS does. (And if you’ve got a deadline for mailing something for legal purposes, it definitely does.)
So, your mail may not get postmarked the same day you send it, even if you send it from a post office. That means that finishing your taxes at 11:30 p.m. and jumping in your car to head to the post office on the corner just isn’t going to cut it anymore.
Your best option is to file and pay your taxes online. But if you must mail your return, you may want to ask at your local post office if they are able to manually stamp and postmark your tax return.
While it will be more expensive, another option is to use a private shipper for your tax paperwork, like FedEx or UPS.
FINAL THOUGHTS
Paper Doll is a Certified Professional Organizer, not CPA or enrolled tax preparer. Always verify your questions with a tax specialist. If you receive a funky form and don’t know what to do with it, the IRS has a surprisingly easy Forms, Instructions and Publications Search.
Most importantly, remember that the sooner you get organized for tax time, the less likely you are to end up like Homer Simpson.
Paper Doll’s Cheat Sheet for Celebrating Time Management Month

Happy National Time Management Month!
There’s an irony that this observation takes place during the shortest month of the year. It’s as if someone said, “Hey, our problem is that we never feel like we have enough time to do what needs to be done. Let’s honor that challenge — with the fewest possible days to do them!”
It’s a challenge, a prompt, a call to action, a reminder — to focus on our choices of priorities, and use time to serve those priorities. If, instead of barreling through each day, reacting to what’s thrown at us, we can use this month to remind us to take a proactive approach.
The reward? The possibility that each day of February can offer baby steps to help us ramp up our productivity, reduce our stress levels, and achieve not only what is expected of us, but what we sometimes dare not expect of ourselves.
SO HOW CAN YOU MANAGE YOUR TIME?
It would be lovely if we could just get in the Doctor Who TARDIS to jump past slow days and let time stretch on when we need to do something complicated. Then again, as fans have learned over 60 years, if being stuck in one time weren’t bad enough, being a stuck time traveler is even worse.
Time management involves the following elements, each with it’s own challenges. Today’s post gives you multiple posts through which you can time jump to find the advice that best serves your needs.
Know What You Want from Your Time
Last year, a few days before the start of Time Management Month, I shared Paper Doll’s Ultimate Guide to Memento Mori and Appreciating Your Time. It examined the unexpected complexity of time (and why children perceive time more slowly than adults), looked at the “finitude” of life, and explored the analog and digital ways to remind ourselves to focus time passing so we didn’t lose the forest for the trees.
It was also a deeply personal post, as I was sharing the joy of seeing my favorite band and feeling returned to my young adulthood again. I’ve been thinking about that post a lot lately, for two reasons. First, I recently started counting down 60 weeks until I turn 60 (!); second, I will be seeing The Floating Men again in concert later in February. I already know that time will stand still for a few hours!
Literally, memento mori comes from the Latin reminder that we will someday die. It is a challenge — much like Time Management Month — to weigh the aspects of your life, decide what you value, determine what you want to achieve, and be prompted to recognize the passage of time so that you do not fritter your life away.
(Lots of frittering is bad. A little frittering helps you refresh your brain. An apple fritter is just yummy. But I digress. If you are digressing too often, you may be hungry, so see the section below about taking breaks!)
Time management isn’t really about managing time. The seconds, minutes, hours, days, and years pass, no matter how much we wish they might speed by or slow down. Rather, time management is a misnomer for what is actually task management and self-management.
Time management is a misnomer for what is actually task management and self-management. Share on XPrioritize Tasks
It’s essential that we use our time both effectively (doing the right things) and efficiently (in the speediest way but with the greatest reduction of errors). If we throw ourselves at whatever task shouts the loudest, we may miss important deadlines.
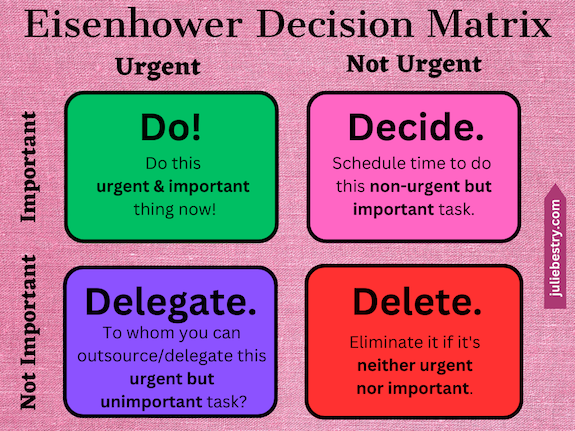
Although I’ve covered the concept of prioritizing many times over the years, I shared my most successful approaches in Use the Rule of 3 to Improve Your Productivity. That post allowed me to reference one of my favorite tools, the Eisenhower Decision Matrix (which, as you may have read in Paper Doll Shares Presidential Wisdom on Productivity, wasn’t actually invented by Eisenhower, but presidents often get the credit for popularizing nifty wisdom).
That post also talked about key skills:
Knowing what to do — as a result of a brain dump that gets everything out of your head and onto a piece of paper or screen so that nothing is forgotten or missed.
Knowing what to do first — that’s where the decision matrix kicks in, and then the next first thing gets done after that, and the next, and so on.
When we focus on important and urgent tasks over those that are important but not timely, or urgent but not, ultimately, important, we train ourselves to prioritize ourselves out of overwhelm.
Scheduling Effectively
In her book The Writing Life, author Annie Dillard famously shared:
How we spend our days is, of course, how we spend our lives. What we do with this hour, and that one, is what we are doing. A schedule defends from chaos and whim. It is a net for catching days. It is a scaffolding on which a worker can stand and labor with both hands at sections of time. A schedule is a mock-up of reason and order— willed, faked, and so brought into being; it is a peace and a haven set into the wreck of time; it is a lifeboat on which you find yourself, decades later, still living. Each day is the same, so you remember the series afterward as a blurred and powerful pattern.
Dillard explored the constantly existing tension between being productive — for ourselves (to achieve our goals) for, as they said in the 70s, “the man” (academia, industry, capitalism) — and being present or showing up (for our partners, our children, our friends, and for justice for our neighbors far and wide).
Planning our days, and then our moments and hours, assures that we get things done. But getting things done, which is important for achieving our goals, is not the same as living our lives.
We must have, if not always balance, then opportunity for variety. After all, all work and no play makes Jack a very dull boy. We must work, but we must also play. We must dine and sleep. We must make time for boredom to reinvigorate our creativity. We must dance, preferably while singing into a hairbrush.
Scheduling should take into account all of the pieces of our lives. Just as we make “homes” in our houses for our clothing and accessories, our food and our food preparation tools, and so on, we must make room in our schedules for all of the other aspects of our lives. The best way to do that is with time blocking. It doesn’t mean that you’ll schedule yourself so tightly that every moment is accounted for and pre-determined.
Time blocking just means that you’ll create safe spaces for your priorities. Start with these posts to get some insight on how to build time blocks into your schedule.
- Playing With Blocks: Success Strategies for Time Blocking Productivity
- Surprising Productivity Advice & the 2023 Task Management & Time Blocking Summit
Do the Tasks
I find that one of the most common places where people’s time management practices fail is that no matter how well they plan their schedules, they don’t actually do the work. It’s like how just buying a gym membership doesn’t actually get us into shape.
Shocking, I know.
To often, people have omitted the most key aspect of time management, and that is to put their butts in the chair (or in the car, to get them to the gym or to run the errands).
Longtime readers know that while I believe motivation is important, action precedes motivation! This means you must do whatever it takes to get your tiny patootie into position.
An object at rest tends to stay at rest; an object in motion tends to stay in motion. (That Isaac Newton knew his stuff!)
You need to get yourself in motion to the point that you are either in micro-motion (typing, reading, writing) or macro-motion (doing a workout, cleaning your house). It might look like you are at rest if you’re in micro-motion, but at the very least, your eyeballs and your brain are a flurry of activity.
For both motivation to get yourself into action and strategies to get started and keep going, avail yourself of the advice in the following posts to get to the starting line, focus, and actually do the tasks!
- Frogs, Tomatoes, and Bees: Time Techniques to Get Things Done
- Count on Accountability: 5 Productivity Support Solutions
- Flow and Faux (Accountability): Productivity, Focus, and Alex Trebek
- How to Use Timers for Improved Productivity and Focus — Part 1
- How to Use Timers for Improved Productivity and Focus — Part 2: Picking a Good Timer
- How to Use Timers for Improved Productivity and Focus — Part 3: Tangible Timers
- How to Use Timers for Improved Productivity and Focus — Part 4: Digital Timers
- How to Use Timers for Improved Productivity — Part 5: Hybrid Timers and Bonus Material
Track Your Time
You can tell yourself where you’ll travel in time, but although you will always travel forward, it will almost assuredly not be in a straight line. The problem with real life is that it takes us off-course.
No matter what we plan, interruptions from others (and unwittingly, from ourselves) creates not merely bumps in the road but ten megaton blasts in our day. The trick is to figure out whether these are unavoidable one-time problems or actual trends.
I’m a huge fan of time tracking to see where my minutes and hours go, and spend the second full week in January participating in Laura Vanderkam‘s annual Time Tracking Challenge.
Last year, I wrote How to Use Time Tracking to Improve Your Productivity, and how it helps with mindfulness and focus, prioritization (see? we always come back to prioritization), data-driven decision-making, stress-busting, and accountability. It also explored the benefits and occasional obstacles of time tracking and offered up a bevy of tools for making it easier to track your time.
If you feel like you’re planning your schedule, but still get to the end of the day with too few of the right things achieved, review that post and see how you might identify what’s going awry with the help of time tracking.
Block Interruptions and Push Through Obstacles
Once we spot the interruptions and obstacles in our days, we need to be vigilant about holding our boundaries.
If you have trouble keeping small children (or spouses, colleagues, or employees who behave like small children) from interrupting your focus, or you find that you are the one standing in your own way, the following posts can help you fight the battle, recapture your time, and post sentries along your boundaries to prevent future incursions.
- 52 Ways to Say NO to a Request So You Can Say YES to Your Priorities
- Paper Doll On Understanding and Conquering Procrastination
- Use the Zeigarnik Effect to Finish Off Your Unfinished Tasks
- Whoopsie! What To Do When Your Week Doesn’t Go As Planned
And sometimes, between time tracking and overcoming your obstacles, you figure out that some things just aren’t possible.
Don’t Forget That You Need to Sleep, Rest and Take Breaks
It’s easy to focus on the task aspect of time management, and yes, self-management does involve conquering your personal inertia (like lack of motivation). But it’s not all in your head — sometimes, it’s in your body!
You can start by scheduling yourself to tackle tough physical tasks when you’re brimming with physical energy and saving the complex mental tasks when your brain is at its peak. That’s different for each individual, so it’s important to track your energy.
Managing your energy is also essential for getting yourself into the groove and using your time well. Lack of motivation may be mental, but it just may be that you are exhausted or burnt out.
Take note of when you’re most likely to make excuses for not getting things done. Pay attention to when you need a snack, a conversation, a walk in fresh air. Don’t know when that is? Then note the times you’re flagging, that you’re reaching for the phone to doomscroll, or just generally feeling cranky.
As you work on self-management, remember that just as your devices need to be recharged, so do you. Check out the following posts when you’re trying to figure out how to bring your best, most energized self to the tasks at hand but it’s not quite working:
- Organize Your Sleep When the Clocks Change and Beyond
- Take a Break — How Breaks Improve Health and Productivity
- Take a Break for Productivity — The International Perspective
- Celebrate the Global Day of Unplugging
- Global Day of Unplugging 2025: Phones and Apps to Reduce Phone Use and Improve Your Life
- Organize To Reverse a Bad Day
TIME MANAGEMENT FOR THE REBELS
With all of the advice out there on how to set yourself up for managing your time, the truth is, some people just need something more, something different, something weird. Just as some office workers need bedazzled or sparkly charging cords
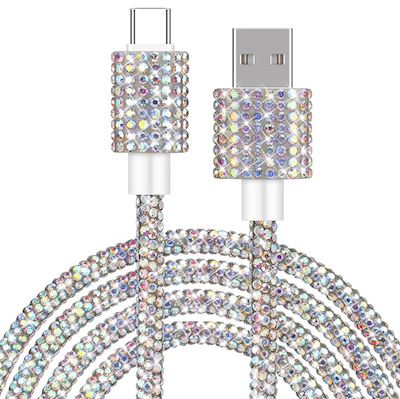
or colorful file folders, others need something that’s just a little left of center.
Big Picture Yearly View
Depending on how complicated your life is, the type of calendar you need may vary.
I depend heavily on a monthly view on my paper planner. I work best when I can see how heavily scheduled I am in terms of client sessions and Zooms so that I can see the flow of days and add my personal obligations and joyful plans accordingly.
I rarely allow myself to have so many fixed events in my schedule that I need to actually see my daily time blocks in a printed or digital calendar. However, many of my clients swear a digital view of their daily schedule, one quarter-hour block after another.
I have one client, a retired artist, who draws his own calendar when we set the next month’s session. From a blank page, he counts forward from the end of the month to visualize the start date of the next month, and draws boxes for each. Meanwhile, another client has 12 large (two-and-a-half foot high), colorful monthly pages decorating her office walls so she can see the ENTIRE year just by swiveling her neck; in addition, she she schedules appointments and gathers task categories in her Planner Pad, but echoes the fixed appointments on her digital calendar.
Only you know what level of scheduling detail you need to see to keep yourself moving forward successfully.
Neato Calendar 2026
Just in case you’re a true minimalist, and the idea of schlepping around a physical planner or typing things into your phone gives you hives, the free Neato Calendar has you covered. It puts the entire calendar on one single page.
Each month has its own column with the day of the month and a letter code for which day of the week it is; weekends are shaded in. It’s probably ideal for people who either have very few events on their calendars, or want a separate calendar to keep track of just one thing, like which days are trash pick-up vs. recycling, or mileage driven, or whose day it is to do one household chore.
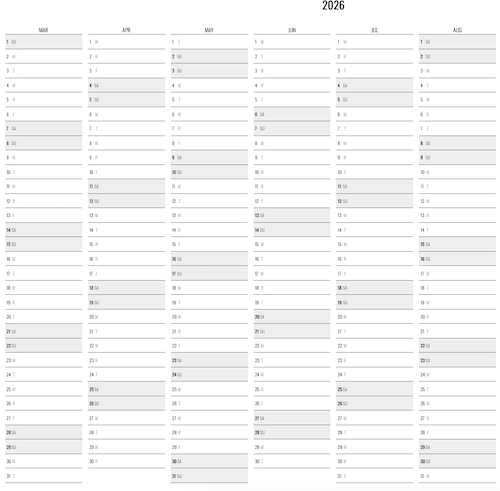
This open source (free to the public) calendar page is too wide for me to provide a legible screen capture here on the blog, so this is just a chunk from the middle of 2026. To print, don’t forget to use landscape settings and the option to fit to one page. I suspect for best results, it probably needs to be printed to a longer sheet than is standard in the US, perhaps a sheet of legal paper, though I suspect it was designed for the longer A3 paper (11.7″ in x 16.5″) popular in Europe.
The main advantages of this super-minimalist calendar calendar are that it’s free, lightweight, portable (to the point that it could be folded and put in a wallet), and it’s so minimalist that by its nature, the user can’t get overwhelmed by details. The main disadvantages are that it lacks nuance and granularity. You’re not going to truly manage much of your time with this calendar, but you may be able to manage one aspect of your time use.
I should note that last year, in anticipate of someday using the link, I’d found an identical one-page yearly calendar called Neatnik, created by Adam Newbold; the only discernible difference is that Neatnik comes with a friendly greeting screen.
A Weekly View
Most planners provide a monthly view with the option for a weekly or daily view, and for those who want granularity, the daily view is usually a top choice. Some people operate best seeing one week at a time.
I’m already a fan of the funnel system of Planner Pads, and if they were more colorful, I often think I’d use them myself, as my clients are always delighted when I explain how they work.
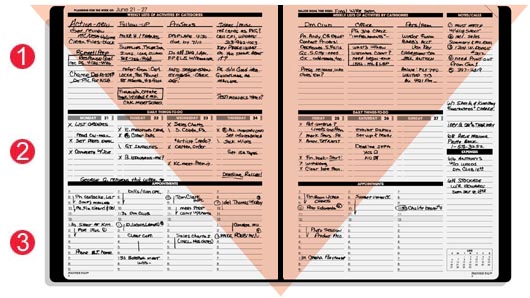
Ink & Volt Dashboard Spiral Deskpad
It’s hard to find a weekly view scheduling tool on par with PlannerPads. While I can often find weekly task pads, I’ve never found a similar product with planning space for categorized tasks, tasks scheduled by day, and appointments.
Recently, I saw ads on social media for the Ink & Volt Dashboard Spiral Deskpad that, while not equaling a PlannerPad, does offer interesting features.
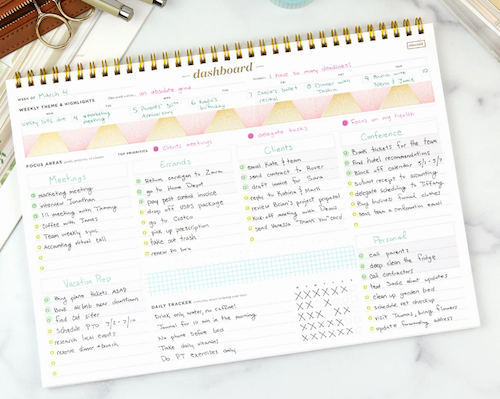
Available on the Ink & Volt website for $31 (or Amazon for $33 in Black, only), it has 52 undated sheets, a landscape layout, and a left-handed-friendly top-spiral binding. Select from among nine colors of covers: Onyx Black, Midnight Blue, Carbon (grey), Matcha (green), Mulberry (shown below), Black (but less black than the Onyx Black), Cloud (white), as well as two pre-order only shades of Bleu (a sort of light sky blue) and Fleur (a light pink).
There are six areas of focus, with a highlighted section for your top three priorities within that focus category. There are also spaces for weekly highlights, a habit tracker, and a section for themes and highlights by day. My favorite aspect is that the checkboxes are printed right on the page to make it easier to check off your successes in a tidy, orderly manner.
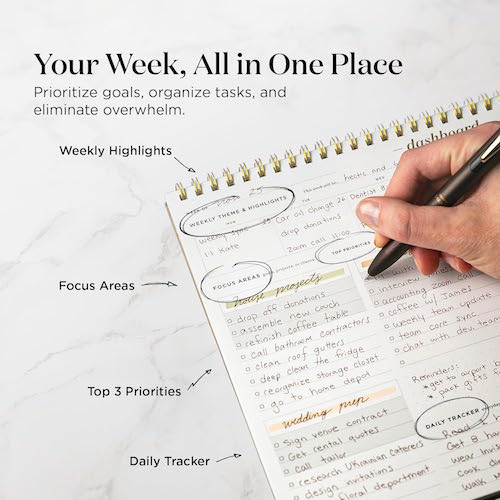
Find Your Moment in Time
In the 5-post series on timers (linked above in the task-doing section), I championed analog timers over digital ones for productivity and focus. To be able to truly see the passage of time, an analog clock (like most of the analog timers I shared) gives you a visual appreciation of what time it is and how it relates to the moments used and the time remaining. But hey, if you’re rebel or you just need something to delight you in a different way, I’ve yet to see something more unusual than this next item.
Author Clock
Author & Company has created Author Clock, which tells time by quotations from literature. Using more than 13,000 passages from more than 2500 books by famous authors, time is told with a sentence or fragment from a literary work referencing a moment of the day. New quotes (and software upgrades) are added by WiFi.
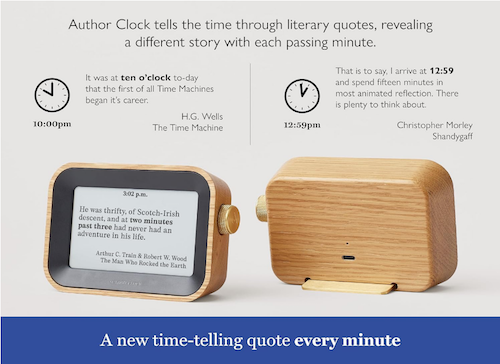
Quotes are available in English, French, Spanish, and German, with each language collection specially curated by Author & Company’s editorial team.
The frame is made of solid oak, with brass dial controls, an easy-to-read E-Paper display that changes from minute to minute, and a rechargeable battery. There are also parental control settings, in case you want to ensure that more mature quotes aren’t seen by little time-tellers.
You can customize a variety of the features, including font style and size, quote frequency (from every minute to every hour), and even add in “vague” quotes, like one relating to “A few minutes to midnight.” A digital clock in the screen’s header is optional.
There are two versions:
Author Clock Volume 1 has an E-Paper measure 4.3″ E-Paper screen and sits on a brass base. It’s suitable for sitting on your desk or nightstand, for when you are close enough to see the smaller letters.
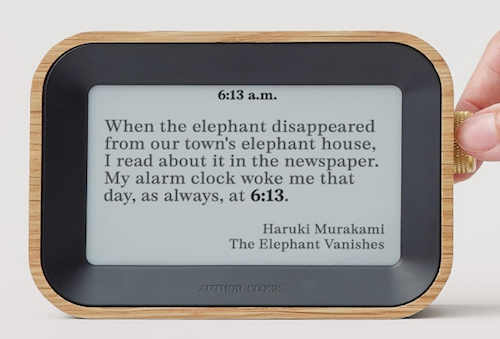
The larger Author Clock Volume 2 has a 7.8″ E-Paper screen. The brass base is removable, in case you want to mount it on the wall and view the larger letters from across the room.
Happy February, and however you manage your time, I hope this month brings you moments to treasure.
Don’t Get Locked Out: How to Set up a Recovery Contact for Apple and Google
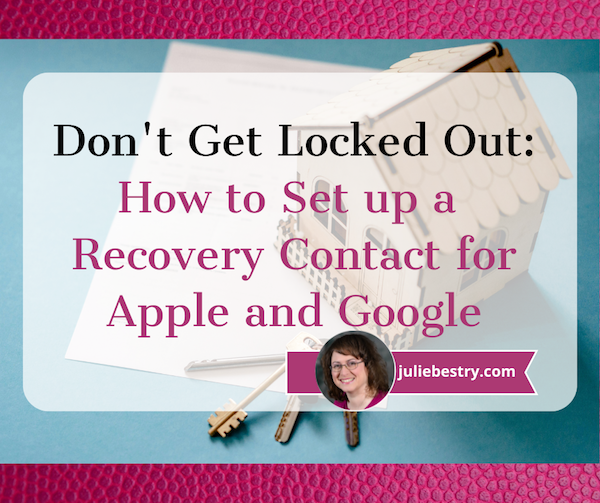
Our relationship to technology gets ever more complicated with each passing year.
People are glued to their phones. Some folks fall in love with their AI chatbots. We get so frustrated when we can’t live with our technology, but we know from experience we also can’t live without it.
So what do we do when we get locked out?
Previously, we’ve talked about what to do if you are no longer walking the planet. As I explained in these posts from the Paper Doll vault, there are preparations you can make in case you aren’t around to access your Apple, Google, or social media accounts:
- Paper Doll Explains Digital Social Legacy Account Management — This post walked through the main concepts of managing your social media legacy, how to inventory your social media digital assets, and the steps to take to secure legacy access to social media accounts, like Facebook, Twitter/X, Instagram, TikTok, and LinkedIn.
- How to Create Your Apple & Google Legacy Contacts — This post delved into the specific steps necessary for setting up legacy contacts for Apple and Google to ensure that your loved ones can secure your digital assets (photos, email, etc.) once you’ve shuffled off this mortal coil.
But what do you do if you’re alive but your access to your digital stuff is not?
Maybe Grandpa forgot his password (or all of his passwords).
Maybe you have been hacked. After all, the first thing the bad guys do is change your password so you can’t see all the other nefarious things they’re doing (and often fill your your Outlook or Gmail inbox with junk to obscure the clues that would point to the hack). When things go awry, you can use all your passwords, passkeys, and 2-factor authentication skills, but sometimes, you need a human solution.
You need someone to vouch for you. This is where the concept of a recovery contact comes in.
Today’s post will review how to set up and use a recovery contact to regain access to your digital resources. But first, let’s get clear on what a recovery contact really is.
WHAT IS A RECOVERY CONTACT?
It may seem that a recovery contact would be the same as a legacy contact.
You might think that you could set up just one or the other and use them for the same purpose. After all, the purpose of a legacy contact is to designate an individual to give official access to your accounts after your death. Why not just pretend that you’re “only mostly dead” to get back into your account?
As explained in earlier posts, a legacy contact doesn’t just randomly give someone your login credentials, like leaving a key under the digital mat. Rather, it sets up a secure process for giving a trusted contact access to the data stored in your accounts after you die to that everyone can achieve financial and structural closure.
A recovery contact, however, works differently. Rather than giving someone the ability to get into your accounts and control them, a recovery contact is the individual whom, when you get locked out of your account, gets to stand up for you that you are really who you say you are and deserve access to your own account. (There’s not a lot of literal standing up. Usually, they receive a code and give it to you. So it’s more like they’re meeting you on your front step to hand you your spare key.)
What’s the Difference Between a Legacy Contact and a Recovery Contact?
Again, they can seem similar, but are used for different purposes.
Key Traits of a Legacy Contact
An Apple Legacy Contact, or what Google calls an Inactive Account Manager, is designed to be used after your demise, upon your appointed contact providing proper documentation (like a death certificate).
The key traits of a legacy contact are that it:
- provides (limited) access to your data after you’re gone — an Apple Legacy Contact can access anything in your iCloud account, while a Google Inactive Account Manager has more curtailed access
- does not allow logins or account control
- may be time-limited
- involves a separate set-up process (for a separate Apple ID, for example) for access by the legacy contact
Key Traits of a Recovery Contact
An Apple or Google Recovery Contact is designed for short-term account access assistance. You get the access; they don’t!
The key traits of a recovery contact are that it:
- helps you regain access while you’re alive and kicking (and probably kicking yourself for forgetting or losing your password or somehow bringing this problem on yourself)
- does not give ongoing access to your account
- does not grant access to actually seeing your data
- only works when you initiate the account recovery process
The bottom line is that your recovery contact helps you get back into your (digital) life, while a legacy contact helps your loved ones wind it down.
Situations Where You Might Need a Recovery Contact
It might seem like it’s obvious — you need a recovery contact when you’ve been locked out, but why might that happen?
- You’re locked out of your account because of suspicious activity (by someone else) or your own failed login attempts attempts (like too many misremembered or mistyped passwords).
- You forgot your password and you’ve lost your device.
- You forgot your password and you can’t access your email.
- You forgot your Apple ID.
- Two-factor authentication is sending codes to a device you no longer have.
- Your phone has been stolen and you no longer have the device with Google’s associated passkey.
- You got really angry at the person to whom you were talking while walking across a bridge and in a fit of pique, you threw your phone into the lake, river, or ocean. (Does anyone really do this? It keeps happening in movies!)
- You upgraded devices and now your new device doesn’t know the things your old device kept sacred.
- You’re ill or injured, and it’s making it hard for you to manage your own tech or you’re having trouble communicating with caregivers helping you.
- Your device access is limited during travel emergencies.
- Your phone got “factory reset” while you were trying to make things work again.
I had a client who had to wipe his phone (that is, restore it to factory settings) such that the phone no longer recognized who he was. He had two-factor authentication set up, so Apple looked for a second device to which to send the code.
Normally, if you’ve got an iPad or a Mac connected to the same Apple ID, your two-factor authentication should work. My client, however, had mostly Windows products, and was getting more and more stressed out. However, because we’d set up his child’s iPad (mostly for toddler videos) with my client’s Apple ID, he was able to get up and running again.
However, we used the opportunity to set his wife (who has her own Apple ID) as his Apple Recovery Contact so that he never had to worry about this again.
From a tech organizing perspective, recovery contacts are especially helpful for people managing multiple devices, juggling shared/family tech, or dealing with caregiver situations.
HOW TO CHOOSE YOUR RECOVERY CONTACT
Choosing a recovery contact is much like choosing a legacy contact, but you’re looking for different characteristics and skill sets.
When I talked about setting up a legacy contact, I focused on the attributes of a good digital executor:
- Whom do you trust to carry out your wishes, or anticipate your preferences if you leave no instructions?
- With whom will you still be in close contact by the time a digital social legacy has to be managed?
- To whom are you comfortable giving access to private conversations?
- Which of your friends is likely to stay current enough with technology to be able to handle your digital legacy?
However, for your recovery contact, you want to look for different features in your peeps.
A good recovery contact is reliable, responsive, calm, and appropriately nosy (but only when invited to be).
A Good Recovery Contact Won’t Ghost You
You recovery contact needs to be reachable in real time.
- Do they check email and/or text messages frequently?
- Are they unlikely to miss time-sensitive notifications?
- Will they dependably check (and not ignore) a message because it looks like it might be automated?
If someone has 37,000 unread emails or the number bubble above their text app icon looks more like a phone number, this isn’t a good recovery contact for you.
A Smart Recovery Contact Will Verify It’s Really You
You recovery contact shouldn’t have a knee-jerk reaction to share your information.
- They’ll pause to consider and confirm that it’s really you who triggered the recovery process and not a Russian baddie in a hacker farm.
- They’re comfortable calling or video-chatting with you to confirm it’s really you who’s stuck before taking any required steps.
- They won’t blindly follow instructions just because Apple (or Google) said so.
Your ideal recovery contact will have at least mild skepticism rather than unquestioning compliance. (Good characteristics for a fellow citizen, as well as a recovery contact, eh?!)
An Ideal Recovery Contact Will Stay Calm Under Mild Stress
We all know folks who freak out when a football game runs long and their show doesn’t start on time. That’s not who you want. Pick someone who:
- Won’t start spiraling when they see the words “account recovery” or “security alert.”
- Can follow step-by-step instructions without melting down.
- Knows when to ask for help instead of guessing and clicking, willy-nilly.
The Best Recovery Contact Has Mental Bandwidth and Time to Deal to Help
Speed matters during account recovery, especially if someone has hacked you. Select a recovery contact who:
- Is routinely available during work hours (or during the hours you’re likely to need help). — If your bestie works 12-hour shifts, she may not be the best option.
- Is in a profession where interruptions won’t be dangerous or impossible. — Brain surgeons can’t just step out to handle your iPhone kerfuffle.
- Can likely respond within hours (or even minutes) and not days.
While we should respect everyone’s work style, your work-from-home friend is probably a better option than your pal who is an airline pilot. Your retired sibling makes a better recovery contact than your friend with a three-week-old baby.
Other Considerations for a Recovery Contact
- Pick a person who respects your boundaries — They should understand that they aren’t being given access to your account, and you can trust that they won’t waste time snooping around or attempting a recovery when you haven’t actually asked for one. So, nobody named Gladys Kravitz.

- Identify someone who is comfortable with basic technology — Your contact doesn’t need to be a web developer, but they need to know how to handle links, codes, and authentication steps. In other words, not someone who needs daily assistance to check their texts, avoid clicking on spam links, or keep themselves from getting locked out of their phones.
- Pick someone who is stable and likely to be in your life for five or ten years — So, not your hinge date from last weekend. Not your friend who flakes on half the meet-ups you plan. Not the boyfriend you’re considering breaking up with. (And not just because you’re afraid he’ll log into your account. But because you have no idea when the two of you might go “no contact” and you’ll have to decide whether to break that status or just give up on the last 20 years of your digital real estate.)
Finally, ask if they’re OK with being your recovery contact so they won’t be startled by a sudden, “Apple [or Google] is contacting you” message. Surprises are for gifts and birthdays, not account security. Capisce?
A legacy contact needs discretion and emotional steadiness. A recovery contact needs availability, clarity, and a cool head when you’re locked out, pacing the floor, and cursing Steve Jobs.
A legacy contact needs discretion and emotional steadiness. A recovery contact needs availability, clarity, and a cool head when you're locked out, pacing the floor, and cursing Steve Jobs. Share on XYour recovery contact may be, but need not be, your spouse, adult child, or next of kin. Pick the person who dependably answers your calls and texts. In the words of Grey’s Anatomy, select the one to whom you could honestly say, “You’re my person.”
If you found your way here because someone asked you to be a recovery contact
Maybe you’re wondering if it’s safe to be someone’s account recovery contact. Yes, because you’re not granting access to anything of your own.
If you agree to the position, they’re no pay, no reward (except undying gratitude), and you won’t be gaining access to their goodies. Rather, the only superpower you’ll get is the ability to furnish them with a recovery code upon their request.
Obviously, you should only give that code directly to the person who trusted you to do so (like by phone or video call); if someone claiming to be the police, a hotel concierge, or a hospital worker requests the code, that’s a scam. Duh. (But you knew that, right?)
HOW TO SET UP YOUR APPLE RECOVERY CONTACT
To set up your Apple Recovery Contact, you’re going to need the following:
- All of your devices set to at least iOS 15, iPadOS 15, watchOS 8, or macOS Monterey or later. Apple may prompt you to update any devices, or remove devices you aren’t using. (I have an iPad from 2013; Apple let me know I had to update the iOS, which I can’t, or remove it from the recoverable device options.)
- Two-factor authentication to already be enabled
- A trusted person (aged 13 or older) who already has an Apple ID
Follow these steps:
1) Go to Settings.
2) Tap your name (Apple ID) at the top.
3) Select Sign-In & Security. (Depending on your iOS version, it might say Password & Security.)
4) Tap Account Recovery. (Depending on your iOS version, it might say Recovery Contacts, as mine does, below).

5) Tap Add Recovery Contact. — At this point, you’ll likely be asked to and authenticate, so be prepared to use Face ID or Touch ID, as applicable.
6) Choose a trusted person from among your contacts.
7) Apple will then send them an invitation to accept.
How to Delete Your Apple Recovery Contact
If you ever need or want to change your Apple Recovery Account, follow the same steps as above, but after once you get to Account Recovery, tap the person’s name and then tap Remove. Your contact will see a message that you’re no longer their account recovery contact.
For more on the Apple Recovery Contact process, check out these Apple pages:
Set up an account recovery contact — This page explains much of what I’ve written above but with additional details.
How to use account recovery when you can’t reset your Apple Account password — This page explains how to request an account recovery when everything has gone kaflooie. (Yes, that is the technical term. Thanks for asking.) You can either do this from your device or on the web at https://iforgot.apple.com in your browser.
Help a friend or family member as their account recovery contact — This explains how to be a good Apple Recovery Contact, including what such an individual does, how they can assist with recovery, and how to remove themselves as a recovery contact.
HOW TO ADD A GOOGLE RECOVERY CONTACT
You may have found Google account recovery to be problematic in the past. Happily, in October 2025, Google upgraded their systems to allow for improved Google Recovery Contact.
Functionally, a Google Account Recover Contact works much the same as an Apple Recovery Contact. (Note if you have Android devices (e.g., phones, tablets), be sure to set up a Google Account Recovery Phone for Android access protection.)
To set up your Google Trusted Account, you’re going to need:
- Access to your Google account (duh!)
- A trusted person with a reachable phone or email. (Google doesn’t specify that the trusted person must be a specific age, but Google’s minimum account-holder age is 13 in the United States; it varies by country. If your contact is old enough to have a Google account, you’re good.)
Follow these steps:
1) Go to your Google Account — If you’re on the web, that’s myaccount.google.com)
2) Click Security.
3) Find the “How you sign in to Google” section.
4) Click Recovery contacts. You may have to scroll down below the listed options (like 2-step verification, password, recovery phone, recovery email, etc.) to find this option in a “more sign-in options” bubble.
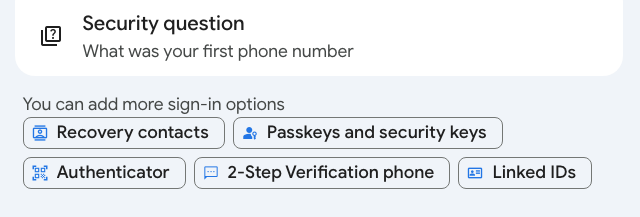
5) Click Add recovery contact.
Note: If you’re prompted to sign in, do so. If you’re setting this up in a browser, Google will likely show you a number code, direct you to open the Google app on your phone, and ask you to confirm the right number from multiple choices. If it doesn’t work the first time, hit “resend” to get the code again. (You have my permission to sigh.)
6) Enter the email address of your trusted contact. Assuming you already have that person among your contacts, their name, face, and email address will pop up, assuring you that you’ve selected the right person. Tap their name/face/email to accept your selection.
7) Click Continue.
8) Click Send Request when Google asks, “Send a recovery contact request? Your request will be sent via email, and [trusted contact’s name] will be able to see your name, email address, and profile photo.”
You’ll now see a list of your open request(s) for Google Recovery Account(s), with the person’s name, email, and photo (if they’ve created a photo for the account), so you’ll know you did it right.
Your contact will receive an email to accept the request, and they’ll have seven days in which to confirm their willingness. After 7 days, the request expires. Once they accept the request, you have to wait seven more days before you can actually use them as a Google Recovery Contact, so don’t go spelunking around your settings and accidentally blitz your access. Step away from the keyboard for a week and stop experimenting!
How to Delete your Google Recovery Account
Maybe you’ve broken up with your Google Recovery Account trusted contact, or perhaps you just know their lives have gotten too busy with babies or work. Just use the same steps as above to navigate to your Google Account’s Security & Sign-in page, then tap Recovery contacts, and find the trash can icon next to the account you want to delete. Tap the trash can and hit Confirm.
To Use your Google Account Recovery
If you encounter difficulties logging into your Google account, go to g.co/recover and enter your Gmail address. Try to answer the identifying questions the best you can and follow the suggestions for regaining access.
If you do need to recover your account, you’ll either 1) select your Google Recovery Contact from the list of recovery options, or 2) follow a pop-up prompt to reach out to them and select Get Number to get a short code.
Google will then send your Google Recovery Contact an email with three different numbers from which to choose, and you’ll have 15 minutes to tell them the number you got so they can select it, too. (This is why you may need to call or text to be clear on what’s going on.)
For more information, read Google’s Add, Manage & Use Recovery Contacts page.
Of course, protecting against from losing access to your essential accounts is always better than having to try to recover access after the fact. This is your reminder that the best ways to organize access to your tech life are to:
- use strong passwords
- don’t repeat passwords across accounts
- change/revise your passwords with frequency
- make use of passkeys, which are device specific and don’t require you to remember anything
- record your passwords somewhere safe, preferably a digital password manager
- use two-factor authentication
- don’t share your passwords with anyone (but if you must grant access, check your digital password manager for ways to share and/or rescind access with greater control)
- keep your devices updated to the latest operating systems and software versions
- set up your account recovery options before you need them
Have you set up recovery contacts? (Did you ever get around to setting up legacy contacts?) What else do you do to keep from getting locked out of your essential accounts? Please share in the comments.
![]()
Follow Me