From Glitter to Macaroni (Part 2): Storing and Displaying Children’s Art
(DRAWING) THE CART BEFORE THE HORSE
Last week, in From Glitter to Macaroni (Part 1): Downsizing and Organizing Children’s Art, we looked at the key elements of digging out from under so that you’re house doesn’t have three-inch thick wallpaper layers of kiddie art.
To recap the key concepts:
- Children live in the moment, enjoying the process of creating art for its own sake. They enjoy applause and appreciation, but by the next day, they’re usually ready to move on, so you should be, too.
- Ask questions to show you’re curious about junior’s artistic choices and thinking.
- Have a plan for collecting the art and host at least a weekly review where you figure out what to purge and what to maintain, at least for the near-term.
- To help you cull the excess, focus on keeping masterpieces (original artwork) and let go of reproductions (coloring book pages, paint-by-numbers, etc.).
- Record the name of the little artist and the date.
If you regularly purge, you’ll feel more confident that whatever you store or semi-permanently display is the best of the best!
HOW TO STORE CHILDREN’S ART
As last week’s post explained, kids create so much art, and so quickly, that thinking you’ll put it all on the fridge or kitchen counter is a recipe for clutter. You need a plan for storage of any art projects that you hope to maintain (both short-term and long-term) without displaying. There’s just no room to show it all off!
Unfortunately, this is the one category of paper that doesn’t lend itself to the filing solutions we usually discuss, like vertical filing folders and three-ring binders with sheet protectors, such as we’d illustrated in Reference Files Master Class (Part 1) — The Essentials of Paper Filing. Those solutions work for pieces that are 8 1/2″ x 11″ emblazoned with only crayon or pencil, but thick paints, glitter, and glue often prevents paper from maintaining structural integrity and laying flat.
Flat Files
In the professional art world, instead of vertical filing cabinets, art pieces and blueprints may be rolled for shipping or travel, but are generally stored in flat files, cabinets with short but deep metal drawers. The problem? Flat files tend to be expensive and ill-suited for children’s art created by anyone but Richie Rich.
For example, this small, 5-drawer Safco Products 4969LG flat file is $710!
At 32″ deep x 46.25″ wide x 16.25″ high, (after a proper culling of lumpy finger-paintings and nature studies made from small sticks and cotton ball clouds) you could probably store all of the elementary school art. But for $710 you could buy a Disney World four-park, four-day ticket and still have $300 left over for concessions, T-shirts, sun-block, and decades of memories!
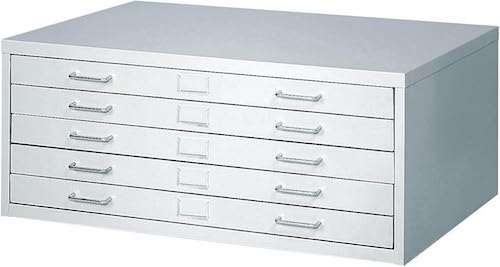
While yes, the above flat file it will let you store pieces of up to 40-inches in depth, your child’s Kraft-paper, full-sized self-portrait could also just be rolled up to fit in the tube of a used-up roll of wrapping paper!
There are more affordable flat files with more storage space (covering less horizontal real estate), like this pretty Bisley 10 Drawer Steel Under-Desk Multidrawer Storage Cabinet, available in ten colors, including black, charcoal, light grey, a truly sickly green, navy, orange, red, steel blue, white, and as seen here, fuchsia.
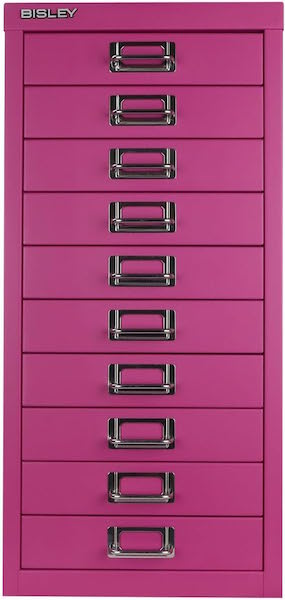
At 15″ deep x 11″ wide x 24″ high, it’s a smaller profile solution that works if your prolific artists create relatively narrow (dimensionally-speaking) works. It’s “only” $260, and can be used for storing art and school supplies, too. But eleven inches of width and 15 inches of depth is decidedly small for the often-expansive creativity of a Mini Mary Cassatt or Tiny (tinier?) Toulouse Lautrec.
Given that, I encourage you to seek less expensive, more portable art storage solutions.
Clean Pizza Boxes
As I mentioned last week, a (clean, new) pizza box is the right size to handle the weekly collection of art creation. As your kids get older and you do seasonal and end-of-school reviews, these can be repurposed for winnowed longer-held collections.
Sure, you can tip your favorite pizzeria cashier to save you a few extra boxes when you pick your next pie, but do you want to be beholden to maintaining a friendly relationship with Mario to keep you in pizza boxes until your kids hit middle school (and stop creating art)? And when he goes off to college, are you prepared to start fresh with his replacement?
Assuming not, consider buying a stack of white, Kraft, or themed pizza boxes directly from Amazon or a restaurant supply store like Webstaurant Store. (I recommend white or Kraft boxes so that you can label accurately (“Jamie’s Artworks—1st Grade” or “Chris’ Creativity — 2024”) without cartoonish distractions.
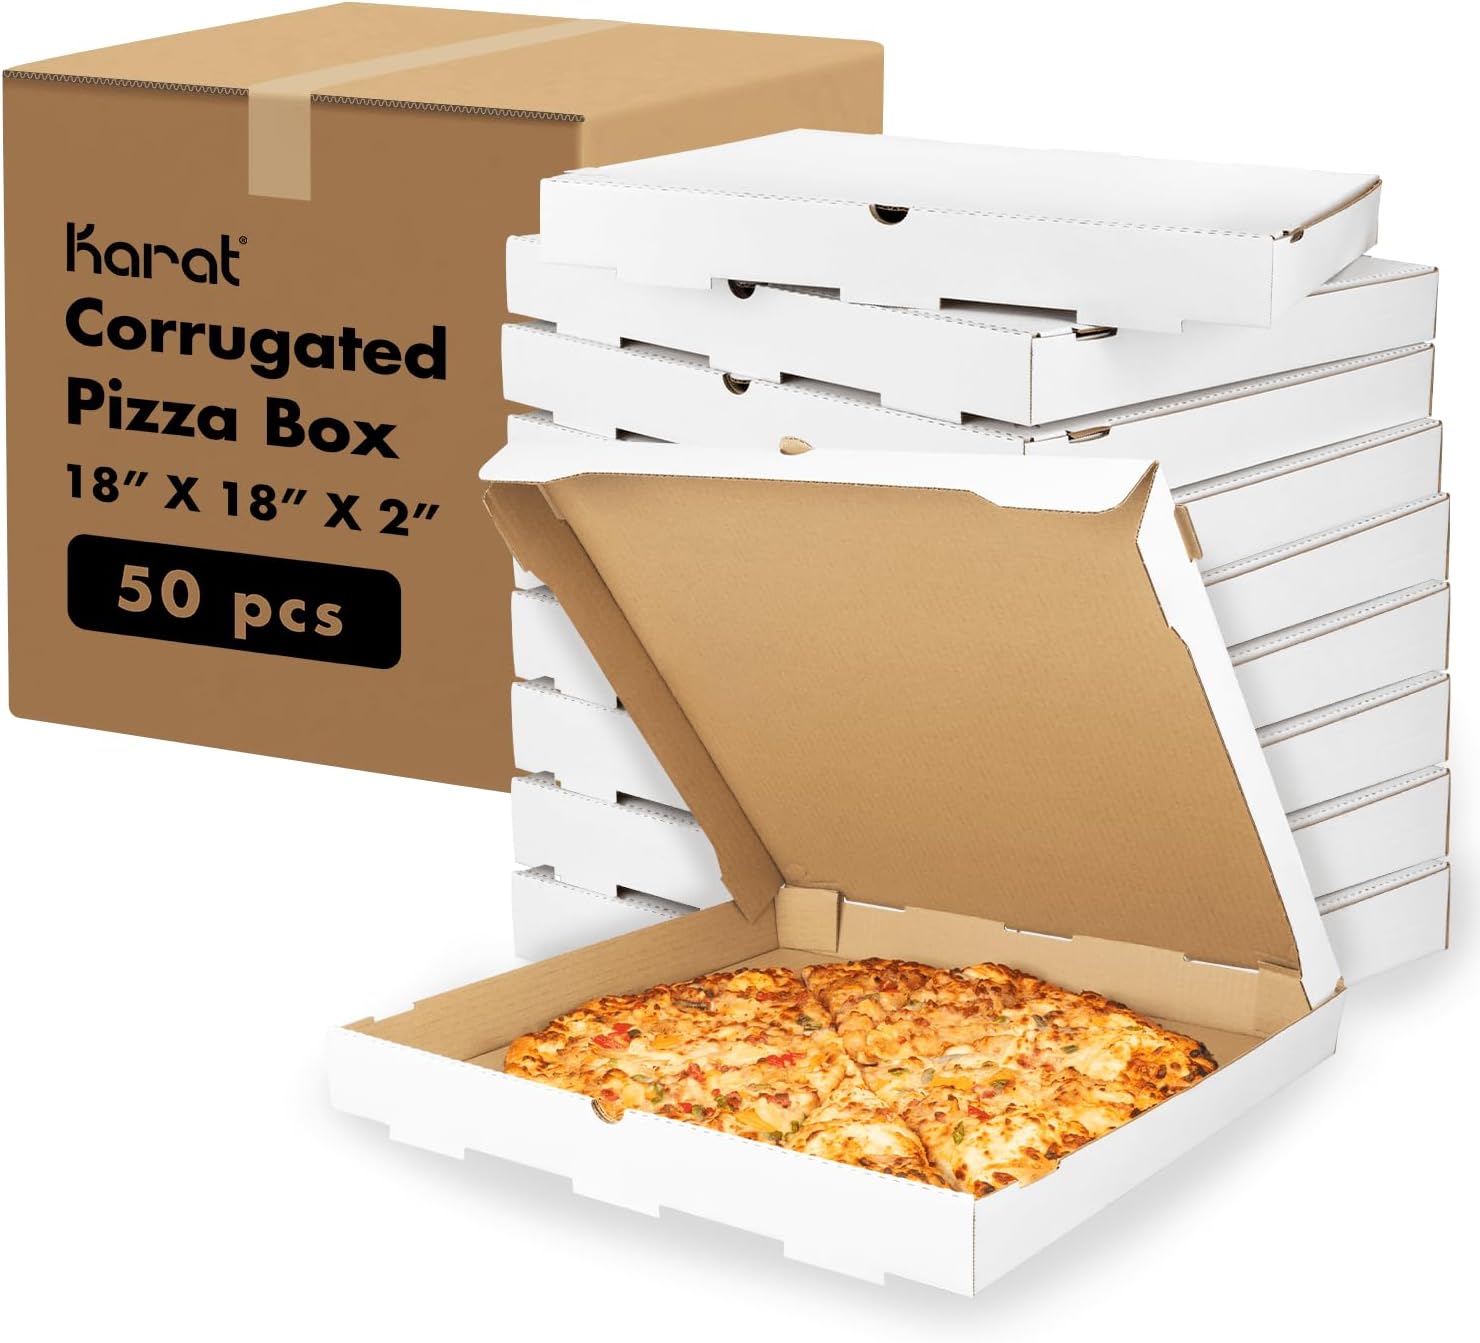
These boxes often come in packs of 50 for about $30-$45, so split a batch with the other parents in your carpool or PTA.
Just be sure to get boxes that are at least 12″ square, as most children’s art won’t fit in the 10″ x 10″ boxes. You can also select options that come in 14″ or 16″ (or even larger) sizes, so explore box style you want to see the different sizes available.
Try one box for each child for gathering a week’s worth of art for curation meetings, storing it on a shelf in the kitchen pantry or mudroom, and another more permanent box for each child into which you put the weekly “best-of” selections.
Art Portfolios Bags
Hard-sided art portfolios cases are a popular resource for professional artists to store work or carry their best pieces. However, children’s art tends to be larger and “lumpier,” so portfolio cases aren’t the best option. Instead, opt for large format portfolios and portfolio bags.
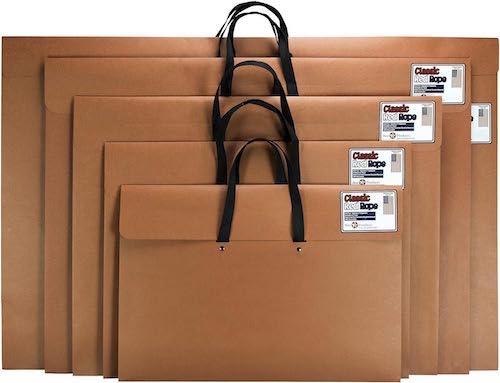
The standard is something like the Classic Red Rope, Paper Artist Portfolio with Soft Woven Handle. All versions come with a 2-inch expandable gusset, and comes in multiple sizes (14″ x 20″, 17″ x 22″, 20″ x 26″, 23″ x 31″, and 24″ x 36″), with prices ranging from $16-$24.
These are lightweight and constructed with heavy-duty recycled paper, ideal for inexpensive paper art storage. Find them on Amazon at the link above or in your local art supply stores. Stand these up along the back wall of a child’s closet or slide them behind a child’s bookcase or dresser to keep art tucked out of the way. You might also consider using using these in combination with pizza boxes, with the pizza boxes for weekly collection and the portfolios for longer-term storage.
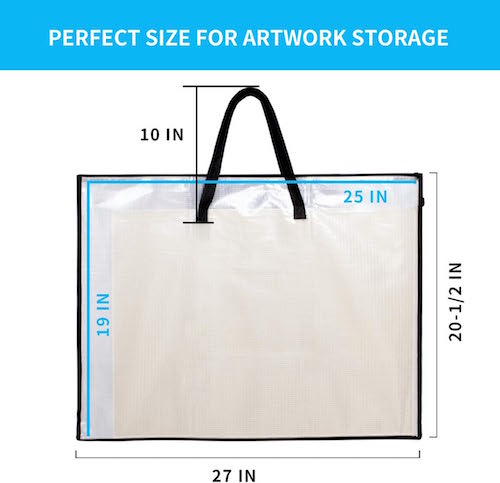
For more visually stimulating storage options, you’ll find lots of zippered plastic/nylon portfolio bags, like this SUNEE 19″ x 25″ Art Portfolio Bag. The nylon strap and edging are sewn into the mesh cloth for extra durability, and it’s semi-transparent so you can immediately realize, “Ah, it’s Katie’s art collection.”
Use one portfolio for each child, labeled with the name on the outside. Don’t try to combine different children’s art in the same storage, especially when they are small.
Aim to keep relatively equivalent numbers of art pieces (per week, per semester, etc.) for each child. If your kid makes it to middle school or high school and is still creating massive numbers of pieces — prolific creation is a rarity after 6th grade — then you have an actual artist on your hands and have my permission to treat this as an interest/hobby (much like sports or musical performance). But when your kids look back in adolescence to what you’ve retained from their tiny tot years, spare yourself family strife and aim for balance.
Capturing Memories
The location doesn’t matter as long as you have adequate space to keep these collections accessible (and file them away regularly). Remember, legal-sized filing cabinets will give you more length, but chance are good that what you need most is more width. If you fold children’s art to make it fit, the paint and glue will crack and flake; glitter will come loose.
You can also choose clear plastic bins to store the art that you decide to keep, memory box-style.
Whatever storage method you use, clearly label each box, bin, portfolio, or folder with the child’s name and the date range. As I noted last week, you may think that you’ll never forget when your Tiny Titian or Mini Matisse created each piece of art, but I guarantee you that 30 years from now, you won’t be able to tell which kid did which.
WHERE TO DISPLAY CHILDREN’S ART
Minimize the backlog, then consider which tangible pieces on display.
Identify a location for a rotating display.
Rotate the art regularly to keep it fresh. Display this week’s award winners and replace them frequently. (Remember, kids live in the moment, so don’t make VIP displays about a moment six months ago!)
Art galleries have both permanent exhibits and rotating ones that allow fresh, inspiring work to grab the attention of visitors. Permanent exhibits (like the collection of family photos on the wall next to the staircase) are lovely, but it’s the rotating exhibits that will catch the eye. The question becomes, where shall it all go?
The American standard is to display art on the fridge. This worked well when everyone had a big white (or avocado green) refrigerator that happily accepted a plethora of magnets. Nowadays, more and more of our boxy chill chests have non-magnetic fronts and are designed to be pieces of art themselves.
Before you run to the 1960s-Classic-Fridges-Are-Us Emporium for your next art wall installation, recognize that there are alternatives to hanging art where your lunch lives.
Invest in a large cork bulletin board.
Pick a bulletin board like you might see in a typical classroom, such as this one from Quartet.
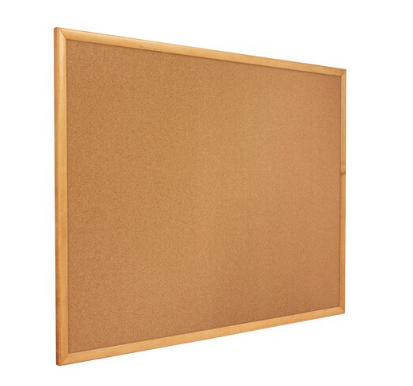
Find full-sized, framed cork boards on Amazon or at office or school supply stores. Alternatively, buy individual cork tiles — array them in a uniform grouping or artistically around a child’s room or playroom — to affix to your walls.
Display the art as-is, right on the cork, or cover the entire board with dollar-store wrapping paper or kraft or butcher paper. Your kids can even draw on or decorate the paper, first, creating a meta-message of art-on-art, or add drawings and designs around the posted art.
Perhaps, use just one cork tile in a high traffic area of the home to showcase the Masterpiece of the Week!
The board does not have to be cork, per se. Customizable felt boards and panels, like these from Felt Right, can make a child’s bedroom or playroom wall bold and exciting as a background display option.
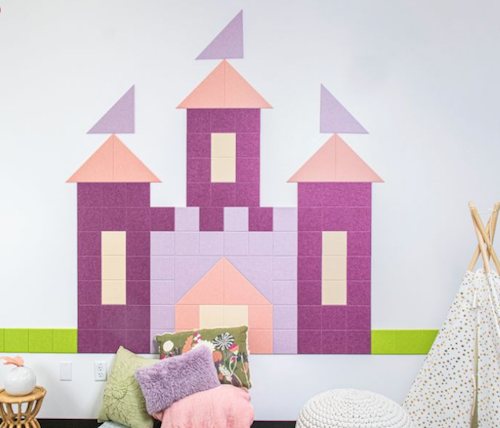
Princess Castle from Felt Right
Wallpaper an unfinished space, like a basement or work area.
Art can be a fun way to decorate your child’s room as well as any other casual area, like a guest room, mud/utility room, playroom or basement, whether you use a cork board or not.
The walls of a basement laundry room are likely to be gunmetal grey and depressing. Charming and colorful children’s art can brighten the area (and the mood of laundry day) immensely. Easily and safely attach artwork to walls with removable 3M’s Command-brand traditional or re-positionable Poster Strips.
Match your child’s magnetic personality!
Chalkboard paint allows children to create masterpieces directly on the wall, but magnetic paint is actually a storage solution for existing art.
Try a brush-on paint like Rustoleum’s Magnetic Primer or Magnetize It! Magnetic Paint & Primer so your wall surface will hold magnets for displaying artwork, schoolwork, and more. Alternatively, use a sprayable magnetic paint primer, like Krylon’s. Find them at Amazon or home supply stores, and then paint your wood, metal, masonry, drywall, or plaster walls.
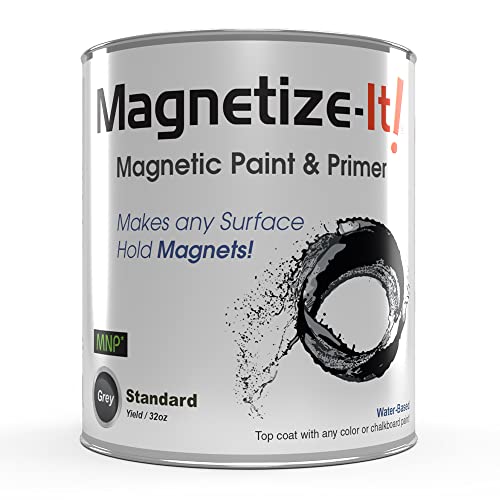
After the primer dries, cover with a colorful latex paint — use a solid color, stripes, or a pattern designed by your little artist. Magnetic primer generally goes on as grey or black, so apply multiple coats of the latex to get proper coverage. Then attach the artwork with decorative magnets. (Hey, that’s another art project your kids might like!)
Hang a retractable clothesline or cable.
Position a clothesline high enough that it’s beyond children’s ability (or consideration) to climb to reach. Attach paper artwork with clothespins. Paint wooden clothespins or use full-sized or miniature plastic ones in bright colors or funky patterns for a more kid-friendly atmosphere.
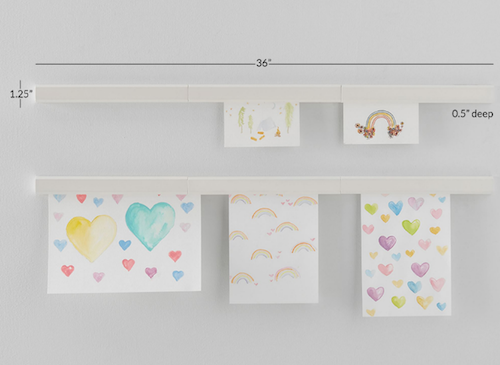
If you want something with a less DIY look, you can purchase an art display rod (with 48 clips) for $29.97, like this one from Willow and Eva on Amazon.

For a little higher-end approach, Pottery Barn has a nifty Rainbow Dot Art Cable for $59 and a Magnetic Art Gallery Display for $79.
Try a Frame Job!
In the olden days, we created our own frames with Popsicle sticks, but times have changed. One modern classic are the L’il Davinci Art Frames from Dynamic Frames.
The L’il Davinci Art Frames are, yes, frames, but each also holds numerous other pieces of art (up to 50 pieces), so you can easily switch out what you wish to display at any given time.
They come in four sizes (8 1/2″ x 11″, 9″ x 12″x 12″ x 18″ and 18″ x 24″) and four frame styles (black, white, cherry, and natural), and you can hang the frames/cabinets in portrait or landscape orientation.

The front-loading frames are a snap to open; push the art under the corners of the frame; the art hiding behind what’s on display is held under a spring-loaded backplate. Prices start at $37.50 for one, but they offer discounts on bundles. Shop directly from Dynamic Frames or pick them up on Amazon.
TRY SOMETHING OFF THE WALL
The spectacular art your little geniuses create need not displayed in the traditional way. You can create magnets, mugs, T-shirts, greeting cards, calendars and other gifts to share with your little ones’ fans.
Consider a variety of companies that allows you to upload children’s artwork and turn it into something tangible:
Book ’em.
(“Framed?” “Book ’em?” Children’s art demands criminally cute puns!)
How about art books? We GenXers were satisfied using a three-hole punch and “sewing” art together into book form with yarn. However, you can use a photo book publishing site like Shutterfly to digitize your children’s artwork into high quality photo books. There are even book creation options designed specifically for children’s art.
Do you picture yourself lending Medici-level patronage to your children’s art collections? Consider one of these higher-end services:
Artimus Art — Artimus Art’s concierge service has you send the actual art to them (rather than you having to take photos); they photograph the art, design, print, and bind the book, and ship it (and, if you want, the original art pieces) back to you. (They also have a DIY option.)
Artkive offers professionally photographed and edited books, as well as framed photo mosaics. You send your child’s art, they create a professional masterpiece as if your tot were Banksy. (Their ads are funnier.)
However, if you fall somewhat in between yarn-bound construction paper and fancy-pants book publishing, try one of these DIY options, where you upload photos of the artwork and design the book yourself:
CREATE A DIGITAL ART ARCHIVE FOR STORAGE AND DISPLAY
Not all art is “forever” art. Whatever is sticky, gooey, and glittery needs to go sooner rather than later. That macaroni art will attract bugs.
Not all art is *forever* art. The stuff that is sticky, gooey, and glittery needs to go sooner rather than later. The macaroni art will attract bugs. Share on XBut whether you intend to keep a particular piece of art on display until your grandchildren’s significant others can admire it or merely until the glitter-and-glue-stick era is over, a digital art archive is an easy solution that isn’t fraught with keep-or-toss guilt.
Even better, you can start easily with skills you (and your kids) already have:
- Scan or snap: Digitally capture each piece of art. This method allows you to keep a record without physical clutter. The meta data ensures that you’ve got the date the photo was taken (so, it’ll at least be noted close to the creation date). Later, you can use your favorite photo app, whether Apple’s Photos or Google Photos or whatever to add notes regarding the artist and what it is (you think) they’ve created.
- For their best work, take a photo of the art with the artist, as if it were a magazine profile. Tots these days are used to selfies and immediate photographic gratification. (Oh, how I remember my father standing us up for posed photos until our faces ached from trying to hold a smile, and we rarely saw those 35 millimeter shots in the same year, let alone season, in which they were taken.) Satisfy your little one with seeing their own toothy (or toothless) grins and their art work, and they can shuffle through the photo app whenever they like.
- Take a photo of the artist with the ALLLLLL the art. Is your junior Frieda Kahlo filling the house with so many pieces each week such that the idea of doing the “Artist Poses With His Work” route and snapping photos all day, every day, exhausts you? Just have your little creator post with the entire week’s collection! If possible, hang the art and place your tiny human slightly off center in a gap between paintings. If there’s just too much, position your child on the floor and arrange the art around them; then stand on a bed or a ladder (with a spotter to safeguard you) and shoot from above to get the artist surrounded by the art. Easy peasy!
- Post the art to social media. Create an Instagram or similar account and just post the weekly shots. Keep it completely private so you just have chronological family “album” online, or open it to friends and relatives. Though fewer than a decade ago, there are a whole slew of photo-sharing web sites to try if you don’t want to support mainstream social media and the evil billionaire overloads who profit from them.
- Use a journaling app (for children or adults) to create a chronological record that only family can access.
- Digital Display: Digital photo frame have gone seriously high tech. Years ago, you plugged a flash drive in; now, you can email directly to the frame to showcase scanned or photographed art collection. Not only can you display the art to a photo frame in your home (so your kids can see their own creations lovingly displayed) but you can make sure grandparents and other loved ones see the art without glitter filling their mailboxes.
- Art Apps: Technology endlessly evolves. Try out apps apps like Artkive or Keepy to organize and store digital versions of your child’s artwork.
“Take a picture; it’ll last longer.”
That may have been childhood snark when someone was caught staring, but now, a digital photo is the ideal option for preserving children’s works of art. Plus, getting a shot of your little one holding the masterpiece provides a stellar historical record of the artist during his or her Blue Period.
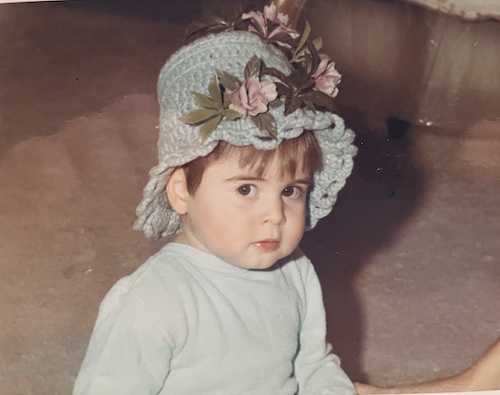
Baby Paper Doll’s Blue Period
Suppress your instinct to use filters, color-correct green hair, or fix the spelling mistakes, the very things that make children’s art a delight.
And, of course, always maintain digital backups, whether in the cloud or on flash drives or external hard drives. Memory is cheap, but memories are priceless!


Great organizing ideas for kids art! I’ve used the art portfolio bags in the past for my kids art work, they’re affordable and easy to use. And boy do they have a lot.
There are so many options, but yes, those art portfolio bags are a favorite for a reason. Thanks for reading!
The pizza box thing is BRILLIANT my friend! I wish I’d known or thought of that about 12 years ago, when the influx was strong and my resolve to get rid of kid art weak. As it turned out, I did discover Artkive and got a couple of really nice books. Still, the closet behind me (as I type) has more than a few underbed boxes with all the masterpieces of yesteryear. Your suggestions are all such amazing solutions for a super common issue – one of these days I’ll get the adult kiddos together for a purge party and I’ll have this post at the ready.
And that hat is absolutely adorable.
LOL, that hat is a toilet paper cover, and there’s a whole series of photos of my various family members wearing different hats. 😉
Clean pizza boxes make stellar flat files, but I am partial to not having to inveigle Mario, et. al., into saving you spare boxes. Thanks for appreciating the ideas; maybe I should come up the highway and we should spend a day helping you pre-sort the art? Thanks for reading and for your support.
I love that you provide a wide array of options for how to keep the art. The pizza boxes are particularly fun. I never would have thought about that, but they actually are a size and shape that lends itself well to kids art. Plus, if you get plain ones, they are easy to label and stack. What a great idea!
I went the way of Artkive and the books. Unfortunately, my kids were grown by the time I got around to the project, so I couldn’t take photos of them with the art. I did capture any “notes” that were on the pieces, such as what they dictated to the preschool teacher when describing the piece. I love those memories.
I’m a huge fan of setting up a gallery for “current” art. I’ve never seen the felt board idea, but I think it is super cute. In the previous version of my house (before we renovated), we used that magnetic paint on a wall near the kitchen table. It was nice, and easy to use, but I have to say that only certain magnets worked on it. The ones that worked best were the flat/business card kind. The decorate ceramic ones were too heavy, and sometimes the piece of art itself was too heavy. In hindsight, I shouldn’t have worried about messing up the paint. We tore the whole wall out.
I tell clients that they can get cool products to make a “pretty” gallery (those strings and clips are a favorite), but you can also just use painter’s tape. Quick, easy, no damage. Kids love having their pieces displayed, so why not, right? Of course, you can put your gallery anywhere. If you have a finished basement, the wall of the stairwell down can be a terrific place!
Thanks for signing on to the pizza box method. It’s a bummer that there was no Artkive when your kids were little, but we’re all stuck with the limits of technology at the times at which we live.
I appreciate the input on magnetic paint; I’m curious whether there’s a difference between the magnetism of the paint-covered primer and the combination primer/paint.
Painter’s tape? How brilliant, I never even thought of that! Thanks for sharing such a great notion!
As usual, some fantastic ideas. I never thought of pizza boxes. This would be a great idea for a school teacher to store student’s work throughout the year. I usually suggest art portfolios for parents.
I have a client who makes her own paper. I found a flat file for her on either Facebook Marketplace or Craig’s List at a good price, since a lot of businesses don’t use them any longer they are available used.
I love using clean pizza boxes as an inexpensive way to temporarily sort children’s art and papers, and yes, I’ve used it for primary grade teachers who have limited resources. A couple of parents can chip in easily to buy enough boxes for an entire classroom, and children’s names can be written on the edge, or labels can be affixed if you want to re-use the boxes.
How cool that your client makes her own paper! And yes, flat files are in lesser use in these digital ages. Thanks for the idea of checking FB Marketplace for them. And thank you for reading!
This post is chock-full of excellent ideas, Julie! I never knew you could buy ‘unmarked’ pizza boxes. What a terrific idea for storing art.
I knew about Artkive but not Artimus, which also looks great! The L’il Davinci Art Frames weren’t around when our kids were young. I would have loved to use those. But they’re good to know about now. We used simple glass frames with clips to frame their art. It was easy to change them when a new ‘masterpiece’ was created.
The art and school memorabilia are stored in a decorative cardboard box the size of an underbed box. We’re saving it for the kids, but at some point, it could be fun to turn some of it into a book by Artkive or Artimus.
Thanks for the kind words, Linda! Those clean pizza boxes are a great solution for so many quick storage problems. It sounds like you had a super prototype for quick-change art display.
How long do you think you’ll keep the art in the under-bed cardboard box? I’ll be eager to see a sample once you transform it!