Displaying Children’s Art: Reframing Grandchild Moses & Making Raggedy Andy Warhol More Magnetic
It’s hard to believe, but it’s been two and a half years since we’ve talked about organizing children’s artwork. Today, we’re going to revisit a popular classic Paper Doll post, Whistler’s Mommy Invites Grandchild Moses and Raggedy Andy Warhol For A Playdate. The avant garde coffeehouse that showcased kids’ art seems to have closed, but I’ve updated with newfangled art storage solutions to reflect improved technology.
Do you sometimes feel like you’re the curator of the MMOTA (Modern Museum of Toddler Art) or the AMOKAC (American Museum of Kindergarten Arts and Crafts)?
Do you feel obligated to believe a picture is worth a thousand words because you can’t understand half of what your toddler says?
 Have you forgotten what color your refrigerator is because the doors, like museum walls, are covered with all of the major artistic methods–watercolor, oil(y Play-doh or sticky jam-hands), and mixed media (painted, sparkly macaroni)?
When children are very young, every artistic endeavor may seem like a masterpiece, but soon enough, parents can become overwhelmed by the embarrassment of finger-painted riches. At some point, you realize you’re either going to have to start buying Frigidaires in bulk, or you’re going to run out of display space in the kiddie art gallery you used to call your home.
Unlike the other categories of paper we discuss — bills, To Do lists, references papers, Social Security cards…there’s no agreed-upon records retention schedule for determining how long one should keep art created by tiny hands. It’s neither an art nor a science, but a labor of love wrapped in papier mch and held in place with colored pipe cleaners. Today, we’re going to explore creative methods for displaying the work, and next week, we’ll cover winnowing the collections.
So, before you run to Fridges-Are-Us for your next art wall installation, recognize that there are alternatives to hanging art where your lunch lives.
THE CLASSICS — ON THE WALL
Hang a retractable clothesline a few inches below ceiling height (too high for children to climb to reach) and hang paper artwork, attaching it with clothespins. Paint wooden clothespins or use plastic ones in primary colors for a more kid-friendly atmosphere. Alternatively, you can use curtain rods and drapery clips,  as Heidi Smith of Budgetwise Home suggests.
This can be a fun way to decorate your child’s room as well as any other casual area, like a guest room, mud/utility room, playroom or basement. You can make it a permanent display gallery with rotating collections, or just put on an ad hoc art show.
Invest in a large cork bulletin board or a number of cork tiles (arrayed uniformly or artistically) and affix to a bare wall. Display the art as-is, right on the cork, or cover the entire board with dollar-store wrapping paper or kraft or butcher paper. Your kids can even draw on or decorate the paper, first, creating a meta-message of art-on-art. Or, just use one cork tile in a high traffic area of the home to showcase the Masterpiece of the Week!
Wallpaper an unfinished basement. The walls of a basement laundry room are likely to be gunmetal grey and depressing. Charming and colorful children’s art can brighten the area (and the mood of laundry day) immensely. Artwork can be easily and safely attached to walls with removable Command Poster Strips.
Match your child’s magnetic personality! We’ve spoken before about chalkboard paint, but magnetic paint can help you yield just as much creativity (without risking that your kids will want to scratch their nails across the surface). Pick up some brush-on or sprayable magnetic paint primer at your favorite home supply store, and paint your wood, metal, masonry, drywall or plaster wall.
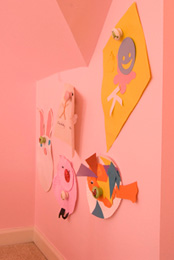
Once the primer is dry, cover with the latex paint of your choice — one solid color, stripes, or a pattern designed by your little artist. As the paint primer goes on in grey or black, you’ll need multiple coats of the latex, especially for any lighter colors, before your art wall is ready for display. Then attach the artwork with decorative magnets. (Hey, that’s another art project your kids might like!)
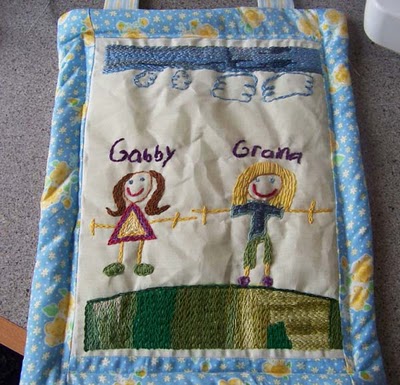
Embroider the truth! This may not be a classical display method, but Eydie, a FeelingStitchy blogger, put her crafty talents to excellent use in framing and displaying children’s art. She made an inkjet transfer to muslin, matched the embroidery floss to the colors of the original drawing and completed a bunch of other artsy tasks I can’t comprehend:
Admit your own artistic weakness — really, it’s OK! Sometimes talent skips a generation, or just part of one. While Paper Mommy (and my sister) seem to excel at visual representation, the results of Paper Doll‘s Pictionary attempts at drawing horses, cows and maps of the United States seem to be interchangeable. Last week, in lieu of leaving a note as I departed my sister’s house, I scribbled off a smiley-face self-portrait. The next day, I received the following email:

Sigh.
So, if painting or papering or corking just isn’t in the cards for you, consider purchasing a pre-made hanging art gallery. 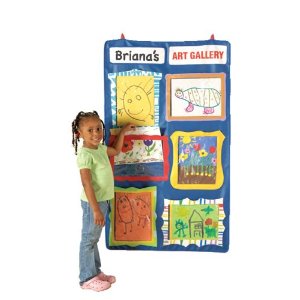 With a limit of six frames, you’re helping your kids to develop a discerning eye and focus on showcasing masterpieces.
Frame it to Contain it. Whether you’re a Do-It-Yourself framer with Popsicle sticks or desire upscale and frequent changes of displays, options abound. A few fun choices include the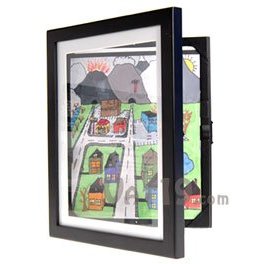 L’il Davinci art cabinet sold at OnlineOrganizing.com and
 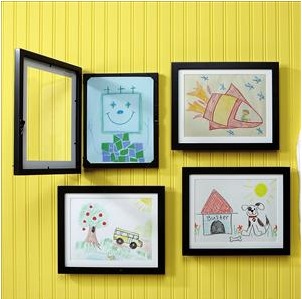 the Wall Art Gallery from Lillian Vernon.
Whatever you choose, no rogue art project will ever complain to the warden that it was framed.
MODERN ART — A LITTLE OFF THE WALL
“Take a picture; it’ll last longer.” Sure, that sounds a little snarky, but it’s a perfect option for preserving mixed-media and other three-dimensional works of art. Better yet, take a snapshot of your child  holding the masterpiece to keep a historical record of the little star during his or her Blue Period.
Scan the artwork using standard scanning software; for oversized pieces, you may have more luck with professional scanners, such as those found at FedEx Office. Either way, suppress your temptation to color-correct green hair or fix the spelling mistakes that actually make children’s art delightful. Maintain backup copies (in the cloud, on hard drives, and on flash drives). Remember: Memory is cheap, but memories are priceless!
Upload scanned art to flickr, Google’s Picassa, or other
If you do want to showcase your kids’ art for the world, acquire a little web real estate. A few years ago, I recommended having your own web site as an option; nowadays, I’d suggest a free WordPress blog for maximum ease and flexibility. In such cases, remember to guard your children’s privacy by providing no identifying names or locations.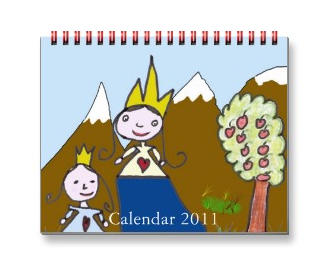
Create calendars, mugs, greeting cards and other gifts to share with your little ones’ fans. Make calendars by laminating pages and having them spiral-bound at your local printing shop; they can print your cards, too. Or, you can have a photo developing site like Snapfish produce calendars or cards in bulk, or use an online service like Zazzle, CafePress or RedBubble to make (and even sell) the creations.


Book ’em. (“Framed”? “Book ’em”? Dare we say that some children’s art is criminally cute?) Online book publishing sites like blurb and Tikatok will let you turn digitized versions of your children’s artwork into coffee table art books. 
For proud parents who have the deep pockets to dress up as Medici-level art patrons, Artimus Art specializes in creating entire packages. For one price, get a hardcover book with a customized cover, art box, online art gallery, and e-greetings to showcase prolific little artistes. Artimus Art has you ship the actual artworks and they’ll professionally photograph them before preservation.
Of course, there’s nothing saying you can’t go Old School and use a three-hole punch in the margin of your kids’ art and then help them “sew” it all together into book form with brightly colored yarn.
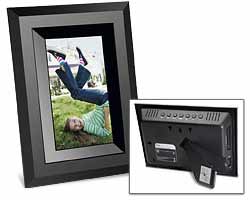
Digitize! Digital picture frames are a great solution for relatives who haven’t quite joined the computer era. Load a series of photos of the art (as well as snapshots of the whole family) onto a memory card or USB flash drive and plug it into a digital picture frame; periodically swap out the card or drive to update to new “collections”. Of course, it can’t hurt to send along an occasional piece of paper artwork along with a letter that says “Dear Grandma and Grandpa” (or “Dear Bubbe and Zayde”, or “Dear Baba and Gigi”, or “Dear Abuela and Abuelo”…)
(DRAWING) THE CART BEFORE THE HORSE
Of course, as we all know, collecting and displaying children’s art is the easy part. It’s the winnowing and the purging (and the vacuuming of the crumbled macaroni and the shaking of glitter off of clothing) and the convincing the pint-sized artists (and yourselves) that the number of pieces of artwork saved bears no relationship to the love for the artist.
Next week, we’ll take a fresh look at how you can oversee the collections of children’s art in your life without becoming a full-time curator.


Follow Me